Advertisement
The Combination Range of
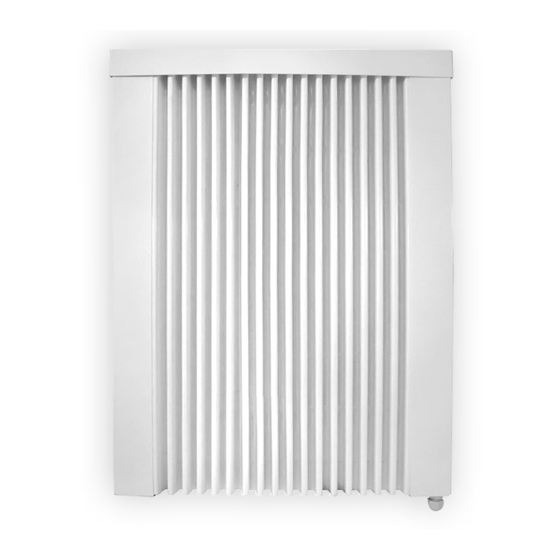
Electric Radiators
INSTALLATION
&
OPERATING INSTRUCTIONS
THESE INSTRUCTIONS SHOULD BE READ CAREFULLY AND RETAINED
FOR FUTURE REFERENCE.
BE SURE TO OBSERVE ALL LABELS AND WARNINGS ON THE
APPLIANCE.
the electric heating company
The Electric Heating Company Limited
Unit 40 ,Block 5, Third Road,
Blantyre Industrial Estate,
Glasgow
G72 OUP
Fax: 01698 820533
Tel: 01698 820533
www.electric-heatingcompany.co.uk
info@electric-heatingcompany.co.uk
Advertisement
Table of Contents

Related Manuals for EHC EH500.38.63


Summary of Contents for EHC EH500.38.63
-
Page 1: Operating Instructions
The Combination Range of Electric Radiators INSTALLATION & OPERATING INSTRUCTIONS THESE INSTRUCTIONS SHOULD BE READ CAREFULLY AND RETAINED FOR FUTURE REFERENCE. BE SURE TO OBSERVE ALL LABELS AND WARNINGS ON THE APPLIANCE. the electric heating company The Electric Heating Company Limited Unit 40 ,Block 5, Third Road, Blantyre Industrial Estate, Glasgow... -
Page 2: Table Of Contents
CONTENTS Page General information ........2 Safety information ........4 Installation . -
Page 3: General Information
All our standard model sizes are supplied with a TEI 1 manual room thermostat. For a fully controllable central heating system, the radiators can be installed with our EHC Control Box, Single or twin Zone Programmer's and Room Thermostats to comply with the latest Building Regulations. -
Page 4: Safety Information
2. Safety Information Handling This radiator is very heavy. Take adequate precautions when lifting and manoeuvring it. Always assess the load, and seek assistance with heavy or awkward loads that are beyond your capabilities. Positioning This radiator is very heavy. In order to maintain stability and to ensure its future safety in use, it is essential that the radiator is FIXED SOUNDLY TO A WALL and that the brackets are mounted on a FIRM, LEVEL SURFACE. -
Page 5: Installation
3. Installation Preparation 1. Before beginning, remove the radiator and parts from the box and check everything is present and correct. In addition to the radiator body, there should be a top grille, a pair of mounting brackets, four suspension hooks, a set of mounting screws &... - Page 6 3. Installation (cont.) Wall fixture and fittings Drill, plug, and secure the brackets to the wall. Appropriate fixtures must be used depending on the wall material: Solid brick/High density block walls These must be drilled and plugged with the Rawlplug No. 10 size fibre inserts provided. The correct size of drill (5.5mm) should be used and the hole should be drilled to a depth of 8mm greater than the length of the Rawlplug so that the fixing is made below the plaster layer.
-
Page 7: Electrical Installation
3. Installation (cont.) At the bottom of the radiator, next to the mains connection there is a small temperature sensor. Loosen the gland and pull the sensor down by approx 5 cm, then re-tighten the gland. This enables the radiator to gauge the room’s temperature. - Page 8 3. Installation (Single Zone Wiring) Radiator Control wiring to be 1.5mm Twin & Earth cable. Radiator Radiator wiring should be a minimum of 2.5mm Twin & Earth cable. Radiator Page 7...
- Page 9 3. Installation (Twin Zone Wiring) Control wiring to be 1.5mm Twin & Earth cable. ZONE 2 ZONE 2 RADIATOR RADIATOR Radiator wiring should be a minimum of 2.5mm Twin & Earth cable. ZONE 1 ZONE 1 RADIATOR RADIATOR Page 8...
- Page 10 3. Installation (cont.) Control cabling – RF models All Radio Frequency radiators come complete with a pre-wired receiver in T-RF which is controlled by either the T-Pod or T Basic Thermostat. T-Pod installations Follow the instructions outlined in section 7 for single radiator installations. Locate the T-Pod programmer on a suitable wall in the same room as the radiator.
-
Page 11: Operating Instructions
4. Operating Instructions TE1(e4) Instructions E4 manual Electronic Thermostat Technical Details: 15°C • Easy to use • Temperature range from 5°C till 30°C 20°C 10°C • Integrated temperature sensor • Frost protection setting • 2 x LED display lights 25°C 5°C 30°C Operating display lights Radiator is “ON“ Radiator is “ON” Radiator is Power going to No power going to “OFF”... -
Page 12: Normal Operation
4. Operation Instructions DTi Normal Operation: Switch the radiator on by pressing the DTi Instructions Digital Thermostat icon and select either the Comfort or Economy Mode of operation. This is achieved by briefly pressing the Mode button until the desired icon is showing on the digital display. The digital display will also show the current temperature of the room. - Page 13 4. Operation Instructions TDi TDi Instructions for use. Setting the Time and Day Step 1: Ensure the radiator is in OFF Mode. The symbol will be on the top left of the display. Step 2: Push the Right Hand Side mode button once to access the Time and Day Setting.
- Page 14 4. Operation Instructions TDi STEP 4 – Auto Mode disappears and the auto symbol appears. Push the mode button so that the moon symbol In this mode the heater will now follow the temperatures that have been selected for specific times of the day. The heater has a default profile already displayed.
- Page 15 4. Operation Instructions DSR Wifi DSR Temperature Setting, Programming and Wifi Setup 1.0 Manual Instructions Modes The radiator can work in 3 different modes by pressing the "Mode" button Auto Mode The set temperature varies automatically following the Programmed Schedule, based on the 3 custom temperatures selected.
- Page 16 4. Operation Instructions DSR Wifi 2.0 Setting Temperatures Sleeping At Home At Work / Away The DSR controller has 3 temperature ranges, ) Normally when at home. -Comfort ( -Economy ( ) Normally used at night or for brief absence periods ) Normally used when away from home .
- Page 17 4. Operation Instructions DSR Wifi 3.0 Setting Program Time and Day Symbol Indication Sleeping At Work / Away At Home To start programming. Day of the week Temperature/hour bar 1. Press and hold for 3 seconds. Hour To select your temperature range 2.
- Page 18 ( LocH will be displayed ) for 3 seconds. Note Advanced settings should only ever be changed by a fully qualified engineer or with advice from EHC. 5.0 Advanced Engineer Settings To enter advance settings, Press the Config button Once to show this screen...
- Page 19 4. Operation Instructions DSR Wifi 6.0 Account Registration www.electric-heatingcompany.co.uk/ To create an account and activate your gateway go to: download/dsr "New user,sign up here " Click on, Follow the Online instructions to create your account. Note: Once registered, you will be sent a Confirmation email. Click on the link to confirm the email to activate your account then sign in.
- Page 20 4. Operation Instructions DSR Wifi 8.0 Pairing Once the DSR Gateway is connected to the Internet and fully registered, you can now pair it with your Heaters. There are 2 ways to put the DSR Gateway into pairing mode. Option 1. You can simply press button on the gateway as shown below, the gateway will now begin searching for external devices.
- Page 21 4. Operation Instructions DSR Wifi Installation of Power Meter The power meter should be connected to a spare 6 amp Mcb or Rcbo within the properties Consumer Unit. This supply should then be taken and connected to a fused switched spur with a minimum contact of 3mm and fuse rated to 3amps.
- Page 22 4. DSR Technical Radiator Controller • LCD STN with backlight • 4 buttons • RF 868Mhz • 1PCB for control, 1PCB for Power • 3 temperatures • Comfort • Economy • Frost • Measured temperature resolution: 0.1ºC • Setting temperature resolution: 0.5ºC •...
-
Page 23: Operating Safety
5. Operating safety IMPORTANT SAFETY INFORMATION This appliance complies with the European Standards EN 60 335-1, EN 60 335-2-61, EN 61000-3-2, EN 61000-3-3, EN 55014 and EN55104 for Safety & Electromagnetic Compatibility. These standards cover the requirement of the EMC Directives 89/336 & 73/23 CAUTION - THE SURFACE OF THIS RADIATOR CAN BE HOT. - Page 24 EHC Electric Radiators We are pleased to offer a 15 year guarantee on your recent purchase of EHC Electric Radiators. The 15 year guarantee applies to the heating elements and body of the radiator. A 2 year guarantee is applicable to the electronics.
-
Page 25: Technical Data
TBasic R/F THERMOSTAT The above Models are for EHC Standard Radiators with TEI 1 Control. Following details should be prefixed to the Manual Model Number when ordering a different type of control: TEi1 - TDi - TDEi - RF - DSR - R... - Page 26 Notes:...
- Page 27 Notes:...
- Page 28 the electric heating company The Electric Heating Company Limited Block 5 Unit 40 Third Road, Blantyre Industrial Estate Blantyre G72 OUP United Kingdom...
Need help?
Do you have a question about the EH500.38.63 and is the answer not in the manual?
Questions and answers