Table of Contents
Advertisement
Advertisement
Table of Contents

Related Manuals for avantec DT910N


Summary of Contents for avantec DT910N
- Page 1 DIGITAL CORDLESS VoIP DECT PHONE – DT910N...
-
Page 2: Table Of Contents
CONTENTS Safety Instructions ......................3 Product Description ......................4 Installation ......................... 5 Basic Telephone Operation ................... 6 Making Calls ......................6 Answering Calls ....................6 Dial Calls from Call Lists ..................6 Making Internal Calls (Intercom) ............... 7 Call Transfer ............Error! Bookmark not defined. Phonebook ........................ -
Page 3: Safety Instructions
1. Safety Instructions Please read all the instructions of this manual before using this product. Observe all the instructions marked on this product. Install this product on a stable surface and to avoid anyone from stepping over the telephone line. Do not fix the AC power supply cord to building surfaces with metal fittings. -
Page 4: Product Description
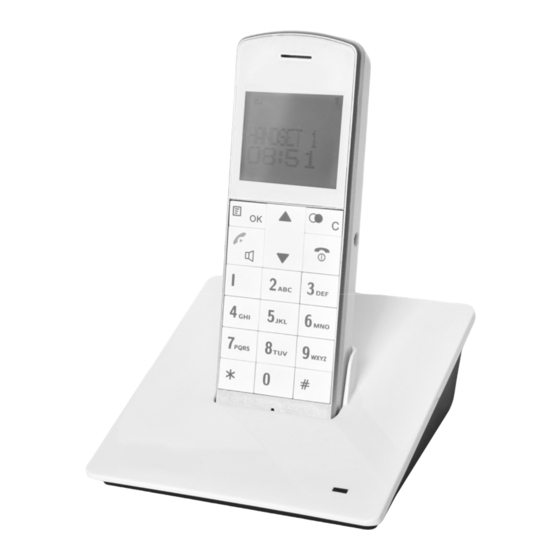
2. Product Description Main Features Dot matrix LCD display with backlight Phonebook capacity 50 entries (with 24 digits and name of 12 characters) Caller ID list: 50 entries Redial log: 10 entries Caller ID: type 1 and type 2 Handset polyphonic ring melodies: 12 Languages: 10 (English, German, French, Italian, Spanish, Portuguese, Dutch, Turkish, Greek, Danish) Number of base per handset: 4... -
Page 5: Installation
3. Installation Connect the Ethernet patch cord, one side into the PoE switch / PoE supply, the other to the base station socket. The base station automatically power up. LED on the base station goes up to indicate that the VoIP DECT enters the ready state. -
Page 6: Basic Telephone Operation
4. Basic Telephone Operation 4.1 Making Calls Direct Dial Press first to get a line and you will hear a dial tone. Enter the phone number. Pre-dial Enter the phone number during standby mode. (Use key to edit any wrong entry.) Press to dial out the number. -
Page 7: Making Internal Calls (Intercom)
After entering the list, press the key to scroll through the entries and pick a number that you wish to call, then press key twice to confirm. The selected number will be dialed out automatically. 4.4 Making Internal Calls (Intercom) If you have two or more handsets registered to a base station, it’s possible to make internal calls between handsets. -
Page 8: Phonebook
5. Phonebook Up to 50 entries (name and number) can be stored in the phonebook. To access the phonebook from standby mode, Press short-cut key during standby mode. (When accessed to the phonebook, the first entry is displayed. Entries are listed alphabetically.) Use the key to browse the phonebook and pick a record that you wish to call. -
Page 9: View The Number Of An Entry
5.3 View the Number of an Entry Press key during standby mode to enter phonebook, the first entry name is displayed. Press key to select the entry. Press key, the phone number is displayed. Press key to go back to standby screen. 5.4 Edit an Entry Press key during standby mode to enter phonebook, the first... -
Page 10: Clock/Alarm
6. Clock / Alarm 6.1 Real Time Clock 6.1.1 Manual Setting 1. In standby mode, press key to enter the handset menu. 2. Press key until “CLOCK/ALARM” is displayed. 3. Press key, “DATE & TIME” is displayed. 4. Press key to enter the date and time setting screen. -
Page 11: Handset Setup
7. Handset SETUP 7.1 Handset Tone 7.1.1 Ring Volume (External Call) In standby mode, press key to enter the handset menu. Press key until “HS SETUP” is displayed. Press key, “HANDSET TONE” is displayed. Press key, “RING VOLUME” is displayed. Press key to enter the menu. -
Page 12: Intercom Melody
7.1.3 Intercom Melody In standby mode, press key to enter the handset menu. Press key until “HS SETUP” is displayed. Press key, “HANDSET TONE” is displayed. Press key, then press key until “INTERCOM” is displayed. Press key, “Melody: x” is displayed (x is the number of current melody). -
Page 13: Range
7.1.6 Range If the RF signal strength is weak during a call (the handset is far away from the base station), the handset will play a WARNING Tone in the earpiece to indicate that the RF range condition is bad. In standby mode, press key to enter the handset menu. -
Page 14: Handset Name
7.3 Handset Name User can assign a name to the handset which shows on the display during standby. In standby mode, press key to enter the handset menu. Press key until “HS SETUP” is displayed. Press key, then press key until “HANDSET NAME”... -
Page 15: Language
7.5 Language There are 10 languages available. English German French Italian Spanish Portuguese Dutch Turkish Greek Danish 7.5.1 Change the Handset Display Language In standby mode, Press key to enter the handset menu. Press key until “HS SETUP” is displayed. Press key, then press key until... - Page 16 Copy this IP address and enter it in a Web Browser. To change the DHCP setting on the handset: Press key to enter the handset menu. Press key until “IP MENU” is displayed. Press key, “IP INFO” is displayed. Press key, “USE DHCP”...
-
Page 17: Register/Subscribe A New Handset (Multiple Handset Scenario)
8.2 Register / Subscribe a New Handset (Multiple Handset Scenario) It is possible to subscribe additional handsets to the same base unit. A maximum of 6 handsets can be supported by the system. Press and hold the page button on base station until the LED on base station turns yellow. - Page 18 upon successful registration. This number is displayed on the handset as “HANDSET X” during standby and the handset number is used for making internal calls.
-
Page 19: Select A Base (Multiple Base Scenario)
8.3 Select a Base (Multiple Base Scenario) In case a handset is registered to more than one base station, you may use this option to select between multiple base stations. (A handset can register to a maximum of 4 base stations) In standby mode, press key to enter the handset menu. -
Page 20: Recall Time
8.4.2 Recall Time (Flash Time) Use this option to select the correct recall (flash) time for your system/country setting. In standby mode, press key to enter the handset menu. Press key until “BS SETUP” is displayed. Press key, then press key until “ADVANCE SET”... -
Page 21: New Pin
8.4.4 New PIN Use this option to modify the PIN code. In standby mode, press key to enter the handset menu. Press key until “BS SETUP” is displayed. Press key, then press key until “ADVANCE SET” is displayed. Press key, and enter PIN code (default as “0000”). Press key until “NEW PIN”... -
Page 22: Other Features
9. Other Features 9.1 Last Number Redial Once you have dialed calls, phone numbers are stored independently in the redial list on each handset. If a call is made when the redial list is full then the oldest entry is replaced. When first accessed to the list, the most recent outgoing call is displayed. -
Page 23: Received And Missed Call Lists
9.2 Received and missed call lists When a call is received, it is automatically stored in the Call List of the handset. Up to 50 entries can be stored in the Call List. If a call is received when the list is full then the oldest entry will be replaced. - Page 24 9.2.1 Features The following details are available in the call list. The caller number: 24 digits The caller name: 12 characters Date and hour of the call 9.2.2 Dial from calls list In standby mode, press key to access the call list. Press key to select the number you want to dial.
-
Page 25: Warranty
10. Warranty This warranty does not cover, or may be voided by the followings: Any damage resulting from abuse or misuse (i.e. liquid spills, abuse, or customer’s modification (warranty label broken) of the telephone). Any damage caused by failure to follow operating or installation instructions provided with the telephone. - Page 26 MU-9101XXX...
Need help?
Do you have a question about the DT910N and is the answer not in the manual?
Questions and answers