Table of Contents
Advertisement
Advertisement
Table of Contents

Subscribe to Our Youtube Channel
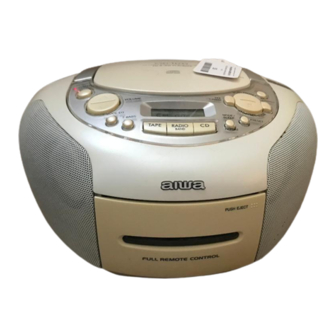
Related Manuals for Aiwa CSD-TD49LHW


Summary of Contents for Aiwa CSD-TD49LHW
- Page 1 CSD-TD49 LH(W,S,L), U(W,L), UC(W) SERVICE MANUAL CD STEREO RADIO BASIC TAPE MECHANISM:AZM-6 YR3NC CASSETTE RECORDER BASIC CD MECHANISM :KSM-213 RDM • This Service Manual is the “Revision Publishing” and replaces “Simple Manual” (S/M Code No.09-027-458-6T1) S/M Code No. 09-027-458-6R1...
-
Page 2: Table Of Contents
TABLE OF CONTENTS -1/1 SPECIFICATIONS ................................3 PROTECTION OF EYES FROM LASER BEAM DURING SERVICING ................. 4 PRECAUTION TO REPLACE OPTICAL BLOCK (KSM-213 RDM) ..................5 ACCESSORIES PARTS LIST ............................6 ELECTRICAL PARTS LIST ............................7-18 TRANSISTOR ILLUSTRATION ............................19 BLOCK DIAGRAM ............................... -
Page 3: Specifications
SPECIFICATIONS -1/1 Tuner section Frequency range, antenna – FM: 87.5 - 108.0 MHz Rod antenna, AM: 530/531 - 1,710/1,602 kHz (10/9 kHz step) Ferrite bar antenna Deck section Track format – 4 tracks, 2 channels / Frequency range – Normal tape: 50 - 12,500 Hz (EIAJ) / Recording system –... -
Page 4: Protection Of Eyes From Laser Beam During Servicing
PROTECTION OF EYES FROM LASER BEAM DURING SERVICING -1/1... -
Page 5: Precaution To Replace Optical Block (Ksm-213 Rdm)
PRECAUTION TO REPALCE OPTICAL BLOCK (KSM-213 RDM) -1/1 Body or clothes electrostatic potential could ruin Solder laser diode in the optical block. Be sure ground body and workbench, and use care the clothes do not touch the diode. 1) After the connection, remove solder shown in the right figure. -
Page 6: Accessories Parts List
ACCESSORIES PARTS LIST -1/1 = ! SAFTY PARTS = Components marked All components used on this model at the production line are shown in this service manual. However, please note that not all components will be available as spare parts for after-sales service. Components marked S and O are designated as spare parts for service and will be stocked at the spare parts centers. -
Page 7: Electrical Parts List
ELECTRICAL PARTS LIST -1/12 (CSD-TD49) -1/10 = ! SAFTY PARTS = Components marked All components used on this model at the production line are shown in this service manual. However, please note that not all components will be available as spare parts for after-sales service. Components marked S and O are designated as spare parts for service and will be stocked at the spare parts centers. - Page 8 ELECTRICAL PARTS LIST -2/12 (CSD-TD49) -2/10 = ! SAFTY PARTS = Components marked All components used on this model at the production line are shown in this service manual. However, please note that not all components will be available as spare parts for after-sales service. Components marked S and O are designated as spare parts for service and will be stocked at the spare parts centers.
- Page 9 ELECTRICAL PARTS LIST -3/12 (CSD-TD49) -3/10 = ! SAFTY PARTS = Components marked All components used on this model at the production line are shown in this service manual. However, please note that not all components will be available as spare parts for after-sales service. Components marked S and O are designated as spare parts for service and will be stocked at the spare parts centers.
- Page 10 ELECTRICAL PARTS LIST -4/12 (CSD-TD49) -4/10 = ! SAFTY PARTS = Components marked All components used on this model at the production line are shown in this service manual. However, please note that not all components will be available as spare parts for after-sales service. Components marked S and O are designated as spare parts for service and will be stocked at the spare parts centers.
- Page 11 ELECTRICAL PARTS LIST -5/12 (CSD-TD49) -5/10 = ! SAFTY PARTS = Components marked All components used on this model at the production line are shown in this service manual. However, please note that not all components will be available as spare parts for after-sales service. Components marked S and O are designated as spare parts for service and will be stocked at the spare parts centers.
- Page 12 ELECTRICAL PARTS LIST -6/12 (CSD-TD49) -6/10 = ! SAFTY PARTS = Components marked All components used on this model at the production line are shown in this service manual. However, please note that not all components will be available as spare parts for after-sales service. Components marked S and O are designated as spare parts for service and will be stocked at the spare parts centers.
- Page 13 ELECTRICAL PARTS LIST -7/12 (CSD-TD49) -7/10 = ! SAFTY PARTS = Components marked All components used on this model at the production line are shown in this service manual. However, please note that not all components will be available as spare parts for after-sales service. Components marked S and O are designated as spare parts for service and will be stocked at the spare parts centers.
- Page 14 ELECTRICAL PARTS LIST -8/12 (CSD-TD49) -8/10 = ! SAFTY PARTS = Components marked All components used on this model at the production line are shown in this service manual. However, please note that not all components will be available as spare parts for after-sales service. Components marked S and O are designated as spare parts for service and will be stocked at the spare parts centers.
- Page 15 ELECTRICAL PARTS LIST -9/12 (CSD-TD49) -9/10 = ! SAFTY PARTS = Components marked All components used on this model at the production line are shown in this service manual. However, please note that not all components will be available as spare parts for after-sales service. Components marked S and O are designated as spare parts for service and will be stocked at the spare parts centers.
- Page 16 ELECTRICAL PARTS LIST -10/12 (CSD-TD39) -10/10 = ! SAFTY PARTS = Components marked All components used on this model at the production line are shown in this service manual. However, please note that not all components will be available as spare parts for after-sales service. Components marked S and O are designated as spare parts for service and will be stocked at the spare parts centers.
- Page 17 ELECTRICAL PARTS LIST -11/12 (AZM-6) -1/1 = ! SAFTY PARTS = Components marked All components used on this model at the production line are shown in this service manual. However, please note that not all components will be available as spare parts for after-sales service. Components marked S and O are designated as spare parts for service and will be stocked at the spare parts centers.
-
Page 18: Electrical Parts List
ELECTRICAL PARTS LIST -12/12 • Regarding connectors, they are not stocked as they are not the initial order items. The connectors are available after they are supplied from connector manufacturers upon the order is received. -18-... -
Page 19: Transistor Illustration
TRANSISTOR ILLUSTRATION -1/1 E C B E C B E C B 2SA1015GR 2SA952K 2SB1370E 2SA933AS KTA1266GR 2SA1296GR 2SC1740S KTC3198GR 2SC5343GL DTC114YS DTC124XSA 2SA1162Y 2SC27140 2SC3052F DTA114TKA DTA114YKA DTC114EKA DTC114YKA DTC124EKA DTC124XKA DTC143TKA DTC144EKA -19-... -
Page 20: Block Diagram
BLOCK DIAGRAM -1/2 FRONT C.B CD C.B CD SECTION CPU SECTION LCD DISPLAY BIAS LCD601 CD R CH BEAT1 CD L CH BEAT0 63 62 61 CD DOOR CNA601 SYSTEM CONTROL Q401 IC651 Q402 LC867132V TO TUNER 8V SW 18 19 SUBQ D404 DATA... - Page 21 BLOCK DIAGRAM -2/2 MAIN C.B/CD C.B FM ST TU ON P-CONT SW12V CASSETTE & POWER AMP. SECTION AC/DC BIAS BEATO BEAT1 28 25 24 23 22 21 HEADPHONE POWER AMP . PRE. AMP . JACK IC202 TA8227 IC203 BD388IFV J201 CN203 TO SPEAKERS HEAD...
-
Page 22: Schematic Diagram -1/5 (Main/Cd-1/2)
SCHEMATIC DIAGRAM -1/5 (MAIN/CD-1/2) TO FRONT C.B TO FRONT C.B TO FRONT C.B CNA601 TO FRONT C.B CNA603 CNA602 CNA604 1 2 3 4 5 6 1 2 3 4 5 6 CN802 CN804 CN801 CN803 CD C.B (1/2) MAIN C.B AC/DC SW12V Q243,244... -
Page 23: Schematic Diagram - 2/5 (Cd-2/2)
SCHEMATIC DIAGRAM -2/5 (CD -2/2) CD C.B (2/2) RESET 150P LH MODEL 1SS133 1.1-1/4W Q401,402 LH MODEL CD 8V SW R425 DSP & D-SERVO R460 JW R461 JW R462 JW Q408 LED DRIVER SW401 (CD DOOR SW) (FFC002) SIGNAL :PB(DIGITAL) :PB(ANALOG) -23-... -
Page 24: Wiring -1/5 (Main/Cd)
WIRING -1/5 (MAIN/CD) CD C.B SPK002 SPK001 TO CD MECHANISM (RCH) (LCH) IMP:7 SW 401 KSM-213 RDM (CD DOOR SW) D402 CNA203 LH MODEL LH MODEL C374 TO FRONT C.B CNA604 TO FRONT C.B MAIN C.B CNA602 TO TUNER C.B CN002 TO FRONT C.B CNA601... -
Page 25: Schematic Diagram -3/5 (Front/Remocon/Deck)
SCHEMATIC DIAGRAM -3/5 (FRONT/REMOCON/DECK) FRONT C.B REMOCON C.B RPM6938 CCHB/ADAMANT CN603 CNA606 D653 1N4148 1000P 1N4148 5Z39 R670 1K FUNCTION SW HZS6A1L RESET LED SW 1N4148 (TAPE MOTOR) DECK C.B (REC B) +B SW SOL1 AUTO STOP SW1 (STOP) DN6851 SW2 (CST) SW1-3 (FFC002) -
Page 26: Wiring -2/5 (Front/Remocon)
WIRING -2/5 (FRONT/REMOCON) REMOCON C.B IC601 IC601 REMOTE CONTROL TO MAIN C.B TO MAIN C.B TO MAIN C.B TO MAIN C.B CN603 SENSOR CN801 CN803 CN804 CN802 CNA606 TO TAPE MECHANISM CNA604 CNA603 Q502 D603 AZM-6 (FFC002) FRONT C.B CNA602 D603 (STANDBY LED) C606... -
Page 27: Schematic Diagram -4/5 (Tuner)
SCHEMATIC DIAGRAM -4/5 (TUNER) TUNER C.B Q008 L001 L002 L008 AM VT ADJ FM TRACKING ADJ FM VT ADJ BUFFER SH001 U,UC MODELS HVC202A L003,TC001 AM TRACKING ADJ 10uHK Q001-003 +B REG L006 AM IF ADJ MUTE -27-... -
Page 28: Wiring -3/5 (Tuner)
WIRING -3/5 (TUNER) TUNER C.B CF 010 C 080 C 082 SH001 U,UC MODELS C 081 TO FRONT C.B CNA605 TO MAIN C.B CNA102 -28-... -
Page 29: Schematic Diagram -5/5 (Power/Batt)
SCHEMATIC DIAGRAM -5/5 (POWER/BATT) J101 AC 110-120V 220-240V,50/60Hz U,UC: AC 120V, 60Hz POWER C.B U,UC MODEL PT 701 LH MODEL FC 101 FC 102 F 701 2.5A 250V SW701 AC VOLTAGE 220-240V 110-120V S101 LH MODEL BATTERY DC 12V R14 x 8 BATT C.B -29-... -
Page 30: Wiring -4/5 (Power/Batt)
WIRING -4/5 (POWER/BATT) POWER C.B C101 D101 C102 D102 C103 D103 C104 D104 J101 AC 110-120V 220-240V, 50/60Hz U,UC: AC 120V, 60Hz U,UC MODELS LH MODEL PT701 BATT C.B -30-... -
Page 31: Wiring -5/5 (Deck)
WIRING -5/5 (DECK) TO FRONT C.B CN501 (FFC003) CRD1 1 2 3 4 5 6 7 8 CNA302 TO MAIN C.B CN302 -31-... -
Page 32: Voltage Chart
VOLTAGE CHART -1/2 THE MEASURED VALUE IS DC VOLTAGE CD SECTION TEST CONDITION: CD PLAY UNIT: V IC651 (LC867132V) PIN'S NUMBER PLAY 0.27 4.69 4.69 4.58 1.30 2.58 PIN'S NUMBER PLAY 4.72 0.14 4.72 0.13 2.07 0.43 4.85 2.16 2.39 PIN'S NUMBER PLAY 4.70... -
Page 33: Voltage Chart
VOLTAGE CHART -2/2 TUNER SECTION TEST CONDITION:SET AM/FM TUNER ON ONE FREQUENCY IC001 (TA2111F) PIN'SNUMBER 1.14 4.77 0.40 4.80 4.12 4.80 0.83 0.32 4.63 0.61 4.21 4.74 PIN'SNUMBER 4.77 4.22 1.32 1.27 4.79 4.79 3.97 1.28 1.28 4.06 3.50 PIN'SNUMBER 0.71 1.13 1.13... -
Page 34: Lcd Diagram
LCD DIAGRAM -1/1 (LCD,CCH-B/ADAMANT) CHARACTER SEGMENT COMMON -34-... -
Page 35: Electrical Adjustment
ELECTRICAL ADJUSTMENT -1/5 TUNER C.B C062 + C061 IC002 C063 L008 L006 L001 L002 TC001 BAR - ANT L003 <TUNER Adjustment> 1. AM VT Adjustment DIGITAL MULTIMETER Requirement: • Measuring instrument: Digital multimeter • Test points: VT (C062+), GND • Adjustment location: L001 1) Connect the digital multimeter between VT(C062+)andGND. - Page 36 ELECTRICAL ADJUSTMENT -2/5 <AM Adjustment> Make the following preparation for AM adjustment. Preparation • Measuring instruments: Standard Signal Generator (S.S.G)/Loop antenna/Oscilloscope/Millivoltmeter 1) Connect the unit and measuring instruments as shown in the diagram below. 2) Position the loop antenna connected to S.S.G. and the one connected to the unit 60cm apart. 60cm AC MILLIVOLTMETER OSCILLOSCOPE...
- Page 37 ELECTRICAL ADJUSTMENT -3/5 <FM Adjustment> Make the following preparation for FM adjustment. Preparation • Measuring instruments: Standard Signal Generator (S.S.G) /Oscilloscope/Millivoltmeter 1) Connect the unit and measuring instruments as shown in the diagram below. 2) Position the loop antenna connected to S.S.G. and the one connected to the unit 60cm apart. AC MILLIVOLTMETER OSCILLOSCOPE OUTPUT...
- Page 38 ELECTRICAL ADJUSTMENT -4/5 DECK ADJUSTMENT Equipment and tools required Measuring equipment • Wow-flutter meter • Oscillosope • Tset tape:TTA-100/TTA-300(or TTA-310,320) 1. Tape Speed Adjustment Requirements MOTOR Measuring equipments : wow-flutter meter (frequency counter ) WOW & FLUTTER METER Test Tape: TTA-100 (3KHz) Test point: HP OUT IN P U T Adjustment point : MOTOR SFR...
- Page 39 ELECTRICAL ADJUSTMENT -5/5 CD CHECK CD PWB IC402 IC401 1 2 3 Vref 4pin Perform the adjustments after the main unit enters the test mode. Place the CD mechanism on level ground. Equipment and tools required Measuring equipment • Digital multi-meter •...
-
Page 40: Cd Test Mode
CD TEST MODE -1/1 1. How to Start the CD Test Mode While pressing the FUNCTION button, insert the AC plug to the power outlet. When the test mode is started, the message [All indicators light] is displayed. 2. How to Exit the CD Test Mode Press the POWER button, push other FUNCTION button or disconnect the AC plug. -
Page 41: Ic Block Diagram
IC BLOCK DIAGRAM -1/1 IC, LC72131D-N IC, MM1469PH IC, BD3881FV -41-... - Page 42 IC DESCRIPTION -1/2 (IC, LC78646E) -1/2 Pin No. Pin Name Description SLCO Slice level control output. SLCIST SLCO output current adjustment resistor connection pin. EFMIN RF signal input pin. RF monitor pin. RFVDD – RF power supply pin. RFVSS – RF ground pin.
- Page 43 IC DESCRIPTION -1/2 (IC, LC78646E) -2/2 Pin No. Pin Name Description LVDD – Left channel power supply pin. LCHO Left channel output pin. LVSS – Left channel ground pin. (Connected to 0V) RVSS – Right channel ground pin. (Connected to 0V) RCHO Right channel output pin.
-
Page 44: Ic Description
IC DESCRIPTION - 2/2 (IC,LC867132V-5Z39) - 1/2 Pin NO. Pin Name Description I-FM ST FM stereo status input: “L” input at stereo. I-CDDOOR CD door switch open/close detection: “L” input at door close. O-FUNC1 FUNCTION IC control output (LOW output or high output). O-FUNC2 FUNCTION IC control output (LOW output or High output). - Page 45 IC DESCRIPTION - 2/2 (IC,LC867132V-5Z39) - 2/2 Pin NO. Pin Name Description µ-COM power supply +5V. VDD3 – µ-COM power supply GND. VSS3 – SEG4 LCD segment output:LCD 5pin /Initial setting output (diode matrix). (OIRT) 44-59 SEG5-SEG20 LCD Segment ouptut:LCD 6pin-LCD 21pin. N.C.
-
Page 46: Mechanical Exploded View
MECHANICAL EXPLODED VIEW -1/1 -46-... -
Page 47: Mechanical Parts List
X MC1004c 8C-CHB-039-010 GRILLE,R L X MC1004c 8C-CHB-025-010 GRILLE,R S O MC1005 8C-CHB-014-010 KEY,POWER O MC1005 8C-CHB-031-010 KEY,POWER S O MC1006 8C-CHB-046-010 BADGE,AIWA 30 LIGHT SPRAY O MC1007 87-063-165-010 OIL-DMPR,150 O MC1008 88-CD5-213-010 SPR-C,LOCK O MC1009 82-NF5-229-010 PLATE,LOCK(*) O MC1010 87-NF4-217-110 HLDR,LOCK 2 O MC1011 8C-CHB-632-010 SPKR,80MM 7OHM 2.5W... -
Page 48: Mechanical Parts List
MECHANICAL PARTS LIST -2/2 = ! SAFTY PARTS = Components marked All components used on this model at the production line are shown in this service manual. However, please note that not all components will be available as spare parts for after-sales service. Components marked S and O are designated as spare parts for service and will be stocked at the spare parts centers. -
Page 49: Color Name Table
COLOR NAME TABLE -1/1 Basic color symbol Color Basic color symbol Color Basic color symbol Color Black Cream Orange Green Gray Blue Transparent Blue Gold Pink Silver Titan Silver Brown Violet White Transparent White Yellow Transparent Yellow Metallic Blue Light Blue Transparent Green Dark Blue Transparent Orange... -
Page 50: Mechanism Exploded View (Azm-6 Yr3Nc)
MECHANISM EXPLODED VIEW -1/1 (AZM-6 YR3NC) -50-... -
Page 51: Mechanism Parts List (Azm-6 Yr3Nc)
MECHANISM PARTS LIST -1/1 (AZM-6 YR3NC) = ! SAFTY PARTS = Components marked All components used on this model at the production line are shown in this service manual. However, please note that not all components will be available as spare parts for after-sales service. Components marked S and O are designated as spare parts for service and will be stocked at the spare parts centers. -
Page 52: Other Parts List (Csd-Td49)
OTHER PARTS LIST -1/2 (CSD-TD49) -1/1 = ! SAFTY PARTS = Components marked All components used on this model at the production line are shown in this service manual. However, please note that not all components will be available as spare parts for after-sales service. Components marked S and O are designated as spare parts for service and will be stocked at the spare parts centers. -
Page 53: Other Parts List (Azm-6 Yr3Nc)
OTHER PARTS LIST -2/2 (AZM-6 YR3NC) -1/1 = ! SAFTY PARTS = Components marked All components used on this model at the production line are shown in this service manual. However, please note that not all components will be available as spare parts for after-sales service. Components marked S and O are designated as spare parts for service and will be stocked at the spare parts centers. - Page 54 2-11, IKENOHATA 1-CHOME, TAITO-KU, TOKYO 110-8710, JAPAN TEL:03 (3827) 3111 0251431...
Need help?
Do you have a question about the CSD-TD49LHW and is the answer not in the manual?
Questions and answers