Table of Contents
Advertisement
Advertisement
Table of Contents

Related Manuals for Tobii Pro X3-120


Summary of Contents for Tobii Pro X3-120
- Page 1 Tobii Pro X3-120 Eye Tracker User Manual...
- Page 2 User manual Tobii Pro X3-120 Eye Tracker Version 1.0.7 05/2017 All rights reserved. Copyright © Tobii AB (publ) The information contained in this document is proprietary to Tobii AB. Any reproduction in part or whole without prior written authorization by Tobii AB is prohibited.
-
Page 3: Table Of Contents
4.2.1 Mounting Tobii Pro X3–120 Eye Tracker to a screen ...........7 4.2.2 Using the mounting bracket adapters (optional accessories) for existing Tobii Pro X2–30, X2–60 adhesive mounting brackets...............8 4.2.3 Mounting Tobii Pro X3–120 Eye Tracker Using a Tripod Stand ........9 Using the External Processing Unit ...................9... - Page 4 CE Statement .......................38 F2.4 Standards ......................38 F2.5 Disposing of the Tobii Pro X3–120................38 Other limitations and considerations ..................38 F3.1 Intended use ......................38 F3.2 Light conditions ....................38 F3.3 Eyelashes......................38 F3.4 Droopy eyelids ......................38 F3.5 Keeping Tobii Pro X3–120 firmware up to date ............39...
-
Page 5: Introduction
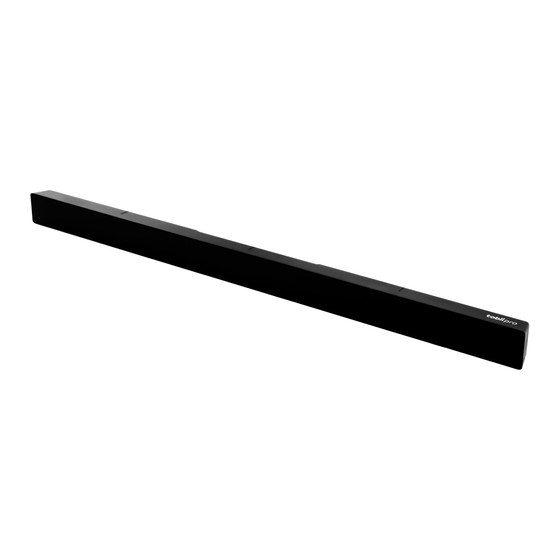
120 Hz. The Tobii Pro X3–120 is a compact and light weight eye tracker measuring only 324 mm (12.7’’) in length and only 118 grams (4.2 oz.) in weight. It enables your portable eye tracking lab and studies that require an eye tracker to track even large objects at close distances. -
Page 6: Tobii Pro X3-120 Eye Tracker On Epu
USB 3 connectivity. In this scenario the SDK and applications can run on Windows, Mac OS and Linux. Tobii X3–120 Eye Tracker needs a EPU02 and will not work with the first generation EPU (EPU01 used with X2– 60)! Tobii Pro X3-120 Eye Tracker User manual v.1.0.7 - en-US 1 Introduction... -
Page 7: Hardware Package Content
Hardware Package Content Standard Package The standard Tobii Pro X3–120 Eye Tracker package contains the following main parts: • Tobii Pro X3–120 Eye Tracker • 4x Adhesive mounting brackets for permanent installation. • USB 3 cable • USB memory stick containing the Tobii Pro X3–120 in- staller, documentation and training video. -
Page 8: Available Accessories
Pro X3–120 adapter plate. devices or objects of similar size such as books or brochures. An adapter plate is required to attach the Tobii Pro X3–120 to the mobile device stand. The mounting brackets package includes more adhesive mounting brack- •... -
Page 9: Product Care
When you transport the device for repair or shipment, use the original casing and packaging materials. Disposing of Tobii Pro X3–120 Eye Tracker Do not dispose of Tobii Pro X3–120 Eye Trackers in general household or office waste. Follow your local regulations for the dis- posal of electrical and electronic equipment. -
Page 10: Setting Up Tobii Pro X3-120 Eye Tracker
• Your computer is compatible with the software that you are going to use (Tobii Pro Studio, Tobii Pro Lab or other eye tracking software) and with Tobii Pro X3–120 Eye Tracker, see Table 4.1 Minimum system requirements for Tobii Pro X3–120 Eye Tracker, page 6. -
Page 11: Mounting Tobii Pro X3-120 Eye Tracker To A Screen
When mounting Tobii Pro X3–120 Eye Tracker onto a laptop or monitor, you use one of the adhesive mounting brackets in- cluded. If you already have a mounting bracket for the Tobii Pro X2–30 or X2–60 eye trackers attached to your monitor, you should use one of the mounting bracket adapters (optional accessory). -
Page 12: Using The Mounting Bracket Adapters (Optional Accessories) For Existing Tobii Pro X2-30, X2-60 Adhesive Mounting Brackets
X2–30, X2–60 adhesive mounting brackets. If you already have a mounting bracket for Tobii Pro X2–30 or X2–60 Eye Trackers attached to your monitor you should use one of the mounting bracket adapters available as optional accessories. The adapter fits on top of the existing mounting bracket. -
Page 13: Mounting Tobii Pro X3-120 Eye Tracker Using A Tripod Stand
The magnet inside will keep the eye tracker in place. The eye tracker USB port should be on the left side of Tobii Pro X3–120 when at- tached to the screen. -
Page 14: Tobii Pro Eye Tracker Installer
Tobii Pro Eye Tracker Installer In order to install the needed prerequisites and to configure the eye tracker for your screen you have to run the Tobii Pro Eye Tracker Installer that you can find on the provided USB memory stick or you can download it from the Tobii Pro website at www. - Page 15 From the list of supported eye trackers choose the X3-120 option and press next. If you intend to use the External Proc- essing Unit together with the X3–120 choose this option from the list instead. Click the Next button. You will be directed to the Firmware and Drivers screen. Please wait while the needed drivers and firmware are being installed.
- Page 16 USB port. Make sure to update the drivers for your USB 3.0 port to the latest version prior to installing the eye tracker. Click to select your Tobii Pro X3–120 Eye Tracker from the list of the discovered Tobii Eye Trackers in the Tobii Eye Tracker Installer window: Click the Next button.
- Page 17 12. Click the Start mapping button. The mapping screen will be displayed on the monitor the eye tracker is attached to (the monitor you previously selected in step 9). 13. Drag the handles on the dotted lines so they align with each of the two lines on the top of the Tobii Pro X3-120 Eye Tracker.
-
Page 18: Installing Additional Software
Installing additional software After installing and setting up the eye tracker, you need to install other software that you intend to use such as Tobii Pro Studio, Tobii Pro Lab, Analytics SDK or Tobii Pro SDK. Please see the respective software user manuals for detailed instructions. -
Page 19: Re-Configuring The Tobii Pro X3-120 Eye Tracker
Re-configuring the Tobii Pro X3–120 Eye Tracker If you move the Tobii Pro X3–120 Eye Tracker to another computer you must always run the Tobii Pro Eye Tracker Installer on that computer to configure the eye tracker for the new computer. If you move the eye tracker between different monitors or set- ups you must always re-configure the Tobii Pro X3–120 Eye Tracker settings for it to work properly. - Page 20 Click the Start mapping button. The mapping screen will be displayed on the monitor the eye tracker is attached to. Drag the handles on the dotted lines so they align with each of the two lines on the top of the Tobii Pro X3-120 Eye Tracker.
- Page 21 When you have finished aligning, click the I’m done button. The settings are automatically saved and the Tobii Pro X3– 120 Eye Tracker is now re-configured. Close the window.
-
Page 22: The X Configuration Tool
The X Configuration Tool The Tobii Pro X3–120 Eye Tracker can be used in many different setups. For example, it can be used to perform eye tracking relative to a physical scene, a TV, or a projection screen. For all this to work, the user must provide some information to the Tobii Pro X3–120 Eye Tracker about the physical setup. -
Page 23: Setting The Parameters In The X Configuration Tool
Setting the parameters in the X Configuration Tool When using the Tobii Pro X3–120 Eye Tracker without being mounted on a standard laptop screen or monitor, you must specify all the positioning parameters in the X Configuration Tool, as described below: Units: —... - Page 24 Active Display Area Width = 1.25 × Calibration grid width. • A — eye tracker angle. Calibrate the digital angle gauge supplied with the Tobii Pro X3–120 Eye Tracker desk stand package before measuring the angle between the eye tracker and the vertical plane. To calibrate the digital angle meter, place it on a flat, vertical surface and press the “Zero”...
- Page 25 This is useful if you want to save a particular configuration of a setup to be able to reuse it at a later point in time or from another computer. Tobii Pro X3-120 Eye Tracker User manual v.1.0.7 - en-US 5 The X Configuration Tool...
-
Page 26: Positioning The Participant And The Eye Tracker
When the Tobii Pro X3–120 Eye Tracker is used in a setup where it is not attached to a screen, it should be placed below the monitor (or below the surface that is to be used for presenting the stimuli) without covering the bottom of the display area for the participant watching the stimuli. -
Page 27: Freedom Of Head Movement
The Tobii Pro X3–120 Eye Tracker allows for head movements within an area of approximately 50 cm x 40 cm (19.7″ x 15.7″) (Width x Height) at the distance of 80 cm (31.5″) from the eye tracker. The supported operating distance (eye tracker to partici- pant’s eyes) for the Tobii Pro X3–120 Eye Tracker is 50 –... -
Page 28: Typical Setups
Typical Setups This chapter describes typical setup configurations that can be used with the Tobii Pro X3–120 Eye Tracker. For specific infor- mation about custom configurations or system requirements and recommendation, please contact your Tobii Pro sales repre- sentative or Tobii Pro technical support. The System Requirements and Recommendations document can be downloaded at www.tobiipro.com. -
Page 29: Local Live Viewer Setups
For details about configuration in Tobii Studio and further instructions on using Tobii Studio, please refer to the Tobii Studio documentation available on www.tobiipro.com. Tobii Pro X3-120 Eye Tracker User manual v.1.0.7 - en-US 7 Typical Setups... -
Page 30: Physical Object Setup
To configure this setup: Mount the eye tracker on a tripod, using the desk stand (accessory) as instructed in 4.2.3 Mounting Tobii Pro X3–120 Eye Tracker Using a Tripod Stand, page 9. -
Page 31: External Video Stimulus Recording
For specific information about custom configurations, supported components or system require- ments and recommendation, please contact your Tobii Pro sales representative or Tobii Pro technical support. The System Re- quirements and Recommendations document can be downloaded at www.tobiipro.com. - Page 32 Switch the input source of the primary screen (used for stimulus presentation) to the external device used for generating the stimuli (DVD player, gaming console, etc.) Tobii Pro X3-120 Eye Tracker User manual v.1.0.7 - en-US 7 Typical Setups...
-
Page 33: Appendix A Tobii Pro X3-120 Eye Tracker Specifications
Gaze precision at ideal conditions Binocular Monocular Human Eye 0.24 0.34 Dynamic illumination pattern compensation is applied in the Tobii Pro X3–120 Eye Tracker. Table A.3 Eye Tracking Specifications (preliminary) Eye Tracking Specifications Tobii Pro X3-120 Eye Tracker Sampling rate 120 Hz... - Page 34 Safety Instructions and Installation Guide USB cable Travel Case Cleaning Wipe Tobii Pro X3-120 Eye Tracker USB memory stick containing the Tobii Pro X3–120 installer, documentation and training video. Tobii Pro X3-120 Eye Tracker user manual (PDF) Table A.7 Accessories...
- Page 35 1 x USB 3.0 with the latest driver and with BC 1.2 or 1 x Gigabit LAN port for External Processing Unit (accessory). When using X3–120 without the EPU together with Tobii Pro Lab, the host computer must comply with the recommended system requirements for Pro Lab.
-
Page 36: Appendix B Recommended Display Sizes
“freedom of head movement”, which is roughly between 50-90 cm for the Tobii Pro X3–120 Eye Tracker from the center of the eye tracker when seen from the side (read more about this in 6 Positioning the participant and the eye tracker, page 22. -
Page 37: Appendix C Data Output
Different applications can be connected as clients to the eye tracker to, e.g. gather eye gaze data in real-time and perform calibrations. Applications that can be used together with the eye tracker include the Tobii Pro Studio software, third party software products, or your own custom software based on the Tobii Software Development Kit. -
Page 38: Appendix D Updating The Tobii Pro X3-120 Eyetracker Firmware
Appendix D Updating the Tobii Pro X3–120 eyetracker firmware From time to time new firmware will be released. The latest firmware versions are available for downloading from the Tobii Pro X3–120 product web page. • When using X3–120 without EPU: Get the two files TobiiIS3Driver_[VERSION].msi and TobiiS3FlashTetServer_[VERSION].msi and save them... -
Page 39: Appendix E Glossary
Eye tracking Gaze data calculations are performed by firmware embedded in the eye tracker or in a separate processing unit processing unit. Tobii Pro X3-120 Eye Tracker User manual v.1.0.7 - en-US Appendix E Glossary... -
Page 40: Appendix F Safety And Compliance
The Tobii Pro X3–120 should be mounted according to the instructions of the approved mounts used. Tobii AB or its agents are not liable for damage or injuries to a person or its property due to a Tobii Pro X3–120 falling from a mounted configuration. -
Page 41: F1.6 Child Safety
Child Safety The Tobii Pro X3–120 is an advanced computer system and electronic device. As such it is composed of numerous separate, assembled parts. In the hands of a child certain of these parts have the possibility of being separated from the device, possibly constituting a choking hazard or another danger to the child. -
Page 42: F2.3 Ce Statement
AS/NZS CISPR 32:2013 F2.5 Disposing of the Tobii Pro X3–120 Do not dispose of the Tobii Pro X3–120 in general household or office waste. Follow your local regulations for the disposal of electrical and electronic equipment. Other limitations and considerations F3.1... -
Page 43: F3.5 Keeping Tobii Pro X3–120 Firmware Up To Date
Keeping Tobii Pro X3–120 firmware up to date From time to time Tobii Pro will release updates for the eye tracker firmware that will improve performance and/or introduce new functionality. The latest firmware can be downloaded from the Tobii Pro Support website http://www. - Page 44 . Illustrations and specifications do not necessarily apply to products and services offered in each local market. Technical specifications are subject to change without prior notice. All other trademarks are the property of their respective owners. ® Tobii Pro Support EUROPE / GLOBAL...
Need help?
Do you have a question about the X3-120 and is the answer not in the manual?
Questions and answers