Table of Contents
Advertisement
Quick Links
© 2016 CASIO COMPUTER CO., LTD.
MO1705-EC
Congratulations upon your selection of this CASIO watch.
Applications
The built-in sensors of this watch measure direction, barometric pressure, temperature and altitude.
Measured values are then shown on the display. Such features make this watch useful when hiking,
mountain climbing, or when engaging in other such outdoor activities.
•
The measurement functions built into this watch are not intended for taking measurements that
require professional or industrial precision. Values produced by this watch should be considered
as reasonable representations only.
•
When engaging in mountain climbing or other activities in which losing your way can create a
dangerous or life-threatening situation, always use a second compass to confi rm direction readings.
•
Note that CASIO COMPUTER CO., LTD. assumes no responsibility for any damage or loss
suffered by you or any third party arising through the use of your watch or its malfunction.
E
About This Manual
•
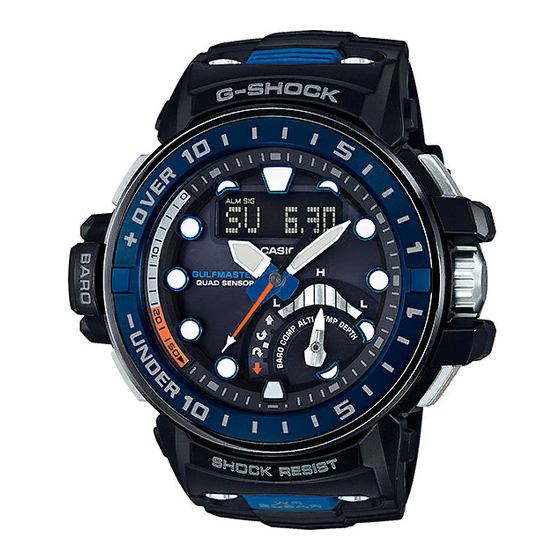
Depending on the model of your watch, digital display text appears
Crown
either as dark fi gures on a light background, or light fi gures on a dark
Hour hand
Minute hand
background. All examples in this manual are shown using dark fi gures
on a light background.
•
Button operations are indicated using the letters shown in the
illustration.
•
Note that the product illustrations in this manual are intended for
reference only, and so the actual product may appear somewhat
different than depicted by an illustration.
* In the Timekeeping Mode, the small hand indicates tide conditions
(page E-96).
Second hand
Small hand*
E-2
High-speed Movement
You can use either of the crown operations described below to move watch hands or indicators at high
speed.
HS1: Can be used to move both hands and display indicators.
HS2 (forward only): Can be used when setting the hour and minute manually to move the hands at high
speed.
To start HS1 high-speed movement
While the crown is pulled out, rotate it rapidly a number of turns away from you
(for forward movement) or towards you (for reverse movement).
To start HS2 high-speed movement (forward only)
While HS1 high-speed forward movement is in progress, rotate the crown
rapidly again a number of turns away from you.
To stop high-speed movement
Rotate the crown in the direction that is opposite that of the current high-speed
movement or press any button.
E-4
Things to check before using the watch
1. Check the battery power level.
Hold down B (page E-2) for at least two seconds to enter the Timekeeping Mode and display the battery
power level.
The battery power level will be indicated as H or M on the left
side of the digital display.
NO
Does any one of the conditions below exist?
•
L fl ashing on the digital display.
•
"CHARGE" fl ashing on the display.
YES
Power is low. Charge the watch by placing it in a location
where it is exposed to light. For details, see "Charging the
Watch" (page E-13).
•
When L is fl ashing, the second hand will jump at two-second intervals.
•
When CHARGE is fl ashing, all hands will move to and stop at 12 o'clock.
E-6
Operation Guide 5477
Warning !
Battery power
indicator
YES
The watch is charged
suffi ciently.
For details about
charging, see
"Charging the Watch"
(page E-13).
NEXT
Go to step 2.
Important!
•
The watch's Altimeter Mode calculates and displays relative altitude based on barometric pressure
readings produced by its pressure sensor. This means that readings taken at different times at the
same location may produce different altitude values due to changes in barometric pressure. Also note
that the value displayed by the watch may be different from the actual elevation and/or sea level
elevation indicated for the area where you are located.
•
When using the watch's altimeter while mountain climbing, be sure to perform regular calibration in
accordance with the local altitude (elevation) indications. For more information, see "To specify a
reference altitude value" (page E-70).
•
Whenever you use the digital compass of this watch for serious trekking, mountain climbing, or other
activities, be sure always to take along another compass to confi rm readings. If the readings produced
by the digital compass of this watch are different from those of the other compass, perform fi gure 8
calibration or 3-point calibration of the digital compass to ensure more accurate readings.
•
The Depth Meter Mode of this watch is intended for use while free diving, snorkeling, etc.
•
Direction readings and digital compass calibration will not be possible if the watch is in the vicinity of a
permanent magnet (magnetic accessory, etc.), metal objects, high-voltage wires, aerial wires, or
electrical household appliances (TV, computer, cellphone, etc.)
Using the Crown
The crown of this watch is a screw in lock crown. Before using the crown,
Crown
you must fi rst rotate it towards you to loosen it. After performing crown
operations, be sure to press the crown in lightly as you screw it back in.
Important!
•
To maintain water resistance and avoid impact damage to the crown,
be sure to screw it back in when you are not using it.
Loosen
The illustrations below show the different crown operations.
Pull out
Note
•
If you do not perform any operation for more than two minutes after pulling out the crown, the indicator
shown below will appear and crown operations will become disabled. If this happens, push the crown
back in and then pull it out again to re-enable crown operations.
•
Pulling out the crown while the watch is in a mode that does not allow confi guration of any settings will
cause the indicator shown below to appear. If this happens, push the crown back in and lock it.
•
The indicator shown below also appears when performing hand home position adjustment. See "Hand
Home Position Adjustment" (page E-40) for more information.
•
You can use high-speed movement to perform the following operations: when changing a time and/or
date setting; when selecting a city; when performing barometric pressure calibration, magnetic
declination angle calibration, altitude calibration, or temperature calibration operations; when
calibrating high tide times; when setting a latitude and longitude; when confi guring timer settings, when
setting an alarm time
2. Check the Home City and the daylight saving time (DST) setting.
Use the procedure under "To confi gure Home City and summer time settings" (page E-34) to confi gure your
Home City and daylight saving time settings.
Important!
•
Proper time calibration signal reception and World Time Mode data depend on correct Home City,
time, and date settings in the Timekeeping Mode. Make sure you confi gure these settings correctly.
3. Set the current time.
•
To set the time using a time calibration signal
See "To get ready for a receive operation" (page E-22).
•
To set the time manually
See "Confi guring Current Time and Date Settings Manually" (page E-36).
The watch is now ready for use.
•
For details about the watch's radio controlled timekeeping feature, see "Radio Controlled Atomic
Timekeeping" (page E-20).
Rotate
Push in
1 second
ENGLISH
E-1
E-3
E-5
E-7
Advertisement
Table of Contents

Related Manuals for Casio 5477


Summary of Contents for Casio 5477
- Page 1 If the readings produced • Note that CASIO COMPUTER CO., LTD. assumes no responsibility for any damage or loss by the digital compass of this watch are different from those of the other compass, perform fi gure 8 suffered by you or any third party arising through the use of your watch or its malfunction.
-
Page 2: Table Of Contents
Operation Guide 5477 Contents Hand Home Position Adjustment ……………………………………………………………………… E-40 To trigger hand home position adjustment manually …………………………………………… E-40 About This Manual …………………………………………………………………………………………… E-2 Moving the Hands for Easy Viewing of the Digital Display ………………………………………… E-41 To shift the hands and view digital info …………………………………………………………… E-41 Using the Crown ………………………………………………………………………………………………... - Page 3 Operation Guide 5477 Power Recovery Mode • Leaving the watch exposed to direct sunlight or some other very strong light source can cause the battery power indicator to show a reading temporarily that is higher than the actual battery level. The •...
- Page 4 Operation Guide 5477 Signal Level Indicator • You can use the procedure under “To enable or disable auto receive” (page E-26) to enable or disable auto receive. During calibration signal reception, the signal level indicator displays the signal level as shown below.
- Page 5 Operation Guide 5477 General Functions (All Modes) Timekeeping • The functions and operations described in this section can be used in all of the modes. Use the Timekeeping Mode (TIME) to set and view the current time and date. Auto Return Features Each press of C in the Timekeeping Mode will change screen contents as shown below.
-
Page 6: Hand Home Position Adjustment
Operation Guide 5477 Hand Home Position Adjustment Moving the Hands for Easy Viewing of the Digital Display If the watch is exposed to strong magnetism or impact, its hands can go out of alignment with the time on You can use the procedure below to move the analog hands in order to better view a digital display. -
Page 7: To Enable Or Disable Barometric Pressure Change Indication
Operation Guide 5477 Reading Barometric Pressure Differential Pointer Barometric Pressure Change Indications Pressure differential is indicated in the Your watch analyzes past barometric pressure readings and uses a barometric pressure change indication range of ±10 hPa (0.3 inHg), in 1-hPa (0.03 to inform you about changes in pressure. -
Page 8: To Perform Fi Gure 8 Calibration
Operation Guide 5477 Note Calibrating the Bearing Sensor • The watch will return to the Timekeeping Mode about 60 seconds after the direction reading You should calibrate the bearing sensor whenever you feel that the direction readings being produced by operation is complete. -
Page 9: To Record The Bearing To An Objective
Operation Guide 5477 Location Recording the Bearing to an Objective • Taking a direction reading when you are near a source of strong magnetism can cause large errors in You can use the procedure in this section to record a bearing along with the date and time of the reading. -
Page 10: To Specify The Altitude Differential Measurement Range
Operation Guide 5477 Specifying the Altitude Differential Measurement Range To use the altitude differential value You can use the procedure below to select either ±100 meters or ±1,000 1. Using the contour lines on a map, determine the altitude difference between your current location and Altitude differential meters as the altitude differential measurement range. -
Page 11: To Record The Temperature
Barometric Pressure (page E-52), Recording the Bearing to an Objective (page E-64), Recording Altitude (page E-70), Recording Temperature (page E-80), Recording Depth and Dive Time (page E-83) If a sensor error occurs, do not use the watch for diving and contact an authorized CASIO service To display a data record center as soon as possible for repair. -
Page 12: To Delete A Specifi C Data Record
Operation Guide 5477 Data Records Altitude Data Barometer Data Year, month, day Year, month, day Hour, minute Altitude Hour, minute Barometric pressure Digital Compass Data Temperature Data Year, month, day Year, month, day Hour, minute Bearing Hour, minute Temperature Depth Meter Data... - Page 13 Operation Guide 5477 Checking the Tide Level and Moon Ages (Tide/Moon) • If the Tide Graph hand indication is not correct, check the Timekeeping Mode time and date, and the Home City settings. If this does not correct the problem, refer to “Calibrating the High Tide Time” (page E-99).
-
Page 14: Using The Alarm
Operation Guide 5477 To measure two fi nishes Using the Stopwatch The stopwatch measures elapsed time, split times, and two fi nishes. Start Split Stop Split release Reset To enter the Stopwatch Mode First runner fi nishes. Second runner Display time of Minutes Use B to select the Stopwatch Mode (STW) as shown on page E-30. -
Page 15: Illumination
If, after multiple retries, ERR keeps appearing, procedure under “To change the current time and date settings manually” (page E-36) to change the standard contact your original retailer or CASIO service center. See “Location” (page E-65). time/daylight saving time (DST) setting. -
Page 16: Troubleshooting
Subjecting the watch to strong shock can affect the accuracy of the depth measurements. If this happens recharges suffi ciently. immediately contact an authorized CASIO service center for inspection and sensor adjustment. ■ RECOVER is fl ashing on the digital display. - Page 17 Operation Guide 5477 Temperature Sensor Precision: Power Supply: Solar panel and one rechargeable battery ±2°C (±3.6°F) in range of –10°C to 60°C (14.0°F to 140.0°F) Approximate battery operating time: 6 months (from full charge to Level 4) under the following...
Need help?
Do you have a question about the 5477 and is the answer not in the manual?
Questions and answers