Table of Contents
Advertisement
Quick Links
Advertisement
Table of Contents

Related Manuals for Samsung SDR-B73303


Summary of Contents for Samsung SDR-B73303
- Page 1 DIGITAL VIDEO RECORDER User Manual SDR-B73303/SDR-B74303/SDR-B75303...
- Page 2 Overview of DVR Contents overview of Dvr Contents Safety Instruction Front Panel Rear Panel Remote Controller Install Hard Drive Connect external equipment Connect DVR Dvr Boot up System Initialization Startup Wizard Main Interface Dvr Menu Popup Menu Main Menu Guide Main Menu Menu Lock Split Mode...
- Page 3 sAfety instruCtion Please carefully read the following safety instruction so as to avoid personal injuries and prevent the equipment and other connection devices from being damaged. 1. Please use the power supply enclosed or specified by the manufacturer. Never operate the equipment by using unspecified power supply. 2.
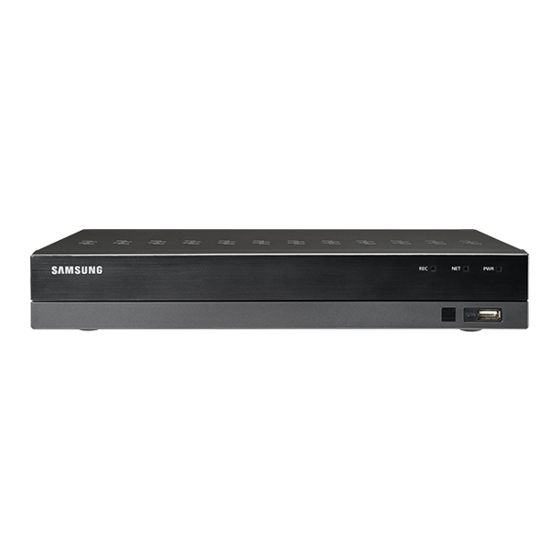
- Page 4 Overview of DVR front pAnel DVR is short for Digital Video Recorder. a b c Type Key or indicator Identification Functions HDD indicator If the "Red" indicator flashes, the hard drive is being read or written to. Status lamp Net indicator Display network connection and data transfer status.
- Page 5 CAUTION RISK OF ELECTRI SHOCK DO NOT OPEN CAUTION : TO REDUCE THE RISK OF ELECTRICAL SHOCK DO NOT OPEN COVERS. NO USER SERVICEABLE PARTS INSIDE. REFER SERVICING TO QUALIFIED SERVICE PERSONNEL. WARNING : TO PREVENT FIRE OR SHOCK HAZARD. DO NOT EXPOSE UNITS NOT SPECIFICALLY DESIGNED FOR OUTDOOR USE TO RAIN OR MOISTURE.
- Page 6 Overview of DVR reMote Controller Operation of remote controller Channel select 1-8; Numeric key Numeric key Menu Enter into Main menu/Exit Multiple display mode Mute suBMenu Go to Submenu Mute on/off Up arrow key, volume increase Select key/Edit key Left/Right key; Decrease/Increase parameter value of Down arrow key, Volume decrease control bar.
- Page 7 instAll HArD Drive HDD is pre-installed. If you want to replace hard disk drive, please refer to the following instruction. Please do not remove the hard drive when DVR is operating. installation of Hard Drive 1. Using a screwdriver, remove the screws from the side and back panels.
- Page 8 Overview of DVR ConneCt externAl equipMent Connect camera signal cable to video input port on the DVR via the BNC connectors. Connect your monitor to the DVR using the VGA or HDMI video cable. Connect DVR to the power supply adapter provided. After all connections are completed, plug the DVR in to perform function checks.
- Page 9 DVR Boot up systeM initiAlizAtion After connecting the DVR power cable to wall outlet, the DVR system initializing screen will appear. It may take 40 seconds to start up, and the screen may beep 5~6 times. stArtup wizArD After the DVR startup is complete, the startup wizard will display. Wizard setting menu includes: Homepage, admin password setting, hard drive management, video recording schedule, basic system configuration, network setup, e-mail and DDNS setting.
- Page 10 DVR Boot up 2. Hard Drive Management: Any new disk connected must be formatted before use. Click on "Select" to highlight the hard drive to be formatted. Click on "Format HDD" and the user login box will appear. Enter the password to log in.
- Page 11 6. Email Configuration: Receive or Send DVR alarm email and set parameters like email address, SSL, email enable, and interval. • encryption: Disable, SSL, TLS and Auto optional. Auto means it can detect the encryption type automatically. It is recommended to set the encryption type as Auto.
- Page 12 Date & Time Display current date and time Channel Name Display channel name SAMSUNG Logo The logo of SAMSUNG will display only when video is loss. Image Capture Make a snapshot of current video Manual Recording Enable or disable manual recording...
- Page 13 Component Name Function Main Menu Access the main menu Lock Sign out or access sign-in page. 4-Channel Layout Display four channels of video. 9-Channel Layout Display nine channels of video. 12-Channel Layout Display Twelve channels of video. 16-Channel Layout Display sixteen channels of video. Display six channels of video.
- Page 14 DVR Menu popup Menu After finishing system initialization, right click the mouse on preview interface or slide the mouse to the bottom of screen to enter into Pop-up Menu. Now you could perform parameter setting and operate on Main Menu, Multi-screen, Record Search, Sequence, Volume and Brightness settings.
- Page 15 MAin Menu guiDe Live Display Output Private Zone Record Record Schedule Record Main stream Substream Capture Capture Capture Schedule Network Parameter Email Email Schedule Network DDNS RTSP Alarm Motion General Record Search Events Picture Main Menu Device General General Users System Info Info...
- Page 16 DVR Menu MAin Menu On LIVE mode, click the mouse button, or [Menu] button on the remote controller, or click [ ] icon on the toolbar to enter the main menu screen. If system interface is locked, refer to section 3.3 to unlock by entering your password. In Main Menu mode, you can make settings for Parameter, Record Search, Device, System, Advanced and Shutdown.
- Page 17 output Go to "Main Menu" ; "Parameter" ; "Display" ; "Output" to enter into the interface. • video output: Live Output • sequence Mode: layout1, 4, 6, 8, 9, 10, 10-1, 12, 13, 13-1 • seq time: Sequence time is set 5 seconds by default. User may set it as required up to 300 seconds • vgA/HDMi resolution: For VGA output or HDMI output, the optional resolution includes 1024×768, 1280×1024, 1440×900, 1280×720,...
- Page 18 DVR Menu record Go to "Main Menu" ; "Parameter" ; "Record" ; "Record" to enter into the interface. • Channel: Set the desired channel in the drop-down menu • record switch: Enable/disable record • stream mode: Mainstream/Substream • pre record: Enable to pre-record motion detection record. record schedule Go to "Main Menu"...
- Page 19 substream Go to "Menu" ; "Parameter" ; "Record" ; "Substream"" to enter into the menu interface • Channel: Select recording channel • resolution: NTSC 352x240 / PAL 352x288 • fps: Select recording frame rate. • Bitrate Control: Select either constant (CBR) / variable (VBR) bit rate. • Bitrate Mode: Select default/custom bit rate.
- Page 20 DVR Menu network Go to "Main Menu" ; "Parameter" ; "Network" ; "Network" to enter the interface. Select the network connection option (PPPoE, DHCP, Static) to set the port. User can view and do the recording, playback or backup of the video remotely. Take DHCP as an example.
- Page 21 Click on "settings--Forwarding and POP/IMAP" Click on "Enable IMAP--Save Changes" e-mail schedule Go to "Main Menu" ; "Parameter" ; "Network" ; "E-mail Schedule" to make Email schedule. Select the channel and the date to be set. One week's schedule can be set. The record schedule of the current channel can be copied to any other channel or all channels.
- Page 22 DVR Menu rtsp Go to "Main Menu" ; "Parameter" ; "Network" ; "RTSP" Set User Name and Password to view video by PC software VLC. • rtsp enable: Enable/Disable • verify: Enable/Disable • rtsp port: 00054 • rtsp user name: admin • rtsp password: 111111 • Analog Channel: rtsp://IP:Port/chA/B • A: 01(ch1), 02(ch2)
- Page 23 Motion Go to "Main Menu" ; "Parameter" ; "Alarm" ; "Motion" to enter into the interface. • Channel: Enable or disable Motion function. • sensitivity: Support 1-8 level, 8 is the highest level. • Buzzer: When detecting object moving, buzzer makes alarms (disable, 10 seconds, 20 seconds, 40 seconds and 60 seconds).
- Page 24 DVR Menu record search general Go to "Main Menu" ; "Record Search" ; "Record Search" to enter into the interface. • Channel: Select the channel you want to search. • type: Select the type the playback record. There are three options: All, Normal and Motion.
- Page 25 • Clip and backup: When it is under single channel playback, the [ ] icon will appear in the Play Control bar. Click the icon to start video clip function, click the icon again to end the function and pop up the dialog. Now, you may save the clipped video file.
- Page 26 DVR Menu play Backup files 1. Copy backup files to the computer. 2. Open SVideo player and click [ + ] or [ For example, if you want to choose *.264, *.avi, *.mp4, add backup file and select a file to play. Play: Click to play file Pause: Click to pause.
- Page 27 Capture Settings: Set the path to save image It is recommended to use SVideo Player contained in compact disk for playback. Use of any other player may cause compatibility problem. picture Go to "Main Menu" ; "Parameter" Support search picture for 5000pcs each time. If the picture number greater than this value, please adjust the date (time) of the current search and search again.
- Page 28 DVR Menu Device Go to "Main Menu" ; "Device" ; "HDD" to enter into the interface. When HDD is connected, the system will automatically detect if the HDD is normal or not; if the HDD needs to be formatted, select the HDD and format it. If the system detects the HDD is normal, the HDD status will be shown as "Normal". • no.: Number of HDD connected to system.
- Page 29 system general Go to "Main Menu" ; "System" ; "General" ; "General" to enter into the interface. User may set Date, Time, Date Format, Time Format, Language, Video Format, Menu Timeouts and Show Wizard on this page. Go to "Main Menu" ; "System" ; "General" ; "DST". Enter into the interface to set DST, Time Offset, Start Time and End Time.
- Page 30 DVR Menu Go to "Main Menu" ; "System" ; "General" ; "NTP". • ntp service: Enable/Disable NTP function. • server Address: Select NTP server (time.windows.com, time.nist.gov, pool. ntp.org). • time zone: Corresponding time zones for various nations or regions. • update time: Enable NTP function and save parameters and click Update Time to calibrate the system time.
- Page 31 user edit User may enable or disable the function or set password. info Go to "Main Menu" ; "System" ; "Info" to enter into the interface. Go to "Main Menu" ; "System" ; "Log". User may search log information in different period of time. Click "Backup" to save all the log information.
- Page 32 DVR Menu Advanced Maintain Go to "Main Menu" ; "Advanced" ; "Maintain" to enter into the interface. • Auto reboot: Enable the auto maintenance function to reboot system regularly at every day/week/month. When Auto Reboot is enabled, DVR should be in the main interface and no user operation. • update: Click Update to enter the Device interface and select the updating file in USB to execute.
- Page 33 Menu loCK In consideration of system safety, user may click the icon [ ] on the toolbar when he leaves away from DVR and the system interface will be locked. User has to input Device ID, User Name and Password on the login interface to unlock. In case that the password is forgotten, contact the technical personnel.
- Page 34 Web Application Manager systeM environMent requireMents The minimum requirements for hardware and OS required to run Web Application are given below. Minimum Recommended Intel i3 Intel i7 or higher 4GB or more 8GB or more Hard Drive 500GB or more 1000GB or more Display RAM 2GB or more...
- Page 35 If the Web plugins is not downloaded successfully, please check if your browser's safety level or firewall setting is set too high. Please open IE browser ; [Menu Bar] Tools ; Internet options ; Security ; Internet ; Custom level ; Enable the options. Download and installation of plugin for ie Enter IP address of DVR in address bar of IE, for example, http://192.168.2.173:80...
- Page 36 Web Application Manager Shut down IE browser and restart it, and then enter IP address of DVR in address bar to access login page. Download and installation of plugin for Mac sAfAri Enter IP address of DVR in address bar of Mac SAFARI, for example, http://192.168.2.173:80, and click on "download"...
- Page 37 Shut down Mac SAFARI browser and restart it, and then enter IP address of DVR in address bar to access login page. The above instruction is to install the initial plug in. You can use the same plugin for IE, for Google Chrome and Firefox.
- Page 38 Web Application Manager Menu Bar Menu Bar: Live, Replay, Configuration, Local Setting and Logout. live Display Log in the Web Application Manager, system will be defaulted to enter into <Live> interface. You can click [Play] button to Open/ close live images, on-spot record, capture, and many live display modes. Buttons on a single live interface : Volume switch Record switch: the remote record switch of client.
- Page 39 playback Click [ ] to enter into Playback interface to remotely view the records in DVR HDD. It supports 1 to 4 channel record playback. record search Record playback procedure Firstly, select the date you want to check and tick 1 to 4 channels. Any record files in current channel at current date will be displayed in the status bar of the interface.
- Page 40 Web Application Manager playback Control Playback control bar Detailed brief description is shown as below list Description Description Play Enable the volume switch Pause Volume adjustment bar Stop Slow playing 1/2,1/4, 1/8, Fast playing 1/2/4/8 Byframe Stop playing all the files Record Clip Single channel mode Snap...
- Page 41 remote setting Click Remote Setting to enter into the interface shown, including Display, Record, Network, Alarm, Device, System and Advance. Display live • Channel: Select analog channel or digital channel. • show name: Enable or Disable display camera name. • show time: Enable or Disable time display. • Channel name: Define a camera name for the camera.
- Page 42 Web Application Manager 3. Mainstream: User may set Mainstream. The relevant parameters should be consistent with DVR local setting. 4. Substream: • Channel: Select analog channel or digital channel. • resolution: Select recording resolution. • fps: Select recording frame rate. • Bitrate Mode: Select default or custom bit rate.
- Page 43 network Unfold <Network> to show its sub-options: Network, Email, and DDNS configuration. lAn setting DVR supports Static/DHCP/PPPoE modes. System default network type is <DHCP>. User can set parameters as required. After the network parameters are modified successfully, DVR will automatically restart to make the setting effective.
- Page 44 Web Application Manager rtsp The relevant parameters should be consistent with DVR local setting. The relevant parameters should be consistent with DVR local setting. It is recommended to use FTP software Filezilla with open source free of charge. Use of other FTP software may cause the image abnormal.
- Page 45 Device Click <Device> to unfold its sub-options: HDD and PTZ User may check HDD status of DVR and overwritten time. Detail setting should be consistent with DVR local setting. User may set the relevant parameters of PTZ. Detail setting should be consistent with DVR local setting.
- Page 46 Web Application Manager users User may configure user name and password and detailed setting should be consistent with DVR local setting. info User may search device name, device number, device type, MAC address, software version, IE version and hardware version of DVR. Channel info Displays all channels camera relevant information.
- Page 47 Advanced Click Advance to unfold its sub-options: Firmware Update, Load default, Events and Maintain. firmware update User may remotely update DVR system. updating procedure Firstly, select the update file path. The file format is *.sw. Secondly, click "Start" to start updating. The updating progress can be seen on the screen.
- Page 48 Web Application Manager Maintain Allow you remotely set auto maintain time for DVR. Detailed setting should be consistent with DVR local setting. local setting User may set Record Path (save Live record and Playback clip file), Download Path for remote file, Snapshot Path for captured pictures, Interval for switching record files (Packaging time), and File type (H264 and AVI).
- Page 49 Mobile App AnDroiD pHones/tABlets 1. Open Play Store to search WiseView and click "INSTALL" to install. 2. After installation, open WiseView and select "Device". Then click [ ] to add new device. Scan QR code under Information page of system on local DVR. Then input client port, user name and password, and then click Save to log in to the device.
- Page 50 Mobile App ipHone/ipAD 1. Open App Store to search WiseView, and click icon [ ] to install. 2. Open WiseView, and go to Device. Click [ ] to add new device. Scan QR code under Information page of system on local DVR.
- Page 51 Appendix trouBlesHooting Symptom Countermeasures • Check if the power supply system is properly connected and data cord and power cables are securely What can I do if the system does not detect connected, and if something wrong with the HDD interface. Or you may check if your HDD is supported the HDD? by referring to the specifications or descriptions.
- Page 52 Appendix usage Maintenance 1. To shut down DVR, please firstly shut down the system and then turn off the power. Do not turn off the power directly or HDD data will be lost or damaged. 2. Please keep DVR away from heat sources or places. 3.
- Page 53 Details Item SDR-B73303N SDR-B73303P Description Inputs 4CH BNC System AHD, CVBS Video NTSC:1,920x1,080 (Full HD) / 1,280x720 (HD) / PAL:1,920x1,080 (Full HD) / 1,280x720 (HD) / Resolution 960 x 480 (960H) 960x576 (960H) NTSC : 120fps@ 1,920x1080 / 120fps@1,280x720...
- Page 54 Appendix Details Item SDR-B73303N SDR-B73303P Supported OS - PC : Windows® XP, Windows® Vista, Windows® 7 Windows® 8 Mac OS X® 10.9 or above - Mobile : Android Ver3.0 or above Web / App viewer iOS® 7.0 or above Supported Browser Smart phone - Microsoft Internet Explorer (Ver.
- Page 55 sDr-B74303n1t Details Item SDR-B74303N SDR-B74303P Description Inputs 8CH BNC System AHD, CVBS Video NTSC:1,920x1,080 (Full HD) / 1,280x720 (HD) / PAL:1,920x1,080 (Full HD) / 1,280x720 (HD) / Resolution 960 x 480 (960H) 960x576 (960H) NTSC : 240fps@ 1,920x1080 / 240fps@1,280x720 PAL : 200fps@ 1,920x1080 / 200fps@1,280x720 / Frame rate / 240fps@960x480...
- Page 56 Appendix Details Item SDR-B74303N SDR-B74303P Supported OS - PC : Windows® XP, Windows® Vista, Windows® 7 Windows® 8 Mac OS X® 10.9 or above - Mobile : Android Ver3.0 or above Web / App viewer iOS® 7.0 or above Supported Browser Smart phone - Microsoft Internet Explorer (Ver.
- Page 57 sDr-B74303n2t Details Item SDR-B74303N SDR-B74303P Description Inputs 8CH BNC System AHD, CVBS Video NTSC:1,920x1,080 (Full HD) / 1,280x720 (HD) / PAL:1,920x1,080 (Full HD) / 1,280x720 (HD) / Resolution 960 x 480 (960H) 960x576 (960H) NTSC : 240fps@ 1,920x1080 / 240fps@1,280x720 PAL : 200fps@ 1,920x1080 / 200fps@1,280x720 / Frame rate / 240fps@960x480...
- Page 58 Appendix Details Item SDR-B74303N SDR-B74303P Supported OS - PC : Windows® XP, Windows® Vista, Windows® 7 Windows® 8 Mac OS X® 10.9 or above - Mobile : Android Ver3.0 or above Web / App viewer iOS® 7.0 or above Supported Browser Smart phone - Microsoft Internet Explorer (Ver.
- Page 59 sDr-B75303 Details Item SDR-B75303N SDR-B75303P Description Inputs 16CH BNC System AHD, CVBS (NTSC/PAL) Video NTSC:1,920x1,080 (Full HD) / 1,280x720 (HD) / PAL:1,920x1,080 (Full HD) / 1,280x720 (HD) / Resolution 960 x 480 (960H) 960x576 (960H) NTSC : 480fps@ 1,920x1080 / 480fps@1,280x720 PAL : 400fps@ 1,920x1080 / 400fps@1,280x720 / Frame rate / 480fps@960x480...
- Page 60 Appendix Details Item SDR-B75303N SDR-B75303P Supported OS - PC : Windows® XP, Windows® Vista, Windows® 7 Windows® 8 Mac OS X® 10.9 or above - Mobile : Android Ver3.0 or above Web / App viewer iOS® 7.0 or above Supported Browser Smart phone - Microsoft Internet Explorer (Ver.
- Page 61 DiMension sDr-B73303 Unit: mm (inch) 300.00mm (11.81'') 52.50mm (2.07'') 48.00mm (1.89'') English _61...
- Page 62 Appendix sDr-B74303 Unit: mm (inch) 300.00mm (11.81'') 52.50mm (2.07'') 48.00mm (1.89'') 62_ Appendix...
- Page 63 sDr-B75303 Unit: mm (inch) 300.00mm (11.81'') 52.50mm (2.07'') 48.00mm (1.89'') English _63...
- Page 64 open sourCe AnnounCeMent oPen Source AnnounceMent The software included in this product contains copyrighted software that is licensed under the GPL/LGPL. You may obtain the Corresponding Source code from us for a period of three years after our last shipment of this product If you want to obtain the Corresponding Source code in the physical medium such as CD-ROM, the cost of physically performing source distribution might be charged.
- Page 65 c) Accompany it with the information you received as to the offer to of this License, you may choose any version ever published by the Free distribute corresponding source code. (This alternative is allowed Software Foundation. only for noncommercial distribution and only if you received the 10.
- Page 66 consider it more useful to permit linking proprietary applications with the computer or modifying a private copy. Propagation includes copying, library. If this is what you want to do, use the GNU Lesser General distribution (with or without modification), making available to the public, Public License instead of this License.
- Page 67 4. conveying Verbatim copies. A separable portion of the object code, whose source code is excluded from the Corresponding Source as a System Library, need not be You may convey verbatim copies of the Program’s source code as you included in conveying the object code work. receive it, in any medium, provided that you conspicuously and appropriately publish on each copy an appropriate copyright notice;...
- Page 68 In the following three paragraphs, a “patent license” is any express permits relicensing or conveying under this License, you may add to a agreement or commitment, however denominated, not to enforce a covered work material governed by the terms of that license document, patent (such as an express permission to practice a patent or covenant provided that the further restriction does not survive such relicensing or not to sue for patent infringement).
- Page 69 15. disclaimer of Warranty. Finally, software patents pose a constant threat to the existence of any free program. We wish to make sure that a company cannot effectively THERE IS NO WARRANTY FOR THE PROGRAM, TO THE EXTENT restrict the users of a free program by obtaining a restrictive license from PERMITTED BY APPLICABLE LAW.
- Page 70 You may charge a fee for the physical act of transferring a copy, and layouts and accessors, and small macros and small inline functions (ten you may at your option offer warranty protection in exchange for a fee. lines or less in length), then the use of the object file is unrestricted, regardless of whether it is legally a derivative work.
- Page 71 no WArrAntY acceptance of this License to do so, and all its terms and conditions for copying, distributing or modifying the Library or works based on it. 15. BECAUSE THE LIBRARY IS LICENSED FREE OF CHARGE, THERE 10. Each time you redistribute the Library (or any work based on the IS NO WARRANTY FOR THE LIBRARY, TO THE EXTENT PERMITTED Library), the recipient automatically receives a license from the original BY APPLICABLE LAW.
- Page 72 Hanwha Techwin cares for the environment at all product manufacturing stages, and is taking measures to provide customers with more environmentally friendly products. The Eco mark represents Hanwha Techwin's devotion to creating environmentally friendly products, and indicates that the product satisfies the EU RoHS Directive.
- Page 73 Head Office 86 Cheonggyecheon-ro Jung-gu Seoul 04541 Korea Tel +82.2.729.5277, 5254 Fax +82.2.729.5489 www.hanwha-security.com Hanwha Techwin America 100 Challenger Rd. Suite 700 Ridgefield Park, NJ 07660 Toll Free +1.877.213.1222 Direct +1.201.325.6920 Fax +1.201.373.0124 Hanwha Techwin Europe Heriot House, Heriot Road, Chertsey, Surrey, KT16 9DT, UK Tel +44.1932.82.6700 Fax +44.1932.82.6701...
Need help?
Do you have a question about the SDR-B73303 and is the answer not in the manual?
Questions and answers
How do you reset the password for this DVR. Online resources insufficient.
To reset the password for the Samsung SDR-B73303 DVR, you can use a compatible remote control. A user mentioned successfully resetting the Admin password on a Samsung DVR using a replacement remote. Additionally, if you can log in, you may be able to change the password through the system settings. If a remote reset does not work, consider checking the manual for specific password reset instructions.
This answer is automatically generated