
Related Manuals for Indesit ICD661UK


Summary of Contents for Indesit ICD661UK
- Page 1 5407660 Issue 1 Oct. 2011 INDESIT TABLE TOP DISHWASHER Model Covered ICD661UK 75297 Service Information Indesit Company UK Ltd © 2011 Reg. Office: Peterborough PE2 9JB Registered in London: 106725...
-
Page 2: Table Of Contents
Indesit Company SAFETY NOTES & GENERAL SERVICING ADVICE 1. This manual is NOT intended as a comprehensive repair/maintenance guide to the appliance. 2. It should ONLY be used by suitably qualified persons having technical competence applicable product knowledge and suitable tools and test equipment. -
Page 3: Technical Specifications
Indesit Company TECHNICAL SPECIFICATIONS Model ICD661 - White - Commercial Code 75297 First produced 2011 Country of Manufacture China Dimensions Width - 550 mm Height - 440 mm Depth - 525 mm Depth when Door Open 800mm Energy Drying Wash... -
Page 4: Introduction
Indesit Company INTRODUCTION A six place Table Top Dishwasher with 6 wash cycles. The Programme Selector, buttons and LED indicators are mounted on the console. Any faults are indicated by beeping and the LEDs flashing quickly on the Console. There are “Low Warning” LEDs mounted on the Console for Salt and Rinse Aid. -
Page 5: Model Identification
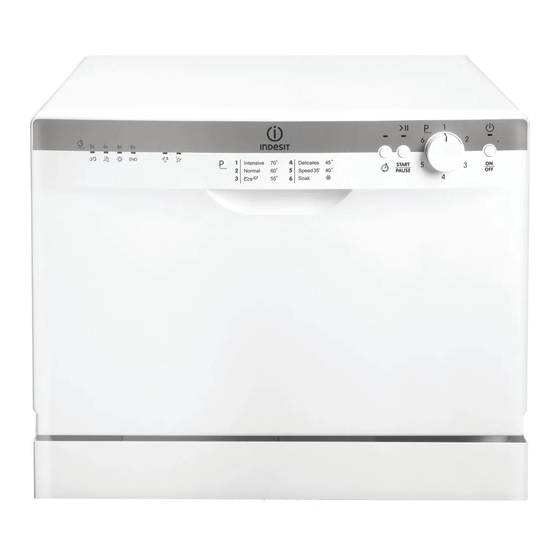
Indesit Company MODEL IDENTIFICATION Place Number of Brand Size Type Noise Market Setting Programmes 6 Place United Indesit Compact Dishwasher 6 Cycles 55dBA Setting Kingdom CONSOLE 1. On-Off Button. Pressing turns on the dishwasher. Holding the On-Off Button in, will cancel any running programme. -
Page 6: Preparing The Machine For Use
Indesit Company PREPARING THE MACHINE FOR USE Adding Salt for the First Time 1. Open the door and the remove the basket. 2. The Salt Pot is located on the left hand side of the bottom of the tank. 3. Remove the salt pot lid, by turning anticlockwise. - Page 7 Indesit Company Loading the Basket This Dishwasher is a 6 place setting machine and will hold 10 inch dinner plates. Cups Medium serving bowl Glasses Saucers Dish Oval platter Dinner plates Soup plates Dessert dishes Cutlery basket Plate racks of Basket When load bigger Dinner plates, please fold the rack to left picture showed location.
-
Page 8: Programme Guide
Indesit Company PROGRAMME GUIDE NOTE: ) Means: need to fill rinse into the Rinse-Aid Dispenser. *En 50242: This program is the test cycle, the rinse-aid dispenser setting is recommended to Position 6. Description Running Energy Water Rinse Program Cycle Selection Information... -
Page 9: Basic Machine Use
Indesit Company BASIC MACHINE USE 1. Load the machine with items top be washed. 2. Close the machines door. 3. Turn the machine on (On-Off button). 4. Select a cycle that suits the load to be washed, using the Programme Selector, 5. -
Page 10: Components & Functions
Indesit Company COMPONENTS & FUNCTIONS Module Mounted in the base of the machine, this is an electronic device that monitors and controls all components within the appliance. Pressure Switch The Pressure switch controls the overall volume of water in the tub and signals to the module when the heater can be turned on. - Page 11 Indesit Company Wash Pump The motor is a synchronous motor, the pump housing connects directly to the sump housing assembly and supplies direct water pressure to the spray arm. Heater 1200W, locates in a metal casing within the sump. Heater Casing within the Sump...
- Page 12 Indesit Company Drain Pump & Water Outlet The drain pump is a separate unit fixed to the sump moulding assembly. It is operated by means of a synchronous motor and is controlled by the module. There is an Anti-Siphon tube between the pump and the outlet hose.
- Page 13 Indesit Company There is a Warning Lamp on the console and an eye glass in the dispenser to advise the user of low rinse aid. The LED is triggered by a level switch, when the rinse aid is empty. Dispenser Solenoid Rinse Aid Level Sensor The Eye Glass is located on the dispenser.
- Page 14 Indesit Company WATER SOFTENING & REGENERATION Stored Regeneration Water Salt Unit The ICD661 has a water softener in the base of the machine. This unit softens the water as it enters the machine, salt can be added and refilled by removing the Salt Cap Lid in the bottom of the tank.
-
Page 15: Test Cycle
Indesit Company TEST CYCLE modify the font displayed _ ___ __________ ___ _____ ___ _____ _____ ______ _______ _____ ______ ______ To start the Test Cycle:- Switch the machine off at (On-Off button). The machine must be 'OFF' to start the Test Cycle. -
Page 16: Fault Codes & Diagnostics
Indesit Company FAULT CODES & DIAGNOSTICS If an error is detected during the cycle, the programme will be terminated and one of the following errors will be displayed using a combination of the programme LEDs on the console panel. The relevant LED(s) will flash in the event of a fault. The On/Off LED will also flash. -
Page 17: Wiring Diagram
Indesit Company WIRING DIAGRAM - MODULE CONNECTIONS Display Board Operation Board Key: A NTC H Inlet Solenoid Valve B Overflow Switch I Regenerating Solenoid Valve C Salt Switch J Dispenser Solenoid Valve D Rinse Aid Switch K Pressure Switch E Flowmeter... -
Page 18: Dismantling Instructions
Indesit Company DISMANTLING INSTRUCTIONS 1. Refer to Safety Notes at the beginning of this Manual. 2. Hand and Sleeve Protection must be worn when working on the Inner Door and Tank. 3. The majority of the electrical tag connections have a locking tab and insulating shroud fitted. It may be easier to release the tag locking tab, if the shroud is temporarily removed from the tag. - Page 19 Indesit Company C. WRAP ROUND OUTER CASE Open the dishwasher door. Remove the 6 Philips screws around the front of the outer case. Remove the 8 rear Philips screws around the rear of the outer case. Remove 1 Philips screw from under each outer case side.
- Page 20 Indesit Company Selector: - Whilst pulling on the knob, from inside the console push the knob tabs inwards to release. Remove the fixing nut and washer from the selector shaft. Selector Fixing Nut Release the handle cover fixing screws and release the wiring to the LED card.
- Page 21 Indesit Company G. MODULE Protect the customers worktop or surface and lay the machine on its back. Remove the module cover fixing screw. Remove the 2 module fixing screws. Noting the connecter and cable positions, transfer wiring and connectors to the new module.
- Page 22 Indesit Company K1 TANK REMOVAL WHEN REPLACING THE TANK Remove the inner door panel (B), the dispenser and door lock can be left in place. Remove the outer case (C). Remove 1 screw securing the hinge bracket to the tank.
- Page 23 Indesit Company K2 TANK REMOVAL WHEN REPLACING OTHER COMPONENTS - continued • This procedure involves laying the tank in front of the machine, therefore there must be enough space to carry out this procedure, it may be advisable to work on the floor.
- Page 24 Indesit Company CIRCULATING PUMP ASSEMBLY Remove the tank (K). Release the runner mounting support (rear of motor). Noting the orientation, disconnected the wiring and earth to the motor. Remove the 3 motor fixing bolts into the sump. Lift the motor clear.
- Page 25 Indesit Company P. THERMISTOR Remove the tank (K). The thermistor is fixed with a fixing screw to the bottom of the sump. Q. HEATER AND CUT OUT Remove the tank (K). Remove wiring noting connection orientation. Remove the 4 fixing screws.
- Page 26 Indesit Company TURBINE Remove the tank (K). Disconnected 2 hoses, noting the orientation of the turbine. U. FLOAT SWITCH Remove the tank (K). Remove the 2 fixing screws from underneath. Remove the wiring noting connections. V. ANTI SIPHON Remove the wrap round case (C).
- Page 27 Indesit Company WATER VALVE Remove the tank (K). Disconnect the tags Remove the plastic support securing the solenoid valve. Remove the hose clips. Service Manual UK English 27 of 28...
- Page 28 Indesit Company Service Manual UK English 28 of 28...
Need help?
Do you have a question about the ICD661UK and is the answer not in the manual?
Questions and answers