Table of Contents
Advertisement
Advertisement
Table of Contents

Related Manuals for Hoover DNH D8513AX-AUS


Summary of Contents for Hoover DNH D8513AX-AUS
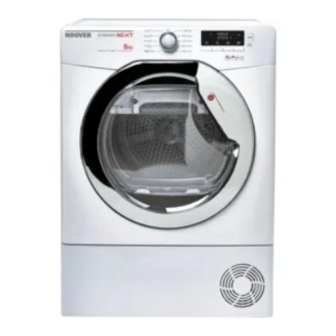
- Page 1 INSTRUCTION BOOK DNH D8513AX-AUS 8 Kg Heat Pump Tumble Dryer English...
- Page 2 Ventilation Service...
-
Page 3: Delivery Information
Keep all documentation in a safe place for future reference or for any future owners. Delivery Information Check that no damage has occurred to the machine during transit. If it has, call Hoover Please check that the following items are Customer Care 1300 769 522 delivered with the appliance: ●... -
Page 4: Safety Warnings
CAUTION,risk of fire.Read these warnings carefully to avoid the possible danger fire. Safety Warnings ● Items that have been spotted or soaked with vegetable or cooking oil constitule a fire hazard and shoul no be placed in a tumble dryer. Oil-affected items can ignite spontaneously, especially when exposed to heat sources such as in a tumble dryer.The items become warm, causing an oxidation reaction in the oil. -
Page 5: Customer Service
The Laundry Environmental Issues ● Do not dry unwashed items in the tumble ● All packaging materials used are environmentally-friendly and recyclable. dryer. Please help dispose of the packaging via ● WARNING Do not tumble dry fabrics treated environmentally-friendly means. Your local with dry cleaning fluids. -
Page 6: Electrical Requirements
For your safety, this dryer must be correctly installed. If there is any doubt about Air Outlets in the Base installation, call Hoover Customer Care advice. Important: During transport ensure that the dryer is in an upright position, if it's necessary you can only flip in the side shown;... -
Page 7: Drain Hose Kit: Fitting Instructions
DRAIN HOSE KIT: FITTING INSTRUCTIONS Do not install the product in a low temperature room or in a room where there is a risk of frost occurring. At 4. Attach the black temperature around freezing point the product may not hose from the kit, be able to operate properly: there is a risk of damage if (using the connector... -
Page 8: Preparing The Load
PREPARING THE LOAD Maximum Drying Weight 8 Kg Cottons Max. Load Synthetics Max. Load 4 Kg The maximum mass of dry textile material to be used in the appliance is 8kg The final part of a tumble dryer cycle occurs without heat (cool down cycle) to ensure that Clothes Preparation the items are left at a temperature that ensures... -
Page 9: Controls And Indicators
CONTROLS AND INDICATORS Programme Program Filter Care Empty Water Start/Pause Selector Display Indicator Button Indicator Time Selection Delay Start Acrylic Synthetic Anti-Crease Button Button Button Button Control Panel and Indicator Lights Control Panel and Indicator Lights Programme Selector : Time Selection Button : To modify the drying timing of required programme;... -
Page 10: Selecting The Programme
SELECTING THE PROGRAMME DESCRIPTION PROGRAMME All towels Select the degree of dryness that you require. This range from Store Dry for all towels and bathrobes, through for items that will be put away without ironing, to the programme that leaves the laundry Hang Dry suitable for ironing. -
Page 11: Opening The Door
DOOR and FILTER Opening the Door 1 . R e m o v e t h e kickplate. 2. Turn the three locking levers anti- clockwise and pull out the front cover. 3. Gently remove the filter frame and clean any dust or fluff with a cloth from the filter. -
Page 12: Water Container
OPERATION WATER CONTAINER OPERATION To Remove the Container Do not open the door during the automatic programs in order to obtain a proper drying. Caution: Ensure the water container is fully WARNING! If you open the door mid cycle, engaged with the door before closing. The water before the cool-down cycle has completed,the container can be heavy after drying. -
Page 13: Delay Start Function
OPERATION Delay Start Function The Delay Start Function allows the user to delay the start of the drying cycle by 1 to 24 hours. When the function is first selected the display will show a delay of 1 hour, subsequent presses of the button will increase the delay with 1 hour steps. -
Page 14: Troubleshooting
● Is the plug properly connected to the mains Service supply? For service and repairs call Hoover Customer ● Is there a power failure? Care on 1300 769 522 ● Is the door fully closed? ● Is the dryer switched on, both at the mains supply and at the machine? ●... - Page 15 Customer care: 1300 769 522 hooverappliances.com.au customercare@hooverappliances.com.au 40009388...
Need help?
Do you have a question about the DNH D8513AX-AUS and is the answer not in the manual?
Questions and answers