
Subscribe to Our Youtube Channel
Related Manuals for Sindoh D200 Series

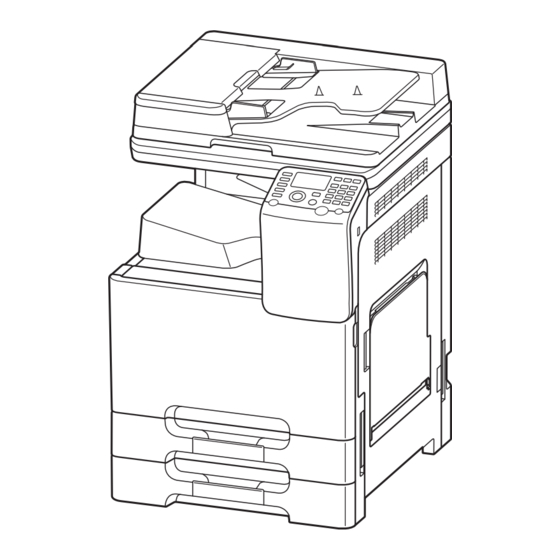
Summary of Contents for Sindoh D200 Series
- Page 1 D200 Series USER MANUAL Description of Utility Keys Before using this Product, please read the USER MANUAL carefully and keep it for your reference.
- Page 2 Guidelines for Safe Use USERS MUST KEEP THE FOLLOWINGS WHEN USING THE MACHINE: WARNING : Negligence of the instructions may cause death or serious injury: Plug the power cord into the wall socket directly. Do not use a extension cord. If the power cable or plug is worn out or damaged, pull the power plug out.
- Page 3 Before Using the Product Thank you very much for your buying the SINDOH’ s Product. This USER MANUAL specifies the right way to use the Machine and simple repairing in detail to maintain it in optimal state at all times and to contribute to your company’ s office rationalization and efficiency.
-
Page 4: Table Of Contents
Table of Contents Chapter 1. Configuring Settings of This Machine 1. Displaying [UTILITY] -------------------------------------- -1-2 2. Displaying [Admin Settings] --------------------------------- -1-4 [Accessibility] Chapter 2. [KeyRepeat/Interval] --------------------------- 2-2 [Sound Settings] ----------------------------- 2-2 [LCD CONTRAST] ----------------------------- 2-3 Chapter 3. [Paper Settings] [MANUAL] --------------------------------- 3-2 [TRAY1] ---------------------------------- 3-2 [TRAY2] ---------------------------------- 3-2 Chapter 4. - Page 5 [Def. Copy Settings] --------------------------- 4-4 3. [Scan/Fax Settings] - ------------------------------------- -4-5 [JPEG Compression] --------------------------- 4-5 [Bk Compression Lvl] -------------------------- 4-5 [Def. Scan Settings] --------------------------- 4-5 4. [Printer Settings] - --------------------------------------- -4-6 [DEF. EMULATION] ---------------------------- 4-6 [PS Setting] -------------------------------- 4-6 [PCL Settings] ------------------------------ 4-7 [XPS] ------------------------------------ 4-7 [PAPER MENU] ------------------------------ 4-8 [OOXML Print Set] ---------------------------- 4-8...
- Page 6 [Input Machine Addr] --------------------------- 5-6 3. [Address Reg List] --------------------------------------- -5-7 [Speed Address List] --------------------------- 5-7 [Group Address List] --------------------------- 5-7 [Program List] ------------------------------- 5-7 [E-MailSub/TextList] --------------------------- 5-8 4. [User Auth/Acct Trk] -------------------------------------- -5-9 [User Counter] ------------------------------ 5-9 5. [ETHERNET] - ------------------------------------------ -5-10 [TCP/IP] ---------------------------------- 5-10 [HTTP ] ----------------------------------- 5-11 [FTP] ------------------------------------ 5-12...
- Page 7 D200 Series Description of Utility Keys Configuring Settings of This Machine...
-
Page 8: Displaying [Utility]
Configuring Settings of This Machine 1. Displaying [ UTILITY ] Press the Utility key. Note - Another way to display utility is to press the ▲ key / ▼ key and select [UTILITY]. [UTILITY] allows you to configure settings of this machine. Settings Description [Accessibility]... - Page 9 Configuring Settings of This Machine Settings Description [Admin Settings] This button displays items that can only be changed by the administrator. To configure settings, you need to enter the administrator password for this machine. You can specify the initial copy, print, or fax operations, power saving function, and network function to suit your requirements.
-
Page 10: Displaying [Admin Settings]
Configuring Settings of This Machine 2. Displaying [ Admin Settings ] To display administrator settings, you need to enter the administrator password for this machine. Press the Utility key. Press the ▲ key / ▼ key to select [Admin Settings], and press the Select key. Enter the administrator password for this machine. - Page 11 [Accessibility] D200 Series Description of Utility Keys [Accessibility]...
-
Page 12: [Keyrepeat/Interval]
[Accessibility] [ KeyRepeat/Interval ] To display : Utility key - [Accessibility] - [KeyRepeat/Interval] Pressing a key enters one character, and holding down a key starts entering successive characters. This is referred to as a key repeat. If necessary, change the time from pressing a key to starting a key repeat, and the interval to enter successive characters. -
Page 13: [Lcd Contrast]
[Accessibility] Settings Description [Completed Prep] Select whether or not to output the completed preparation sound when this machine is placed into the ready state. To output sounds, adjust the volume at three levels. [ON] or [Medium] is specified by default. [Caution Sound] Select whether or not to output the following caution sounds. - Page 15 [Paper Settings] D200 Series Description of Utility Keys [Paper Settings]...
-
Page 16: [Manual]
[Paper Settings] [ MANUAL ] To display : Utility key - [Paper Settings] - [MANUAL] Specify the size and type of the paper loaded in Manual Feed Tray. Settings Description [PAPER TYPE] Select the type of the paper loaded in the tray. [PAPER SIZE] When loading a standard size paper, select the paper size. - Page 17 [User Settings] D200 Series Description of Utility Keys [User Settings]...
-
Page 18: System Settings]
[User Settings] 1. [ System Settings] [ Language Selection ] To display : Utility key - [User Settings] - [System Settings] - [Language Selection] Select a language to display information on the Message Window. The default value depends on the region the machine is used in. [ UNIT OF MEASURE ] To display : Utility key - [User Settings] - [System Settings] - [UNIT OF MEASURE] Select a measurement unit for numeric values displayed on the Message Window from [mm] and... -
Page 19: [Auto Clr Level Adj]
[User Settings] Settings Description [DEFAULT TRAY] Select a tray to be used with top priority. If paper of the same size is loaded in multiple trays, paper is fed from the tray with top priority. [TRAY1] is specified by default. [ Auto CLR Level Adj ] To display : Utility key - [User Settings] - [System Settings] - [Auto CLR Level Adj] When setting the color mode to [Auto CLR] to scan an original, adjust the standard to judge whether... -
Page 20: Copier Settings]
[User Settings] 2. [ Copier Settings ] [ Auto Zoom Combine ] To display : Utility key - [User Settings] - [Copier Settings] - [Auto Zoom Combine] Select whether or not to adjust the image automatically to optimal zoom ratio when you specify [Combine] and select [AUTO] for [Paper]. -
Page 21: Scan/Fax Settings]
[User Settings] 3. [ Scan/Fax Settings ] [ JPEG Compression ] To display : Utility key - [User Settings] - [Scan/Fax Settings] - [JPEG Compression] Select the default compression method for color fax from [High Quality], [Standard] and [High Compression]. Data size is the largest in [High Quality] and the lowest in [High Compression]. [Standard] is specified by default. -
Page 22: Printer Settings]
[User Settings] 4. [ Printer Settings ] [ DEF. EMULATION ] To display : Utility key - [User Settings] - [Printer Settings] - [DEF. EMULATION] Select the Page Description Language. When you select [Auto], this machine automatically switches between PCL and PS. [Auto] is specified by default. -
Page 23: [Pcl Settings]
[User Settings] [ PCL Settings ] To display : Utility key - [User Settings] - [Printer Settings] - [PCL Settings] Configure the PCL print settings. Settings Description [CR/LF MAPPING] Select whether or not to replace the line feed codes when printing text data. -
Page 24: [Paper Menu]
[User Settings] [ PAPER MENU ] To display : Utility key - [User Settings] - [Printer Settings] - [PAPER MENU] Configure the paper and paper tray settings used for printing, and the setting on printing condition if no setting is specified by the printer driver. Settings Description [DEFAULT TRAY]... -
Page 25: [Layout-Combination]
[User Settings] Settings Description [OOXML Print Mode] Select whether to give priority to either the image quality or speed when directly printing of an OOXML (docx, xlsx, or pptx) file is carried out. [Speed Mode] is specified by default. [Sheet/Book Print] Select whether to print the currently selected sheet or the entire book when handling an Excel file. - Page 26 [User Settings] Settings Description [Layout Settings] Set the layout in details. [Pg Space - Line] : Set a page space in the row direction. [0] is specified by default. [Pg Space - Column] : Set a page space in the column direction. [0] is specified by default.
- Page 27 D200 Series Description of Utility Keys [Admin Settings]...
-
Page 28: System Settings]
[Admin Settings] 1. [ System Settings ] [ Pwr Sup/Pwr Sav ] To display : Utility key - [Admin Settings] - [System Settings] - [Pwr Sup/Pwr Sav] Configure the settings on how to use the Power key and the machine action in Power Save mode. Settings Description [ENERGY SAVER]... -
Page 29: [Daylight Saving]
[Admin Settings] Settings Description [Date Setting] Enter the current date. [Time Setting] Enter the current time. [TIME ZONE] To automatically adjust the time of this machine using an NTP server, set the time difference between UTC and your local area in multiples of 30 minutes. -
Page 30: [List/Counter]
[Admin Settings] [ List/Counter ] To display : Utility key - [Admin Settings] - [System Settings] - [List/Counter] Prints the job setting list of this machine and configure the paper count. Settings Description [Job Settings List] Prints a list of settings for [User Settings] and [Admin Settings] among others. -
Page 31: [Extmemfuncsettings]
[Admin Settings] Settings Description [Auto Reset] Select whether or not to reset all settings (except registered settings) for each of Copy, Fax, and Scan functions when this machine has not been operated for a certain period of time. To reset them, set the amount of time that elapses before the settings are reset. -
Page 32: Admin/Mach Setgs]
[Admin Settings] 2. [ Admin/Mach Setgs ] [ Admin Registration ] To display : Utility key - [Admin Settings] - [Admin/Mach Setgs] - [Admin Registration] Register the name, E-mail address and extension number of the machine administrator. Settings Description [Name] Enter this machine’... -
Page 33: Address Reg List]
[Admin Settings] 3. [ Address Reg List ] [ Speed Address List ] To display : Utility key - [Admin Settings] - [Address Reg List] - [Speed Address List] Print the list of one-touch destinations registered on this machine. After selecting the type of the one-touch destination (E-mail, fax, SMB, FTP, and WebDAV) to be printed, specify printing conditions, then start printing. -
Page 34: [E-Mailsub/Textlist]
[Admin Settings] Settings Description [Starting Dest. No.] Specify the registration number of the program to start printing from. [Number of Dest.] Specify the number of programs you want to print. [PRINT] Prints the list based on the conditions specified in [Starting Dest. No.] and [Number of Dest.]. -
Page 35: User Auth/Acct Trk]
[Admin Settings] 4. [ User Auth/Acct Trk ] [ User Counter ] To display : Utility key - [Admin Settings] - [User Auth/Acct Trk] - [User Counter] Use this option to check the number of pages for each user and to reset the counter. To reset the counter, select the user to clear the counter for, then select [Restrict]. -
Page 36: Ethernet]
[Admin Settings] 5. [ ETHERNET ] [ TCP/IP ] To display : Utility key - [Admin Settings] - [ETHERNET] - [TCP/IP] Configure the settings to use this machine in a TCP/IP environment. Settings Description [ENABLE] Select whether or not to use TCP/IP. [ON] is specified by default. [IPv4 Settings] Assign an IP address (IPv4) to this machine. -
Page 37: [Http ]
[Admin Settings] Settings Description [LINK LOCAL] Displays the link-local address that is automatically specified from the MAC address of this machine. [DNS Host] Configure the DNS settings when a DNS server is used. [DYNAMIC DNS] Select whether or not to enable the Dynamic DNS function. When your DNS server supports the Dynamic DNS function, the specified host name can be automatically registered on the DNS server or changes can be automatically updated as long as... -
Page 38: [Ftp]
[Admin Settings] [ FTP ] To display : Utility key - [Admin Settings] - [ETHERNET] - [FTP] Select whether or not to use this machine as the FTP server. Settings Description [FTP TX setting] Select whether to use the FTP transmission function of this machine. Selecting this option sends the scanned original data to the FTP server. -
Page 39: [Wsd Print]
[Admin Settings] [ WSD PRINT ] To display : Utility key - [Admin Settings] - [ETHERNET] - [WSD PRINT] Specify whether or not to use Web Service (DPWS: Devices Profile for Web Services). Settings Description [Printer Settings] Select whether or not to use the WS print function. [DISABLE] is specified by default. -
Page 40: Printer Settings]
[Admin Settings] 6. [ Printer Settings ] [ Network Timeout ] To display: Utility key - [Admin Settings] - [Printer Settings] - [Network Timeout] When this machine is connected via a network to the computer, change the communication timeout time if necessary. [60 sec.] is specified by default. -
Page 41: Security Settings]
[Admin Settings] 7. [ Security Settings ] [ Admin. Password ] To display : Utility key - [Admin Settings] - [Security Settings] - [Admin. Password] If necessary, change the machine’ s administrator password. Be sure to remember the changed password so that you do not forget it. After entering a new administrator password, you need to enter the new administrator password again for confirmation. -
Page 42: [Enhancedsecuritymd]
[Admin Settings] [ EnhancedSecurityMd ] To display : Utility key - [Admin Settings] - [Security Settings] - [EnhancedSecurityMd] Select whether or not to enable the Enhanced Security Mode. If you enable the Enhanced Security Mode, the various security functions are forcibly configured. This allows you to ensure higher-level security of data management. -
Page 43: [Microsd Setting]
[Admin Settings] Setting items in Administrator Settings Settings to forcibly changed • [Mode using SSL/TLS]: Cannot be [Security] - [PKI Settings] - [SSL Setting] in Web Connection changed to none. • [Encryption Strength]: Cannot be changed to a setting in which the strength is lower than [AES256, 3DES]. - Page 45 Direct Input Screen Machine Model Notice to the User This Machine is a Business (A-grade) electromagnetic conformity machine, A-grade Machine and the seller and the (Business Broadcasting & user should pay attention to this point. Communication Equipment) The Machine is aimed at being used in the area out of home.
Need help?
Do you have a question about the D200 Series and is the answer not in the manual?
Questions and answers