Table of Contents
Advertisement
Available languages
Available languages
Advertisement
Table of Contents

Summary of Contents for NJS NJS800
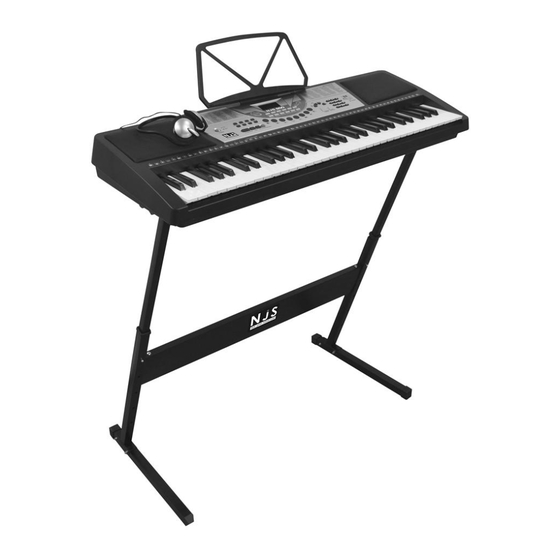
- Page 1 NJS800 Electronic Keyboard Kit Page 1...
-
Page 2: Pat Testing
IMPORTANT Installer and Users please note: These instructions should be read carefully and left with the user of the product for future reference. PAT TESTING When used in an office or studio environment, or at any public performance, this product must be safety-tested yearly by a qualified electrician (PAT Tested) in order to comply with the Electricity at Work Regulations. - Page 3 ASSEMBLY Assemble the keyboard stand as shown below. Page 3...
- Page 4 SETTING UP Using AC/DC Power Supply Adaptor Plug the adaptor provided to the mains supply. Plug the output lead from the adaptor into the socket on the front panel labelled “DC 12V”. If the adaptor is lost or needs to be replaced for any other reason, use an adaptor rated at 12 V DC at 350 mA or greater, fitted with a 2.1 mm power plug, with the centre pole positive, such as P003L.
- Page 5 Identifying the controls. 1. Speaker 12. Null Play 23. Chord Off 2. Power Switch 13. LED Display 24. Manual Bass 3. Master Volume 14. Keyboard 25. Fingered 4. Accom Volume 15. Demo One 26. Single 5. Tempo 16. Demo All 27.
- Page 6 This can also be done by pressing the [+] and [-] buttons repeatedly until the desired timbre is reached. Master Volume Adjustment There are 16 levels of master volume from “00” to “15” and the preset volume is “10” when first switched on. Press [MASTER VOL +/-] button to increase or decrease the master volume.
- Page 7 Press [Intro/Ending] button to start the accompaniment immediately from the intro part. The system first plays a prelude, and then enter auto accompaniment. (2) Fill in During the accompaniment, press [Fill in] button, the instrument plays a short piece intermezzo automatically then continues...
- Page 8 Single-finger Auto-bass Chord Method To select Major chords: press the basic voice key. To select Minor chords: press the basic key and any black key on its left side synchronously. To select Major Seventh chords: press the basic key and any white key on its left side synchronously.
-
Page 9: Effect Control
Manual Bass Press [Manual Bass] button, the manual bass function is on, the 19 keys on the left part of the keyboard change into bass keys but still keep the original timbre. However, the timbre of the other keys can be changed. Press [Chord Off] button to cancel this function. -
Page 10: Intelligent Teaching Function
Null Play Press [Null Play] button with the screen showing “Ply, the edited rhythm can be played. Repeatedly. Press the button again or the [Start/Stop] to stop playing. INTELLIGENT TEACHING FUNCTION One-key Function Press [One Key] button, the screen displays the code number of the current, Demo songs. - Page 11 GUARANTEE New Jersey Sound products are distributed by Electrovision Ltd., Electrovision guarantees the product free from defects in materials and workmanship for a period of twelve months. Should this appliance be operated under conditions other than those recommended, at voltages other than the voltage indicated on the appliance,or any attempts made to service or modify the appliance, then the warranty will be rendered void.
- Page 12 IMPORTANT Installateurs et Utilisateurs, veuillez noter: Vous devez lire cette notice attentivement et la conserver précieusement pour une éventuelle future consultation. AVANT UTILISATION Vous devez contrôler l'appareil y compris le câble et la prise. Si le produit est endommagé, NE l'utilisez PAS et contactez immédiatement votre revendeur. TEST DE CONFORMITE Si vous utilisez cet appareil sur un lieu de travail, il doit être contrôlé...
-
Page 13: Comment Assembler Le Support
COMMENT ASSEMBLER LE SUPPORT 1. Trouvez les pièces (C) & (F). Alignez les trous situés sur la base (C) avec les trous sur (F). Utilisez les écrous et boulons (J) pour raccorder les 2 sections. Utilisez les outils adéquats pour assurer une fixation solide. Répétez ces actions pour les sections (D) &... -
Page 14: Panneau De Commande
PANNEAU DE COMMANDE : Haut-parleur 17- Monotouche Interrupteur 18- Guide Contrôle volume 19- Touches numériques principal 20- Rythme Volume 21- Timbre l’accompagnement 22- Métronome Tempo 23- Accords désactivés Transposition 24- Basse manuelle Soutien 25- Plusieurs doigts Vibrato 26- Un doigt Enregistrement 27- Percussions panneau 10- Lecture... -
Page 15: Méthode D'utilisation De Base
d’alimentation est le pôle positif. Raccordez un côté de l’adaptateur à la prise d’alimentation de l’appareil et l’autre à la prise du réseau électrique. (Notez que la tension d’entrée de l’adaptateur doit correspondre à celle fournie par le secteur.) Installation des piles (non fournies) Retirez le couvercle du compartiment à... - Page 16 Sélection des timbres Vous pouvez choisir librement l’un des 100 types de timbre réservés que comprend l’appareil, numérotés de « t00 » à « t99 ». (1) Lorsque vous allumez l’appareil, le timbre prédéfini est « t00 » et correspond au son du piano.
- Page 17 TOUTES LES DÉMOS (DEMO ALL) MONOTOUCHE (ONE KEY) GUIDE 12 morceaux de démonstration : 01 Grassland paean 02 Courser gallop defend the frontiers 03 Opéra de Pékin 04 Embroider gold plaque 05 Noisy New Year 06 Marche turque (Turkish march) 07 Enfance (Childhood) 08 Joyeux Noël (Merry Christmas) 09 Vive le vent (Jingle bells)
- Page 18 MÉTRONOME (METRONOME) PERCUSSIONS CLAVIER (KEYBOARD PERCUSSION) RYTHME AUTOMATIQUE Sélection du rythme Le système propose 100 types de rythme différents, de « r00 » à « r99 ». Pour en sélectionner un, appuyez sur la touche [RYTHME] (RHYTHM) : le voyant de la touche s’allume et le rythme programmé...
- Page 19 Métronome automatique Ce système offre 8 types de métronome, avec une battue à 1/8, 2/8… 7/8, 8/8. En mode normal, appuyez sur la touche [MÉTRONOME] (METRONOME) une première fois, le synthétiseur bat la mesure à 1/8. Appuyez sur la touche une deuxième fois, il s’arrête.
- Page 20 VOLUME PRINCIPAL (MASTER VOL) VOLUME ACCOMPAGNEMENT (ACCOM VOL) TEMPO TRANSPOSITION (TRANSPOSE) ACCORD DE BASSE AUTOMATIQUE L’instrument offre plusieurs types d’accords différents : « accords de basse automatiques à un doigt », « accords de basse à plusieurs doigts », « basse manuelle ».
- Page 21 Doigtés pour les accords à un doigt Accords à plusieurs doigts Appuyez sur la touche [PLUSIEURS DOIGTS] (FINGERED), « C-2 » apparaît alors à l’écran, ce qui signifie que le mode accords de basse automatiques à plusieurs doigts est activé et que les 19 touches de la partie gauche du clavier sont devenues des touches d’accords.
- Page 22 Le tableau suivant se base sur la note do, les accords pour les autres notes peuvent être déduits par analogie. DOIGTÉ POUR ACCORD À PLUSIEURS DOIGTS (basé sur la note do) Basse manuelle Appuyez sur la touche [BASSE MANUELLE] (MANUAL BASS) pour activer la fonction de basse manuelle : les 19 touches de la partie gauche du clavier deviennent alors des touches de basse mais conservent leur timbre d’origine.
- Page 23 CONTRÔLE DE L’EFFET Transposition [TRANSPOSITION –] Appuyez touches [TRANSPOSITION +] (TRANSPOSE +/TRANSPOSE –) pour transposer le clavier ; le réglage de transposition actuel est indiqué sur l’affichage à DEL. La plage de transposition peut être réglée de « -12 » à « 12 ». Appuyez sur les touches [+] et [–] simultanément pour que le clavier revienne en mode normal au niveau prédéfini «...
-
Page 24: Enregistrement Et Lecture
SOUTIEN (SUSTAIN) VIBRATO ENREGISTREMENT (REC) LECTURE (PLAY) PROGRAMMATION (PROG) LECTURE NULLE (NULL-PLAY) UN DOIGT (SINGLE) PLUSIEURS DOIGTS (FINGERED) BASSE MANUELLE (MANUAL BASS) ACCORDS DÉSACTIVÉS (CHORD OFF) MÉTRONOME (METRONOME) PERCUSSIONS CLAVIER (KEYBOARD PERCUSSION) ENREGISTREMENT ET LECTURE Appuyez sur la touche [ENREGISTREMENT] (REC), l’écran affiche alors «... - Page 25 commande et le clavier peut être sélectionné pour composer un rythme. Appuyez de nouveau sur la touche après avoir enregistré 32 notes de percussion et le système quitte la fonction. SOUTIEN (SUSTAIN) VIBRATO ENREGISTREMENT (REC) LECTURE (PLAY) PROGRAMMATION (PROG) LECTURE NULLE (NULL-PLAY) UN DOIGT (SINGLE) PLUSIEURS DOIGTS (FINGERED) BASSE MANUELLE (MANUAL BASS)
-
Page 26: Fonction D'apprentissage
FONCTION D’APPRENTISSAGE Appuyez sur la touche [GUIDE], puis sur une note quelconque pour démarrer la mélodie. Si vous appuyez à ce moment sur les touches du clavier, la mélodie principale sera masquée, mais elle reprendra au bout de 5 secondes si aucune note n’est jouée. Schéma du circuit électronique du synthétiseur Ce schéma électronique vous est fourni à... -
Page 27: Garantie
GARANTIE Les produits New Jersey Sound sont distribués par Electrovision Ltd. Electrovision garantit ce produit contre tout défaut de fabrication ou de matériaux pendant douze mois. Si ce produit est utilisé dans des conditions autres que celles recommandées dans cette notice, à des tensions autres que celles indiquées sur l'appareil, la garantie est annulée.
Need help?
Do you have a question about the NJS800 and is the answer not in the manual?
Questions and answers