Sony HXR-NX5U User Manual
Hide thumbs
Also See for HXR-NX5U:
- User manual (21 pages) ,
- Operating manual (128 pages) ,
- Service manual (122 pages)
Table of Contents
Advertisement
Quick Links
Guide to using the
Adapted from the Guide to using the Sony HDR-AX2000
©Campbell Cameras
Detailed information(text) and camera images not to be used without CampbellCameras Written Permission
YOU CAN CLICK ON ANY PHOTO TO ENLARGE IT TO SEE THE DETAILS
Things to Remember:
If a menu item is "grayed" out, it means that that option is not available under the current recording condition.
DO NOT EXPOSE your camcorder's lens or LCD viewfinder to the sun for extended amount of time as it will
damage them. Be sure and use the Lens Hood and an
Temperature - The camcorder is not recommended in weather conditions below 32º as it can affect your recordings.
To solve this you can get a Polar Mitten Cover that allows you to place heat warmers in it to keep your video
camera warm. Batteries will be effected when the temperature reaches below 32º, and the battery life will go down. It
is important to a) keep your batteries warm and b) have
I recommend formatting your SD cards when they are new, and when reusing the cards. ALL DATA RECORDED ON
THE MEMORY CARD WILL BE ERASED BY FORMATTING, AND CAN NOT BE RECOVERED. Save important data on
the memory card on other media such as a computer, before formatting the memory card.
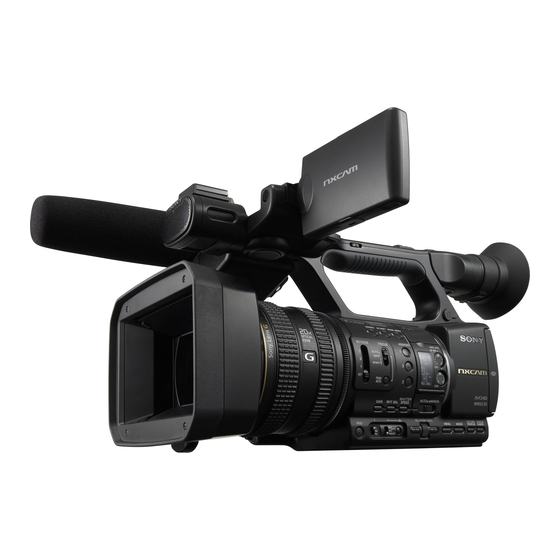
Like your trusty 12 gauge, the Sony HXR-NX5U is a camera that can handle any situation. It
contains all the features of the AX2000 (72mm lens, 3-1/3" CMOS chips, 2 XLR ports, 2 SD card
slots and a 1.5 lux) plus more. Its built in GPS can direct you back to the exact spot you made the
shot from, perfect for recreates or for B-roll footage. Two accessories shoes on the top handle
make it even easier to attach a wireless mic or other accessories. Perhaps the biggest draw of the
NX5U is the option to add on the
11+ hours of video while you are simultaneously recording to the SD cards giving you an instant
back-up of all your recordings. An included shotgun mic and XLR cable round out this set-up to
make it the complete package for anyone seriously into outdoor filming.
Inserting Memory Cards:
The SD Card slots are located in the back of the camera next to the battery. To insert SD cards into the camera you
1) Open the cover
2) Take your memory card with the notched corner facing down, and insert into the memory card slot until it clicks.
3) Repeat with memory card slot B.
FORMATTING MEMORY CARDS
1) Press the MODE button
2) Touch [MANAGE MEDIA] –> [MEDIA FORMAT]
3) Touch the memory card to be formatted
file:///Users/johannalc40/Documents/guide%20to%20the%20nx5u.html[10/25/12 2:40:02 PM]
Sony HXR-NX5U
FMU
128. It is an additional storage device capable of holding
LCD Hood
if filming in sunny conditions.
extra batteries
when filming in colder situations.
Advertisement
Table of Contents

Related Manuals for Sony HXR-NX5U


Summary of Contents for Sony HXR-NX5U
- Page 1 Like your trusty 12 gauge, the Sony HXR-NX5U is a camera that can handle any situation. It contains all the features of the AX2000 (72mm lens, 3-1/3" CMOS chips, 2 XLR ports, 2 SD card slots and a 1.5 lux) plus more.
- Page 2 4) Touch [YES] –> [YES] –> OK *Formatting deletes all data from the memory card to recover recordable free space. * YOU CAN NOT RECOVER LOST FILES AFTER YOU FORMAT THEM!!! *Connect your camcorder to the wall outlet using the supplied AC adaptor to prevent your camcorder from running out of power during the operation SELECTING THE MEMORY CARD SLOT TO BE USED FOR RECORDING Press the A or B button of the memory card slot where the memory card you want to record on is inserted.
- Page 3 Press MENU -> select REC/OUT Set -> REC FORMAT with the SEL/PUSH EXEC dial. Adjusting the Zoom The Sony HXR-NX5U has three options for adjusting the zoom to make it easy no matter how you are filming. USING THE POWER ZOOM LEVER...
-
Page 4: Using The Zoom Ring
The power zoom lever is located on the side of the camera with the hand strap. While hand is in strap you can use your pointer and middle finger to adjust the zoom. W stands for Wide View (wide angle) T stands for Close View (telephoto) USING THE HANDLE ZOOM 1) Set the handle zoom to VAR of FIX on the side of the handle. -
Page 5: Adjusting The Iris
Manual Focus Switch 1) During recording or standby, set the FOCUS switch to MAN (manual) 2) Rotate the Focus Ring and adjust the Focus A mountain symbol will appear when you can not adjust the focus any farther A person symbol appears when you cannot adjust the focus any closer. - Page 6 You can manually adjust the iris to control the volume of the light entering the lens. By adjusting the iris, you can change or close the aperture of the lens, which is expressed as an F value between F1.6 and F11. The volume of the light increases the more that you open the aperture (decreasing F value).
-
Page 7: Adjusting The Gain
f/8.0 f/5.6 f/2.8 TO ADJUST THE IRIS AUTOMATICALLY Press the IRIS button until the A (automatic) appears next to the iris value (f-stop) on the LCD screen, or set the AUTO/MANUAL switch to AUTO. * When you set the AUTO/MANUAL switch to AUTO, other manually adjusted items (gain, shutter speed, white balance) also become automatic. -
Page 8: Adjusting The Shutter Speed
1) Press the MENU button 2) Select CAMERA SET 3) Select GAIN SET 4) Choose L, M, or H 5) Set the dB for the letter you chose. 6) Press MENU button to hide your settings. You can adjust the gain manually when you do not want to use the AGC (automatic gain control). 1) During recording or standby, set the AUTO/MANUAL switch to MANUAL 2) When the gain is automatically adjusted, press the gain button. - Page 9 3) Change the shutter speed displayed on the screen by turning the SEL/PUSH EXEC dial. You can adjust the shutter speed displayed on the screen by turning the SEL/PUSH EXEC dial. You can adjust the shutter speed in a range of 1/4 second through 1/10000 second. The denominator of the set shutter speed appears on the LCD screen.
-
Page 10: Adjusting The White Balance
Notice how the clouds become more pronounced as the ND Filter is increased. *IF you change the ND filter while recording, the movie and the sound may be distorted. * While recording a bright subject, diffraction may occur if you close the aperture further down, resulting in a fuzzy focus (this is common phenomenon with video cameras). - Page 11 4) Capture a white subject, such as white paper, full-screen in the same lighting condition as the one in which the subject is. Press the White Balance symbol button once. A or B starts flashing rapidly. It will stay on when the white balance adjustment is completed and the adjusted value is stored in A or B.
- Page 12 You can assign your own setting Appropriate setting to record people Appropriate setting to record film-like pictures Appropriate setting to record sunset Appropriate setting to record black and white pictures Selecting/Modifying a Picture Profile: 1) During standby, press the PICTURE PROFILE button 2) Select a picture profile number with the SEL/PUS EXEC dial.
-
Page 13: Color Mode
TYPE1 Creates a look similar as when a film-originated movie is viewed on television. The slope of the gamma curve in dark areas is suppressed, creating a deep black tone, while the mid-tone to highlight areas maintain detailed contrast. TYPE2 Suppresses the dark areas even further, creating a deeper black reproduction. -
Page 14: Skintone Detail
[LB[COLOR TEMP] -9 (blueish) to +9 (reddish) Sets a color correct offset value. [CC[MG/GR]] -9 (greenish) to +9 (magentish) DETAIL to set items for the detail Item Description and settings Sets the detail level -7 to +7 SKINTONE DETAIL to adjust the detail of skinetone areas to reduce wrinkles Item Description and settings Suppresses details in skin-tone areas to reduce... -
Page 15: Channel Setting
This feature softens up the faces of those being filmed to give them that more "flawless" look Audio Setup The NX5U incorporates the XLR ports for audio that allow you to use simultaneously a wireless shotgun microphone. The NX5U includes a shotgun microphone and XLR Cable. XLR PORTS CHANNEL SETTING: 1) Select input sources with the CH1 (INT MIC/INPUT1) switch and the CH2 (INT... - Page 16 • CH2 is set to INPUT 1 then mono INT MIC is being recorded on CH1 and XLR INPUT1 is being recorded on CH2. • CH2 is set to INPUT 2 then mono INT MIC is being recorded on CH1 and XLR INPUT2 is being recorded on CH2.
- Page 17 PUSH AUTO IRIS IRIS RING ROTATE AE SHIFT (ASSIGN 5 button) BACK LIGHT SPOTLIGHT STEADYSHOT D.EXTENDER FADER COLOR BAR ZEBRA (ASSIGN 4 button) PEAKING MARKER REC LAMP VISUAL INDEX (ASSIGN 6 button) MODE HOW TO ASSIGN Buttons 1) Press the MENU button 2) Select OTHERS –>...
- Page 18 1) Press the MODE button 2) (on the LCD screen) Touch [EDIT] –>[PHOTO CAPTURE] –> select the desired memory card and image quality. 3) Touch the movie to be captured. The selected movie starts playback 4) Touch the play/pause button at the point where you want to capture. The movie pauses. Play and pause toggles as you press the play/pause button.
- Page 19 Peaking: Peaking is used to help adjust the focus. When peaking is activated, edges in focus on the screen will be highlighted in red, yellow or white. • ON/OFF: When you select ON Peaking appears and you can display an image on the screen with its outlines enhanced.
- Page 20 • ON/OFF: When you select ON, you can display markers. The default setting is [OFF]. Markers will not be recorded on the memory card. • CENTER: When you select ON, you can display a marker at the center of the screen. The default setting is [ON] •...
- Page 21 Campbell Cameras Attn: Johanna Campbell 1327 Co. Rd. 800 N. Carmi, IL 62821 file:///Users/johannalc40/Documents/guide%20to%20the%20nx5u.html[10/25/12 2:40:02 PM]...
Need help?
Do you have a question about the HXR-NX5U and is the answer not in the manual?
Questions and answers