Table of Contents
Advertisement
Quick Links
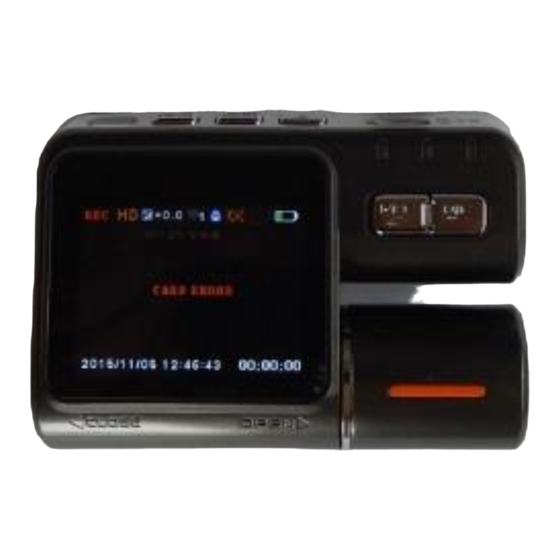
Carcam.ie D4 Specifications & Instruction Manual
(1) TF Screen
(2) Menu Select (Programming / Playback Mode)
(3) Photo Camera / Playback Mode
(4) Set / OK in the Programme Menu & Emergency Store in Recording Mode.
(5) Micro SD Card Socket.
(6) Indication Lights;
BLUE Flashing:
Battery Charging.
RED Flashing:
Camera Recording / Playback.
GREEN LIGHT:
Camera Start up.
(7) Microphone on/off in recording mode.
180° screen change (Fr Camera) in recording mode.
Menu navigation in programming mode.
(8) Record On / Off.
180° screen change (Fr Camera) in recording mode.
Menu Navigation in programming mode.
Advertisement
Table of Contents

Related Manuals for Carcam D4

Summary of Contents for Carcam D4
- Page 1 Carcam.ie D4 Specifications & Instruction Manual (1) TF Screen (2) Menu Select (Programming / Playback Mode) (3) Photo Camera / Playback Mode (4) Set / OK in the Programme Menu & Emergency Store in Recording Mode. (5) Micro SD Card Socket.
- Page 2 (installation) or releases (removal). Please view image attached for the direction the SD card, as forcing it in the wrong way will damage the camera & the card. Carcam.ie has installed the Micro SD Card...
-
Page 3: Video Menu
(7) & (8). Blue is the colour which highlights an option and confirm the option using button (4). Once an option is selected, the menu will revert to the video menu page. Carcam.ie has set the video format to HD. -
Page 4: Time Stamp
(4) and the menu will revert to the video menu page. Carcam.ie has set the G-Sensor to medium. Please note that sometimes the G-Sensor may have to be adjusted to the high setting. If you notice locked files on the memory card when you’re reviewing footage, it means the G-Sensor has been triggered and this can happen if the vehicle is on rough terrain or has sudden stops / change of direction. -
Page 5: Setup Menu
Confirm the setting using button (4) and the menu will revert to the video navigation page. Carcam.ie has set the video time to 5 minutes which we have found to be the most convenient setting for playback. -
Page 6: Date Input
Once the last setting has been entered, the menu will revert to the set up menu page. Carcam.ie has set the date and time on the camera. - Page 7 Open this folder and you will have access to all the recorded files which will be dated and timed. Double click any recording to play the video and the front and rear camera will be displayed side by side on the screen. Most video software on PC’s will play the video but if for any reason it won’t play, download VLC player for free from the web and this will play the recorded footage.
- Page 8 Delete Note: the easiest and quickest way to delete files is when the camera or SD Card is directly connected to a PC using the cable provided. However, it is possible to do this on the camera as follows; Press button (4) to enter the Delete sub-menu attached.
-
Page 9: Camera Mode
File List Highlight the File List option using buttons (7) & (8) and select using button (4). This will open the screen opposite where the file information is displayed. This includes date and time which makes it much easier for accessing the exact file you want. Scroll through the files using buttons (7) &...
Need help?
Do you have a question about the D4 and is the answer not in the manual?
Questions and answers