Advertisement
Available languages
Available languages
SE
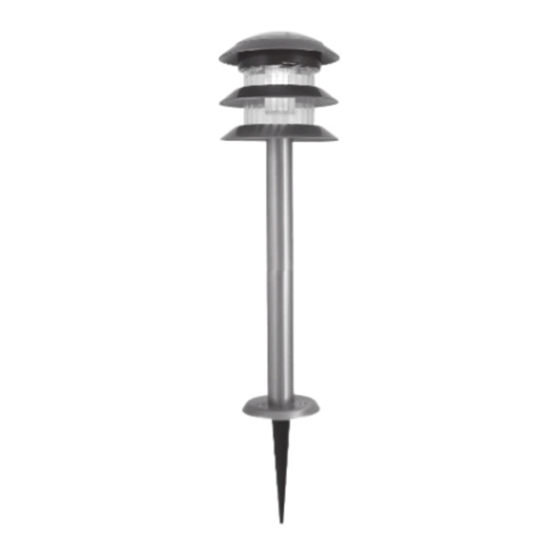
Garden Light, solar cell
Article number: 36-1866
Garden Light. Solar cell with white LED and rechargeable batteries
that charges from the sunlight. Lighting time approx. 8 hours when
the battery is fully charged. Lights up automatically after dusk.
Please read the entire instruction manual before using and
save it for future use. We apologise for any text or photo errors and
any changes of technical data. If you have any questions concerning
technical problems please contact our Customer Service Department
This box contains
•
1 instruction manual
•
1 light containing 2 connecting tubes (part b), connection/spike
(part c), 1 complete lantern with solar cell, electronics and Ni-
MH batteries.
Area of use
•
The garden light is meant for indoor and outdoor use.
•
The garden light is meant to be used during the lighter period of
the year. It is rain and water resistant (IP44).
•
The garden light will light up automatically at dusk and stay
on as long as there is power left in the batteries (a new fully
charged battery will run for up to 8 hours).
•
The charging depends on the weather and the location of the
light (amount of sun hours = the battery's charging).
•
Remove the battery and recharge it in a separate charger
occasionally to increase the lifetime of the battery.
•
Recommended temperature range: -20°C to + 40°C
Safety Instructions
•
Directions and safety instructions must be followed.
•
Do not use the light in an environment where it could be
exposed to gas, steam or dust.
•
Never look directly into the light source; it could damage your
eyes.
•
Only use rechargeable batteries of the recommended type. (see
chapter Technical data)
•
NEVER use regular dry cell batteries in the lights!
•
Do not change or dismantle the product, the guarantee is no
longer valid if any parts have been dismantled or modified.
•
Never use any sharp metal tools or other objects that could
scratch the surface of the light, if scratched it could start to rust.
•
Only let a qualified technician perform repairs, use only original
parts.
•
The garden light is not a toy! Keep children away from the light.
•
There is an ON/OFF switch underneath the lid on the garden
light, battery power on/off.
•
Discard the light if damaged in any way.
GREAT BRITAIN For consumer contact, please visit www.clasohlson.co.uk and click on customer service.
Assembly Instructions
Select a good location in the sun without any shadows. Place it
where other lights do not shine on the garden light sensor and shut
it off during the night.
1. Check that all parts are in
the box.
2. Press a connection/spike
(part c) tightly into a
connection pipe (part b)
with the spike out (visible),
CAREFULLY press or push
a connection/spike (part
c) in the other end of the
connection pipe with the
spike inward. Then press
a connection pipe onto the
visible connection (see
picture).
3. Push the complete lantern
(part a) on to the free
connection pipe (part b).
4. Select placement of the light
and push the spike down
into the ground.
5. Turn the top part of the
lantern clockwise until it
releases. Lift up and pull off
the yellow insulation strip.
6. Set the switch, underneath
the lid, to the ON position.
The garden light is now
ready to use!
Note! You can change the
height of the light by using one
or two connection pipes.
Care and Maintenance
Carefully observe the safety instructions and the assembly directions.
•
Clean the lantern's top part (solar cell and sensor) regularly with
a soft sponge and lukewarm water with detergent. Never use any
solvents.
•
Bring the lights in during winter and store them in a dry cool
place.
•
Remove the batteries and charge them if the lights are not to be
used for a long time, see next chapter.
a
Insert/remove the rechargeable batteries
The garden light is powered by two rechargeable R6 batteries
(1.2 V, 600mA), placed underneath the top part.
1. Turn the top part anticlockwise until it releases, lift it up and
unscrew the three screws that holds the lid with the switch. Fold
up the lid and remove/insert the rechargeable batteries according
to the marking in the battery holder.
2. Assemble in reversed order
b
Warning! NEVER use regular dry cell batteries in the garden light,
only rechargeable Ni-MH accumulators (1.2 V, 600mA).
•
The rechargeable batteries are consumable goods and are not
c
covered by the guarantee!
Disposal
Follow local ordinances when disposing of this product. If you are un-
sure about how to dispose of this product contact your municipality.
b
Do not discard the NiCd batteries in the household waste.
c
Do not expose the NiCd batteries to heat or fire. Danger of
explosion!
Do not discard the NiCd batteries in the water.
Technical data
•
Light source
•
Rechargeable batteries
Switch
•
Max light time
batteries)
•
Height above ground:
The charging circuit is protected against low voltage and will shut off
automatically.
1x high power LED
2x Ni MH R6 (1.2 V, 600 mA)
Up to 8 hours (new, fully charged
41 cm
Advertisement
Table of Contents

Subscribe to Our Youtube Channel
Related Manuals for Clas Ohlson 36-1866


Summary of Contents for Clas Ohlson 36-1866
- Page 1 Garden Light, solar cell Assembly Instructions Care and Maintenance Article number: 36-1866 Select a good location in the sun without any shadows. Place it Carefully observe the safety instructions and the assembly directions. where other lights do not shine on the garden light sensor and shut •...
- Page 2 Trädgårdsbelysning, solcell Monteringsanvisning Skötsel och underhåll Artikelnummer: 36-1866 Välj en bra placering i solen och utan skuggor, och så att andra Beakta noga säkerhetsföreskrifterna och monteringsanvisningen. lampor inte lyser på trädgårdsbelysningens sensor och släcker den Solcell med vit LED med uppladdningsbara batterier som laddas av •...
- Page 3 Hagebelysning, solcelle Monteringsanvisning Vedlikehold Artikkelnummer: 36-1866 Velg en bra plassering i solen og uten skygger. Påse at ingen andre Les sikkerhetsforskriftene og monteringsanvisningen nøye. lamper lyser på hagebelysningens sensor og slukker den på natten. • Rengjør lyktens overdel (solcelle og sensor) regelmessig med Hagebelysning.
- Page 4 SUOMI Puutarhavalaisin, aurinkokenno Asennusohje Huolto ja ylläpito Tuotenumero: 36-1866 Valitse hyvä aurinkoinen paikka, ja johon muut valaisimet eivät Noudata tarkkaan turvallisuus- ja asennusohjeita. valaise pimeällä ja sammuta sensoria. • Puhdista valaisimen yläosa (aurinkokenno ja sensori) Puutarhavalaisin aurinkokennolla. Valkoiset LED-valot. Ladattava säännöllisesti pehmeällä...
Need help?
Do you have a question about the 36-1866 and is the answer not in the manual?
Questions and answers