
Subscribe to Our Youtube Channel
Related Manuals for JUKI LK-1941


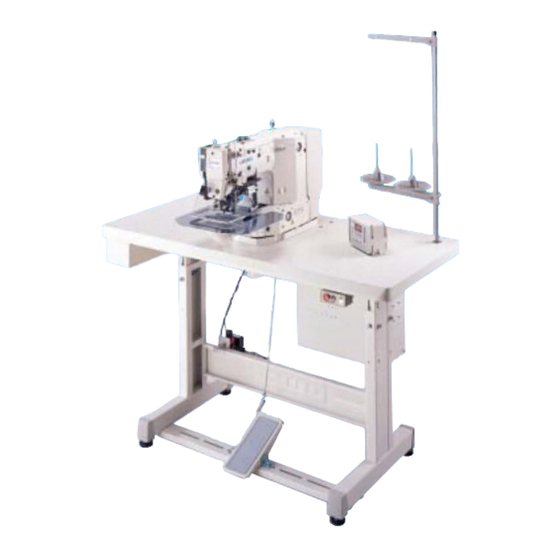
Summary of Contents for JUKI LK-1941
- Page 1 Computer-controlled High Speed Shape-tacking Industrial Sewing Machine with Full-rotary Three-fold Capacity Hook LK-1941/LK-1942 ENGINEER’S MANUAL 29343605 No.E340-01...
- Page 3 Instruction Book intended for the maintenance personnel and sewing operators at a sewing factory. All personnel engaged in repair of LK-1941/LK-1942 are required to carefully read Section 2 “Standard Adjustment” which contains important information on the maintenance of LK-1941/LK-1942.
-
Page 4: Table Of Contents
CONTENTS 1. SPECIFICATIONS ..................1 2. CONFIGURATION ..................2 (1) Names of main unit....................2 (2) Names of switches on the control box ..............3 (3) Function of the operation panel key ..............4 3. ADJUSTMENTS ..................5 (1) Adjustment of the main shaft components ............5 1) Adjusting the play of the main shaft .................... - Page 5 1) Installing the thread retaining wiper ....................93 2) Adjusting the thread retaining wiper ..................... 93 (5) Feeding frame components for belt (LK-1941) ..........95 1) How to use the feeding frame blank for belt ................. 95 2) How to use the feed plate blank and the feed plate guide for belt ..........95 11.
-
Page 6: Specifications
1. SPECIFICATIONS 1) Sewing area : X (lateral) direction 100 mm Y (longitudinal) direction 60 mm * 2,200 rpm (When sewing pitch is less than 3 mm.) 2) Max. sewing speed : 3) Stitch length : 0.1 to 10.0 mm (adjustable in 0.1 mm step) 4) Feed motion of work clamp foot : Intermittent feed (2-shaft drive by stepping motor) 5) Needle bar stroke :... -
Page 7: Configuration
2. CONFIGURATION (1) Names of main unit • Needle thread • Needle thread breakage drawing device detecting plate (For G and Z types only) • Machine head • Wiper switch • Thread stand • Temporary stop switch • Operation box •... -
Page 8: Names Of Switches On The Control Box
(2) Names of switches on the control box • Reset key • Data indication • Sewing LED • Item selection LED • Ready key • Function key • + / Feed forward key • – / Feed backward key • Selection key : Every time this key is pressed, the selection will be made as follows. •... -
Page 9: Function Of The Operation Panel Key
(3) Function of the operation panel key − −... -
Page 10: Adjustments
3. ADJUSTMENTS (1) Adjustment of the main shaft components Standard Adjustment 1) Adjusting the play of the main shaft For the standard adjustment, clearance provided between the counter weight and the main shaft front bushing is 0.5 mm. Main shaft intermediate bushing Counter weight Thrust collar A... - Page 11 Adjustment Procedures Results of Improper Adjustment ① Push the counterweight to the main shaft front bushing, insert a clearance gauge of 0.5 mm between the main shaft intermediate bushing and the thrust collar A and fix the thrust collar A with screw while pressing it to the main shaft intermediate bushing side.
-
Page 12: Adjusting The Main Shaft Sensor
Standard Adjustment 3) Adjusting the main shaft sensor Sensor cover 2 Setscrew 1 Slit plate passes the center. Face A Slit plate (2) Adjusting the intermediate presser components (LK-1942) Standard Adjustment 1) Adjusting the position of the intermediate presser cam ①... - Page 13 Adjustment Procedures Results of Improper Adjustment ① Remove the sensor cover. ™ If the main shaft sensor is not ② Fit the sensor installing base to face A. properly installed, the sensor Tighten setscrew 1 so that the slit plate passes the center of may be damaged or error may the sensor without interfering with each other and put the sensor ocur.
-
Page 14: Position Of The Intermediate Presser Bar
Standard Adjustment 2) Position of the intermediate presser bar ◎ Protruding amount of intermediate presser bar 2 from intermediate presser bar guide bracket 1 is 12.5 mm. ◎ Needle 3 passes the center of intermediate presser 4. 3) Height of the intermediate presser adjusting screw Height of the intermediate presser adjusting screw is 24.5 mm for the standard adjustment value. - Page 15 Adjustment Procedures Results of Improper Adjustment Tighten setscrew 笙 so that the protruding amount of intermediate 藺 If the protruding amount of presser bar 笆 from intermediate presser bar guide bracket is 12.5 intermediate presser bar is mm and needle 笳 passes the center of intermediate presser 笘. excessively large, breakage of intermediate presser spring 笞...
-
Page 16: Adjusting The Intermediate Presser Lifting Cylinder Knuckle
Standard Adjustment 4) Adjusting the intermediate presser lifting cylinder knuckle ◎ The distance from installing plate 2 to the inside of the curved section of intermediate presser lifting link 3 is 422 ± 1 mm when rod 1 of the intermediate presser lifting cylinder is protruding. 422 ±... - Page 17 Adjustment Procedures Results of Improper Adjustment ① Loosen nut 4 and turn knuckle 5 for adjustment. ™ If the adjustment value is ② Tighten nut 4 after sadjustment. excessive, the lifting amount of the intermediate presser is decreased when the sewing machine stops.
-
Page 18: Adjusting The Hook Shaft Drive Components
(4) Adjusting the hook shaft drive components Standard Adjustment 1) Longitudinal position of the main shaft sprocket ◎ Align plane A of the main shaft sprocket with the center of engraved dot (ø1) on the main shaft. Plane A ⇦ Face plate side Center of engraved dot 2) Longitudinal position of the hook driving shaft sprocket... - Page 19 Adjustment Procedures Results of Improper Adjustment ① Remove the timing belt. ™ If the position of the main shaft ② Loosen two setscrews 1 in the main shaft sprocket and move sprocket is improper, the timing belt will be deteriorated or the main shaft sprocket in the direction of the arrow mark to adjust the position.
-
Page 20: Removing The Play Of The Hook Shaft
Standard Adjustment 4) Removing the play of the hook shaft 5) Height of the needle bar Upper engraved line A : Engraved line for DP x 5 B : Engraved line for DP x 17 #18 to #25 C : Engraved line for DP x 17 #26 6) Removing the oil shield plate of the hook −... - Page 21 Adjustment Procedures Results of Improper Adjustment Loosen two thrust collar setscrews 1 and tighten them while ™ If the play is excessively narrowed, the noise will be pressing the hook shaft in the direction of arrow mark. caused. Bring needle bar 1 to the lowest position of its stroke. Loosen needle bar connection screw 2 and adjust so that upper marker line 4 engraved on the needle bar aligns with the bottom end of needle bar bushing, lower 3.
-
Page 22: Needle And The Engraved Lines
Standard Adjustment 7) Needle and the engraved lines Relation between needle and engraved lines When DPx17 When DPx17 When DPx5 is used. #18 to #25 is used. #26 is used. 8) Clearance between the needle and the hook 0.03 to 0.1mm 9) Inner hook stopper Groove on throat plate... - Page 23 Adjustment Procedures Results of Improper Adjustment Turn the handwheel by hand in the direction of normal rotation. When needle bar 5 has gone up, adjust so that lower marker line 6 engraved on the needle bar aligns with the bottom end of the needle bar bushing 7, lower.
-
Page 24: Timing Belt Tension
Standard Adjustment 10) Timing belt tension ◎ The timing belt tension is determined by the tension spring. (Standard belt tension : 147 to 166 N) Timing belt Tension spring Idler pulley − −... - Page 25 Adjustment Procedures Results of Improper Adjustment ① When loosening the timing belt, loosen setscrews 1 and 2, ™ If the timing belt tension is press the belt in the direction of arrow mark ⇦, tighten setscrew excessively low, the belt runs 1 in the state that the belt is slack, and fix with setscrew 2.
-
Page 26: Adjustment Of The Thread Trimmer Mechanism Components
(5) Adjustment of the thread trimmer mechanism components Standard Adjustment 1) Adjusting the thread trimmer cam Position of the direction of the main shaft : Adjust the clearance between the thread trimmer cam and the main shaft thrust collar to clearance 0.5 mm. Position of the direction of the rotation : Align the engraved point of the main shaft with the engraved line of the thread trimmer cam. - Page 27 Adjustment Procedures Results of Improper Adjustment Determine the position of the thread trimmer cam, and tighten screw ™ Thread trimming failure will No. 1 1 of the thread trimmer cam from the upper side of the occur. sewing machine. ™ Lock of the sewing machine will Turn the main shaft by 1 / 4 rotation in the right direction, and occur at the sewing start or at tighten screw No.
-
Page 28: Position Of The Thread Trimmer Shaft
Standard Adjustment 3) Position of the thread trimmer shaft Make sure that the rear end of thread trimmer shaft 4 aligns with the processed face A of the sewing machine arm in the state that tension release pin 2 of tension release arm 1 is separated from tension release notch 3 (thread trimmer stopper support comes in contact with the section B of the sewing machine arm stopper.). - Page 29 Adjustment Procedures Results of Improper Adjustment ① Loosen setscrew 6 in the cam installing link. (The thread ™ If thread trimmer shaft 4 is trimmer shaft is possible to rotate.) m i s t a k e n l y a d j u s t e d , t h e Loosen two setscrews 5 in the tension release arm thrust collar.
-
Page 30: Position Of The Thread Trimmer Magnet Arm
Standard Adjustment 5) Position of the thread trimmer magnet arm Turn the main shaft to the running section of the thread trimmer cam (refer to “(2) Adjusting the thread trimmer link stopper screw”) and move the thread trimmer magnet in the direction of arrow A. Then the cam installing link moves in the direction of B. - Page 31 Adjustment Procedures Results of Improper Adjustment Loosen adjusting screw 1 in the thread trimmer magnet and adjust ™ Thread trimmer roller enters the the position of the thread trimmer arm so that a clearance of 1 slit of thread trimmer cam, mm is provided between the cam face of the thread trimmer cam causing thread trimmer failure or and the roller attaching face of the cam installing link.
-
Page 32: Installing Position Of The Moving Anf Counter Knives (For H And G Types)
Standard Adjustment 6) Installing position of the moving anf counter knives (For H and G types) Position of the moving knife : The distance from the end face on the throat plate side to the top end of the moving knife is 18.9 mm when the moving knife travels to the extreme front. Position of the counter knife : Clearance A provided between the flat work section of the needle hole guide and the counter knife is : H type : 0.8 to 1.0 mm... - Page 33 Adjustment Procedures Results of Improper Adjustment ◎ Adjusting the moving knife ™ Thread spreading failure or ① Fit the cam installing link to the thread trimmer cam, turn the thread trimming failure will be hand pulley in the normal rotating direction, rotate the main caused.
-
Page 34: Position Of The Moving Knife And The Hot Wire Plate (For Z Type)
Standard Adjustment 8) Position of the moving knife and the hot wire plate (For Z type) Position of the moving knife : The distance from the end face of the throat plate side to the top end of the moving knife is 18.9 mm when the moving knife travels to its extreme front. Position of the counter knife : Clearance provided between the periphery of the needle hole guide and the top end of hot wire plate is 0.5 mm both in the longitudinal and lateral directions. - Page 35 Adjustment Procedures Results of Improper Adjustment ◎ Adjusting the moving knife 藺 Thread spreading failure or ① Remove the machine arm, fit the cam installing link to the thread thread trimming failure will be trimmer cam, turn the hand pulley in the normal rotating caused.
-
Page 36: Adjustment Of The Tension Release Components
(6) Adjustment of the tension release components Standard Adjustment 1) Installing position of the tension release notch Tension release roller Cam installing link Setscrew 1 Tension release notch Tension release notch Thread trimmer cam 2) Position of the tension release stopper Adjust the clearance provided between the periphery of thread trimmer cam and section C of the tension release arm roller to 1.2 mm when the tension release arm is drawn in the direction of A (state that the tension release arm and the tension release link come in contact with each other) in the state that the cam... - Page 37 Adjustment Procedures Results of Improper Adjustment ① Loosen two setscrews 1 in the tension release notch, and move ™ Length of remaining needle the tension release notch up to the maximum in the normal thread after thread trimming will rotating direction (➡) of the main shaft. Then securely tighten be shortened.
-
Page 38: Adjusting The Sensor Components
(7) Adjusting the sensor components Standard Adjustment 1) Mechanical origin (63) Needle hole Y feed support shaft X feed support shaft Feed plate 2) Adjusting the Y origin sensor 1 Sensor slit setscrew 3 Y sensor 2 Y sensor slit −... - Page 39 Adjustment Procedures Results of Improper Adjustment Mechanical origin is as shown in the figure on the left side. ™ Maximum area cannot be secured. In the lateral direction, the center of needle hole, the center of X ™ Distortion of stitching shape will feed support shaft and the center of Y feed support shaft become occur.
-
Page 40: Adjusting The X Origin Sensor
Standard Adjustment 3) Adjusting the X origin sensor 2 X sensor 1 Sensor installing base setscrew 3 X sensor slit − −... - Page 41 Adjustment Procedures Results of Improper Adjustment ① Select Test mode No.2, origin retrieval. ② Every time depressing the pedal, the origin is retrieved. Loosen sensor installing base setscrew 1 and shift the position of X sensor 2 to set the feed plate to the position of origin. Caution : After the adjustment, make sure that X sensor slit 3 does not interfere with X sensor 2.
-
Page 42: Adjustment Of The Feed Mechanism Components
(8) Adjustment of the feed mechanism components Standard Adjustment 1) Adjusting the position of the X motor base Center of the hook driving shaft Center of X motor base 2) Adjusting the positions of the X motor and the Y motor (adjusting the backlash of the driving gear) Felt presser Y motor... - Page 43 Adjustment Procedures Results of Improper Adjustment Loosen three setscrews 1, lightly push the X motor base in the ™ If the pushing is not sufficient, direction of arrow ( ➡ ), and tighten again setscrews 1. the backlash of the gear will become large, and the accuracy Caution : When removing setscrews 1 and the X motor base, of the needle entry will be...
-
Page 44: Installing The Feed Plate Support Plate
Standard Adjustment 3) Installing the feed plate support plate End face A 4) Installing the feed plate Flat section Fig. 1 45˚ 45˚ − −... - Page 45 Adjustment Procedures Results of Improper Adjustment ① Loosen two Y feed arm setscrews 1. ™ The load of the feed will become ② Push Y feed shaft 2 in the direction of arrow ( ⇦ ). large, causing the failure of the ③...
-
Page 46: Installing The Feed Bracket
Standard Adjustment 5) Installing the feed bracket Sewing area Center needle (54.8) − −... - Page 47 Adjustment Procedures Results of Improper Adjustment ① Select the test mode No. 2, origin retrieval, and depress the If the installing dimension is not pedal to perform the origin retrieval. proper, maximum sewing area ② Tighten two setscrews 1 and install feed bracket 2. cannot be secured.
-
Page 48: Adjusting The Bobbin Thread Winder Components
Main shaft 3 Setscrew (2 pcs.) Hand pulley gear (LK-1942 : 12.7 mm) (LK-1941 : 54.5 mm) (10) Adjusting the presser components Standard Adjustment 1) Adjusting the presser cylinder knuckle 藺 When the presser goes up (when the cylinder shrinks to the utmost.), adjust the length from the rear end of the presser cylinder to the front end of the cylinder knuckle to 87 mm. - Page 49 Adjustment Procedures Results of Improper Adjustment Loosen setscrews 笳, adjust the position of bobbin winder driving 藺 If the clearance is small, it will wheel 笊 so that the clearance provided between bobbin winder cause worn-out of the bobbin driving wheel 笊 and arm cover installing face 笆 should be 4.3 thread winder components or mm, and tighten again setscrews 笳...
-
Page 50: Height Of The Slider
Standard Adjustment 2) Height of the slider ◎ Closely attach the top end of the slider to the presser plate sheet. Presser plate sheet Slider 3) Adjusting the speed controller ◎ Lowering speed of the presser can be properly adjusted. ◎... - Page 51 Adjustment Procedures Results of Improper Adjustment Adjust the height of slider 2 using four setscrews 1. To position ™ If the height of the slider is the height, lightly press the slider to presser plate sheet 3 when incorrect, malfunction of the the presser goes up feed will occur.
-
Page 52: Adjustment Of The Draw-Out Device Components (For G And Z Types)
(11) Adjustment of the draw-out device components (For G and Z types) Standard Adjustment 1) Position of the draw-out lever ◎ When the power is turned OFF, draw-out lever 笊 is level. − −... - Page 53 Adjustment Procedures Results of Improper Adjustment Loosen two setscrews 2 to adjust the position. ™ If the draw-out lever slants, the draw-out amount of needle thread becomes insufficient, and stitch skipping at the start of sewing or the like occurs. −...
-
Page 54: Adjustment Of The Sewing Components
(12) Adjustment of the sewing components 1) List of the replacement components for the respective types << Replacement components for LK-1941 and -1942>> Part No. Type H type G type Z type Parts (Heavy-weight materials) (Extra-heavy-weight materials) (Extra-heavy-weight materials) DPx17#18... -
Page 55: Kinds And Application Of The Hook
2) Kinds and application of the hook There are four kinds of hooks for LK-1940 Series. It is necessary to use the hook properly in accordance with the needle size and sewing conditions. Use a suitable hook referring to "Correspondence table of needle size" and "Correspondence table of sewing conditions"... -
Page 56: Stitching Pattern
(1) Service Pattern DIP SWITCH DATA ROM SYSTEM ROM • Five kinds of service patterns (Nos. 51, 52, 53, 54 and 60) are registered in LK-1941/42 beforehand. Service patterns are registered in SYSTEM_ROM (005 *) of 1. • • Patterns in SYSTEM ROM are fixed data and cannot be edited with the input devices (PGM-7 and PGM-20). - Page 57 4) Storage medium • Standard DATA_ROM (U32) 256k bit EEP-ROM (58C256) Part No. : HL011940000 • In addition to the standard DATA_ROM, the following ROM is available. 1) DATA ROM of existing AMS-205, 206 64k bit EEP-ROM (58C65) * When using the above ROM, change of DIP switch on MAIN circuit board is required. SW1-1 : ON 58C256 (Standard ROM set at the time of delivery) OFF : 58C65 (ROM for AMS-205, -206) Note) 1.
-
Page 58: Memory Switch
5. MEMORY SWITCH • Purpose of the memory switch The memory switches are able to set the various performances of the sewing machine by means of programming. The contents are separated in the user level (U) and the service level (S). Note : The contents of the memory switches may vary in accordance with the revision of SYSTEM ROM. - Page 59 Display Function Setting range Remarks State at the time of delivery X : 0 to ± 50 Travel limit of X-feed or Y-feed is set. +X : 50 X : 0 to ± 30 (Setting separated in domains of +X, -X, +Y and -Y is –X : 50 possible.) (unit : 1 mm)
- Page 60 1 : Presser goes up immediatly thread trimming after thread trimming. and the cloth can be immediately taken out. This function is not used with LK-1941/42. Do not – change the setting. Ouput of needle cooler is selected. 0 : Ineffective 1 : Effective...
-
Page 61: Operating Method
(1) Operating method 1) How to start the memory switches Operation method Indication Explanation Step Pressing key and key, turn ON READY Keep RESET the power switch. (Start of the user level) pressing. ➡ READY RESET Turn ON the power switch. Immediately after turning ON the power switch, simultaneously press key. - Page 62 ① Operation when both the latter first digit and second digit on the indication are "– –". Step Operation method Indication Explanation ① -1 [Ex.] When No. 01 is indicated. Press down keys to FORWARD BACK select the indication No. desired to change.
- Page 63 ② Operation when the indication is “0 3 – –”. Indication Explanation Step Operation method ② -1 Press down key to select FORWARD BACK the indication No. 3. FORWARD BACK ② -2 Sewing LED Press down key to light up Sewing READY SEWING Lights up.
- Page 64 ③ Operation when the latter second digit is “–” and first digit is “Numeral” Step Operation method Indication Explanation ③ -1 [Ex.] When the indication No. is Press down key to select FORWARD BACK No. 04. the indication No. 04. FORWARD BACK ③...
-
Page 65: How To Finish The Memory Switches
④ Operation when the indication section is “99.” Step Operation method Indication Explanation ④ -1 [Ex.] When the indication No. Press down key to select FORWARD BACK is No. 99. the indication No. 99. FORWARD BACK ④ -2 Sewing LED Press down key to light up Sewing READY... -
Page 66: Test Mode
6. TEST MODE • Purpose of the test mode This mode is set to facilitate the electrical check for the maintenance work. • Items of the test mode Test mode can check the items as shown in the list below. Indication No. -
Page 67: Operating Method
(1) Operating method 1) How to start the test mode Step Operation method Indication Explanation Keep Pressing key and key, turn ON READY RESET pressing. the power switch. (Starting of the user level of memory READY switch) RESET Turn ON the power switch. -
Page 68: How To Finish Test Mode
2) How to finish test mode Operation method Indication Explanation Step Turn OFF the power. Turn OFF the power switch. 3) How to check each test program No. ① CP-1 (Input signal check) State of input of switches and sensors is indicated on the 8 LEDs. The table below is the list of LED indication, and you can understand to which LED each switch or each sensor is assigned. - Page 69 Indicating section (input line No.) Checking measure Explanation State of the input line No. 1 key will be indicated on LED. READY [Example] Check the key. READY [Example] Check the key. RESET RESET As for the other keys, refer to the input line No. 1 of the above table.
- Page 70 Indicating section (input line No.) Checking measure Explanation State of the input line No. 3 switch will be indicated on LED. [Example] Check the presser lifter switch. Presser lifter switch [Example] Check the start switch. Start switch Update of the input line No. 3 to 4 (Refer to the adjustment of the sensor components.) Simultaneously...
-
Page 71: ② Cp-2 (Origin Retrieval)
② CP-2 (Origin retrieval) For origin adjustment, JOG movement and state of origin sensor will be indicated. Step Indicating section Checking measure Explanation JOG movement of the X/Y axes can be changed by pressing down the key. SELECT SELECT “ ”... -
Page 72: ③ Cp-3 (Continuous Operation)
③ CP-3 (continuous operation) Performs the initial setting of the operation conditions, and moves to the continuous operation mode. Step Indicating section Checking measure Explanation A time of pause is set by pressing down FORWARD BACK Setting range : 0 to 9,900 ms FORWARD BACK (in a unit of 100 ms) -
Page 73: ④ Cp-4 (Revolution Movement)
④ CP-4 (Revolution movement) Output of the specified number of revolutions is made and the actual number of revolutions is indicated. Step Indicating section Checking measure Explanation [Initial state] “SPEED” LED of the setting item lights up. Lights up If there is no change, move to the step 3. Set value of the number of revolutions is (Example) When the set by pressing down... - Page 74 If following operation is made when the step is above-mentioned “step 4”, the indication can be changed to the indication of the specified number of revolutions. Indicating section Checking measure Explanation The output is changed to the output of the specified number of revolutions by pressing SELECT down...
-
Page 75: ⑤ Cp-5 (Solenoid, Solenoid Valve, Status Output And Hot Wire Output)
⑤ CP-5 (Solenoid, solenoid valve, status output and hot wire output) Checks the respective outputs. Output No. Table Solenoid, solenoid valve, hot wire output, status output Feeding frame valve right/left (AIR_1, _2) : Depending on pedal specifications Presser valve, right (AIR_1) Presser valve, left (AIR_2) Intermediate presser valve (AIR_3) Thread controller No. -
Page 76: ⑥ Cp-6 (Hot Wire Output)
⑥ CP-6 (Hot wire output) • This mode is purposed to use for valuation and test by setting hot wire output time longer than that of normal setting. • Setting range is 350 ms to 1,000 ms. (In a uint of 50 ms) •... -
Page 77: External Input/Output
7. EXTERNAL INPUT/OUTPUT (1) Purpose of the external I/F For LK-1941/42, exclusive I/F specifications purposed to perform interface with the external device (mainly sequencer) should be cleared. (2) Output signal 1) [Main shaft status output] Signals of main shaft status are output as mentioned below. ACTIVE is LOW. - Page 78 2) [Explanation of output signal of each status] ① Bit 0 : Presser SW input waiting The signal becomes ACTIVE when the presser SW is in the state that input is possible. Plural presser SWs can receive. However, when either SW is in the state that receiving is possible, the signal becomes ACTIVE.
- Page 79 Input circuit (71055 PORT C) 71055 Fig. 2 * The following parts are necessary when using the external I/F. Connector used : Straight header 34P (Blue) of Yamaichi Denki Name JUKI Part No. Maker Part No. Maker Remarks Socket HK014820340...
- Page 80 (5) DETAILS OF I/F CONNECTORS J48- Internal Circuit Signal name Remarks PC-C Sewing machine status PC-E PC-C DOWN position PC-E PC-C UP position PC-E PC-C Presser SW input waiting PC-E PC-C Start SW input waiting PC-E PC-C During sewing (including jump feed) PC-E PC-C Bobbin thread counter over...
-
Page 81: Parts Grease Or Lock-Tite Paint Is Applied
8. PARTS GREASE OR LOCK-TITE PAINT IS APPLIED ◎ Apply grease to the parts shown in the figure periodically (one time/half yearly). Be sure to apply grease or LOCK-TITE to the respective sliding parts which are not shown in the figure when overhauling or reassembling. - Page 82 ◎ Apply grease to the parts shown in the figure periodically (one time/half yearly). Be sure to apply grease or LOCK-TITE to the respective sliding parts which are not shown in the figure when overhauling or reassembling. Screw part LOCK-TITE 601 Grease Grease Grease...
-
Page 83: Presser Dimensions
9. PRESSER DIMENSIONS Feed plate ø 4 Origin (100) AMS-206 Sewing area LK-1941, 42 Sewing area − −... -
Page 84: How To Use Optionals
10. HOW TO USE OPTIONALS (1) Needle cooler Standard Adjustment When synthetic thread is used and thread breakage or stitch skipping due to needle heat occurs, use the needle cooler to cool needle. 1) Installing the needle cooler compl. Fig. 1 −... - Page 85 Adjustment Procedures Results of Improper Adjustment ① Insert air tube 2 into needle cooler compl.1. ② As shown in Fig. 1, handle air tube 2 and install needle cooler compl. 1 to tap A in the wiper base through washer 3 with setscrew 4.
-
Page 86: Installing The Solenoid Valve
Standard Adjustment 2) Installing the solenoid valve Caution Connector marker J79 − −... - Page 87 Adjustment Procedures Results of Improper Adjustment ① Remove the motor cover. ② Loosen setscrew 1 and remove end block 2. ③ Install solenoid valve 3, install end block 2 again, and tighten setscrew 1. Caution : When installing the solenoid valve and the end block, be sure to securely insert bushings 4 so that they are not fallen.
-
Page 88: How To Use The Needle Cooler
Standard Adjustment 3) How to use the needle cooler ™ Needle cooler blows air while the main shaft is rotating. (2) Thread tension controller No. 3 / inverting clamp device Setting of memory switch No. 31 and allocation of the output port, when using the thread tension controller No. - Page 89 Adjustment Procedures Results of Improper Adjustment When installing of the needle cooler is completed, set No. 35 (with/ without needle cooler output) of the memory switch to “1” (0 : Ineffective, 1 : effective). * Normally, it is not necessary to change the setting since the setting at the time of delivery is "1".
-
Page 90: Installing The Tension Controller No. 3 (B50192220B0)
Standard Adjustment In case thread-tightness is partially not good due to difference in cloth thickness, hitch stitch, etc., needle thread tension can be increased at desired position by using the tension controller No. 3. 1) Installing the tension controller No. 3 (B50192220B0) Fig.1 −... - Page 91 Adjustment Procedures Results of Improper Adjustment ① Loosen setscrew 1 and remove thread guide plate 2. ② Install air tube 3 to tension controller No. 3 4 and install the controller almost horizontally to the machine arm with setscrew * Refer to Fig. 1 for threading. Note) 3, 4 and 5 only are included in tension controller No.
-
Page 92: Installing The Solenoid Valve
Standard Adjustment 2) Installing the solenoid valve Caution Connector marker J79 Fig. 2 − −... - Page 93 Adjustment Procedures Results of Improper Adjustment ① Remove the motor cover. ② Loosen setscrew 1 and remove end block 2. ③ Install solenoid valve 3, again install end block 2, and tighten setscrew 1. Caution : When installing the solenoid valve and the end block, be sure to securely insert bushings 4 so that they are not fallen.
-
Page 94: How To Use The Tension Controller No. 3
Standard Adjustment 3) How to use the tension controller No. 3 ① Confirmation of the memory switch ② Creation of the pattern ™ To drive the tension controller No. 3, it is required to input an inverting point in the stitching pattern. *... - Page 95 Adjustment Procedures Results of Improper Adjustment ™ When installing of the tension controller No. 3 is completed, set No. 31 of memory switch to "1". * Normally, it is not necessary to change the setting since the setting at the time of delivery is "1". * Refer to Instruction Manual for setting of the memory switch.
-
Page 96: Reverse Sweeping Wiper
(3) Reverse sweeping wiper Standard Adjustment 1) Installing the reverse sweeping wiper ◎ By using the wiper base and the wiper of the optional parts, the wiper sweeping action can be changed to the reverse sweeping. Standard Reverse sweeping Wiper base Wiper Standard Reverse sweeping... - Page 97 • Clearance provided between the wiper and the needle is 1 mm or more. • Adjust the wiper to 40 mm from the top surface of the throat plate. (Refer to the Instruction Manual for LK-1941/42.) − −...
-
Page 98: Thread Retaining Wiper
(4) Thread retaining wiper Standard Adjustment 1) Installing the thread retaining wiper ◎ By using the wiper base and the thread clamp wiper of the optional parts, the wiper retains thread. Thread clamp wiper Wiper base Wiper Wiper base Standard Thread clamp 2) Adjusting the thread retaining wiper 0.5 mm... - Page 99 (For adjusting procedure, refer to the Instruction Manual for caused. LK-1941/42.) ② Clearance C provided between the needle and the wiper ™ When adjustment of the thread clamp spring is improper, the becomes smaller than the tandard adjustment value, and the...
-
Page 100: Feeding Frame Components For Belt (Lk-1941)
(5) Feeding frame components for belt (LK-1941) Standard Adjustment 1) How to use the feeding frame blank for belt ◎ By using the feeding frame blank for belt of the optional part, the sewing product can be pressed more securely than the ordinary blank material. - Page 101 Adjustment Procedures Results of Improper Adjustment Caution : Be sure to cut off the air supply and start the work ™ If the processing line is smaller when replacing the feeding frame. than the specified value, it will cause the needle and the ①...
-
Page 102: Table Of Error Indication
− −... -
Page 103: Troubles And Corrective Measures
− −... - Page 104 − −...
-
Page 105: Troubles And Corrective Measures (With Regard To Sewing)
− −... - Page 106 − −...
- Page 107 − −...
- Page 108 − −...
- Page 109 − −...
- Page 110 − −...
- Page 111 − −...
-
Page 112: Electrical Components
− −... - Page 113 − −...
- Page 114 − −...
- Page 115 − −...
- Page 116 − −...
- Page 117 − −...
-
Page 118: Circuit Diagram
13. CIRCUIT DIAGRAM (1) Block diagram − −... - Page 119 (2) POWER circuit diagram A − −...
- Page 120 (3) POWER circuit diagram B − −...
- Page 121 (4) Machine head sensor circuit diagram − −...
- Page 122 (5) Solenoid valve circuit diagram − −...
- Page 123 − −...
- Page 124 − −...
- Page 125 (10) Heat cutter circuit diagram − −...
- Page 126 FAX : (81)3-3430-4909 • 4914 * The description covered in this engineer's manual is subject to change for improvement of the commodity without notice. Copyright 狡 2000-2004 JUKI CORPORATION. All rights reserved throughout the world. 04 · 09 Printed in Japan (E)
Need help?
Do you have a question about the LK-1941 and is the answer not in the manual?
Questions and answers