
Subscribe to Our Youtube Channel
Related Manuals for Sprint MF975s


Summary of Contents for Sprint MF975s
-
Page 1: User Guide
MF975S User Guide [UG template version 14b_mbb] [draft version for review control] [carrier_OEM_model name or number_document type_language_date_draft number] example: [sprint_abc_XYZ-123_ug_en_050714_d1]... -
Page 2: Table Of Contents
Table of Contents Introduction..............................1 Before You Begin ..........................1 Operating Environment (Compatible OSs) ................... 1 Package Contents ..........................3 SSID and Security Key ......................... 3 Additional Information ........................... 3 Trademarks ............................4 Get Started ..............................5 Parts and Functions ..........................5 Home Screen ............................ - Page 3 Windows 7........................... 27 Connect Mac Computers with Wi-Fi ....................31 Connect iPhone/iPod Touch/iPad ....................... 33 Connect an iPhone or and iPod Touch ..................33 Connect an iPad ......................... 36 Connect an Android™ Device ......................39 Connect WPS Supported Wi-Fi Devices..................... 42 Connect with Micro USB Cable (Windows) ....................
- Page 4 General Use [describe per carrier] ....................66 Handling the Device [describe per carrier] .................. 66 Wi-Fi (Wireless LAN) [describe per carrier] ................67 RF Exposure Information and Specific Absorption Rate (SAR) Information [describe per carrier] ..67 Specific Absorption Rate (SAR) Information for this Product [describe per carrier] ....67 Electromagnetic Safety Information [describe per carrier] ............
-
Page 5: Introduction
The following topics describe the basics of using this guide and your new mobile broadband device. Before You Begin Thank you for purchasing your new MF975S. The following topics explain how best to use this guide to get the most out of your mobile broadband device. - Page 6 Item Description Windows XP Home Edition Service Pack 3 Windows XP Professional Service Pack 3 Windows XP (64-bit) Windows Vista Home Basic (32-bit or 64-bit) Windows Vista Home Premium (32-bit or 64-bit) Windows Vista Business (32-bit or 64-bit) Windows Vista Ultimate (32-bit or 64-bit) Windows 7 Starter (32-bit) Compatible Operating Systems (OSs) Windows 7 Home Basic (32-bit or 64-bit)
-
Page 7: Package Contents
Important Information Booklet (including terms and conditions of service) ● Wireless Recycling Envelope SSID and Security Key Before connecting Wi-Fi devices to your MF975S, you will need to confirm the SSID (network name) and security key. ■ From home, select Wi-Fi. -
Page 8: Trademarks
● Note that connection speeds may drop or connections may be disabled depending on line traffic or connection environments. ● When using WLAN overseas, change the settings according to the laws of those countries. ● To enhance security, it is recommended that you set a passcode for unlocking the screen. Trademarks ●... -
Page 9: Get Started
Get Started The following topics give you all the information you need to set up your device and wireless service the first time. Parts and Functions Learn your device's primary parts and functions. Device Layout The following illustration outlines your device's primary external features and buttons. Get Started... -
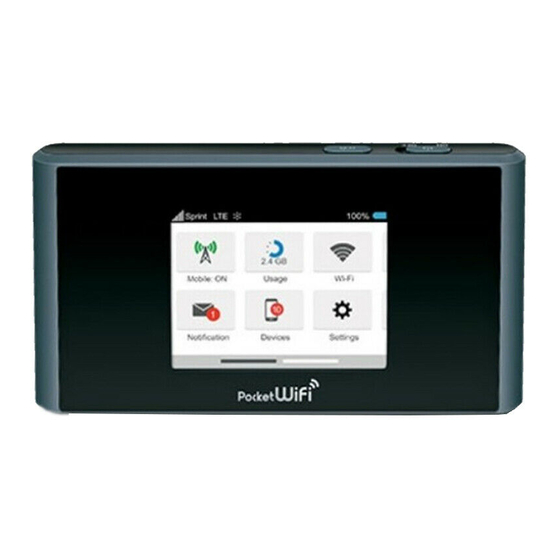
Page 10: Home Screen
Part Description View device status. Use touchscreen gestures (tap, swipe, flick, etc.) Display to access menus and additional screens. USIM Card Slot Install the USIM card. Micro USB Port Connect the micro USB cable for charging or tethered connections. Battery Cover Remove the battery cover to remove or insert the battery. -
Page 11: Status Bar Icons
Status Bar Icons The home screen's status bar may feature the following icons, depending on current status. Icon Description Mobile networks disconnected Out of service area Internet Wi-Fi available/Wi-Fi signal level Battery full Battery low No battery (charging required) Touch Menu Icons Tap the Touch Menu icon to access your device's settings and notifications. -
Page 12: Sleep Mode
Menu Option Description Show the messages received Notification Show the number of connected devices Devices Make settings for software update, roaming, display brightness, sleep mode, Settings passcode for screen lock Set the WPS function. Show your device's phone number, software version and URL for the WEB UI Information Show help for icons on display Support... -
Page 13: Touchscreen Use
The time required to recover the network connection varies by environment, settings, etc. Tip: Use the device settings menu to set a sleep activation timer. Touchscreen Use Your device's touchscreen lets you control actions through a variety of touch gestures. Tap or Touch When you want to select items onscreen such as menu icons, or press onscreen buttons, simply tap or touch them with your finger. -
Page 14: Text Entry Window
Drag To drag, touch and hold an onscreen item, move it where desired, and then release your finger. Text Entry Window Where applicable, use onscreen keyboards for text entry. Item Description Entry Box Text entry. Get Started... -
Page 15: Data Transfer Volume And Transfer Speed
[optional content describing data transfer speeds using various network types, e.g., 4GLTE, 3G, etc.] Wireless Mode Maximum Downlink Speed Typical Downlink Speed xx – xx Mbps Sprint Spark Enhanced 4G LTE xx Mbps xx – xx Mbps 4G LTE xx Mbps xx –... -
Page 16: Insert A Usim Card
● Avoid applying labels. May damage USIM Card. ● See instructions included with USIM Card for handling. ● USIM Card is the property of the company. ● USIM is replaceable (at cost) in case of loss/damage. ● Return USIM Card to the company when cancelling subscription. ●... -
Page 17: Remove The Usim Card
2. Insert USIM card. Insert gently with gold IC chip facing up. Remove the USIM Card Follow these instructions to remove the device's USIM card. 1. Open the USIM card slot. Get Started... -
Page 18: Battery Use
2. Remove the USIM card. 3. Insert the USIM card tray. Battery Use The following topics explain how to insert and remove your device's battery. Battery Cautions Storage: Avoid storing or leaving battery with no charge remaining. Saved information and settings may become lost or changed, or battery may become unusable. -
Page 19: Insert The Battery
Insert the Battery Follow these instructions to insert your device's battery safely and properly. Make sure the device is turned off before 1. Remove the battery cover. 2. Insert the battery. Align the contacts of the battery with the contacts in the device. Get Started... -
Page 20: Remove The Battery
3. Replace the battery cover. Remove the Battery Follow these instructions to remove your device's battery. Always power the device off before removing the battery. 1. Remove the battery cover. Get Started... -
Page 21: Check The Ssid And Security Key
2. Remove the battery. 3. Replace the battery cover. Check the SSID and Security Key Your device's default SSID (network name) and security key are printed on a label beneath the device's battery. Turn the device off and remove the battery to access this information. Get Started... - Page 22 1. Remove the battery cover. 2. Remove the battery. 3. Check the SSID (network name) and security key printed on the label beneath the battery. 4. Reinsert the battery. Get Started...
-
Page 23: Charge The Battery
Align the contacts of the battery with the contacts in the device. 5. Replace the battery cover. Charge the Battery Follow these instructions to charge your device's battery using either the included AC adapter or via a USB connection on your computer. Battery Charging Cautions Charging Conditions: Under low temperatures charging performance decreases. - Page 24 1. Insert the micro USB cable (USB plug) into the AC adapter. 2. Insert the other end of the micro USB cable into your device's micro USB port. Get Started...
- Page 25 Unplug the AC adapter from the outlet, and remove the micro USB cable from the device and the AC adapter. MF975S and AC Adapter Becoming Warm or Hot Your device and the AC adapter may become warm while charging. This is not a malfunction.
-
Page 26: Turn Your Device On And Off
1. Insert the small end of the micro USB cord into your device's micro USB port. 2. Insert the large end of the micro USB cord into an external USB port on your computer. Upon connecting the first time, the device driver will automatically install on your computer. 3. - Page 27 Your device's Wi-Fi function activates and automatically connects to the Internet. Turn Your Device Off ■ Slide the Power key to OFF position. Your device will power off. Your screen remains blank while your device is off (unless the battery is charging). Get Started...
-
Page 28: Connect With Wi-Fi (Wlan)
Connect with Wi-Fi (WLAN) The following topics outline basic features and operations of your device's Wi-Fi (WLAN) connections, including connecting with various OS and device types. Wi-Fi (WLAN) Overview Below are some basics of your device's Wi-Fi (WLAN) function. Wi-Fi (WLAN) Information ●... -
Page 29: Connect Windows Pcs With Wi-Fi
Your device's Wi-Fi function activates and automatically connects to the Internet. Connect Windows PCs with Wi-Fi The following topics describe how to connect your device with various versions of Windows PCs via Wi-Fi. Windows 8 Connect Windows 8 PCs to your device with Wi-Fi. 1. - Page 30 4. Select your device's SSID from the list, and click Connect. 5. Enter the security key (WPA) and then click Next. The PC connects to your device. The connected status icon on your device will show an additional device has been connected. Connect with Wi-Fi (WLAN)
-
Page 31: Windows 7
Windows 7 Connect Windows 7 PCs to your device with Wi-Fi. 1. Slide the Power key to ON position. Your device's Wi-Fi function activates and automatically connects to the Internet. 2. Activate your PC's Wi-Fi function. Consult your PC's operation manual for details on activating Wi-Fi. 3. - Page 32 4. Click Connect to a network. 5. Select your device's SSID from the list, and click Connect. Connect with Wi-Fi (WLAN)
-
Page 33: Windows Vista
6. Enter the security key (WPA) and then click OK. The PC connects to your device. The connected status icon on your device will show an additional device has been connected. Windows Vista 1. Slide the Power key to ON position. ... - Page 34 4. Click Connect to a network. 5. Select your device's SSID from the list, and click Connect. Connect with Wi-Fi (WLAN)
-
Page 35: Connect Mac Computers With Wi-Fi
6. Enter the security key (WPA) and then click Connect. 7. Click Close. The PC connects to your device. The connected status icon on your device will show an additional device has been connected. Connect Mac Computers with Wi-Fi Follow the instructions below to connect a Mac computer to your device via Wi-Fi. - Page 36 2. On your Mac, in the Apple menu, click System Preferences… > Network. 3. Click FireWire > Turn AirPort On. Your computer's Wi-Fi function activates. Connect with Wi-Fi (WLAN)
-
Page 37: Connect Iphone/Ipod Touch/Ipad
4. Select your device's SSID from the Network Name pulldown list. 5. Enter the security key (WPA) in the Password field, check Remember this network, and then click Join. The computer connects to your device. The connected status icon on your device will show an additional device has been connected. - Page 38 1. Slide the Power key to ON position. Your device's Wi-Fi function activates and automatically connects to the Internet. 2. Select Settings > Wi-Fi on your iPhone or iPod Touch. 3. Touch to turn on the Wi-Fi function. The iPhone or iPod Touch's Wi-Fi function activates. Connect with Wi-Fi (WLAN)
- Page 39 4. In the CHOOSE A NETWORK list, tap the device's SSID. 5. Enter the security password and then tap Join. Connect with Wi-Fi (WLAN)
-
Page 40: Connect An Ipad
The iPhone or iPod Touch connects to your device. The connected status icon on your device will show an additional device has been connected. Connect an iPad Follow the instruction to connect your iPad to your device using Wi-Fi. Note: The operations below are based on your iPad Wi-Fi security set to [xxx]. - Page 41 3. Touch to turn on the Wi-Fi function. The iPad's Wi-Fi function activates. Connect with Wi-Fi (WLAN)
- Page 42 4. In the CHOOSE A NETWORK list, tap the device's SSID. Connect with Wi-Fi (WLAN)
-
Page 43: Connect An Android™ Device
5. Enter the security key (WPA) and then tap Join. The iPad connects to your device. The connected status icon on your device will show an additional device has been connected. Connect an Android™ Device You can share your device's connection with compatible Android devices, such as wireless phones, tablets, and Chromebook computers. - Page 44 Your device's Wi-Fi function activates and automatically connects to the Internet. 2. On your Android device, from home, select Menu Key > System settings. 3. Tap or click Wi-Fi. The Wi-Fi settings menu appears. Connect with Wi-Fi (WLAN)
- Page 45 4. Tap or click the Wi-Fi slider to turn Wi-Fi on. Wi-Fi is enabled on the Android device. 5. Tap or click your device's SSID from the list. Connect with Wi-Fi (WLAN)
-
Page 46: Connect Wps Supported Wi-Fi Devices
6. Enter the security key and then click Connect. The Android device connects to your mobile broadband device. The connected status icon on your device will show an additional device has been connected. Connect WPS Supported Wi-Fi Devices Connect a variety of WPS (Wi-Fi Protected Setup) supported devices to your mobile broadband device. 1. - Page 47 3. On your mobile broadband device, from home, tap WPS. 4. Tap a WPS option. 5. When prompted, press the WPS button on the external device to connect. The external device connects to your mobile broadband device. The connected status icon on your device will show an additional device has been connected.
-
Page 48: Connect With Micro Usb Cable (Windows)
Connect with Micro USB Cable (Windows) The following topics describe how to share your device's Internet connection with a Windows-based PC using a direct USB connection. Device Recognition and Removal – Windows PC USB Connection The following topics detail the device recognition and device removal processes when using a direct USB connection between your mobile broadband device and a Windows PC. -
Page 49: Device Removal - Windows Pc Usb Connection
4. Insert the other end of the micro USB cable into an available external USB port on the PC. The PC should recognize the mobile broadband device within a few seconds. The device driver will automatically be installed on the connected PC. Device Removal –... -
Page 50: Software Installation - Windows Pc Usb Connection
1. On the PC, double-click in the task tray. The Safely Remove Hardware window appears. 2. Click USB Mass Storage Device > Stop. [illustration] The Stop a Hardware Device window appears. If multiple USB devices are connected to the PC, make sure to select the correct device to remove. - Page 51 Administrator Privileges: To install the device drivers manually, you may be required to log into an account with administrator privileges. Manual Device Driver Installation Note: Screenshots and operations are based on a Windows 8 PC. 1. Power on and connect your PC and your mobile broadband device using the supplied micro USB Device Recognition –...
-
Page 52: Connect With Micro Usb Cable (Mac)
Connect with Micro USB Cable (Mac) The following topics describe how to share your device's Internet connection with a Mac computer using a direct USB connection. Device Recognition and Removal – Mac USB Connection The following topics detail the device recognition and device removal processes when using a direct USB connection between your mobile broadband device and a Windows PC. -
Page 53: Device Removal - Mac Usb Connection
4. Insert the other end of the micro USB cable into an available external USB port on the Mac. The Mac should recognize the mobile broadband device within a few seconds. Once recognized, appears on the desktop. When connecting the first time, you will see a message "A new network interface has been Software Installation –... -
Page 54: Network Setup - Mac Usb Connection
2. Click for the Web UI. [illustration] If a memory card is installed, first click for Memory Card. 3. Remove the micro USB cable from the Mac's USB port. [illustration] Removal is complete. Cautions for Removing the Mobile Broadband Device Sleep Mode: The mobile broadband device may malfunction if the Mac enters sleep mode while connected. -
Page 55: Settings
Settings The following topics provide an overview of items you can change using your device's Settings menus, accessed primarily through the Web UI. Web UI Overview Use the device Web UI in a browser to check or change your mobile broadband device settings from a device connected either via Wi-Fi or by direct USB connection. - Page 56 Item Description xxxxx Xxxxx xxxxx Xxxxx xxxxx Xxxxx Settings...
-
Page 57: Appendix
Appendix Troubleshooting Check the questions and answers below for troubleshooting solutions for common device issues. Check Here First Question: Unable to connect via Wi-Fi (WLAN) Answer 1: Check whether the mobile broadband device is properly connected to the computer or other external device. - Page 58 Question: Driver is not automatically installed when the mobile broadband device is connected to the PC (Windows PC only). Answer 1: Wait several seconds for installation to begin after the system recognizes any new hardware. If the installer does not automatically activate even after a period of time, remove the mobile broadband device from the PC and reconnect it.
-
Page 59: Specifications
Answer 5: Contact Customer Service. Question: Unsure if logged on as an Administrator. Answer 1: For Windows 8, follow these steps to check. Move the pointer into the upper-right or lower-right corner and then click or tap charm > Control Panel. - Page 60 Mobile Broadband Device Specifications Item Description Model Name MF975S Dimensions 116.3 x 62.1mm x 13.9mm Weight 149.7g Interface Power Consumption 4.5W Operating Environment -10℃ ~ 60℃ Frequency 1.2G Compatible Networks WAN: 4G (FDD-LTE/TDD -LTE), 3G ( CDMA) WLAN: IEEE802.11a/b/g/n/ac Charging Time...
-
Page 61: Warranty And Service [Describe Per Carrier]
PC+SUS304 MF975S Back Cover PC+GF+SUS304 MF975S Battery Cover MF975S USIM Tray PC+Powder Metallurgy MF975S LCD Support Frame MF975S Power Key MF975S Lock Key PC+TPU Warranty and Service [describe per carrier] The following topics outline your device's warranty and service information. -
Page 62: Services
■ ■ Check warranty period in the Warranty. Services Before submitting your device for repairs, contact Customer Service or General Information; be prepared ■ During the warranty period, repairs will be made under the terms and conditions described in the ■... -
Page 63: Safety And Notices
Safety and Notices The following topics address important safety precautions, general notes, and required RF exposure information for your mobile broadband device. Safety Precautions [describe per carrier] The following topics outline important safety precautions that must be observed when using your mobile broadband device. - Page 64 [xxxxx]: [xxxxxxxx] [xxxxx]: [xxxxxxxx] [xxxxx]: [xxxxxxxx] [xxxxx]: [xxxxxxxx] [xxxxx]: [xxxxxxxx] [xxxxx]: [xxxxxxxx] [xxxxx]: [xxxxxxxx] Safety and Notices...
-
Page 65: Mobile Broadband Device [Describe Per Carrier]
[xxxxx]: [xxxxxxxx] Mobile Broadband Device [describe per carrier] [xxxxx] [xxxxx]: [xxxxxxxx] [xxxxx]: [xxxxxxxx] [xxxxx]: [xxxxxxxx] [xxxxx]: [xxxxxxxx] [xxxxx]: [xxxxxxxx] Safety and Notices... - Page 66 [xxxxx]: [xxxxxxxx] [xxxxx]: [xxxxxxxx] [xxxxx]: [xxxxxxxx] [xxxxx]: [xxxxxxxx] [xxxxx]: [xxxxxxxx] [xxxxx]: [xxxxxxxx] [xxxxx]: [xxxxxxxx] Safety and Notices...
-
Page 67: Usim Card And Memory Card [Describe Per Carrier]
[xxxxx]: [xxxxxxxx] [xxxxx]: [xxxxxxxx] USIM Card and Memory Card [describe per carrier] [xxxxx] [xxxxx]: [xxxxxxxx] [xxxxx]: [xxxxxxxx] [xxxxx]: [xxxxxxxx] [xxxxx]: [xxxxxxxx] [xxxxx]: [xxxxxxxx] Safety and Notices... -
Page 68: Ac Charger And Micro Usb Cable [Describe Per Carrier]
AC Charger and Micro USB Cable [describe per carrier] [xxxxx] [xxxxx]: [xxxxxxxx] [xxxxx]: [xxxxxxxx] [xxxxx]: [xxxxxxxx] [xxxxx]: [xxxxxxxx] [xxxxx]: [xxxxxxxx] [xxxxx]: [xxxxxxxx] [xxxxx]: [xxxxxxxx] Safety and Notices... -
Page 69: Mobile Broadband Device Use And Electronic Medical Equipment [Describe Per Carrier]
[xxxxx]: [xxxxxxxx] [xxxxx]: [xxxxxxxx] [xxxxx]: [xxxxxxxx] [xxxxx]: [xxxxxxxx] [xxxxx]: [xxxxxxxx] Mobile Broadband Device Use and Electronic Medical Equipment [describe per carrier] [xxxxx] Safety and Notices... -
Page 70: General Notes [Describe Per Carrier]
[xxxxx]: [xxxxxxxx] [xxxxx]: [xxxxxxxx] [xxxxx]: [xxxxxxxx] [xxxxx]: [xxxxxxxx] General Notes [describe per carrier] The following topics outline general usage and handling instructions for your mobile broadband device. General Use [describe per carrier] [xxxxx] ● [xxxxx] ● [xxxxx] ● [xxxxx] ● [xxxxx] ●... -
Page 71: Wi-Fi (Wireless Lan) [Describe Per Carrier]
● [xxxxx] ● [xxxxx] ● [xxxxx] ● [xxxxx] Wi-Fi (Wireless LAN) [describe per carrier] [xxxxx] ● [xxxxx] ● [xxxxx] ● [xxxxx] ● [xxxxx] ● [xxxxx] ● [xxxxx] ● [xxxxx] RF Exposure Information and Specific Absorption Rate (SAR) Information [describe per carrier] The following topics detail the specific absorption rate (SAR) information, electromagnetic safety information, and radiofrequency (RF) exposure information for you mobile broadband device. -
Page 72: European Rf Exposure Information [Describe Per Carrier]
European RF Exposure Information [describe per carrier] [xxxxx] Safety and Notices... -
Page 73: Index
Index Android Device RF Exposure Information, 86 Connect Wi-Fi, 38 Safety Precautions, 77 Battery Security Key, 3, 17 Charge, 19 Services, 75 Install, 14 Settings, 69 Remove, 16 SIM Card, 12 Customer Service, 76 Insert, 13 Data Transfer Speed, 12 Remove, 14 Device Driver Installation Sleep Mode, 9... - Page 74 Wi-Fi Network Name, 3 USB connection, 62 Windows Vista Connect Wi-Fi, 53 Connect Wi-Fi, 28 Wii U WLAN Connect Wi-Fi, 53 Activate, 23 Windows PC Overview, 23 Remove USB connection, 63 Software Installation, 64 Connect Wi-Fi, 60 Index...
-
Page 75: Fcc Regulations
FCC Regulations: This device complies with part 15 of the FCC Rules. Operation is subject to the following two conditions: (1) This device may not cause harmful interference, and (2) This device must accept any interference received, including interference that may cause undesired operation. - Page 76 general, the closer you are to a wireless base station antenna, the lower the power output. The exposure standard for wireless employs a unit of measurement known as the Specific Absorption Rate, or SAR. The SAR limit set by the FCC is 1.6W/kg. The FCC has granted an Equipment Authorization for this model device with all reported SAR levels evaluated as in compliance with the FCC RF exposure guidelines.
Need help?
Do you have a question about the MF975s and is the answer not in the manual?
Questions and answers