
Related Manuals for Polaroid 43GSR4100KN


Summary of Contents for Polaroid 43GSR4100KN
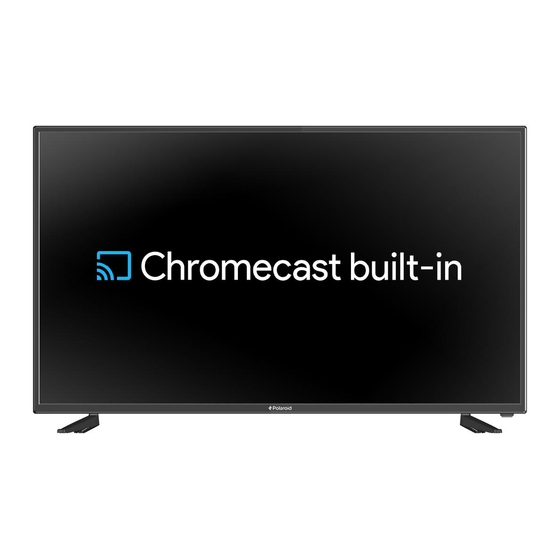
- Page 1 43" 2160p (4K), LED Chromecast built-in TV 49" 2160p (4K), LED Chromecast built-in TV 55" 2160p (4K), LED Chromecast built-in TV 65" 2160p (4K), LED Chromecast built-in TV 75" 2160p (4K), LED Chromecast built-in TV...
-
Page 3: Table Of Contents
Contents IMPORTANT SAFETY INSTRUCTIONS ........2 SAFETY INFORMATION . -
Page 4: Important Safety Instructions
Important Safety Instructions • Read these instructions – All the safety and operating instructions should be read before this product is operated. • Keep these instructions – The safety and operating instructions should be retained for future reference. • Heed all warnings – All warnings on the appliance and in the operating instructions should be adhered to. -
Page 5: Safety Information
Safety Information To ensure reliable and safe operation of this equipment, please read carefully all the instructions in this user guide, especially the safety information below. Electrical safety • The TV set should only be connected to a main power supply with voltage that matches the label at the rear of the product. -
Page 6: What Is Included/Tv Placement Setup
Remote Control 6 Screws TV Set with Batteries User’s Manual Base Stand TV Stand Installation/Removal 43GSR4100KN 200mm 200mm Four mounting holes (size M6 screw) Wall Mounting The TV is provided with mounting holes for a VESA approved wall mounting bracket (NOT SUPPLIED). - Page 7 49GSR4100KM 200mm 200mm Four mounting holes (size M6 screw) Wall Mounting The TV is provided with mounting holes for a VESA approved wall mounting bracket (NOT SUPPLIED). The VESA mounting pattern is 200 x 200mm. Remove the screws holding the base to the base bracket and lift the base away (do not remove the base mounting brackets).
- Page 8 Wall Mounting The TV is provided with mounting holes for a VESA approved wall mounting bracket (NOT SUPPLIED). The VESA mounting pattern is 200 x 200mm. Remove the screws holding the base to the base bracket and lift the base away (do not remove the base mounting brackets).
-
Page 9: Front/Back View
75GSR4100KL 600mm 400mm Four mounting holes (size M6 screw) Wall Mounting The TV is provided with mounting holes for a VESA approved wall mounting bracket (NOT SUPPLIED). The VESA mounting pattern is 600 x 400mm. Remove the screws holding the base to the base bracket and lift the base away (do not remove the base mounting brackets). -
Page 10: Button Functions
VOL+ MENU SOURCE POWER Button Functions POWER: Turn on TV/Standby SOURCE: Audio/Video input source selection MENU: Open settings menu VOL-: Decrease volume VOL+: Increase volume CH-: Previous channel CH+: Next channel IR RECEIVER: Receives infrared signals from the remote control INDICATOR LED: Status indicator 75”... -
Page 11: Connecting To External Devices
Connecting to External Devices Connecting external devices to your LED TV HDMI3 HDMI2 (ARC) HDMI1 (MHL) OPTICAL Headphone 0.5A LAN:Network connection port. HDMI :Connect to High-Definition(HD) signal output device.(HDMI can support 4K60Hz Signal) RF: Connect to the antenna(75ff VHF/UHF) socket with the RF coaxial cable. OPTICAL:Connect a digital sound system to this jack. -
Page 12: Remote Control
Remote Control 1. POWER Turns the LED TV on and off (standby mode). 2. MTS In NTSC receiving mode, press to select. the audio modes to Mono, Stereo or SAP. In ATSC Digital receiving mode, press to display theaudio selection menu on the screen. Using the P.MODE S.MODE SLEEP... -
Page 13: Install The Batteries
22. FAV+.Next favourite channel. 23. CC Press repeatedly to activate and/or set the CC (Closed Caption Display) modes. 24. FAV. Show the list of favorite channels. 25.FAV-.Previous favourite channel. Install the Batteries If the remote control fails to operate the TV functions, replace the batteries in the remote control. -
Page 14: Google Cast
Chromecast built-in Turning on your TV for the first time The first time you turn on your TV, the initial setup wizard opens. The wizard guides you through setting up your TV including the Chromecast built-in setup, menu language, time zone, TV signal source, and the channel list. - Page 15 4 Type google.com/cast/setup in the search bar of your device’s browser. 5 Tap ACCEPT to agree to the Terms of Service and Privacy Policy.
- Page 16 6 Touch DEVICES and choose the TV with Google Home you want to set up. Touch SET UP. 7 Touch CONTINUE.
- Page 17 8 Make sure the code on your device matches the code on your TV. Touch I SEE THE CODE. 9 Optional: Change the name of your TV with Chromecast built-in to something distinct by deleting the current name and typing in a new name. Note: Guest mode and Send Chromecast built-in device usage data and crash reports to Google are enabled by default.
- Page 18 10 Choose the Wi-Fi network you want to connect to your TV with Chromecast built-in. Enter password.Touch CONTINUE. 11 If your TV with Chromecast built-in needs an update, it will automatically update at this time and will let you know when the update is complete.Touch CONTINUE.
- Page 19 12 Touch SIGN IN. 13 Touch CONTINUE. 14 Touch LEARN HOW TO CAST. 15 Choose a sample clip to learn how to Cast. Important Note:please make sure yourAndroid/IOS device is connected to the same wifi network as the tv.
-
Page 20: Casting A Video, Movie, Or Tv Show
Casting a video, movie, or TV show After you set up Chromecast built-in on your TV and mobile device, you are ready to cast videos, movies and TV shows. 1 On your mobile device, make sure that Wifi is turned on. 2 Open a Chromecast built-in-enabled app. - Page 21 4 Type google.com/cast/setup in the search bar of your device’s browser. 5 Open bluetooth,if you don’t want open bluetooth,pls skip to step 7.
- Page 22 6 Touch DEVICES and choose the TV with Google Home you want to set up. Touch SETUP,skip to step 8. 7 Connect the wifi which blongs to Chromecast built-in.
- Page 23 8 Touch CONTINUE. 9 Touch I SEE THE CODE 10 Touch OK; Optional: Change the name of your TV with Chromecast built-in to something distinct by deleting the current name and typing in a new name. Note: Guest mode and Send Chromecast built-in device usage data and crash reports to Google are enabled by default.
- Page 24 11 Choose the Wi-Fi network you want to connect to your TV with Chromecast built-in. Enter password. Touch CONTINUE. 12 Touch SIGN IN.Touch CONTINUE.
- Page 25 13 Touch LEARN HOW TO CAST 14 Choose a sample clip to learn how to Cast. If you still have questions,please visit www.polaroidhdtv.com or google.com/cast/help Or call our help line(USA):1-888-636-8599...
-
Page 26: Tv Setting
TV Setting Main Menu Operation Press MENU to display the main menu or return to the previous menu or close the main menu. Press ◄ / ► to highlight the desired menu icon, and press ENTER to select. If no buttons are pressed, the menu will close automatically after about 10 seconds. Input Channel Picture... -
Page 27: Channel Menu
Channel Menu Press MENU to enter the main menu, Press ◄ / ► button to select. Press ENTER / ▼ to enter. Press MENU again to exit or back to parent menu. Press ▼ / ▲ button to select among Air/Cable / Auto Scan / Signal Information/Channel List . - Page 28 Only available when there is signal under DTV. After finishing your adjustment, Press MENU button to return back to the previous menu. Channel List Display your program list. Press ENTER button to enter.
-
Page 29: Picture Menu
Picture menu Press MENU to enter the main menu, Press ◄ / ►button to select. Press ENTER to enter. Press MENU again to exit or back to parent menu. Press ▼ / ▲ button to select among Picture Mode /Brightness/ Contrast / Color/ Tint / Sharpness / Color Temperature/Advanced Settings. -
Page 30: Color Temperature
Contrast Adjust the highlight intensity of the picture, but the shadow of the picture is invariable. Press ◄ / ► button to adjust. Color Adjust the saturation of the color based on your own like. Press ◄ / ► button to adjust. Tint Adjust the hue(Red,Green,Blue) of the picture. -
Page 31: Audio Menu
Audio Menu Press MENU to enter the main menu, Press ◄ / ► button to select. Press ENTER to enter. Press MENU again to exit or back to parent menu. Press ▼ / ▲ button to select among Sound Mode/ Sound EQ / Balance / Audio Language /Digital Audio Output/AVL. -
Page 32: Audio Language
Balance Adjust the balance between left and right speakers to adapt to your listening position. Press ◄ / ► button to adjust. Audio Language Select the language supported by the chosen digital channel. It is available Only in TV. Press ◄ / ► button to select(English / French / Spanish). Digital Audio Output Send digital audio to external audio system. -
Page 33: Chromecast Built-In
Chromecast built-in Press MENU to enter the main menu, Press ◄ / ► button to select. Press ENTER to enter. Press EXIT to exit or back to parent menu. For detail please refer to page 12~23. Lock menu Press MENU to enter the main menu, Press ◄ / ► button to select. Press ENTER to enter. -
Page 34: Change Password
Enter your 4- digital password. Default password is 1470 or 0000,and if forget what you set, please call the service center. Change Password Enter a new 4-digital password then re-enter it to confirm. Press ENTER button to enter. Press ◄ button to clear. Press ►... -
Page 35: Time Menu
US Rating Restrict movie and TV programs by US Ratings. Only available when "System Lock" is "on". Press ENTER button to enter. Press MENU button to back. For the United States, the rating setting basically include the following options: TV, MPAA. Canada Rating Restrict movie and TV programs by Canadian Ratings. -
Page 36: Sleep Timer
Sleep Timer Set a timer for the TV to turn off automatically. Press ◄ / ► button to select(Off / 10min/20min / 30min / 60min / 90min / 120min/180min/240min). Settings Menu Press MENU to enter the main menu,Press ◄ / ► button to select. Press ENTER to enter. - Page 37 Menu language Select an OSD menu language can be displayed.Default English is selected as menu language. Press ◄ / ►button to select language.(English / Français / Español ) OSD Time out Adjust the duration of the OSD (on screen display) menu. Press ◄...
-
Page 38: Select Language
HDMI Color range Press ◄ / ► button to select Auto/0-255/16-235. HDMI EDID Press ◄ / ► button to select defult/1.4/2.0. Setup Wizard Connect RF cable to your TV Aerial socket. Select Language Press ◄ / ► button to select the language to be used for menus and message. Press ▼... -
Page 39: Auto Scan
Auto Scan Press ◄ / ► button to select the antenna type. Press ▼ / ▲ button to select and press ENTER button to start auto scan. Restore Default Change power on options or reset TV to factory default. Press ENTER button to enter. Active standby mode Press ◄... -
Page 40: Settings Menu
Help menu Press MENU to enter the main menu, Press ◄ / ► button to select. Press ENTER to enter. Press MENU again to exit or back to parent menu. Press ▼ / ▲ button to select among Quick Setup Guide/ Wifi-Mac/WIFI-IP Addr/Ethemet-Mac/Ethemet-IP Addr/ Netifilx Esn/Software Version/Google Cast Version/Model name/Serial Number. -
Page 41: Troubleshooting
Troubleshooting If the device performance fails, check whether the detected problem is in the following table. If your device still fails, contact customer service. SYMPTOM POSSIBLE CAUSE REMEDY TV – No signal input Signal cable is loose or not Ensure signal cable is not loose connected. -
Page 42: Specifications
Specifications Specifications Mode 43GSR4100KN TV System ATSC Maximum 3840x2160 Brightness 240 cd/m2 Static Contrast 3000:1 Response Time 8 ms Consumption 150W Power Supply AC 100-120V- 50/60Hz Connectivity HDMl input x 3 RF Antenna Input Google Cast LAN Output Headphones Output... - Page 43 Mode 55GSR4100KM TV System ATSC Maximum 3840x2160 Brightness 300 cd/m2 Static Contrast 6000:1 Response Time 6 ms Consumption 150W Power Supply AC 100-120V- 50/60Hz Connectivity HDMl input x 3 RF Antenna Input Google Cast LAN Output Headphones Output OPTICAL Output Data Interface Supported System Files FAT32 and FAT16...
- Page 44 Mode 75GSR4100KL TV System ATSC Maximum 3840x2160 Brightness 400 cd/m2 Static Contrast 5000:1 Response Time 6 ms Consumption 300W Power Supply AC 100-120V- 50/60Hz Connectivity HDMl input x 3 RF Antenna Input Chromecast built-in LAN Output Headphones Output OPTICAL Output Data Interface Supported System Files FAT32 and FAT16...
Need help?
Do you have a question about the 43GSR4100KN and is the answer not in the manual?
Questions and answers