
Related Manuals for Domain DM-DV5768NVU


Summary of Contents for Domain DM-DV5768NVU
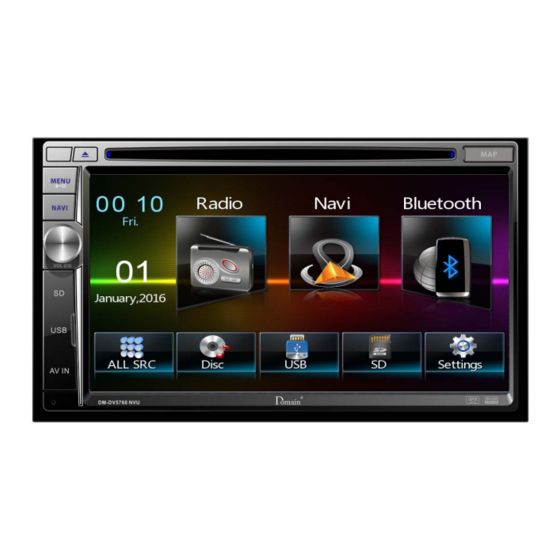
- Page 1 6.75 inch DVD/VCD/CD/MP3/USB/SD PLAYER with built in BLUETOOTH/GPS and FM/AM TUNER DM-DV5768NVU INSTRUCTION MANUAL...
-
Page 2: Safety Precautions
Safety Precautions Thank you for purchasing this product. Do not change the fuse on the power Please read through these operating cord without professional guidance. instructions so you will know how to Using an improper fuse may cause operate your model properly. Please damage to this unit or even cause fire. -
Page 3: Expanding Systems
Safety Precautions 1. Never disassemble or adjust the unit without any professional guidance. For details, please consult any professional car shop / dealer for inquiry. 2. If the front panel or TFT monitor is dirty, please use a clean silicone cloth and neutral detergent to wipe off the spot. -
Page 4: Table Of Contents
Contents Safety Precautions ........1 Play/Pause..........12 Previous/Next ........12 Contents ............3 Search for a Folder .......12 Before Using ..........4 Repeat ..........12 Front Panel ..........4 Repeat A-B ...........13 Remote Control........5 Shuffle (Random) Play......13 Notes on Remote Control Usage ....6 Video Setup ..........13 Uninstall Battery........6 Elapsed Time ........13 Install Battery ..........6 Direct Track Entry .........13... -
Page 5: Before Using
Before Using Front Panel Notice: The graphic in this manual is for reference only, and may be different from the actual unit. Reference to actual unit is suggested. 1. [ ] Button Press to eject a disc. . [MENU/ ] Button Press to switch between the main menu and current source. -
Page 6: Remote Control
Before Using Remote Control 1. Select playing mode 2. Eject the disc 3. Enter the main menu of the disc EJECT 4. Enter the title menu of the disc 5. Zoom in /out on an image 6. Select radio band 7. -
Page 7: Notes On Remote Control Usage
Before Using Notes on Remote Control Usage 1. Aim the remote control at the remote sensor on the unit. 2. Replace the battery from the remote control or insert a battery insulator if the battery has not been used for a month or longer. 3. -
Page 8: Basic Operations
Basic Operations Parking Brake Inhibit Playing Source Selection • When the “BRAKE” cable is connected to Press the [ MENU ] button on the front panel the brake switch, the display on the TFT or the [ SRC ] button on the remote to change monitor will display video only when the between available playing sources. -
Page 9: Select Preset Equalizer
Basic Operations Select Preset Equalizer Adjust Fader/Balance 1. Enter the EQ setup mode You can adjust front/back/left/right balance of the speaker and the subwoofer volume to Touch the [ ] icon in the user interface get balanced listening effect according to the and the EQ setup interface will display on surroundings and your interest. -
Page 10: Set Date /Time
Basic Operations Set Date /Time Set Time 1. Touch [ Time ]. 1. Touch [ 2. Touch the time on the screen, a submenu 2. Touch [ Time ]. is displayed. The date/time setup menu is displayed. 3. Touch [ ] or [ ] to set hour and minute. -
Page 11: Radio Mode
Radio Mode Tuner TFT Display Select Radio as Playing Source Open the Source Menu and then touch [Radio]. Select One Radio Band Press the [ BAND ] button on the remote or touch the [ ] icon on the user interface to select one radio band among FM1, FM2, FM3, AM1 and AM2. -
Page 12: Preset Station
Radio Mode Playback Mode Preset Station Eject a Disc The unit has 5 bands, such as FM1, FM2, Press the [ ] button on the front panel to FM3, AM1, AM2, and each band can store 6 eject the disc. When the disc is ejected, the stations;... -
Page 13: Connect A Usb Device
Playback Mode Connect a USB Device Previous/Next 1. Open the USB door. Touch [ ] / [ ] icon on the screen to skip 2. Insert the USB device into the USB slot. to previous / next track / chapter. Play starts automatically. -
Page 14: Repeat A-B
Playback Mode You can repeat a specific of video file (repeat To select a track directly, touch the [ A-B). icon on screen control to displaythe direct 1. Touch the screen to display control menu, entry menu. Enter the desired track using the if necessary. -
Page 15: Bluetooth Mode
Bluetooth Mode Disconnect Bluetooth Device You can make or receive phone calls with Bluetooth-enabled phones through the To disconnect one device, touch [ unit. You can also listen to music from a Bluetooth-enabled device. Pair the Bluetooth-enabled Devices To connect your Bluetooth device to the unit, you need to pair the device to the unit. -
Page 16: Adjust Bluetooth Settings
Bluetooth Mode connect” function. ∙ [Auto Answer]: To turn on or off “Auto answer” function. ∙ [Pair Password]: To set paring code. ∙ [Phone Book]: To synchronize phone book, touch [ Download ] on the sub-menu popped out. Phonebook sync may take several minutes to load on initial setup. -
Page 17: Settings
Settings Display System 1. Touch the upper left corner to display the main menu. 2. Touch [ Settings ]. The settings menu is displayed. Adjust General Settings 1. Touch [ General ], if necessary. 2. Touch to select a setting. 3. -
Page 18: Adjust Sound Settings
Settings Adjust Sound Settings 1. Touch [Sound]. 2. Touch an option repeatedly to select. 3. Touch the upper left corner of the screen to exit. Sound settings Options Description Flat 80Hz Sub Woofer Filter Touch to select a crossover frequency. 120Hz 160Hz When listening to music at low volumes, this feature will selectively boost certain... -
Page 19: Adjust Volume Settings
Settings Adjust Volume Settings You can set different volumes for different modes. 1. Touch [Volume]. The volume setting sub-menu is displayed. 2. Touch on a source. ∙ [Media] ∙ [Radio] ∙ [Bluetooth] ∙ [AV-IN1] ∙ [AV-IN2] 3. Touch [ ] or [ ] to assign value: 0 to 12. -
Page 20: Other Modes
Other Modes Listen to Other Devices Replace a Fuse You can connect an external audio/video If there is no power, the fuse may be device to the unit. damaged and need to be replaced. 1. Connect the external device with the 1. -
Page 21: Specifications
Specifications General Reference Supply Voltage ..............12V(DC) Operating Voltage Range ............10.5 - 15.8V(DC) Max Operating Current .................15A Maximum Output Power ............50 W x 4 channels RMS Power Output ............... 25W x 4 channels Grounding System ............ Car Battery Negative Pole Dimensions(WXHXD) .......... -
Page 22: Region Code
Specifications Supported Formats: ·USB or memory file format: FAT16, FAT32 ·Mp3 bit rate(date rate): 32-320 Kbps and variable bit rate ·WMA v9 or earlier ·Directory nesting up to a maximum of 8 levels ·Number of albums/folders: maximum 99 ·Number of tracks/titles: maximum 999 ·ID3 tag v2.0 or later ·File name in Unicode UTF8(maximum length:128 bytes) Unsupported Formats:... -
Page 23: Troubleshooting
Troubleshooting What appears to be a problem is not always serious. Please check the following points before calling a service center. Problem Cause Corrective action General Unit fuse blown. Install new fuse with correct rating. Car battery fuse blown. Install new fuse with correct rating. Unit does not power on Illegal operation Reset the unit. -
Page 24: Installation
Installation Disconnecting the Battery To prevent a short circuit, be sure to turn off the ignition and remove the negative (-) battery cable prior to installation. Note: If the unit is to be installed in a car equipped with an on-board drive or navigation computer, do not disconnect the battery cable. - Page 25 Installation Using the Cosmetic Trim Ring One cosmetic trim rings is packaged with the head unit for installation flexibility. This unit will fit into most import dashes with little or no modification to the dash board/cavity. Some US domestic vehicle dashes will accept a Double-DIN chassis, but there is usually a small gap between the radio and dash piece after installation is complete.
-
Page 26: Wire Connections
Wire Connections... - Page 27 CLASS 1 LASER PRODUCT PN: 127075007067...
Need help?
Do you have a question about the DM-DV5768NVU and is the answer not in the manual?
Questions and answers