
Related Manuals for Domain DM-DV6768NVS


Summary of Contents for Domain DM-DV6768NVS
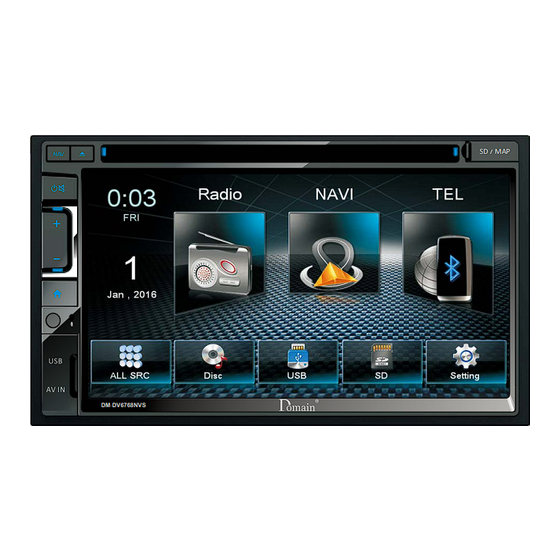
- Page 1 6.75 inch DVD/VCD/CD/MP3/USB/SD PLAYER with built in BLUETOOTH/GPS and FM/AM TUNER SMARTPHONE LINK SD MAP DM-DV6768NVS DM-DV6768NVS INSTRUCTION MANUAL...
-
Page 2: Safety Precautions
Safety Precautions Thank you for purchasing this product. Do not change the fuse on the power Please read through these operating cord without professional guidance, instructions so you will know how to using improper fuse may cause damage operate your model properly.Please to this unit or even cause fire. -
Page 3: Expanding Systems
Safety Precautions 1. Never disassemble or adjust the unit without professional guidance. For details, please consult an authorised service provider or dealer. 2. If the front panel or TFT monitor is dirty, please use a clean silicone cloth and neutral detergent to clean. -
Page 4: Table Of Contents
Contents Safety Precautions ........1 Bluetooth Mode ........16 Expanding Systems ........2 Pair the Bluetooth-enabled Devices ..16 Disconnect Bluetooth Device ....16 Before Using ..........4 Make a Call ...........16 Front Panel ..........4 Receive a Call........17 Remote Control........5 Adjust Bluetooth Settings......17 Notes on Remote Control Usage ....6 Music Mode ..........17 Basic Operations ........7 FYLink ............18... -
Page 5: Before Using
Before Using Front Panel Notice: The graphics in this manual are for reference purposes only and may differ somewhat from the actual unit. 1. [NAV] Button: Press to switch to navigation mode. 2. [ ] knob: Press to turn the unit ON. Press and hold to turn the unit OFF. When on, press momentarily to activate the MUTE function. -
Page 6: Remote Control
Before Using Remote Control 1. Return to the home menu 2. Eject the disc 3. Access to tuner source 4. Access to disc source 5. - Search an available radio station by decreasing tuning frequency - Select the previous chapter/track for playback 6. -
Page 7: Notes On Remote Control Usage
Before Using Notes on Remote Control Usage 1. Aim the remote control at the remote sensor on the unit. 2. Replace the battery from the remote control or insert a battery insulator if the battery has not been used for a month or longer. 3. -
Page 8: Basic Operations
Basic Operations Parking Brake Inhibit • When the “BRAKE” cable is connected to the brake switch, the video playback will be controlled by driving status, system setup and input video sources. • Parking brake function is overridden when the video source is set to REVERSE. •... -
Page 9: Select Preset Equalizer
Basic Operations Select Preset Equalizer 1. Enter the EQ setup menu Touch the EQ icon in the user interface and the EQ setup interface will display on the screen. 2. Select EQ mode Touch the desired EQ selection: [ User ] / [ Flat ] / [ Classic ] / [ Rock ] / [ Jazz ] / [ Techno ] / [ Pop ], and the EQ mode will change. -
Page 10: Set Date /Time
Basic Operations Set Date /Time 1. Touch [ ] on the playing source menu. 2. Touch [ Clock ]. The date/time setup menu is displayed. Set Date 1. Touch [ Date ]. 2. Touch the date information on the screen . A submenu is displayed. -
Page 11: Radio Mode
Radio Mode Tuner Menu 1. Touch to view the SOURCE MENU. 2. To view all the stored stations 3. Preset stations list of current band 4. Clock 5. Current station frequency 6. Current radio band 7. Touch to view more buttons 8. -
Page 12: Preset Station
Radio Mode Preset Station The unit has 5 bands, such as FM1, FM2, FM3, AM1, AM2, and each band can store 6 stations; hence the unit can store 30 stations in total. Search Stations Automatically Touch [ ] to search and store the 6 strongest stations in the current band automatically. -
Page 13: Playback Mode
Playback Mode Load a Disc You can play video, audio or images stored on the following discs: • DVD Video, DVD-R, DVD-RW • VCD • Audio CD, CD-R, CD-RW Note: Ensure that the disc contains playable content. Eject a Disc Press the [ ] key on the front panel to eject the disc. -
Page 14: Previous/Next
Playback Mode To resume play, touch [ 3. Skip to previous / next track / chapter, press [ ] / [ ] key. Previous/Next Touch [ ] / [ ] key on the screen to skip to previous / next track / chapter. -
Page 15: Repeat A-B
Playback Mode For CD/MP3 files: 1. Touch anywhere except the upper left corner to display menu on the screen, if necessary. 2. Touch [ ] repeatedly: ] Repeat single: Play the current single repeatedly. ] Repeat folder: Play all in the current folder. ] Repeat all: Play all in the disc or storage repeatedly. -
Page 16: Video Setup
Playback Mode Video Setup Touch [ ] to access video setup mode, touch [ ] or [ ] to set the desired effect. You may set the brightness,contrast, saturation, and hue of the video output from 1 to 20. Playback Information Touch the screen when playing back DVD and VCD discs and the playback information will be displayed on the top area of the TFT. -
Page 17: Bluetooth Mode
Bluetooth Mode You can make or receive phone calls with Bluetooth-enabled phones through the unit. You can also listen to music from a Bluetooth- enabled device. Pair the Bluetooth-enabled Devices To connect your Bluetooth device to the unit, you need to pair the device to the unit. -
Page 18: Receive A Call
Bluetooth Mode Receive a Call 1. If there is an incoming call, the screen will appear “Incoming”. 2. You may touch the screen to select [ Hang up ] or [ Answer ]. • You can select to receive calls automatically by set [Auto answer] to [On] status. -
Page 19: Fylink
FYLink Overview of SmartLink The system of the car device is WinCE version, which supports the connection between the car device and Smart phone, and the connection way is standard USB interface connection. And you can also control your phone by the car device, such as receiving calls, dialing calls, listening to the music and watching movies or pictures from your phone, as well using navigation from the Smart phone to the screen of the car device. -
Page 20: Connect With Iphone
FYLink • According to the different mobile phone” Media library” and “Video” program support formats, it is not all the video files copied to mobile phone can be identified and played. According to the different equipment function, not all video files of all formats can be played in vehicle terminal smoothly. -
Page 21: Settings
Settings Display System 1. Touch the upper left corner to display the main menu. 2. Touch [ Setting ]. The settings menu is displayed. Adjust General Settings 1. Touch [ General ], if necessary. 2. Touch to highlight a setting. 3. -
Page 22: Adjust Time Settings
Settings Adjust Time Settings 1. Touch [ Clock ]. 2. Touch an option repeatedly to select: 3. Touch the upper left corner of the screen to exit. Time settings Options Description Year/ Touch [ ] or [ ] to set year, month and day. Date Month/Day Clock... -
Page 23: Adjust Dvd Rating
Settings Adjust DVD Rating 1. Touch [DVD]. 2. Touch an option repeatedly to select. 3. Touch the upper left corner of the screen to exit. DVD rating Options Description Set password Set password to restrict the play of discs. The default password is 4321. Kid safe Acceptable for children. -
Page 24: Other Modes
Other Modes Listen to Other Devices You can connect an external audio/video device to the unit. 1. Connect the external device with the supplied AV cable. 2. Touch the upper left corner to display the main menu. 3. Touch [AV-IN1] / [AV-IN2 ] to access external device. Reset When the unit hangs up, you can reset it. -
Page 25: Specifications
Specifications General Reference Supply Voltage ..............12V(DC) Operating Voltage Range ............10.5 - 15.8V(DC) Max Operating Current .................15A Grounding System ................Negative Dimensions(WXHXD) ........... 178 x 101.5 x 166.9mm Weight(main unit) ..................1.84kg Signal Noise Ratio ................≥55dB Residual Noise Sensitivity (S/N=30dB) ..........18dBμV Frequency Response (±3dB) ...........20Hz~12.5KHz Station Seeking Level .............. -
Page 26: Region Code
Specifications Supported Formats: ·USB or memory file format: FAT16,FAT32 ·Mp3 bit rate(date rate): 32-320 Kbps and variable bit rate ·Directory nesting up to a maximum of 8 levels ·Number of albums/folders: maximum 99 ·Number of tracks/titles: maximum 999 ·ID3 tag v2.0 or later ·File name in Unicode UTF8(maximum length:128 bytes) Unsupported Formates: ·... -
Page 27: Troubleshooting
Troubleshooting What appears to be a problem is not always serious. Please check the following points before calling a service center. Problem Cause Corrective action General Unit fuse blown. Install new fuse with correct rating. Unit does not power on Car battery fuse blown. -
Page 28: Installation
Installation Disconnecting the Battery To prevent a short circuit, be sure to turn off the ignition and remove the negative (-) battery cable prior to installation. Note: If the unit is to be installed in a car equipped with an on-board drive or navigation computer, do not disconnect the battery cable. -
Page 29: Wire Connections
Wire Connections VIDEO OUT CAMERA IN DVR ACC DVR B+ DVR GND DVR VIDEO IN DVR BUS... - Page 30 CLASS 1 LASER PRODUCT PN: 127075007082...
Need help?
Do you have a question about the DM-DV6768NVS and is the answer not in the manual?
Questions and answers
Yes please my Domain car stereo the screen show like computer screen
The screen on your Domain DM-DV6768NVS car stereo looks like a computer screen because it is a TFT monitor, which is a type of LCD screen commonly used in electronic displays, including computers and car stereos.
This answer is automatically generated