Table of Contents
Advertisement
Quick Links
Owner's Manual
201a
Before using this unit, carefully read the sections entitled: "USING THE UNIT SAFELY"
and "IMPORTANT NOTES" (p. 2; p. 5). These sections provide important information
concerning the proper operation of the unit. Additionally, in order to feel assured that
you have gained a good grasp of every feature provided by your new unit, Owner's
manual should be read in its entirety. The manual should be saved and kept on hand
as a convenient reference.
202
Copyright © 2008 ROLAND CORPORATION
All rights reserved. No part of this publication may be reproduced in any form without the
written permission of ROLAND CORPORATION.
Advertisement
Table of Contents

Related Manuals for Roland RMP-5


Summary of Contents for Roland RMP-5
- Page 1 The manual should be saved and kept on hand as a convenient reference. Copyright © 2008 ROLAND CORPORATION All rights reserved. No part of this publication may be reproduced in any form without the...
-
Page 2: Using The Unit Safely
Roland Service Center, or - - - - - - - - - - - - - - - - - - - - - - - - - - - - - - - - - - - - - - - - - - - - - - - - - - - -... - Page 3 - - - - - - - - - - - - - - - - - - - - - - - - - - - - - - - - - - - - - - - - - - - - - - - - - - - - • Before using the unit in a foreign country, consult with your retailer, the nearest Roland Service Center, or an authorized Roland distributor, as listed on the “Information” page.
- Page 4 101c • Carefully follow the installation instructions for • This unit (RMP-5) for use only with Roland stand PDS- batteries, and make sure you observe the correct 2. Use with other stands is capable of resulting in polarity. instability causing possible injury.
-
Page 5: Important Notes
To Roland assumes no liability concerning such loss of data. alleviate the problem, change the orientation of this unit; or move it farther away from the source of interference. - Page 6 IMPORTANT NOTES • When connecting / disconnecting all cables, grasp the connector itself—never pull on the cable. This way you will avoid causing shorts, or damage to the cable’s internal elements. 558a • To avoid disturbing your neighbors, try to keep the unit’s volume at reasonable levels.
-
Page 7: Table Of Contents
Loading the Battery ..................................9 Connecting the AC Adaptor ..............................9 Adjusting the Head Tension ..............................9 Mounting the RMP-5 on the Stand (PDS-2: Sold Separately) ................. 10 Turning the Power On and Off................................10 Basic Operation ....................11 Striking the pad to produce sound ..............................11 Using the Metronome.................................... -
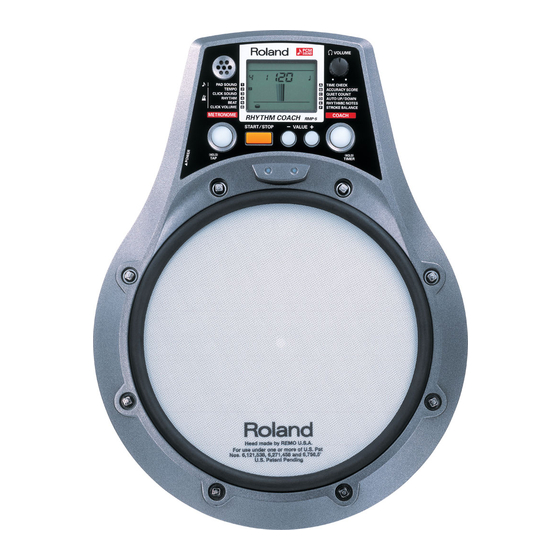
Page 8: Panel Descriptions
When this button is held down, the timer icon ( ) lights in Connect other pads here. the display, and the RMP-5 switches to Timer mode (p. 16). An optional PCS-31L cable allows you to use cymbal pads and kick trigger pads. For more detailed information, refer to “Using VALUE [+]/[-] button the RMP-5 with Additional Pads”... -
Page 9: Getting Ready
Adjusting the Head Tension compartment (located on the bottom of the unit). BEFORE playing the RMP-5, you must tune the head by using the Connect the snap cord to the battery, and place it included drum key to your preferred playing tension. -
Page 10: Mounting The Rmp-5 On The Stand (Pds-2: Sold Separately)
Turn down the volume control on each of the screw. devices in your system. Adjust the angle of the Turn on the power of the RMP-5. pad. Turn on the connected amp or audio system, and If you connect an AC adjust the volume to the desired level. -
Page 11: Basic Operation
The pad sounds are arranged by type of instrument: backing style for your workout. snare, kick, hi-hat, tom, etc. The RMP-5 contains 54 built-in sounds. For details, refer to the Pad Sound list A beep tone is played when nothing is at the end of this manual. -
Page 12: Using Tap Tempo To Set The Metronome
Using the Rhythm Coach Mode You can set the metronome tempo by playing the on-board pad The RMP-5’s Rhythm Coach function is a unique set of exercises or any pad connected to the EXT TRIG IN jack. specifically designed to help build speed, accuracy, stamina, and better timing skills. -
Page 13: Time Check
Basic Operation TIME CHECK ACCURACY SCORE When you press the [COACH] button and switch to Rhythm This mode will actually give you a “score” on your timing Coach Mode, the Time Check result appears in the display. The accuracy. Time Check mode setting made here is used with all other modes. The result is indicated in the display. -
Page 14: Quiet Count
This is the Speed Check. With Speed Check, if you play correctly for eight measures, the RMP-5 will acknowl- edge this and advance 5 BPM faster. When finished, press the [START/STOP] button This continues until it reaches the metronome’s maxi- again. -
Page 15: Rhythmic Notes
Basic Operation RHYTHMIC NOTES STROKE BALANCE This function is very helpful when used to practice change-ups, or This function checks the differences in playing dynamics between to improve your grasp of note lengths. The rhythm type will the right and left hands (or one hand). change every two measures. -
Page 16: Advanced Use
Selecting “E-16 or “H-16” in TIME CHECK allows you to check the Pressing the [METRONOME] button at this point timing of sixteenth-notes. switches the RMP-5 to Metronome mode, and In this case, the timing of all of the sixteenth-notes is checked. pressing the [COACH] button to Rhythm Coach You can also use the following method to check the timing of the mode. -
Page 17: Using The Rmp-5 With Additional Pads
Felt washer included with CY-8 Do not use the wing nut included with the CY-8 or the washer The RMP-5 must be set to the following settings. included with the PDS-2. Input Mode (p. 20) Stopper included... -
Page 18: Connecting Other Pads
When connecting a cymbal pad and kick pad, refer to parameters. P.17. You cannot change the RMP-5 pad’s trigger type. This is If connecting rim shot capable pads like a PD-85, PD- indicated as “---” in the display. 125 etc., refer to the next section, “Connecting Pads Capable of Playing Rim Shots”... -
Page 19: Connecting Pads Capable Of Playing Rim Shots
To set the rim sound, strike the pad’s rim. The “EXT2” indicator flashes. Attached cable (stereo) PD-85 Select the sound assigned to the rim. While simultaneously holding down the [METRONOME] and [COACH] buttons, turn on the power. The RMP-5 is now in the parameter setting mode. -
Page 20: Parameter List
Using the RMP-5 with Additional Pads Parameter List While simultaneously holding down the [METRONOME] and [COACH] buttons, turn on the power. Afterwards, press the [COACH] button to select the parameter, then press the [+] or [-] button to set the value. -
Page 21: Mask Time
Using the RMP-5 with Additional Pads (Log 1, Log 2)S Rim Sensitivity Compared to Linear, wider volume change will occur for softer hits. When using a pad capable of playing rim shots, you can adjust the Rim Sensitivity. (Spline) Setting this to a higher value makes it easier to trigger the sound assigned to the rim. -
Page 22: Appendices
Setting this to a higher value makes the sensitivity higher. used. When finished, press the [START/STOP] button. Replacing the Head The setting is stored, and then the RMP-5 returns to the normal screen. When replacing or tuning, use the included drum key. Restoring the Factory Settings Remove all tuning bolts. -
Page 23: Specifications
Click Sounds 15 types * We recommend replacement with alkaline batteries. Rhythm Types 24 types * The batteries included with the RMP-5 are Patterns 22 types intended to provide confirmation that the unit Beat 24 types functions properly. Battery life may be shorter than that indicated above. -
Page 24: Let's Practice With Rmp-5
This just might be the ideal thing for people with short attention spans! So let’s take a look at how you can use the RMP-5 Rhythm Coach to practice effectively. Practice a lot, and get good! Author Profile: Akira Yamazaki Professional Drummer, V-Drums Demonstrator, born in Osaka/Japan. - Page 25 This menu lets you change the sound you’ll hear when you strike the pad with headphones or speakers connected to the RMP-5. You can practice anytime anywhere using the RMP-5’s metronome and its pad with a mesh head, but if you connect headphones or a sound system, you’ll be able to practice while enjoying realistic drum sounds that...
- Page 26 Let’s make your practicing more effective and musical by switching the time signature. The RMP-5’s metronome is not limited to quarter notes; it can play at any timing — triplets with the middle beat omitted, triplets with only the last beat sounded, sixteenth note backbeats. By using the metronome with these settings, you can make your practicing even more effective.
- Page 27 In the example printed here, the right hand plays the hi-hat, the left hand plays the snare, and the foot plays the kick. However if you’re practicing only on the RMP-5 itself, you can just let both hands strike near the center of the pad, and move your foot lightly on the floor.
- Page 28 Dynamics means to use changes in intensity to create expression in your performance. Stable, lively, and expressive — easy to say, and hard to master. But the RMP-5 Rhythm Coach will help you build your skill in these elements. For specific examples, take a look at the explanation of how you can use the Coach function.
- Page 29 Next, try checking yourself with this phrase. With the default setting, the RMP-5’s Time Check screen will be set to “E-4”. This means that the time is being checked for quarter notes; checking won’t be done on shorter note values. Other settings allow you to check the timing of shorter note values such as eighth notes, sixteenth notes, or triplets.
- Page 30 Attached cable Since the RMP-5 allows you to connect another pad, you can (for example) connect a V-Drums kick pad and test the timing of the kick as well. Of course you could connect a hi-hat or tom pad instead, and use all of the Coach...
- Page 31 Let’s Practice with RMP-5 ACCURACY SCORE fig.d-rc-AS.eps Press the [COACH] button a number of times to select “ .” Press the [START/STOP] button and start practicing. The Accuracy Score is a numerical evaluation of the Time Check. Scoring will apply to the notes you play after hearing the initial two-measure count. First try four measures using “A-4”.
- Page 32 Let’s Practice with RMP-5 QUIET COUNT fig.d-rc-QC.eps Press the [COACH] button a number of times to select “ .” Press the [START/STOP] button and start practicing. This feature lets you train to keep the rhythm regardless of whether the metronome is audible or inaudible. It’s an ideal way to train your rhythmic sense and time-keeping ability.
- Page 33 Let’s Practice with RMP-5 AUTO UP/DOWN fig.d-rc-AUD.eps Press the [COACH] button a number of times to select “ .” Press the [START/STOP] button and start practicing. In this practice mode, the speed gradually changes from the tempo that you initially set. It’s a good way to strengthen your endurance and practice tempo increases while playing single strokes in which you alternately strike once with the left hand and once with the right hand, or double strokes in which you strike twice with each hand.
- Page 34 Let’s Practice with RMP-5 RHYTHMIC NOTES fig.d-rc-RN.eps Press the [COACH] button a number of times to select “ .” Press the [START/STOP] button and start practicing. Here you’ll be practicing changing up and down. For rhythm, these things are truly the basics of the basics. Practice them until you can perform time changes smoothly.
- Page 35 More than the force of the strike, the key is to maintain a consistent height to which you raise the stick. It’s also useful to practice in front of a mirror so that you can see the height of your sticks, but the RMP-5’s screen will give you a pretty strict evaluation that will help you achieve even better control of your dynamics.
-
Page 36: Index
INDEX AC Adaptor ....................9 Restoring the Factory settings ............. 22 AC Adaptor jack ................... 8 Retrigger cancel ..................21 ACCURACY SCORE ................12–13 RHYTHM ....................... 11 AUTO UP/DOWN ................12, 14 Rhythm coach mode ................12 RHYTHMIC NOTES ................12, 15 Rim gain ....................... - Page 37 For the U.K. IMPORTANT: THE WIRES IN THIS MAINS LEAD ARE COLOURED IN ACCORDANCE WITH THE FOLLOWING CODE. BLUE: NEUTRAL BROWN: LIVE As the colours of the wires in the mains lead of this apparatus may not correspond with the coloured markings identifying the terminals in your plug, proceed as follows: The wire which is coloured BLUE must be connected to the terminal which is marked with the letter N or coloured BLACK.
- Page 38 For EU Countries For China...
- Page 39 Information When you need repair service, call your nearest Roland Service Center or authorized Roland distributor in your country as shown below. PHILIPPINES CURACAO URUGUAY NORWAY JORDAN G.A. Yupangco & Co. Inc. Zeelandia Music Center Inc. Todo Musica S.A. Roland Scandinavia Avd.
- Page 40 *3 The “open” sound is easily produced by striking the pad with a stick and the “mute” sound is easily produced by striking with the palm of your hand. *4 Sounds suitable for use when a rim-shot-capable pad is connected and used in combination with the RMP-5 (p. 19).
Need help?
Do you have a question about the RMP-5 and is the answer not in the manual?
Questions and answers