Table of Contents
Advertisement
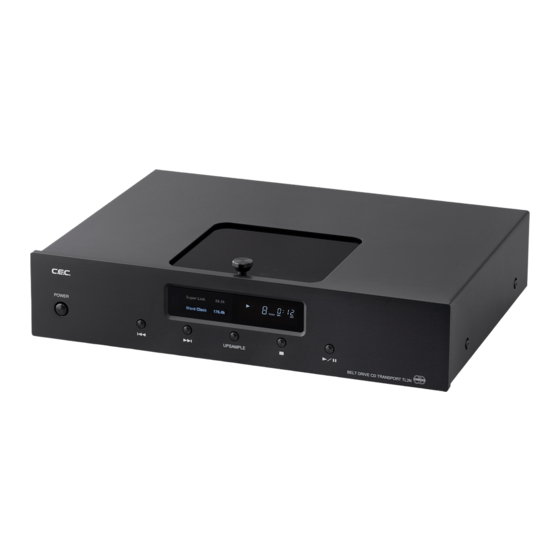
BELT DRIVE CD TRANSPORT
Thank you for purchasing a TL2N.
Please read through and refer to this Owner's Manual to use your TL2N
safely and adequately.
It is recommended to keep the packaging available for future transport-
ation needs.
POWER
POWER
TL2N
Owner's Manual
UPSAMPLE
BELT DRIVE CD TRANSPORT TL2N
Advertisement
Table of Contents

Summary of Contents for cec TL2N
- Page 1 BELT DRIVE CD TRANSPORT TL2N Owner's Manual Thank you for purchasing a TL2N. Please read through and refer to this Owner's Manual to use your TL2N safely and adequately. It is recommended to keep the packaging available for future transport- ation needs.
-
Page 2: Table Of Contents
Feed belt (belt to drive laser pick-up) can be seen through the window at mechanism cover. In addition to CEC’s proprietary SUPER LINK, SPDIF; balanced connection AES/EBU (XLR), COAXIAL (RCA) and TOSLINK (Optical) outputs are for the connection with D/A converter. -
Page 3: Important Safety Instructions
TL2N User's Manual Important Safety Instructions CAUTION RISK OF ELECTRIC SHOCK! DO NOT OPEN! CAUTION: TO REDUCE THE RISK OF ELECTRIC SHOCK, DO NOT REMOVE THE COVER OR REAR PANEL. IT DOES NOT CONTAIN ANY USER-SERVICEABLE PARTS. REFER SERVICING TO QUALIFIED SERVICE PERSONNEL. - Page 4 CD TRANSPORT TL2N Important Safety Instructions for replacement of the obsolete outlet. (For European Countries: ) Do not defeat the safety purpose of the grounding-type plug. This plug has two poles and a third grounding hole. The third hole is provided for your safety. If the provided plug does not fit your outlet, consult an electrician for replacement of the obsolete outlet.
-
Page 5: Handling Precautions
TL2N User's Manual Important Safety Instructions For CANADA AC POWER CORD CONNECTION CAUTION: TO PREVENT ELECTRIC SHOCK, MATCH THE BLADE WIDTH OF THE PLUG TO THE SLOT WIDTH. THE PLUG MUST BE FULLY INSERTED TO THE SLOT. Handling Precautions ❶ Connecting Other Devices Unplug the AC power cord from the outlet before connecting or disconnecting other devices. - Page 6 CD TRANSPORT TL2N Handling Precautions ❻ Installation Use of an audio rack is recommended to maximize the sound quality and performance of this appliance. Installation and use of this appliance in the locations described below may cause deterioration in sound quality or malfunction:...
-
Page 7: Compact Disc Handling
TL2N User's Manual Compact Disc Handling When taking a compact disc from its case, lift it out by holding the edge of the disc while pressing down on the center button of the case. Since a compact disc can be played or recorded only on one side, discs should always be placed on the CD-Turntable with the label side up. - Page 8 CD TRANSPORT TL2N Compact Disc Handling Do not use cracked discs or irregularly shaped discs (octagonal, heart-shaped, or any other special shapes). These may cause this appliance to malfunction. CD-R/RW DISC This appliance is able to playback CD-R/RW discs recorded in audio CD format and fi...
-
Page 9: Accessories
AC power cord Remote control unit Owner's manual Keep the packaging available for future transportation needs. The power cord is for use with the TL2N exclusively, and should not be used for other devices. I V E L t d I V E o . -
Page 10: Front Panel Functions
CD TRANSPORT TL2N Front Panel Functions POWER POWER UPSAMPLE BELT DRIVE CD TRANSPORT TL2N POWER button Press to turn the power ON or OFF. Turning the power on the display will blink "0 0:00" and the CD transport will check its tray for a compact disc. - Page 11 TL2N User's Manual Front Panel Functions Remote sensor The remote sensor, which receives signals from the remote control unit, is located at the left side of the display window. Aim for this sensor when using the remote control unit. The remote control may malfunction if there are any obstacles between the remote control unit and the remote sensor.
-
Page 12: Inside The Cd Door
Rear Panel Functions and Connections (refer to drawing on next page) Make a connection before power on, otherwise TL2N may malfunction due to interference when contacting a cable plug to a terminal. Turn off and on again to recover the function. - Page 13 TL2N User's Manual Rear Panel Functions and Connections AES/EBU CD Transport TL2N CEC Holdings Co., Ltd. 3-pin AC Power cord from the AC wall outlet to/from compatible SUPERLINK converter to D/A converter from Clock Generator Digital outputs COAXIAL Standard (SPDIF) digital signal output jack with a RCA type connector.
-
Page 14: Superlink" Digital Signal Transmission System
CD TRANSPORT TL2N "SUPERLINK" Digital Signal Transmission System SUPERLINK is a proprietary digital signal transmission system that transports music signals and synchronization(clock) signals with separate cables. The SPDIF(Sony Philips Digital Inter Face) and AES/EBU(Audio Engineering Society/ European Broadcasting Union) systems, commonly used in coaxial digital outputs and optical outputs, transmit both the music and clock signals through the same cable, and thus are prone to jitter effects caused by the signals interfering with each other. -
Page 15: Upsampling
TL2N User's Manual Upsampling Standard CD sampling frequency of 44.1kHz(16bit) can be up-sampled to 88.2kHz(24bit) of two times or 176.4kHz(24bit) of four times which expects more precise, smooth and deep sound. Check whether your D/A converter is compatible with those higher sampling frequencies. If it is not any comfortable sound won’t come out with such an higher sampling frequency. -
Page 16: Remote Control Unit
Remote Control unit Button Functions buttons work for TL2N and the others are compatible with the other CEC products like D/ A converter DA5 and DA3N, CD player CD5 and so on. Here referes to TL2N functions only. PROGRAM button Press to enable programmed playback. - Page 17 TL2N User's Manual Remote Control unit Numeric buttons Press to select a track directly for playback or to enter a programmed playback order. To select ex. 24-track press +10 twice and then 4. REPEAT button Press to repeatedly playback all the tracks on a disc.
-
Page 18: Basic Operation
CD TRANSPORT TL2N Basic Operation Normal playback Press the POWER button to turn the CD transport on. Open the CD door sliding backward by hand. When the door is open the display indicates “OPEn”. Lift up the CD-Stabilizer, if it is on the... - Page 19 TL2N User's Manual Basic Operation Pause Playback / button to stop playback temporarily. Press this button Press the PLAY/PAUSE again to resume playback. Stop Playback Press the STOP button to stop playback. NOTE: Playback will stop automatically if you open the CD door without pressing...
-
Page 20: Programmed Playback
CD TRANSPORT TL2N Programmed Playback Programming Up to 32 tracks in a customized playback order can be programmed by using the remote control unit while playback is stopped. Press the PROGRAM button on the remote control Track number Playback order unit to activate the program mode. - Page 21 TL2N User's Manual Programmed Playback Checking, Adding, Changing and Deleting Programmed Tracks Programmed tracks can be checked, added, changed and deleted under the program mode while playback is stopped. Check the Playback Order of Programmed Tracks Press the CHECK button repeatedly to show the playback order of program- med tracks.
-
Page 22: Maintenance Of Rubber Belt
CD TRANSPORT TL2N Maintenance of Rubber Belt Periodical maintenance or check is not required for a rubber belt used for all CEC belt-drive CD transports and players. However, the tension of the belt may be lowered by using for years which may result unstable reading of information on CD, noise during music reproduction and/or jump of the music. -
Page 23: Summary Of Tips And Hints To Use Belt Drive Cd
❸ The CD transport requires no periodic maintenance except the belt replacement mentioned on page 22, and contains no other user-serviceable parts. Contact your dealer or an authorized CEC service center for an inspection and repair in case of malfunction. -
Page 24: Specifi Cations
CD TRANSPORT TL2N Specifi cations Playable disc music CD and finalized music CD-R/RW Spindle drive system belt-drive Pick-up drive system belt-drive CD-Stabilizer diameter approx. 120mm, weight approx. 380g (brass) SUPERLINK x 1: 2.5Vp-p/75 (BNC x 4) / 44.1kHz AES/EBU x 1: 2.5Vp-p/110 (pin2=hot) / 44.1k, 88.2k, 176.4kHz... -
Page 25: Troubleshooting
TL2N contains a microcomputer that can malfunction due to the external noise or interference. If this seems to be the case, turn the unit off and wait for a short while before... -
Page 26: Service Contact Preparation
CD TRANSPORT TL2N Service Contact Preparation In case you need to contact a service center please prepare the following information. Model name and serial number: Purchase date: Dealer name and contact information: Description of the unit's problem:... - Page 27 TL2N User's Manual Memo...
- Page 28 CEC Holdings Co., Ltd., Japan 1703-A...
Need help?
Do you have a question about the TL2N and is the answer not in the manual?
Questions and answers