Table of Contents

Related Manuals for FLORA LJ3208P


Summary of Contents for FLORA LJ3208P
- Page 1 Flora Digital Printing System Model LJ320P Flora LJ3208P USER GUIDE 2011-7-18 Shenzhen Runtianzhi Image Technology Co.,Ltd www.floradigital.com.cn Copyright 2011@ Shenzhen Runtianzhi Image Technology Co.,Ltd. By Victor Xu ~ 1 ~...
-
Page 2: Table Of Contents
Flora Digital Printing System Model LJ320P FLORA .................................. 1 LJ3208P USER GUIDE ............................. 1 ............................ 5 LORA IGITAL RINTING YSTEM .................................. 5 ISCLAIMER ......................... 5 ANUAL SEGE ONDITIONS AND IMITATIONS ................................ 6 ONTENTS OF ACKAGE ................................. 6 RINTER ... - Page 3 Flora Digital Printing System Model LJ320P 3.4 Ink Supply Compartment .......................... 16 3.5 Electrical Compartment ........................... 16 3.6 Drying System .............................. 16 3.7 Take‐up System & Feeding System ........................ 17 3.8 Power Control Panel ............................ 17 LJ3208P ........................ 18 HAPTER ORKING YSTEM OF LORA 4.1 System Block Diagram ............................. 18 ...
- Page 4 HAPTER PERATION ANUAL OF LORA 6.1 Brief Introduction ............................. 54 6.2 Starting‐up Activities ............................ 54 6.3 Print head Jetting Check .......................... 54 6.4 Operational Approach of PhotoPRINT Server Flora Edition 6.1v2 .............. 54 6.4.1 Job Folder ................................. 5 4 6.4.2 Layout Tag ................................ 5 5 ...
-
Page 5: Flora
Disclaimer This is an alpha release of the User's Guide for Flora LJ3208P printer. We have made every effort to guarantee the accuracy and integrity of the information in this manual. If you find some errors or omissions, please bring them to our attention so we can check and correct them accordingly. -
Page 6: Contents Of Package
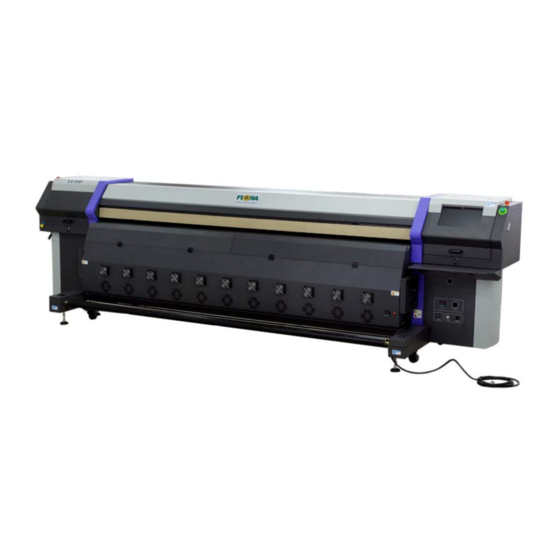
Printer Introduction The Flora LJ3208P printer is a wide format digital printer suitable for small up to medium size business use. It uses a Solvent ink. It provides high productivity and is capable to replace traditional silkscreen printing. This type of printer is widely used in the fields such as advertisement, packing, printing, interior decoration, flexible packaging, etc. -
Page 7: About The Manual
Polaris head About The Manual The manual provides the end user all the information related to the machine basic functions, software installation, machine parameter calibration, maintenance and troubleshooting of Flora LJ3208P. Copyright 2011@ Shenzhen Runtianzhi Image Technology Co.,Ltd. By Victor Xu... -
Page 8: Chapter 1 Safety Operating Instructions
This chapter introduces the important safety information. Please read and understand the safety information carefully before operating the printer. 1.2 Safety Information FLORA printer uses the following chemical substances All kinds of printing media Solvent Ink Cleaning liquid (Solvent Flush) 1.2.1 Solvent and Ink Properties... -
Page 9: Printing Media Rolls Are Bulky And Very Heavy
Flora Digital Printing System Model LJ320P electrical connection regulation. The ground voltage should be less than 3 V. Set the machine on smooth ceramic tile or cement ground Use specified anti-static floor mat to minimize harmful static build-up. 1.2.7 Printing media rolls are bulky and very heavy Wear hand and foot safety protection gear when loading, unloading and handling media to avoid serious body injuries. - Page 10 Flora Digital Printing System Model LJ320P Put a used ink bottle into a plastic bag and dispose of it as an industrial waste. Observe local regulations for disposal of waste ink bottles. Avoid spilling ink into your skin or clothes. Wash any ink off immediately with soapy water.
-
Page 11: Chapter 2 Preinstall Requirement
Model LJ320P Chapter 2 Preinstall Requirement This is a pre-install guide for Flora LJ3208P. Customers are recommended to prepare the room and other necessary devices before the machine arrived and installation. We have made every effort to guarantee the accuracy and integrity of the information in this guide. Should you find some errors or omissions, please bring them to our attention so we can check and correct them accordingly. -
Page 12: Configuration Of Computer
Flora Digital Printing System Model LJ320P When the operating temperature is lower than 20 ºC or higher than 40º C, printing speed should be reduced to two-thirds of normal print speed to maintain good print quality. 2.2.2.2 Places where the printer must not be installed... -
Page 13: Available Media Types
Flora Digital Printing System Model LJ320P 116-0385-022 Servo Card 1pcs 116-0396-081 HPP Board 1pcs 312-0015-233 Ink Pump 9pcs 141-0487-000 Ink Pump Filter 9pcs 141-0428-006 Disc Filter 16pcs 116-0340-020 Raster Reader 1pcs 141-0134-004 Raster Strip 1pcs 2.6 Available Media Types The following types of media are available:... -
Page 14: Chapter 3 External Views, Part Names And Functions
Flora Digital Printing System Model LJ320P Chapter 3 External Views, Part Names and Functions The mechanical design parts/assembly of the machine are grouped according to its function; namely, the print head carriage, the x-axis movement mechanism, the y-axis movement mechanism, the roll media feeding and take-up mechanism, the ink supply compartment, the electrical control cabinet and the printing platform. -
Page 15: Computer Station
Flora Digital Printing System Model LJ320P 3.1 Computer Station Computer station is control centre, which is located at right side of the machine! It takes charge early treatment before printing including image ripping and print mode setting. Most function starts to work when get the command from computer. -
Page 16: Ink Supply Compartment
Flora Digital Printing System Model LJ320P 3.4 Ink Supply Compartment Ink supply station contains two compartments. One is on the right side for ink pumps and filter, while the other one is on the back right side for ink bottles. -
Page 17: Take-Up System & Feeding System
Flora Digital Printing System Model LJ320P 3.7 Take-up System & Feeding System Take-up system in the front of the machine is used to roll up the output media, while the feeding system fixed behind the machine used for roll down the media for feeding. -
Page 18: Chapter 4 Working System Of Flora Lj3208P
Chapter 4 Working System of Flora LJ3208P The Flora LJ3208P large format printer is using raster image technology to process photos stored in computer. It is one of the most innovative products, which combines photo digital technology with high precision engine driver. -
Page 19: Polaris Print Head Introduce
Flora Digital Printing System Model LJ320P 4.2 Polaris Print head Introduce Feature: 35 picoliter nominal drop size 512 individual addressable nozzles Incorporates versaDropTM binary jetting capability Excellent channel-to-channel uniformity High frequency continuous operation Designed for long service life Integral mounting bezel with precision... -
Page 20: Printing Control System
Flora Digital Printing System Model LJ320P 4.3 Printing Control System Fig.4.3-1 Printing Control Board 4.3.1 Printing Control Board (116-0401-132) The print head control board controls and drives the jetting parameters of the print heads.(as below). Functions of the board are as follow:... -
Page 21: Usb Board (116-0417-011)
Flora Digital Printing System Model LJ320P color NP Note: D8~D15 are normal on, while D7 is off. Because the negative pressure tank is always empty. Power indicator: All of these four LEDS will be normal on. D3: 3.3V D4: 5V... -
Page 22: Servo Card ( 116-0385-022
Flora Digital Printing System Model LJ320P USB indicator: Green Led: working indicator, normally on; Red Led: Error indicator, normally off Fig.4.3.2-2 USB Indicators Power indicator: D18: 24V power indicator normal on D19: 5V power indicator normal on Communication indicator: D1, D2, D3: null Fig.4.3.2-3 Power Indicators... -
Page 23: Hpp Board ( 116-0396-081
Flora Digital Printing System Model LJ320P Power indicator: Power is ok, on; or, off. Nixie Tube: Show the error number. No problem Lack of ink Negative problem Movement problem Fig.4.3.3-2 Nixie Tube Error indicator----Nixie Tube If the digital LED shows 0, it means everything is ok, with no problem. -
Page 24: Connector Board(116-0402-020)
Flora Digital Printing System Model LJ320P Power indicator: D1: 24V power indicator normal on D2: 5V power indicator normal on D3: 15V power indicator normal on Fig.4.3.4-1 Power Indicator 4.3.5 Connector Board(116-0402-020) This board is used as interface board for Print head and the Print head Control Board thru a 16-pin flexible data cable. -
Page 25: X-Axis Movement (Carriage Motion System)
Flora Digital Printing System Model LJ320P Both the Carriage and Feeding assembly are driven by servomotors, which are controlled by their respective Servo Driver can prove high precision motion as to enhance the printing quality. 4.4.1 X-axis Movement (Carriage Motion System) X-axis movement System serves for carriage which will drive the print head moving. -
Page 26: Y-Axis Movement (Media Feeding System)
Flora Digital Printing System Model LJ320P stroke. Home Position Switch Right Limit Switch Left Limit Switch Fig. 4.4.1.3-1: Limited Switches Besides limited switches, there are two protection rubbers used as mechanical protector. They are fixed on the side of beam. - Page 27 Flora Digital Printing System Model LJ320P Servo Driver DCS810 Servomotor 150W PN: 141-0510-000 PN: 141-0509-000 Step and Direction Signal Encoder Feedback Signal Servomotor Power Signal 36VDC Power Supply Fig. 4.4.2.1-1: Servo Driver & Motor 4.4.2.2 Pinch Roller & Printing platform Pinch rollers are used to press the media against the knurl-rollers.
-
Page 28: Ink Supply & Negative Pressure System
Flora Digital Printing System Model LJ320P Ink Supply & Negative Pressure System System Circuit: Fig. 4.5.1: System Circuit 4.5.1 Ink Supply System The ink Bottle/Barrel serves as the main reservoir for ink supply, should be refilled in a timely manner so continuous supply of ink will not be interrupted during printing. -
Page 29: Purge And Flush Individually
If the machine doesn’t work for more than 3 days, flush all the print heads with solvent is recommended. And when the nozzles are blocked seriously, flush is also available. These two functions are available on this flora machine. Notice: The valve must be turned with the correct Valve Key. -
Page 30: Other Parts Intro
Flora Digital Printing System Model LJ320P the tubes are filled with overflowed ink. There are one ink protection tanks fixed behind the secondary ink tanks! Note: There are three actual scenarios where the overflow happens. 1. The ink overflow situation will happen when the ink tank level sensor fails to detect the full level while the ink pump tends to turn-on and ink is keep on flowing into the ink supply circuit;... -
Page 31: Flushing System
Flora Digital Printing System Model LJ320P purged out through all nozzles. In this operation, the nozzles are being cleaned from slight contamination of small debris, and micro-bubbles will be forced out. Maintenance Toggle Button Solvent Flush Toggle Switch – used for flushing the solvent into the Print head. -
Page 32: Drying System
Flora Digital Printing System Model LJ320P 4.7 Drying System For this model there are two drying system for high speed output drying! One is Heating System which temperature of heating can be setting by manually, the other one is Cold Fans System. - Page 33 Flora Digital Printing System Model LJ320P Feeding Roller depends upon the printing-side orientation of the media. Fig. 4.8-2: Feeding and Take-Up Switches Fig. 4.8-1: Spooling Set-up of the Media Auto Manual Tension Fig. 4.8-3: Media Sensor Fig. 4.8-5: Feeding Roller Fig.
-
Page 34: Chapter 5 Installation Manual Of Flora Lj3208P
Flora Digital Printing System Model LJ320P Chapter 5 Installation Manual of Flora LJ3208P 5.1 Machine Pre-installation The minimum working area should content the space for the operator to move around the machine conveniently and safely. Prepare the necessary AC plug on the power cord attached to the machine. Please see the Technical Specification table for the power requirements. -
Page 35: Install Photoprint Server Flora Edition 6.1V2
“Apply” and “OK”, then finished 5.3.1 Install PhotoPRINT Server Flora Edition 6.1v2 Turn-on the Main Power to give power to the PC and Monitor. Insert the CD supplied with the machine with label PhotoPrint 6.1V2 for the necessary installation. - Page 36 Then you will get a window for 【Setup Status】, wait it finish. The 【Product Selection】 window will comes in after that. Please enter password which you can find from the dongle. And then choose “PhotoPRINT SERVER Flora Edition 6.1v2” from product Copyright 2011@ Shenzhen Runtianzhi Image Technology Co.,Ltd.
-
Page 37: Install Flora Driver
Click “Next”, software files will now start to install. Click “Finish” after completing the successful installation. 5.3.2 Install Flora Driver Insert the Flora Driver. From the list of Folder under Print Driver, select corresponding machine model (Eg: Flora_3208P_3204P_NewUsb_8heads_V1.1.1.1 for 6.12(2011.06.02).exe). Then double-click the setup file;... -
Page 38: Install Usb Driver
Flora Digital Printing System Model LJ320P Files will be extracted and later on 【Welcome】 window will appear. Click “Next”, coming with 【choose setup language】 window, select you language then click “Next”; Click “Next” when 【Welcome】 window. Then, 【Select Model】 window will appear. Choose the particular model of the machine you are about to install, then click “Next”;... -
Page 39: Add Setup
Flora Digital Printing System Model LJ320P Go to Device Manager, you can find that the hardware name Flora Digital Printer V2.1; Right click on this option, choose Update Driver as above. Click it, if will pop Hardware Update Wizard windows as below;... -
Page 40: Install Print Heads
Flora Digital Printing System Model LJ320P The Brand name should be Runjiang Then select the brand name of the printer and the model name. Then click “Next”; Click “Finish” after the final process. Then you can find the device. If the setup is successful the installed device or printer will be shown on the PhotoPRINT GUI. - Page 41 Flora Digital Printing System Model LJ320P Female Connector Fig.5.4-3 Connectors Male Connector Filter Fig.5.3-3 Print head Assembly iii. Install the print head one by one, position the print head and then tight the two fixation screws accordingly. Note: The back fixation screws must be tightened to fasten fixing tabletting, meanwhile the front fixation screw must be tightened properly before doing Y-align.
- Page 42 Flora Digital Printing System Model LJ320P Connect the 30pins flexible print head data cable to the Print head Control Board and print head. Please take note of the proper connection of cable. Connect the input tubing of print head to the Ink tank supply port accordingly, Take note not to interchange the connection for input and the bleeding tubes.
-
Page 43: Ink And Solvent Preparation
Flora Digital Printing System Model LJ320P 5.4 Ink and Solvent Preparation Pour the ink and solvent in their corresponding ink/solvent barrels. Be sure to observe proper procedure in handling the ink. See Chemical Safety Information Flush the print head with solvent, clean the analog. -
Page 44: Print Head Y Alignment
For the purpose of getting the best dot print quality is a painful process so it needs patience. All you can do is play with temperature and voltage settings. The recommended Voltage setting range is controlled by Flora driver software so there’s no chance for you to set the voltage beyond the recommended range. - Page 45 Flora Digital Printing System Model LJ320P Unaligned print head will affect ink composition a picture. So for every row print heads, the first nozzle of every print head must be on the same coordinate at Y-axis. The gap between two rows should be same with the gap between two nozzles. Print head installation must ensure the print head is perpendicular to Y-axis, and in parallel with X-axis.
- Page 46 Flora Digital Printing System Model LJ320P Align K2 with K1. The gap between 256 nozzle of K1 and 1 one of K2(① or ③) must be equal to the gap between two nozzles(②). If ③ > ②, push print head K2 go upward.(K1 is basic print head, you mustn’t adjust K2)
-
Page 47: Vertical Alignment
Flora Digital Printing System Model LJ320P K1 is the reference print for 1# print heads, while K2 is the reference for 2# print heads. When perform Y alignment, K1 and K2 print head mustn’t be adjusted unless C, M or Y heads were in maximum position. If on this occasion, K1 and K2 should be... - Page 48 Flora Digital Printing System Model LJ320P Highlight Internal Right Align from test drop list, and send print by click align color icon; you will get prints as below. Every color will have three units of prints, take K for example: Fig.5.5.5-2 Send Internal Right Align...
-
Page 49: Internal Left Align
Flora Digital Printing System Model LJ320P Path for setting Internal Left alignment: Print Option Tag → Advanced (Test Print Tools Bar → Parameter Setting Icon) → Offset Tab → Internal of Head 5.5.6 Internal Left Align Internal left align is similar with internal right alignment, only the moving direction is different. - Page 50 Flora Digital Printing System Model LJ320P For Flora machine, we take K1 as the base to align the other print heads. Highlight Right Align from test drop down list, and send print by click align color icon. You will get prints as below.
-
Page 51: Alignment
Flora Digital Printing System Model LJ320P Path for setting Right alignment: Print Option Tag → Advanced (Test Print Tools Bar → Parameter Setting Icon) → Offset Tab → Right align Check Box Print Heads Previous Value Test Results Modified Value... -
Page 52: Step Alignment
Flora Digital Printing System Model LJ320P Offset Tab → X align Check Box 5.5.9 Step Alignment Step alignment is an important alignment for Y-axis. If the step is too big, the output will have blank line; otherwise, the output will have overlap line. - Page 53 Flora Digital Printing System Model LJ320P If any factor (temperature, voltage and highness of the carriage) which will affect viscosity or firing speed has changed, you must check Internal left & right alignment, right alignment and X alignment! Copyright 2011@ Shenzhen Runtianzhi Image Technology Co.,Ltd.
-
Page 54: Chapter 6 Operation Manual Of Flora Lj3208P
Note: Please take note that all print heads must print the same. If not, do purge or flush the print heads. 6.4 Operational Approach of PhotoPRINT Server Flora Edition 6.1v2 6.4.1 Job Folder Figure below shows the current job list and statuses, the printer model, add job icon and other printing instructions. -
Page 55: Layout Tag
Flora Digital Printing System Model LJ320P Printing job queue shows the jobs that are currently printed and those queued for printing. Ripping job queue shows the jobs that are under ripping process, have completed the ripping process and those ready to be sent for printing. -
Page 56: Work Flow Tag
Flora Digital Printing System Model LJ320P Figure above shows the image layout parameters like: printing size, margins, number of copies and orientation of image. This is the first window that will pop out every time you click the job or default job properties. After editing you can directly send the job for printing by clicking send button or send for ripping by clicking OK button. -
Page 57: Print Option Tag
Flora Digital Printing System Model LJ320P Spot white must un-tick this box Fig.6.4.4-1 Color Management Windows 6.4.5 Print Option Tag This test is being performed in order to verify the conditions of the Print head nozzles before printing. It prints a swatch which could represent the nozzles to be firing on a definite order. - Page 58 Flora Digital Printing System Model LJ320P Backward Button Right Button Forward Button Stop Button Left Button 6.4.5.1 Advance Button Figures below will pop out when you click the advance button under job properties printer option. The following pop out windows representing a printing parameter setting. They will appear as soon as you click their designated button.
- Page 59 Flora Digital Printing System Model LJ320P Fig.6.4.5.1-2 System Tab Table.6.4.5.1-2 System Clean Auto Clean Count by The clean times can be set in this text box Press ink time Priming time can be set in this text box Micro Drop...
- Page 60 Flora Digital Printing System Model LJ320P Motor Tab Fig.6.4.5.1-3 Motor Tab Table.6.4.5.1-3 Motor Page Print head Step (111PPD) this text box used to Step this text box used to set the change page feeding carriage moving step when step(Refer to Step Align)
- Page 61 Flora Digital Printing System Model LJ320P Click Set Button after setting Fig.6.4.5.2-1 Page Mode Set is display list which will shows repeat times, extraction and total pass for every resolution. After setting the printing mode, the detail will be showed in this list.
-
Page 62: Shut-Off Procedure
Flora Digital Printing System Model LJ320P =12pass 6.5 Shut-off procedure 6.5.1 Over-night protection Flush print head one by one until you can’t see ink in the ink tube. Wipe-off any ink contamination on carriage plate bottom. Pour Flush solution to the lint free cloth on top of the prepared print head capping material. -
Page 63: Chapter 7 Service And Maintenance Manual Of Flora Lj3208P
Flora Digital Printing System Model LJ320P Chapter 7 Service and Maintenance Manual of Flora LJ3208P 7.1 Brief Introduction This is to describe the various service and maintenance procedure to be observed in using this LJ3208P machine. Every operator must read this chapter carefully. -
Page 64: Maintenance Of Ink Supply And Vacuum Line System
Flora Digital Printing System Model LJ320P direction. Orientate the port when connecting the flat data cable on the print head and Print head Control Board. Perform flushing procedure to make sure that all jets are working well. Turn on the printer power. -
Page 65: Adjust Timing Belt Tension
Flora Digital Printing System Model LJ320P can insure high-precision carriage moving and paper feeding . Clean and lubricate the print head carriage rail on a weekly basis, apply enough light duty grease or oil in the contact area Clean and lubricate slide bearing, ball bearings for timing belt pulleys, gears and ball bearing for automatic take up/feeding system on a weekly basis. - Page 66 Flora Digital Printing System Model LJ320P Lock nut Upper tension adjusting bolt The belt should stay in the middle of the pulley Lower tension adjusting bolt Left View Driven Pulley Fig. 7.5-1 Carriage Tension Belt Assembly c) Measure the belt pull tension load at the middle of the rail with a distance of 60-70mm should be 1000g, using a pull test gage and a steel ruler.
-
Page 67: Appendix A Troubleshooting Guide
Flora Digital Printing System Model LJ320P Appendix A Troubleshooting Guide Problems Probable Causes Solution o No ink flowing to the tube line of the Print head Carriage o Empty ink supply in the Ink • Fill-up empty ink barrel barrel •... - Page 68 Flora Digital Printing System Model LJ320P o Presence of ink in the Ink Remove or purge any presence of ink in the Ink l Ink Pumps are not Protect Tank Protect Tank working o Defective / Out of Position Ink...
- Page 69 Flora Digital Printing System Model LJ320P A particular portion of the o Feeding of the Pinch Roller is Adjust the tension of the Pinch Roller (see printer is showing not equal Pinch Roller Adjustment Procedure) horizontal banding o Feeding of the Pinch Roller is...
-
Page 70: Appendix Bhow To Set Negative Pressure Sensor (Ckd) Display
Flora Digital Printing System Model LJ320P Appendix B HOW TO SET NEGATIVE PRESSURE SENSOR (CKD) DISPLAY Power up Press MODE button 1X The sensor will then press arrow UP/DOWN until it display show this display Press MODE button Press MODE... - Page 71 Flora Digital Printing System Model LJ320P HOW TO SET NEGATIVE PRESSURE PARAMETERS Press MODE button 1X to display the encircled below Press arrow UP/DOWN button to set the parameter Press MODE button 1x to display the encircled below Press arrow...
-
Page 72: Appendix C Glossary
Flora Digital Printing System Model LJ320P Appendix C Glossary Adobe Acrobat - Software package created by Adobe for converting any document to an Adobe Portable Document Format (PDF) file. Anyone can open your document across a broad range of hardware and software using the downloadable, free software Adobe Acrobat Reader, and it will look exactly as you intended—with layout, fonts, links, and images intact. - Page 73 Flora Digital Printing System Model LJ320P jet-to-jet drop mass uniformity is required in many applications to eliminate banding When the specific gravity is 1, 1picoliter (pL) = 1 nanogram (ng). Drop Velocity - The speed at which a drop of jetting fluid travels from the orifice plate to the receiving medium.
- Page 74 Flora Digital Printing System Model LJ320P the jets at rest, balanced against the surface tension of the liquid. Meniscus Pressure Used at Spectra - the meniscus pressure often refers to an inward bubble pressure that equals the fluid pressure at a print head jet nozzle when that jet is not activated. A negative meniscus pressure is applied to inactivated jets only when the print head system is operating, helping to prevent the jetting fluid from leaking at the nozzles.
Need help?
Do you have a question about the LJ3208P and is the answer not in the manual?
Questions and answers