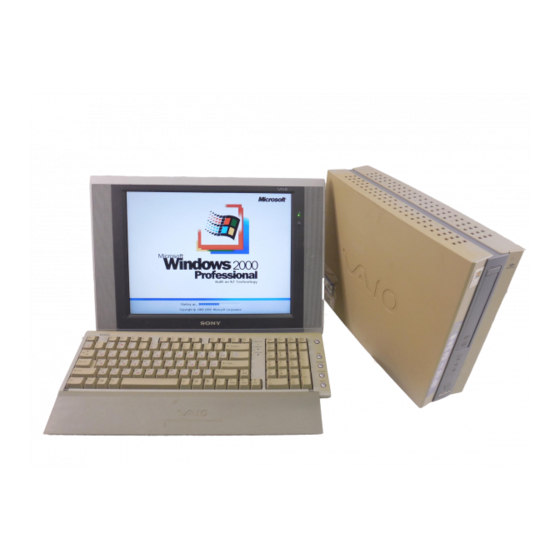
Sony PCV-LX810 Service Manual
Hide thumbs
Also See for PCV-LX810:
- User manual (124 pages) ,
- System reference manual (112 pages) ,
- Specifications (1 page)
Table of Contents
Advertisement
Quick Links
Download this manual
See also:
User Manual
Advertisement
Table of Contents

Related Manuals for Sony PCV-LX810


Summary of Contents for Sony PCV-LX810
- Page 1 PCV-LX810/LX910 SERVICE MANUAL US Model Canadian Model S400 Specifications PERSONAL COMPUTER VAIO 9-874-310-11...
- Page 2 CAUTION Danger of explosion if battery is incorrectly replaced. Replace only with the same or equivalent type recommended by the manufacturer. Dispose of used batteries according to the manufacturer’s instructions. Confidential – 2 – PCV-LX810/LX910 (UC)
-
Page 3: Table Of Contents
REPAIR PARTS LIST 8-1. Exploded Views and Parts List (Main Section) ..8-1 8-2. Exploded Views and Parts List (Display Section) (PCV-LX810) ............8-3 8-3. Exploded Views and Parts List (Display Section) (PCV-LX910) ............8-5 8-4. Accessories and Parts List ........8-8 •... -
Page 4: Disassembly
P2-10 LCD PANEL, DISPLAY UNIT, IFX-127 ANL-25 MOUNTED MOUNTED PWB P2-12 P2-13 INVERTER UNIT, IFX-119 (S2)/ IFX-119 (T) MOUNTED P2-14 • Ps-s denotes the page concerned. • HDD has a low resistance to vibration, requiring careful handling. Confidential PCV-LX810/LX910 (UC) -
Page 5: Main Unit
2 Hold the release handle and pull out the main unit in the direction of arrow A . 2-3. STAND (ACCESSORY) 2 two claws 2 two claws 1 claw 3 Remove the stand in the direction of arrow A . Confidential PCV-LX810/LX910 (UC) -
Page 6: Hdd
A . 6 two bosses 6 two bosses 3 two claws 5 claw 2-5. CD-RW/DVD-ROM 3 power cable 4 harness (DISC) 5 harness 1 drive pin (CD-DVD audio) 2 Pull the CD-RW/DVD-ROM. 6 Remove the CD-RW/DVD-ROM. Confidential PCV-LX810/LX910 (UC) -
Page 7: Modem Card (Pci)
3 harness (USB) 2-7. RISER CARD, RISER SUPPORT 1 screw (BV3 × 6) 3 Pull out the riser support in the direction of arrow A . riser spacer 5 riser card 4 screw (BV3 × 6) 2 claw Confidential PCV-LX810/LX910 (UC) -
Page 8: Switching Power Supply
2-8. SWITCHING POWER SUPPLY 4 switching power supply 1 screw 5 Disconnect respective power connectors (3 × 4) on the mother board, HDD and CD-RW/DVD-ROM. 2 screw (PSW3 × 6) 3 claw Confidential PCV-LX810/LX910 (UC) -
Page 9: Memory (Dimm)
Note 2: Make sure that the clips are closed when the memories were inserted completely. Note 3: Insert the memories, starting from the one having smallest bank number. memory (DIMM) clip bosses (2 places) clip DIMM socket Confidential PCV-LX810/LX910 (UC) -
Page 10: Cpu
Thermal diffusion grease : silicon compound (G-765) 90G Amount to apply : 0.1 g (as the same size as the tip of a match) grease Take care not to apply the grease to any other places because it has high conductivity. Confidential PCV-LX810/LX910 (UC) -
Page 11: Mother Board
A . 2 FI connector tape convex part of PCC connector FI connector tape Note: When you stick FI connector tape, make sure that the tape does not cover the convex part of PCC connector. Confidential PCV-LX810/LX910 (UC) -
Page 12: Neck Cover (Rear), Arm Cover (Rear)
A . 2 two claws 3 neck cover (rear) 2 two claws 4 Elect the display ass’y in the direction of arrow B . 6 arm cover (rear) 5 two claws 5 two claws 5 two claws Confidential PCV-LX810/LX910 (UC) -
Page 13: Arm Cover (Front), Neck Cover (Front), Center Cover
2 four claws 5 Remove the neck cover in the direction of arrow B . 4 two claws 7 Pull out the center cover in the direction of arrow C . 6 claw 6 claw 6 claw Confidential PCV-LX810/LX910 (UC) 2-10... -
Page 14: Display Ass'y
4 three claws 3 two screws (B3 × 10) 6 screw (PSW3 × 6) 9 four screws (3 × 6) 0 display ass’y 8 Remove the LCD cable from groove. 7 LCD cable 6 screw (PSW3 × 6) Confidential 2-11 PCV-LX810/LX910 (UC) -
Page 15: Ifx-120 Mounted Pwb
1 four screws (3 × 6) 3 shield 5 harness (for speaker unit (L)) 2 three screws (BTP3 × 10) 7 screw (BTP3 × 10) 9 ANL-25 mounted PWB 4 harness (for speaker unit (R)) 8 display unit Confidential PCV-LX810/LX910 (UC) 2-12... -
Page 16: Lcd Panel, Ifx-127 Mounted Pwb
2 harness 3 LCD cable 5 two screws (PS3 × 6) 4 two FFC harnesses (sensor) 7 spacer 6 LCD panel 8 two screws (B2 × 3) 5 two screws (PS3 × 6) 9 IFX-127 mounted Confidential 2-13 PCV-LX810/LX910 (UC) -
Page 17: Inverter Unit, Ifx-119 (S2)/Ifx-119 (T) Mounted Pwb
A . qh three screws (PCV-LX910) (3 × 6) qk Remove the control unit in the direction qd two claws of arrow B . qj two claws ql control board sheet qg FFC harness (control) (PCV-LX910) Confidential PCV-LX810/LX910 (UC) 2-14... -
Page 18: Main Electric Parts Arrangement
(DIMM) LEX-27 mounted PWB • DISPLAY SECTION LCD panel inverter unit IFX-127 mounted PWB (PCV-LX910) control unit (PCV-LX910) ANL-25 mounted PWB IFX-119 (S2) mounted PWB (PCV-LX810) IFX-119 (T) mounted PWB (PCV-LX910) IFX-120 mounted PWB Confidential 2-15 PCV-LX810/LX910 (UC) (END) -
Page 19: Mother Board Description
SECTION 3 MOTHER BOARD DESCRIPTION Overview The PCV-LX810/LX910 mother board supports the following features: Form factor Special Form Factor Processor Single Socket-370 Pentium III processor. 66/100/133 MHz front side bus speed. On board Socket-370. VRM 8.4 compatible. Main memory Two 168-pin DIMM sockets. - Page 20 M/B voltage and temperature monitoring. CPU core temperature monitoring. Fan control function. Other futures BIOS: 2 Mbit Flash ROM (include System BIOS, Video BIOS, startup Sony logotype). Plug and Play compatible. Advanced Power Management (APM 1.2). Windows 2K support. Suspend to RAM support.
-
Page 21: Programs For Service
4. When “Press ESC key when Ready to start” is displayed, press the [ESC] key. 5. A frame will appear fully on the screen. Check for positional error or distortion, and press the [Enter] key. Confidential PCV-LX810/LX910 (UC) - Page 22 After the diagnostic program started, the test is Enter serial number and press the [Enter] key. carried out automatically. 3. “OK” is displayed if the test result is normal, or “NG” if ab- normal. Confidential PCV-LX810/LX910 (UC)
- Page 23 IFX-119 (T) or (S2) board is replaced. 15. Turn off the power switch of the PC. 16. Disconnect the serial cable. 17. Disconnect the cable of the display from the connector con- version tool. CONNECTION Confidential PCV-LX810/LX910 (UC) (END)
-
Page 24: Service Information
Enable cable select Capacity Model Part No. Maker Code memo. (formatted) PCV-LX910 A-8049-328-A Quantum AS60A011 60 GB 179609111 Master/Slave selection Jumper setting Cable Select for Master/Slave Factory setting (Factory default) Master Slave (Jumper Packing Position Confidential PCV-LX810/LX910 (UC) -
Page 25: Jumper Setting Of Mother Board
1: ON CLEAR CMOS 2: ON VGA INTERRUP ENABLE CAUTION Do not change the jumper with the power turned on. Before changing the jumper, turn off the power and disconnect the power cord from the set. Confidential PCV-LX810/LX910 (UC) (END) -
Page 26: Block Diagram
TSB12LV26/ SiS950 auxually TSB41AB3 connector COM1 LPC Super I/O IEEE1394 COM2 Link + PHY connector Sony CXD1459TQ Memory Memory Stick Stick connector controller Ultra66 PCI Riser Slot BIOS Flash ROM 2Mbit PCI Slot #1 PCI Slot #2 Confidential PCV-LX810/LX910 (UC) -
Page 27: Lcd Board
Light Control Circuit DC/DC Circuit 3.3VLCD 12V to 3.3V Audio VR Audio BL VR Circuit Molex 53261 7pin PS/2,Keyboard, Mouse, USB Molex IFX-120 53261 7pin MiniDIN 6pin PS/ MiniDIN 6pin PS/ 2 Keyboard 2 Mouse Inverter Unit Confidential PCV-LX810/LX910 (UC) - Page 28 Power/Back- SCDT Light Control 3.3V Point Circuit Regurator Audio VR Audio BL VR Circuit Molex 53261 7pin PS/2,Keyboard, Mouse, USB Molex IFX-120 53261 7pin MiniDIN 6pin PS/ MiniDIN 6pin PS/ 2 Keyboard 2 Mouse Inverter Unit Confidential PCV-LX810/LX910 (UC) (END)
-
Page 29: Frame Harness
+5VSB CD_IN +12V Signal Name CD Left In WOL_CON CD GND Signal Name CD GND +5VSB CD Right In WAKE_UP FRONT PANEL(SONY PANEL) Signal Name PRIMARY/SECONDARY IDE Signal Name Signal Name CD_LED# Reset IDE FDD_LED# HDD_LED# N.C. MS_LED SUS_LED PWR_LED PWR_ON# N.C.(Key) - Page 30 N.C. AD23 +3.3V AD22 AD21 AD20 AD19 +3.3V AD18 AD17 AD16 C/BE2# +3.3V FRAME# IRDY# +3.3V TRDY# DEVSEL# STOP# PLOCK# +3.3V PERR# N.C. +3.3V N.C. SERR# +3.3V C/BE1# AD15 AD14 +3.3V AD13 AD12 AD11 AD10 (Key) (Key) Confidential PCV-LX810/LX910 (UC)
- Page 31 Tx2+ Tx2- Tx1+ Tx1- Tx0+ Tx0- TxCLK+ TxCLK- Audio Left Out Audio GND Audio Right Out USB Data+ +5V USB USB Data- Tablet TxD# Tablet RxD# BL_ON Tablet DTR# +5V KBD/MOUSE 33 (P1) GND 34 (P2) +12V Confidential PCV-LX810/LX910 (UC)
- Page 32 A20/CSTOP# RDY,IREQ#/CINT# A21/CDEVSEL# Vpp1 Vpp2 A16/CCLK A22/CTRDY# A15/CIRDY# A23/CFRAME# A12/CCBE2# A24/CAD17 A7/CAD18 A25/CAD19 A6/CAD20 VS2#/CVS2 A5/CAD21 RESET/CRST# A4/CAD22 WAIT#/CSERR# A3/CAD23 RFU,INPACK#/CREQ# A2/CAD24 REG#/CCBE3# A1/CAD25 BVD1,SPKR#/CAUDIO A0/CAD26 BVD2,STSCHG#/CSTSCHG D0/CAD27 D8/CAD28 D1/CAD29 D9/CAD30 D2/RFU D10/CAD31 WP,IOIS16#/CCLKRUN# CD2#/CCD2# RFU: Reserved Confidential PCV-LX810/LX910 (UC)
-
Page 33: Frame Harness Diagram
256MB of memory board can be installed. LEX-27 BOARD FRONT CN100 i.LINK MEMORY PC CARD PANEL From board to connector (direct connection) S400 STICK 4pin Harness (with connectors on both ends) POWER DISC Harness (soldering on either end) Confidential PCV-LX810/LX910 (UC) -
Page 34: (Pcv-Lx910)
256MB of memory board can be installed. LEX-27 BOARD FRONT CN100 i.LINK MEMORY PC CARD PANEL From board to connector (direct connection) S400 STICK 4pin Harness (with connectors on both ends) POWER DISC Harness (soldering on either end) Confidential PCV-LX810/LX910 (UC) (END) - Page 35 22 X-4623-102-1 SHIELD ASSY, BOTTOM 23 X-4623-095-2 SHIELD ASSY, TOP COVER 25 X-4623-094-4 DOOR ASSY 26 X-4623-093-1 SHAFT ASSY 27 4-969-961-11 EMBLEM (NO.4), SONY 29 4-654-492-01 ESCUTCHEON (SAM) 30 X-4623-600-3 SHIELD 8 ASSY, DRIVE 31 4-649-522-01 SCREW, DRIVE ♦ 32 1-796-164-12...
- Page 36 EXPLODED VIEWS AND PARTS LIST (DISPLAY SECTION) Ref. No. Part No. Description Remark (PCV-LX810) 101 X-4623-584-3 COVER PC ASSY, FRONT 102 4-045-165-11 EMBLEM (NO. 6), SONY 103 4-649-447-01 INSULATOR 104 1-529-530-11 SPEAKER UNIT (L) 105 1-960-890-11 HARNESS, FFC (VOLUME) 106 4-649-457-02 TOOTH (W+P) S TITE 3X6 ♦...
- Page 37 SCREW +PSW 3X8 159 1-500-082-11 CLAMP, SLEEVE FERRITE 160 4-651-609-01 CLAMP (GASKET TO) 165 4-651-881-12 FI CONNECTOR TAPE 166 4-651-586-01 SHEET (L14) 167 4-653-380-01 GASKET (L5) 168 4-653-535-12 TAPE (EMI) (FI) (A), CONNECTOR 169 4-653-981-01 STAND BRKT Confidential PCV-LX810/LX910 (UC)
-
Page 38: Accessories And Parts List
0 sont critiquens pour la sécurité. Ne les remplacer que par une pièce portant le numéro spécifié. PALM REST (1) MOUSE (1) PEN SET (1) PEN (1) PEN STAND (1) STAND (1) PEN LEAD (5) PEN LEAD FORCEPS (1) PCV-LX910 Confidential PCV-LX810/LX910 (UC) (END) - Page 39 9-928-393-11 PCV-LX810 9-874-310-11 PCV-LX910 This manual and the constituent data may not be replicated, copied nor reprinted in whole or in part without prior written authorization of Sony Corporation. Sony Corporation English 2001E0500-1 © 2001 Sony Corporation – 48 –...
Need help?
Do you have a question about the PCV-LX810 and is the answer not in the manual?
Questions and answers