Table of Contents
Advertisement
Quick Links
Advertisement
Table of Contents

Related Manuals for Audiovox XM XMAS100-UG002


Summary of Contents for Audiovox XM XMAS100-UG002
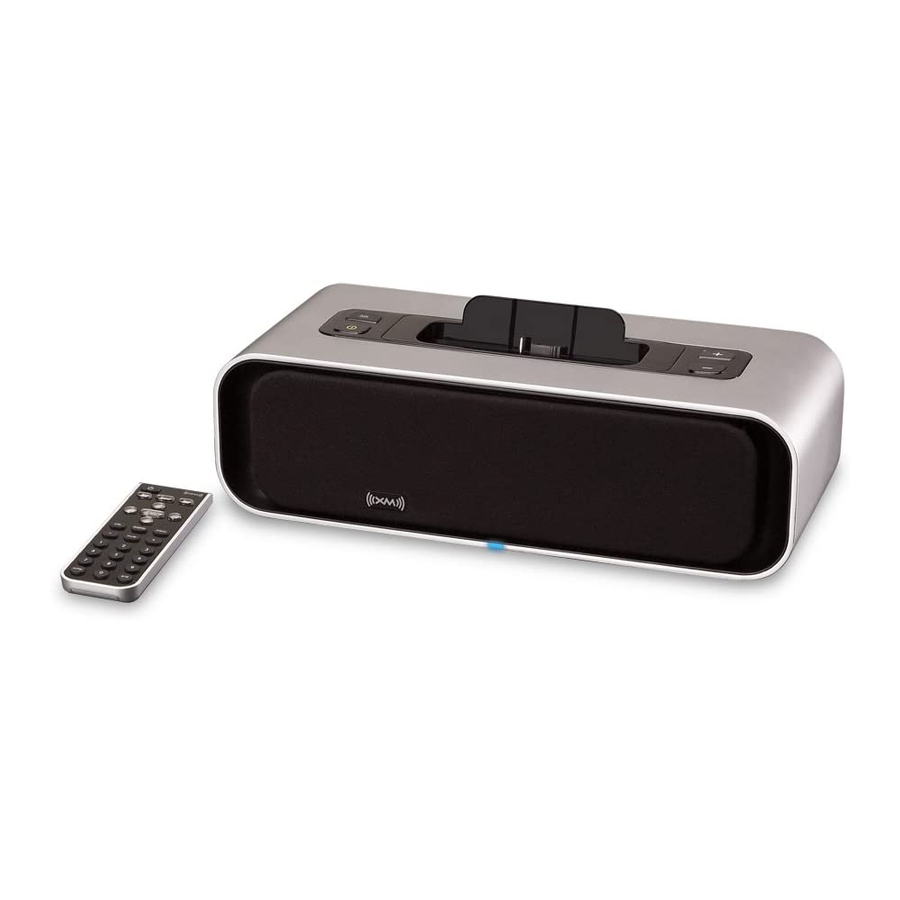
- Page 1 XM Compact Sound System User Guide...
- Page 2 About XM XM is America’s number one satellite radio company. Broadcasting live daily from studios in Washington, DC, New York City, Chicago, the Country Music Hall of Fame in Nashville, Toronto and Montreal, XM’s lineup includes more than 170 digital channels of choice from coast to coast: commercial-free music, premier sports, news, talk radio, comedy, children’s and entertainment programming;...
-
Page 3: Table Of Contents
Getting Started . . . . . . . . . . . . . . . . . . . . . . . . . . . . . . . . . . . . . . . .4 Step 1: Unpack the XM Compact Sound System . -
Page 4: Getting Started
Getting Started Congratulations, you’ve just expanded the use of your XM Radio! Now, in addition to listening to the channels you love in the car, you can listen to XM Music, Sports, News, Talk, Comedy & Entertainment in your home, at the office, etc. Use these instructions to set up your XM Compact Sound System. -
Page 5: Step 2: Choose Your Radio-Specific Dock Adapter
Step 2: Choose your Radio-specific dock adapter The Xpress dock adapter is already installed in the Compact Sound System. The Xpress dock adapter can be used with the following radios: the Audiovox Xpress, Audiovox Xpress , Audiovox Xpress , Audiovox Xpress... - Page 6 Getting Started To remove the Xpress dock adapter, lift both sides of the adapter at the same time. 2 Insert the dock adapter for your radio. If your radio is a Pioneer inno™ or a Samsung Helix™, you will also need the XM2go Boombox Adapter Model: XMPA1 (Sold separately).
- Page 7 Adapter for the inno inno / Helix ™ XM2go Boombox Adapter Model: XMPA1 (Sold separately) Included inno /Helix ™ ™ Dock Adapter and Helix ™ ™ ™...
-
Page 8: Step 3: Insert Your Radio
Getting Started Step 3: Insert your radio To insert your XM Radio into the Compact Sound System, align the radio’s connector with the Sound System’s connector, then carefully but firmly press to secure the radio in place. TIP! Although designed to fit snugly, we recommend that you remove the radio before moving the Sound System. -
Page 9: Step 4: Connect The Antenna
Step 4: Connect the antenna Place the antenna: • Position the antenna for best reception, most likely near a south-facing window. 2 Plug the antenna into the jack labeled Antenna. -
Page 10: Step 5: Connect The Power
Getting Started Step 5: Connect the power Plug the AC power adapter into the jack labeled 12V DC on the Sound System. 2 Plug the other end into any 110 - 120V wall outlet or power source. Step 6: Turn it on Press the power button on the Sound System. -
Page 11: Step 7: Listen
Step 7: Listen This Sound System was designed to work with a wide range of XM receivers. You may need to adjust the audio “Line Out Level” in the menu options of your receiver to achieve optimal performance from this sound system. Please see your XM receiver user guide for additional information on this adjustment. -
Page 12: Remote Control Functions
Getting Started Remote Control functions Power Button * 60-Minute Replay Buttons Pause and replay up to 60 minutes of live XM broadcast. XM Button Confirms selection for channel and menu items. info Displays either your personal stock or info extras informa- tion. -
Page 13: Taking Care Of Your Sound System
Taking Care of Your Sound System Placement Do not place the Sound System or XM radio near heat sources or in direct sunlight. Do not place the Sound System on an inclined or unstable surface, in areas of excessive dust, or areas prone to mechanical shock. Do not block the speakers or ventilation ports. -
Page 14: Troubleshooting
Troubleshooting If this happens My XM radio is not receiving a signal. My XM radio will not turn on. I only receive XM channels 0 and 1. The radio and Sound System are on and receiv- ing a signal but I can’t hear anything. I hear noise or interference. -
Page 15: Technical Information
Power Remote power Temperature Operating Storage Audio Power Frequency response Suitable Receivers (sold separately) Audiovox Xpress Audiovox Xpress Delphi RoadyXT® Pioneer inno™ (with XM2go Boombox Adapter) Samsung Helix™ (with XM2go Boombox Adapter) Technical Information 300mm(W) X 93mm(H) X 120mm(D) 11.80 in(W) X 3.66 in(H) X 4.72 in (D) 49mm(W) X 78mm(H) X 35mm(D 1.93 in(W) X 3.07 in(H) X 1.37 in (D) -
Page 16: Fcc And Ic Statement
FCC Statement The user is cautioned that changes or modifications not expressly approved by XM Satellite Radio Inc. can void the user’s authority to operate this device. This device has been designed to operate with the antenna provided in the original packaging. Use of antenna other than the antenna provided will result in improper operation, and is strictly prohibited per regulations of Industry Canada. -
Page 17: Warranty
Warranty 12 Month Limited Warranty AUDIOVOX ELECTRONICS CORPORATION (the Company) warrants to the original retail purchaser of this product that should under normal use and conditions, be proven de- fective in material or workmanship within 12 months from the date of original purchase, such defect(s) will be repaired or replaced with new or reconditioned product (at the Company’s option) without charge for parts and repair labor. - Page 18 This Warranty gives you specific legal rights and you may also have other rights which vary from state to state. U.S.A. : AUDIOVOX ELECTRONICS CORPORATION, 150 MARCUS BLVD., HAUPPAUGE, NEW YORK 11788 1-800-645-4994 CANADA : CALL 1-800-645-4994 FOR LOCATION OF WARRANTY STATION SERVING YOUR...
- Page 19 Notes Notes:...
- Page 20 XMAS100 XMAS100-UG002...
Need help?
Do you have a question about the XM XMAS100-UG002 and is the answer not in the manual?
Questions and answers