Page 2
Tenda does not assume any liability that may occur d ue to the use or application of the product or circuit layout(s) described herein. Every effort has been made...
About this Manual Thank you for choosing Tenda! Before you start , please read this User Guide, which instructs you to install and configure your device . This User Guide is applicable to 4G600 and 4G630. Unless otherwise specified, the 4G630 is used as an example throughout this User Guide.
Contents About this M anual ......................II Convention ........................II Technical Support ......................II I Product Overview ......................1 1 Package Contents ......................1 2 Getting to Kno w Your Device ..................1 2.1 What It Looks like ....................1 2.2 LED ........................
Page 5
4.2 DMZ Host ......................50 4.3 UPNP ........................51 4.4 Remote Web Management ..................52 4.5 Band width Control (Available only in 4G600) ............53 4.6 Client Filter (Availab le only in 4G600) ..............55 5 Tools .......................... 59 5.1 Time & Date ......................59 5.2 Firmware Upgrade ....................
Install Guide Resource CD If any of the parts are incorrect, missing, or damaged, contact your Tenda dealer. Keep the carton, including the original packing materials, in case you need to return the product for repair. 2 Getting to Know Your Device
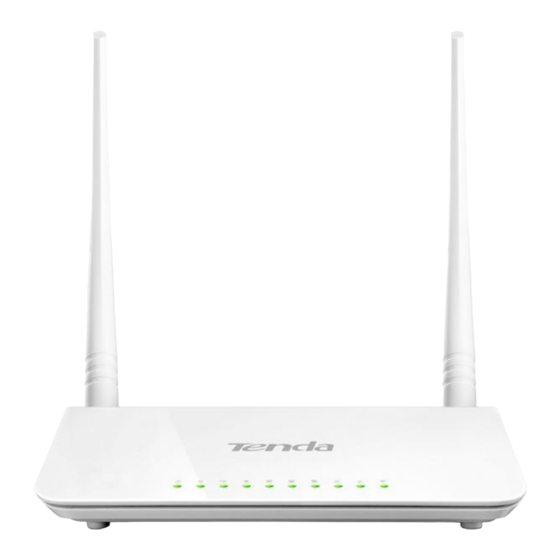
 2.1 What It Looks like...
2.2 LED Status Description PW R Solid The device is receiving electric power. Blinking System is starting up properly. Blinking The device is functioning properly. I Product Overview | Tenda...
WPS/Reset device to factory default settings or 1-3 seconds to enable W PS quick encryption. Internet port for cabling the device to the Internet side LAN1/2/3 Local (LAN) Ethernet ports for cabling the device to I Product Overview | Tenda...
2→Default Login IP address This IP address is to be used to access the device’s settings through a Web browser. 3/4→Default login user name/password This information is to be used for web access authentication . 5→Device’s physical address I Product Overview | Tenda...
Internet. ① Insert a 3G/4G USB modem to the device. ② Connect the device to a power outlet. ③ Connect your desktop, notebook and smart phone, etc. to the device. II Quick Setup | Tenda...
Connect the WAN port of the device to an Internet-enabled DSL/fiber optical/cable modem. ② Connect the modem and the device to a power outlet. ③ Connect your desktop, notebook and smart phone to the device. II Quick Setup | Tenda...
If your computer is set to a static or fixed IP address ( This is uncommon), change it to "Obtain an IP address automatically" and "Obtain DNS server address automatically" from the device. See 1 Configure Your PC. II Quick Setup | Tenda...
In the address bar, input the device’s LAN IP address ( 192.168.0.1 by ② default), and press Enter. ③ Enter the login password (admin by default) and click Login. ④ The Status screen appears. Click Wizard to enter the setup wizard interface. II Quick Setup | Tenda...
4 Quick Internet Setup & Wireless Security Setup Read the following and determine your Internet connection type. Then follow the right setup wizard. If you access the Internet via a 3G/4G USB modem, see 3G/4G Router II Quick Setup | Tenda...
3G/4G Router Mode ① Select 3G/4G Router Mode and click Next. ② Configure 3G/ 4G Internet connection settings and then click Next. If you are not sure of which service provider to use, select Auto. II Quick Setup | Tenda...
Page 16
③ Configure your wireless network: SSID, Channel, Key and then click Next. ④ Click Finish and wait for the device to restart. II Quick Setup | Tenda...
Wireless Router Mode – DHCP ① Select Wireless Router Mode and click Next. ② Select DHCP and click Next. ③ Configure your wireless network: SSID, Channel, Key and then click Next. II Quick Setup | Tenda...
④ Click Finish and wait for the device to restart. Wireless Router Mode – PPPoE ① Select Wireless Router Mode and click Next. II Quick Setup | Tenda...
Page 19
② Select PPPoE, enter the PPPoE User Name/Password and click Next. ③ Configure your wireless network: SSID, Channel, Key and then click Next. II Quick Setup | Tenda...
Five Internet connection types are supported for the wired WAN connection (Ethernet): DHCP, PPPOE, PPTP, L2TP and Static IP. For PPTP, L2TP and Static IP, see 2.2 WAN Settings. Universal Repeater Mode ① Select Universal Repeater Mode and click Next. II Quick Setup | Tenda...
Page 21
② Enter or select the SSID, MAC, Channel and security settings exactly the same as the remote AP and then click Next. ③ Configure your wireless network: SSID and Key and then click Next. II Quick Setup | Tenda...
Auto-switch System Mode: If unchecked, system will not switch between the 3G/4G Router Mode and Wireless Router Mode. If the Auto-switch System Mode and 3G/4G Priority are selected , system will: prioritize the 3G/4G Router Mode when detecting the coexistence of an II Quick Setup | Tenda...
Page 23
Wireless Router Mode when detecting the coexistence of an Ethernet cable and a 3G/4G USB modem. toggle to the 3G/4G Router Mode when only detecting a 3G/4G USB modem. operate in the Wireless Router Mode when only detecting an Ethernet cable. II Quick Setup | Tenda...
Click Status to enter the Status screen. WAN Status WAN Status in 3G/4G Router Mode: 3G/4G Traffic Statistics To view the 3G/4G traffic statistics, click Status -> 3G/4G Traffic Statistics. This screen is available only in the 3G/4G Router Mode. III Features & Configurations | Tenda...
Page 25
WAN Status in Wireless Router Mode WAN Status in Universal Repeater Mode III Features & Configurations | Tenda...
Internet or not. ② If there is no available secondary DNS server, nothing appears in the secondary DNS server field . LAN Status Note The DHCP Server is disabled in Universal Repeater Mode. Wireless Status III Features & Configurations | Tenda...
Up Time: Displays the time duration indicating how long t he router has been up since startup. Up time is recounted and renewed upon power -off. Connected Clients: Displays the number of DHCP clients. III Features & Configurations | Tenda...
IP address and log in again. Also, you have to set the default gateway addresses of all LAN PCs to this new IP address. ③ The device's LAN IP address and WAN IP address must be on different IP III Features & Configurations | Tenda...
Change the IP address to the one you wish to use, for example, 192.168.10.1. ② Click Save to save your settings. 2.2 WAN Settings Click Basic -> WAN Settings to configure your Internet connection settings. 3G/4G Router Mode III Features & Configurations | Tenda...
Page 30
ISP if you are not clear. ⑤ User Name/Password: Enter the user name and password for your 3G/4G Internet service. ⑥ Click Save. Knowledge Center Connect Automatically: Connect automatically to the Internet after rebooting the system or connection failure. III Features & Configurations | Tenda...
Page 31
Select PPTP (Point -to-Point-Tunneling Protocol) if your ISP uses a PPTP connection. DHCP DHCP or Dynamic IP is a connection mode that allow s the device to automatically acquire IP information from your ISP or your existing networking equipment. III Features & Configurations | Tenda...
Page 32
PPPoE is a connection mode associated with some DSL connections that requires user name and password. Contact your ISP if you need assistance with these login credentials. Configuration Procedures: ① Internet Connection Type: Select PPPoE. III Features & Configurations | Tenda...
Page 33
Static IP is a connection mode that allows you to specify the Static IP information provided by your ISP or that corresponds with your existing networking equipment. Configuration Procedures: ① Internet Connection Type: Select Static IP. III Features & Configurations | Tenda...
Page 34
I S P, o t h e r w i s e s e l e c t S t a t i c . C o n s u l t y o u r I S P i f y o u a r e III Features & Configurations | Tenda...
Page 35
VPN across TCP/IP -based data. Enter your ISP provided information to establish a connection. MPPE is an encryption technology developed by Microsoft to encrypt point-to-point links. Configuration Procedures: ① Internet Connection Type: Select PPTP. III Features & Configurations | Tenda...
Page 36
ISP or our technical support suggests changing the MTU value. Below Web-based applications might require an MTU change: A secure Website that does not open, or displays only part of a Web III Features & Configurations | Tenda...
Websites, secure login pages, FTP or POP servers. 2.3 WAN Speed (Available only in Wireless Router Mode) Click Basic -> WAN Speed to enter the configuration interface. Here you can configure the WAN speed and duplex mode. III Features & Configurations | Tenda...
Ensure that your device's WAN port operates with the same speed and duplex mode as the remote link partner. Otherwise, your device's WAN port may not receive and send data. 2.4 DNS Settings Click Basic -> DNS Settings to enter the configuration interface. III Features & Configurations | Tenda...
Some ISPs (Internet Service Providers) require end -user's MAC address to access their network. This feature copies your current PC's MAC address to the device. Click Basic -> MAC Clone to enter the configuration screen. III Features & Configurations | Tenda...
Page 40
② Click Save to save your settings. To manually enter the M AC address allowed by your ISP: ① Enter the MAC address allowed by your ISP. ② Click Save to save your settings. III Features & Configurations | Tenda...
Start IP/End IP: You can specify the starting and ending address es of the IP address pool here. These addresses shoul d be part of the same IP address subnet as the device’s LAN IP address. III Features & Configurations | Tenda...
(if any). By viewing this list, you can know whether there are unauthorized accesses. Also, you can specify a reserved IP address for a PC on your LAN. That PC will always receive the same IP address each time when it accesses the DHCP III Features & Configurations | Tenda...
Page 43
IP address from the device's DHCP server, instead, you must manual ly specify a different IP address for your PC to access the Internet. ② For PCs that have already obtained IP addresses, you may need to perform III Features & Configurations | Tenda...
Page 44
Repair action to activate the configured static IP addresses. III Features & Configurations | Tenda...
The best selection is a channel that is the least used by neighboring networks. ③ Click Save to save your settings. III Features & Configurations | Tenda...
This option is available only in 11b/g/n mixed mode with the channel bandwidth of 20/40. 3.2 Security Click Wireless -> Security to enter the configuration screen. Here you can define a security key to secure your wireless network against unauthorized accesses. III Features & Configurations | Tenda...
Page 47
WPA2-PSK: W PA2 personal supports AES, TKIP and TKIP+AES cipher types. Mixed WPA/WPA2-PSK: If selected, both W PA-PSK and W PA2-PSK secured wireless clients can join your wireless network. AES: If selected, wireless speed can reach up to 300Mbps. III Features & Configurations | Tenda...
Page 48
Reset OOB: If clicked, the W PS LED will turn off and the security function will be disabled automatically. The W PS server on the router enters idle mode and will not respond to any client’s W PS connection request. III Features & Configurations | Tenda...
MAC Addresses. Click Wireless -> Access Control to enter the configuration screen. Three options are available: Disable, Deny and Allow. If you want to allow all wireless clients to join your wireless network, select Disable. III Features & Configurations | Tenda...
3.4 Connection Status Click Wireless -> Connection Status. Here you can see a list of wireless III Features & Configurations | Tenda...
Page 51
① The Bandwidth here refers to the channel bandwidth instead of wireless connection rate. ② You can know whether there are unauthorized accesses to your wireless network by viewing this connection status list . III Features & Configurations | Tenda...
To restrict your LAN PCs to access certain services on the Internet via their IP addresses, see 4.6 Client Filter (Available only in 4G600). 4.1 DDNS Settings Dynamic DNS or DDNS is a term used for the updating in real time of Internet Domain Name System (DNS) name servers.
Page 53
IP address. If your DDNS service provider provides you with a DDNS account (User Name: tenda, Password: 123456, Domain Name: tenda.dyndns.org) and you want to use the PC at the IP address of 218.88.93.33 to remotely access this device on the port number of 8090.
Page 54
Here in this exampl e, enter 123456. ⑤ Domain Name: Enter the DDNS domain name you have registered with your DDNS service provider. Here in this example, enter tenda.dyndns.org . ⑥ Click Save to save your settings. ⑦...
(218.88.93.33) followed by a colon (:) and the remote management port number. Here in this example, enter http://tenda.dyndns.org:8090 . 4.2 DMZ Host The DMZ (De-Militarized Zone) function disables the firewall on the router for one device for a special purpose service such as Internet gaming or video conferencing applications that are not compatible with NAT (Network Address Translation).
(a feature in W indows XP), you may need to enable Universal Plug and Play (UPnP) for better experience. Click Advanced -> UPnP to enter the configuration screen. The UPnP feature is enabled by default. III Features & Configurations | Tenda...
For the purpose of security, we suggest that you only enter the IP address of the PC that is to be used to remotely manage your device. Remote Web Management Application Example: To access your device (WAN IP address: 102.33.66.88) at your home from the III Features & Configurations | Tenda...
Port: This is the management port to be open to outside access. The default setting is 8080. This can be changed. 4.5 Bandwidth Control (Available only in 4G600) If there are multiple PCs behind your device competing for limited bandwidth resource, then you can use this feature to specify a reasonable amount of III Features &...
Page 59
LAN. Here in this example, enter 256 in both boxes. ⑤ Enable: Check to enable the current rule. ⑥ Add to List: Click to add the current rule to the rule list. ⑦ Click Save to save your settings. III Features & Configurations | Tenda...
③ The bandwidth for ADSL/DSL li ne usually refers to the download bandwidth. 4.6 Client Filter (Available only in 4G600) This section allows you to set the times specific clients can or cannot access the Internet via the devices’ IP addresses and service port. Note that this feature is unavailable in 3G/4G Router Mode.
Page 61
Click Add to add a filter rule. ② Filter Mode: Select Deny. ③ Description: Briefly describe the current rule. This field is optional. ④ IP: Enter 192.168.0.110 as the starting IP address and 192.168.0.111 as the ending IP address. III Features & Configurations | Tenda...
Page 62
Here in this example, select Mon, Tue, Wed, Thur and Fri. ⑧ Click Save to save your settings. ⑨ Enable Client Filter: Check to enable the client fil ter feature. ⑩ Select Allow from the Default drop-down list and then click Save. III Features & Configurations | Tenda...
Page 63
The valid service port number range is 1 ~ 65535. ② If you have not set up the system time for this device, click Tools -> Time & Date to configure correct time and date settings for the rule(s) to be effective. III Features & Configurations | Tenda...
Internet. ③ Time Zone: Select your current time zone. ④ Click Save to save your settings. ⑤ Go to the Status screen to make sure the system time is correctly updated. III Features & Configurations | Tenda...
Page 65
Internet Time Server: Uncheck to disable the feature. ② Specify the time and date manually or click Copy Local Time to automatically copy your PC's time to the device. ③ Click Save to save your settings. III Features & Configurations | Tenda...
It is advisable that you upgrade the device's firmware over a wired connection. DO NOT disconnect the power connection to the device when the upgrade is in process otherwise the router may be permanently damaged. Configuration Procedures: III Features & Configurations | Tenda...
Click Tools -> Backup & Restore to enter the configuration screen. It is advisable to include the file name suffix of ".cf g" to avoid problems when renaming the file name. To backup configurations: ① Click Backup. III Features & Configurations | Tenda...
Page 68
② Click OK on the appearing window. ③ Click Save on the File Download window. ④ Select a local hard drive to save the file and click Save. III Features & Configurations | Tenda...
Page 69
To restore configurations: ① Click Browse. ② Select the configuration file that is saved previously to your local hard drive and click Open. III Features & Configurations | Tenda...
Do not restore factory default settings unless the following happens: You need to join a different network or unfortunately forget the login password. You cannot access the Internet and your ISP or our technical support asks III Features & Configurations | Tenda...
Otherwise, anyone in your network can access this utility to change your settings. ① The default login password is "admin". ② A valid password must only include letters, numbers or underscore. III Features & Configurations | Tenda...
Confirm New Password: Re-enter the new password for confirmation. ④ Click Save to save your settings. 5.6 Logs Click Tools -> Logs to enter the configuration screen. Here you can view the history of the device’s actions upon system startup. III Features & Configurations | Tenda...
5.7 Reboot When a certain feature does not take effect or the device is malfunctioning, try rebooting the device. III Features & Configurations | Tenda...
Step 2: Click Open Network and Sharing Center. If you cannot find the icon on the right bottom corner of your desktop, follow steps below: Click Start -> Control Panel -> Network and Internet -> Network and Sharing Center. IV Appendix | Tenda...
Page 75
Step 3: Click Local Area Connection -> Properties. Step 4: Find and double click Internet Protocol Version 4(TCP/IPv4). IV Appendix | Tenda...
OK. Step 6: Click OK on the Local Area Connection Properties window (see Step 4 for the screenshot). Windows XP Step 1: Right click My Network Places on your desktop and select Properties. IV Appendix | Tenda...
Page 77
Step 2: Right click Local Area Connection and select Properties. Step 3: Scroll down to find and double click Internet Protocol (TCP/IP). IV Appendix | Tenda...
Page 78
Step 4: Select Obtain an IP address automatically and Obtain DNS server address automatically and click OK. Step 5: Click OK on the Local Area Connection Properties window (see Step 3 for the screenshot). IV Appendix | Tenda...
Step 2: Double click the name of the wireless network (SSID) you wish to join and then follow onscreen instructions. When Connected appears next to the selected wireless network (SSID), you have successfully connected to it. IV Appendix | Tenda...
Windows XP Step 1: Right click My Network Places and select Properties. Step 2: Right click Wireless Network Connection and select View Available Wireless Networks. IV Appendix | Tenda...
Page 81
Step 3: Double click the name of the wireless network (SSID) you wish to join and then follow onscreen instructions. When Connected appears next to the selected wireless network (SSID), you have successfully connected to it. IV Appendix | Tenda...
We will be more than happy to help you out as soon as possible. 1. Q: I cannot access the device's management interface. What should I do? Make sure the PWR (power) LED on the device is on and the SYS LED blinks normally.
Page 84
You need to change the MTU size. Try changing the MTU to 1450 or 1400. If this does not help, gradually reduce the MTU from the maximum value until the problem disappears. For details, see WAN MTU Setup. IV Appendix | Tenda...
This section explains how to remove a wireless network from your PC. Windows 7 ① Right-click the Network icon and select Properties. ② Select Manage Wireless Networks. ③ Select the wireless network and click Remove network. IV Appendix | Tenda...
Windows XP ① Right-click My Network Places and select Properties. ② Right click Wireless Network Connection and then select Properties. IV Appendix | Tenda...
Page 87
③ Click Wireless Networks, select the wireless network name under Preferred networks and then click the Remove button. IV Appendix | Tenda...
Reorient or relocate the receiving antenna. IV Appendix | Tenda...
Page 89
NOTE: (1) The manufacturer is not responsible for any radio or TV interference caused by unauthorized modifications to this equipment. (2) To avoid unnecessary radiation interference, it is recommended to use a shielded RJ-45 cable. NCC Notice 經型式認證合格之低功率射頻電機,非經許可,公司、商號或使用者均不得擅自變更 頻率、加大功率或變更設計之特性及功能。 低功率射頻電機之作用不得影響飛航安全及幹擾合法通信;經發現有幹擾現象時,應 立即停用,並改善至無幹擾時方得繼續使用。前項合法通信,指依電信規定作業之無 線電信。低功率射頻電機須忍受合法通信或工業、科學及醫療用電波輻射性電機設備 之幹擾。 IV Appendix | Tenda...