Table of Contents
Advertisement
Advertisement
Table of Contents

Subscribe to Our Youtube Channel
Related Manuals for Danelec DM800


Summary of Contents for Danelec DM800
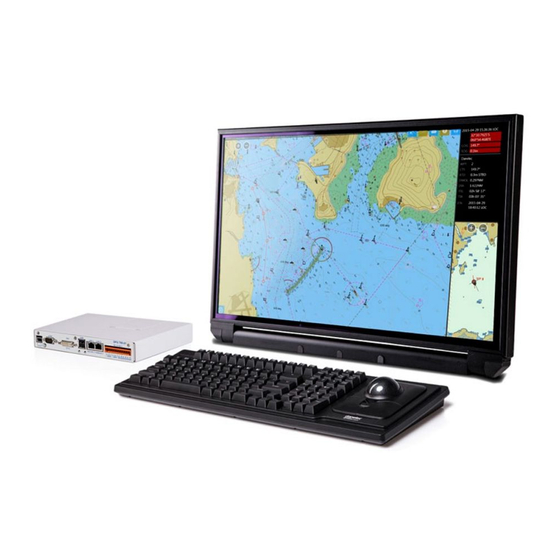
- Page 1 User Guide DANELEC DM800 ECDIS G2 Version 1.1...
-
Page 2: Table Of Contents
DANELEC User Guide V1.1 Data Management The User Permit Number (UPN) The Public Key Deleting ENC Data Deleting ENC Permits Installing ENC P ermits Installing AVCS DVDs Installing AVCS B a s e CDs Installing AVCS Update CDs Installing Exchange Set using USB... -
Page 3: Data Management
DANELEC User Guide V1.1 1. Data Management This User Guide refers to Version 2.13 of the DANELEC DM800 ECDIS G2. All Chart licensing and data management operations are carried out on the ‘Nav Data’ screen from the Main Menu. Navigation chart data comes as geospatial databases distributed over the Internet or on portable data storage devices. -
Page 4: The User Permit Number (Upn)
DANELEC User Guide V1.1 2. The User Permit Number (UPN) The ‘User ‘Permit Number’ is a 28 character alphanumeric string that is unique to each ECDIS installation or group of ECDIS (e.g. multiple bridge installations). The ‘User Permit Number’ should have been supplied at the time of delivery and must be used when ordering an AVCS license. -
Page 5: The Public Key
DANELEC User Guide V1.1 3. The Public Key The Admiralty Vector Chart Service requires a Scheme Administrator Certificate, or Public Key, to be installed on the ECDIS system. The C e r t i f i c a t e currently used is the IHO.CRT, issued by the International Hydrographic Organization, to authenticate its AVCS ENCs. - Page 6 DANELEC User Guide V1.1 When the ‘SA Certificates’ panel is opened for the first time after ECDIS launch, the SA Certificates search starts automatically. To refresh the SA Certificates list manually, press the ‘Refresh’’ button in the upper-right corner of the panel: Installing new SA Certificate 1.
- Page 7 DANELEC User Guide V1.1 Deleting SA Certificate Press the ‘Delete’ button on the ‘System’ window and confirm the operation. The Certificate is removed. Restoring SA Certificate Press the ‘Restore IHO.CRT’ button on the ‘System’ window and confirm the operation. The last deleted Certificate is restored.
-
Page 8: Deleting Enc Data
(purge) all ENC Permits and ENC Data from the system before installing AVCS. For more information please refer to the ‘Data Cleansing’ section in the generic AVCS User Guide. In the Danelec ECDIS, you can delete both installed ENC Databases and Datasets. Deleting ENC Database 1. - Page 9 DANELEC User Guide V1.1 2. Select ‘Chart Library’ 3. Open the Catalog of the Database whose Dataset is to be deleted by pressing the ‘Catalog’ button 4. Find the Dataset to be deleted in the list of Datasets. Press the ‘Delete’...
-
Page 10: Deleting Enc Permits
DANELEC User Guide V1.1 5. Deleting ENC Permits New AVCS customers who had previously subscribed to other ENC services are strongly recommended to remove (purge) all ENC Permits and ENCs from the system before installing AVCS. For more information, please refer to the “Data Cleansing’... - Page 11 DANELEC User Guide V1.1 Deleting All ENC Permits To delete all installed ENC Permits, press the ‘Select All’ button on the above ‘Navigational Data’ screen Press the ‘Delete Selected’ button and confirm the operation. All selected installed ENC Permits are deleted.
-
Page 12: Installing Enc Permits
DANELEC User Guide V1.1 Installing ENC Permits Install Cell Permits 1. Select the ‘Nav Data’ Tab from the Main Menu: 2. Select ‘Install Charts’. Click on ‘Install Permits’ The ‘Install Permits’ panel opens: 3. Press the ‘Refresh’ button in the upper-right corner of the panel and the ECDIS starts searching for ENC Permits: To stop the search, press the ‘Cancel’... - Page 13 DANELEC User Guide V1.1 At the end of installation, a message appears giving notification of the result. Press ‘OK’ to close the message: The installation status of the Cell Permits opens: ‘OK’ or ‘Fail’ appears to confirm the installation of the Permits. Warning...
-
Page 14: Installing Avcs Dvds
DANELEC User Guide V1.1 Installing AVCS DVDs When using the AVCS DVD Service, one or two discs need to be installed (depending on which Volume or Country Cells are to be installed). No other CDs need to be installed as these DVDs contain all the Base ENCs and Updates up to the date of their issue. - Page 15 DANELEC User Guide V1.1 3. In the ‘Find and Install Charts’ list, find the Exchange Set to install and select it. 4. Enter a name for the new Database and press ‘OK’. The installation starts. 5. At the end of the installation, an information message confirms the completion of the operation: press ‘OK’...
- Page 16 DANELEC User Guide V1.1 Once the first AVCS DVD has been successfully installed, if then needed, repeat the same installation procedure for the second AVCS DVD.
-
Page 17: Installing Avcs Base Cds
DANELEC User Guide V1.1 Installing AVCS Base CDs Insert the AVCS Base CD into the CD/DVD Drive 1. Select the ‘Nav Data’ Tab from the Main Menu: 2. Select ‘Install Charts’ and then ‘Find and Install Charts’. A list of all ENC Exchange Sets found on removable data storage devices connected to the ECDIS appears: When you open the ‘Find and Install Charts’... - Page 18 DANELEC User Guide V1.1 4. Enter a name for the new Database and press ‘OK’. The installation starts. 5. At the end of the installation, an information message confirms the completion of the operation: press ‘OK’ 6. The installation summary is displayed and the result and warning messages window opens. To close the window, press the ‘Cancel’...
-
Page 19: Installing Avcs Update Cds
DANELEC User Guide V1.1 Installing AVCS Update CDs Note: AVCS Base CDs are re-issued about every 6 to 8 weeks. The AVCS update disc will indicate which Base disc week must have been installed. It is important that users do not attempt to load an Update CD that is not consistent with the Base... - Page 20 DANELEC User Guide V1.1 4. Enter a name for the new Database and press ‘OK’. The installation starts. 5. At the end of the installation, an information message confirms the completion of the operation: press ‘OK’ 6. The installation summary is displayed and the result and warning messages window opens. To close the window, press the ‘Cancel’...
-
Page 21: Installing Exchange Set Using Usb
DANELEC User Guide V1.1 Installing Exchange Set using USB The loading process of an AVCS Exchange Set from a USB within the ECDIS is the same as the one for the AVCS DVDs, Base and Update CDs Service and is detailed below: Insert the USB into the USB Drive. - Page 22 DANELEC User Guide V1.1 4. Enter a name for the new Database and press ‘OK’. The installation starts. 5. At the end of the installation, an information message confirms the completion of the operation: press ‘OK’ 6. The installation summary is displayed and the result and warning messages window opens. To close the window, press the ‘Cancel’...
-
Page 23: Viewing An Enc
DANELEC User Guide V1.1 Viewing an ENC To view an ENC in the DM800 G2 ECDIS: 1. Select the ‘Nav Data’ Tab from the Main Menu: 2. Select ‘Chart Library’ 3. Open the Catalog of the Database whose Cell is to be viewed on the ECDIS by clicking on the Database itself or by clicking on the ‘Catalog’... -
Page 24: Installing Aio Permits
DANELEC User Guide V1.1 Installing AIO Permit The Admiralty Information Overlay (AIO) is installed in the Danelec DM800 ECDIS G2 by installing the Cell GB800001 included in the PERMIT.TXT file and then the AIO Data. Install AIO Cell Permit 1. Select the ‘Nav Data’ Tab from the Main Menu: 2. - Page 25 DANELEC User Guide V1.1 At the end of installation, a message appears giving notification of the result. Press ‘OK’ to close the message: The installation status of the AIO Cell Permit opens: ‘OK’ or ‘Fail’ appears to confirm the installation of the Permits.
-
Page 26: Installing Aio Data
DANELEC User Guide V1.1 Installing AIO Data Insert the AIO CD into the CD/DVD Drive 1. Select the ‘Nav Data’ Tab from the Main Menu: 2. Select ‘Install Charts’ and then ‘Find and Install Charts’. A list of all ENC Exchange Sets found on removable data storage devices connected to the ECDIS appears: When you open the ‘Find and Install Charts’... - Page 27 DANELEC User Guide V1.1 4. Enter a name for the new Database and press ‘OK’. The installation starts. 5. At the end of the installation, an information message confirms the completion of the operation: press ‘OK’ 6. The installation summary is displayed and the result and warning messages window opens. To close the window, press the ‘Cancel’...
-
Page 28: Using The Aio
DANELEC User Guide V1.1 Using the AIO Insert the AIO CD into the CD/DVD Drive 8. Select the ‘Nav Data’ Tab from the Main Menu: 9. Select ‘Install Charts’ and then ‘Find and Install Charts’. A list of all ENC Exchange Sets found on removable data storage devices connected to the ECDIS appears: When you open the ‘Find and Install Charts’... - Page 29 DANELEC User Guide V1.1 11. Enter a name for the new Database and press ‘OK’. The installation starts. 12. At the end of the installation, an information message confirms the completion of the operation: press ‘OK’ 13. The installation summary is displayed and the result and warning messages window opens. To close the window, press the ‘Cancel’...
-
Page 30: System Checks
System Checks The user has the option to review the status of all installed ENCs on the Danelec DM800 ECDIS G2 as an update log with short information about the updates, or as an update tree with detailed information about each updated object. - Page 31 DANELEC User Guide V1.1 By default, the ‘Update Log’ is displayed. To switch between the updates log and updates tree, select the required option in the drop-down list in the upper-right corner of the panel. To view information about updates applied to a Cell, select the required Cell in the list. Alternatively, use the Search field at the bottom of the Cells list to find the Cell you need.
- Page 32 DANELEC User Guide V1.1 To view the Update Tree Select the ‘Nav Data’ Tab from the Main Menu: Select ‘Chart Library’. The ‘Chart library’ panel opens with the list of all installed chart databases Find the database you need and press its ‘Update History’ button...
- Page 33 DANELEC User Guide V1.1 By default, the ‘Update Log’ is displayed. To switch to the Update Tree, select the Update Tree option in the drop- down list in the upper-right corner of the panel. The Update Tree opens with updates grouped by producing agency and sorted alphabetically. The Update Tree levels include: Hydrographic office, Dataset, Update, Updated objects.
- Page 34 DANELEC User Guide V1.1 To group and sort updates by Producing Agency, press the ‘Sort by Agency’ button in the upper-right corner of the panel. To scroll the Chart View to an updated object, select the object in the list: the chart view is scrolled to the object.
-
Page 35: Troubleshooting
DANELEC User Guide V1.1 Troubleshooting Many of the difficulties that could be experienced when using the Admiralty Vector Chart Service with this system can be avoided by carefully following the instructions in this guide. However, issues that are known to have caused confusion in the past are detailed in the Frequently Asked Questions (FAQ) section which can be found at: http://www.ukho.gov.uk/Support... - Page 36 DANELEC User Guide V1.1 Emergency Chart Permit Generation In certain circumstances it may be necessary for a vessel to get access to an AVCS chart at very short notice, for instance if a route needs to be diverted due to a medical or safety emergency.
Need help?
Do you have a question about the DM800 and is the answer not in the manual?
Questions and answers