Table of Contents
Advertisement
Advertisement
Table of Contents

Related Manuals for Zte BLADE A512


Summary of Contents for Zte BLADE A512
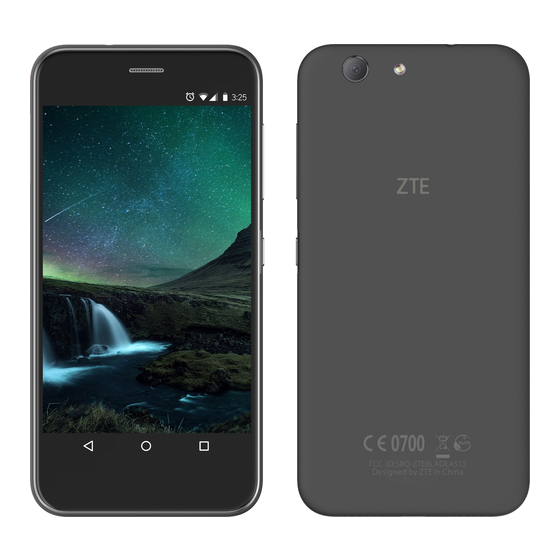
- Page 1 ZTE BLADE A512 User Manual...
- Page 2 About This Manual Thank you for choosing this ZTE mobile device. In order to keep your device in its best condition, please read this manual and keep it for future reference. Copyright Copyright © 2017 ZTE CORPORATION All rights reserved.
- Page 3 Google and Android are trademarks of Google, Inc. ® The Bluetooth trademark and logos are owned by the Bluetooth SIG, Inc. and any use of such trademarks by ZTE Corporation is under license. microSDXC Logo is a trademark of SD-3C, LLC. ®...
-
Page 4: Table Of Contents
Contents Getting Started ............10 Getting to Know Your Phone ..........10 Knowing the Keys .............. 12 Installing the nano-SIM Card and the microSDXC™ Card 12 Charging the Battery............14 Extending the Battery Life ..........16 ... - Page 5 Monitoring the Phone Status ..........32 Managing Notifications ............33 Managing Shortcuts and Widgets ........37 Organizing With Folders ............ 38 Rearranging the Primary Shortcuts ........39 Entering Text ..............39 Editing Text ................ 43 ...
- Page 6 Using Options During a Call ..........69 Managing Multi-party Calls ..........70 Adjusting Your Call Settings ..........72 Contacts ..............76 Checking Contact Details ..........76 Adding a New Contact ............76 Setting Up Your Own Profile ..........77 ...
- Page 7 Replying to a Message ............93 Forwarding a Message ............94 Copying a Message ............94 Changing Message Settings ..........95 Web Browser ............96 Opening the Browser ............96 Using Multiple Browser Tabs ..........97 ...
- Page 8 Video Player ............114 Opening the Video Library ..........114 Playing and Controlling Videos ........114 Managing Video Files ............115 FM Radio ............... 117 Scanning and Saving Channels ........117 Listening to FM Radio ............117 ...
- Page 9 Upgrading the Phone Software ......140 Troubleshooting ........... 141 ...
-
Page 10: Getting Started
Getting Started Getting to Know Your Phone Proximity & light sensor Indicator light Front camera Earpiece nano-SIM/ microSDXC card tray Touch screen Charging/ micro-USB jack... - Page 11 Headset jack Flash Back camera Volume key Power key Speaker...
-
Page 12: Knowing The Keys
Knowing the Keys Function Press and hold to turn on or off flight Power key mode, restart, turn on or off vibration or sound, or power off. Press to turn off or on the screen display. Press or hold either end of the key to turn the Volume key volume up or down. - Page 13 WARNING! To avoid damage to the phone, do not use any other kind of SIM cards, or any non-standard nano-SIM card cut from a SIM card. You can get a standard nano-SIM card from your service provider. 1. Insert the tip of the tray eject tool into the hole next to the card tray.
-
Page 14: Charging The Battery
As you charge your phone, the lock screen will show you the exact battery level on the status bar. WARNING! Use only ZTE-approved chargers and cables. The use of unapproved accessories could damage your phone or cause the battery to explode. - Page 15 1. Connect the adapter to the charging jack. Ensure that the adapter is inserted with the correct orientation. Do not force the connector into the charging jack. 2. Connect the charger to a standard AC power outlet. If the phone is on, you’ll see a charging icon, such as appear on the status bar.
-
Page 16: Extending The Battery Life
customer service if you still cannot power on the phone after prolonged charging. Extending the Battery Life Active applications, screen brightness levels, Bluetooth and Wi-Fi usage and GPS functionality can drain your battery. You can follow the helpful tips below to conserve your battery power: ... -
Page 17: Setting Up For The First Time
Setting Up for the First Time When you first power on your phone after you purchase it or reset it to factory settings (see Backup and Reset), you need to do some settings before using it. Touch the language field to select the language. Then follow the prompts to set up Wi-Fi, Google account, Google location and other options. -
Page 18: Using The Touch Screen
Swipe from to use voice assistant, or swipe from open the camera. - or - Touch a notification twice consecutively to open the related app. NOTE: If you have set an unlock pattern, a PIN or a password for your phone (see Protecting Your Phone With Screen Locks), you’ll... - Page 19 Touch and Hold To open the available options for an item (for example, a message or link in a web page), touch and hold the item. Swipe or Slide To swipe or slide means to quickly drag your finger vertically or horizontally across the screen.
- Page 20 Pinch In some apps (such as Maps, web browser, and Gallery), you can zoom in and out by placing two fingers on the screen at once and pinching them together (to zoom out) or spreading them apart (to zoom in). ...
-
Page 21: Getting To Know The Home Screen
NOTE: The auto-rotate feature needs to be enabled for the screen orientation to automatically change. Touch > > Settings > Display > When device is rotated and select Rotate the contents of the screen. You can also access the screen rotation control by sliding down the status bar twice and touch Auto-rotate/Portrait. - Page 22 Extended Home Screen Panels Your home screen is extendable, providing more space for app icons, widgets, and more. Simply swipe left or right on the home screen to see the extended panels. You can add or remove home screen panels, or adjust their order. To add a new home screen panel: 1.
-
Page 23: Personalizing
Personalizing Changing the System Language Touch > > Settings > Language & input > Language. Select the language you need. Setting the Date and Time Touch > > Settings > Date & time. Set the date, time, time zone, and time format. To adjust the date and time automatically, turn on ... -
Page 24: Changing Ringtone And Notification Sound
Changing Ringtone and Notification Sound You can customize the default incoming call ringtone and the default notification sound. 1. Touch > > Settings > Sound & notification. 2. Touch Phone ringtone or Default notification ringtone. 3. Select the ringtone you want to use. NOTE: If you have additional audio files saved in the internal storage or the microSDXC card, touch More Ringtones or More... -
Page 25: Adjusting Volume
Adjusting Volume Touch > > Settings > Sound & notification. Drag the sliders below Media volume, Alarm volume and Ring volume to adjust the volume for each type of audio. NOTE: You can adjust the media volume when a media application is in use by pressing the Volume key. - Page 26 NOTES: Press and hold the Power key and touch to turn on Alarms only quickly, or touch to turn on vibration. Press the Volume key when no media application is active to show the volume bar. Drag the slider to the left or keep pressing the Volume down key to turn on vibration.
-
Page 27: Applying New Wallpapers
To set a Do not disturb rule: If you want to allow all notification alerts through most of the time, but want to limit alerts during certain times (like at night or on the weekends), you can set a rule for Do not disturb mode. 1. -
Page 28: Changing Screen Brightness
3. Touch Set wallpaper. NOTE: In addition, you can touch > > Settings > Display > Wallpaper to pick an image from Gallery, Photos or Wallpapers, or an animation from Live Wallpapers. Changing Screen Brightness 1. Touch > > Settings > Display > Brightness level. 2. - Page 29 Touch None to disable the screen lock. Touch Swipe to enable screen lock and allow unlocking with a ‘swipe' gesture. You can unlock the screen by touching the display and sliding up. Touch Pattern to draw and redraw a pattern that you ...
-
Page 30: Protecting Your Phone With Screen Pinning
Protecting Your Phone With Screen Pinning You can use the screen pinning feature to keep an app in view, so others cannot switch to other apps or access your personal information. Turn On Screen Pinning 1. Touch > > Settings > Security > Screen pinning. 2. - Page 31 Unpin the Screen To unpin the screen and return to normal use, touch and hold at the same time. If you have asked for the unlock pattern, PIN or password before unpinning the screen, swipe up on the lock screen and draw the pattern or enter the PIN/password.
-
Page 32: Knowing The Basics
Knowing the Basics Monitoring the Phone Status The status bar at the top of the home screen provides phone and service status icons on the right side. Below are some of the icons you may see. EDGE connected No signal 3G/HSPA+ connected Signal strength LTE connected... -
Page 33: Managing Notifications
Managing Notifications Notification Icons The status bar at the top of the home screen provides notification icons on the left. Below are some of the icons you may see. New Wi-Fi network New SMS detected New MMS Downloading data New message(s) from Sending data the Email app New message(s) from... -
Page 34: Respond To Or Remove A Notification
Open/Close the Notification Panel Notifications report the arrival of new messages, calendar events, and alarms, as well as ongoing events, such as when you are playing music. You can open the notification panel to view the details of notifications. To open the notification panel, swipe your finger down on the home screen or from the top of the screen. - Page 35 Block all: Hide future notifications from this app. Treat as priority: Show notifications from this app when Do not disturb mode is set to Priority only. Allow peeking: Allow this app to show certain notifications briefly in the current screen. Hide sensitive content: Hide content in this app's ...
- Page 36 Do not disturb / Total silence / Alarms only / Priority only: Touch to turn on Do not disturb mode and select an option. Touch again to turn off Do not disturb mode. See Using Do Not Disturb Mode. ...
-
Page 37: Managing Shortcuts And Widgets
Managing Shortcuts and Widgets Add Shortcuts and Widgets 1. Touch > - or - To add widgets, touch and hold an empty area of the home screen and select WIDGETS. 2. Slide up or down to browse the available applications or widgets. -
Page 38: Organizing With Folders
Adjust Widget Size 1. Touch and hold a widget on the home screen and then release it. 2. An outline appears around the widget. Drag the outline to resize the widget. NOTE: Not all widgets can be resized. Organizing With Folders You can create folders on the home screen and add several shortcuts to a folder. -
Page 39: Rearranging The Primary Shortcuts
Rearranging the Primary Shortcuts The home screen includes a customizable primary shortcuts area at the bottom visible from all home screens. You can keep at most four items in the primary shortcuts area. Drag shortcuts or folders in or out of the area to rearrange it. Entering Text You can enter text using the onscreen keyboard. -
Page 40: Change Input Methods
Change Input Methods 1. When you use the onscreen keyboard to enter text, touch the icon at the bottom right corner of the screen. 2. Select the input method you need. Android Keyboard The Android Keyboard provides a layout similar to a desktop computer keyboard. - Page 41 As you enter a word, candidates appear above the keyboard. Touch to select the correct one; touch and hold to see more possible options. Touch to use uppercase. Double-tap to lock uppercase. This key also changes to indicate the current case you are using: for lowercase, for uppercase,...
-
Page 42: Google Voice Typing
3. Move your finger from letter to letter on the keyboard to trace a word without lifting the finger until you reach the end of the word. End of the word Start of the word NOTES: Touch when you want to. If you want to enter a single letter, go ahead and touch. -
Page 43: Editing Text
Or touch at the bottom right and select Google voice typing. 2. When you see the microphone image, speak what you want to type. 3. You can continue entering text to keep it or to delete it. NOTE: Say "comma," "period," "question mark," "exclamation mark," or "exclamation point"... -
Page 44: Opening And Switching Apps
Replace text with the clipboard text: Select the text you want to replace. Then touch PASTE. Insert clipboard text to the text field: Touch and hold the tab below the cursor and then select PASTE. Opening and Switching Apps Open an App Touch >... -
Page 45: Uninstalling An App
Uninstalling an App 1. Touch > to open the application list screen. 2. Touch and hold an application icon and drag the icon to (Uninstall) at the top of the screen. 3. Touch OK to uninstall the app. NOTE: Some pre-installed apps cannot be uninstalled. -
Page 46: Connecting To Networks And Devices
Connecting to Networks and Devices Connecting to Mobile Networks Control Mobile Data Use To enable or disable data access: 1. Touch > > Settings > Data usage. 2. Touch the Mobile data switch to enable or disable mobile data use. To get data services when roaming: 1. -
Page 47: Connecting To Wi-Fi
Set Access Point Names To connect to the Internet you can use the default Access Point Names (APN). And if you want to add a new APN, please contact the service provider to get the necessary information. 1. Touch > >... - Page 48 Turn Wi-Fi On and Connect to a Wi-Fi Network 1. Touch > > Settings > Wi-Fi. 2. Slide the Wi-Fi switch to the On position to turn on Wi-Fi. 3. Touch a network name to connect to it. 4. If the network is secured, enter the password and touch CONNECT.
- Page 49 To connect to a secured network, you first need to get the security details from the network's administrator. 1. Touch > > Settings > Wi-Fi. 2. Slide the Wi-Fi switch to the On position. 3. Touch > Add network. 4. Enter the network SSID (name). If necessary, enter security or other network configuration details.
- Page 50 3. Touch > Advanced > WPS Pin Entry. 4. The WPS PIN number displays on the screen. Enter the PIN number into the access point's setup page. After entering the PIN number, your phone automatically finds the access point and configures the connection. NOTE: For detailed information about the WPS feature of the access point, please refer to its user documents.
-
Page 51: Using Wi-Fi Direct
Keep Wi-Fi on during sleep: Set whether to keep Wi-Fi on in sleep mode. Install certificates: Install certificates needed for connecting to certain Wi-Fi networks. Wi-Fi Direct: Use the Wi-Fi Direct feature. See Using ® Wi-Fi Direct WPS Push Button: Connect to a WPS network via the ... -
Page 52: Connecting To Bluetooth Devices
The other device will receive a connection prompt and need to accept the request for connection. Both devices may need to enter a common PIN. 5. Once connected the device is displayed as “Connected” in the Peer devices list. Send Data via Wi-Fi Direct 1. -
Page 53: Change The Device Name
Change the Device Name 1. Touch > > Settings > Bluetooth. 2. Slide the Bluetooth switch to the On position if Bluetooth is off. 3. Touch > Rename this device. 4. Edit the name and touch RENAME. Pair With Another Bluetooth Device 1. -
Page 54: Send Data Via Bluetooth
Forget (Unpair With) a Bluetooth Device You can make your phone forget its pairing connection with another Bluetooth device. To connect to the device again, you need to search it and enter or confirm a passkey again. 1. Touch > >... -
Page 55: Connecting To Your Computer Via Usb
Connecting to Your Computer via USB You can connect your phone to a computer with a USB cable and transfer music, pictures, and other files in both directions. Your phone stores these files in the phone storage or on a removable microSDXC card. -
Page 56: Using Usb On-The-Go (Otg)
Using USB On-The-Go (OTG) Your phone supports USB On-The-Go. You can connect the phone and a USB peripheral device (such as a USB flash drive, a USB mouse, or a USB keyboard) with an OTG adapter cable. For example, when you connect the phone with a USB flash drive, you can browse the files on the flash drive;... - Page 57 CAUTION: As part of the phone storage, the microSDXC card may have data on it that is necessary for some apps to function normally. Therefore, do not remove or replace the card randomly. Set Up the microSDXC Card as Portable Storage When you install a microSDXC card that has not been used on your phone before, the phone will mount the card as portable...
- Page 58 4. Touch ERASE & FORMAT. CAUTION: The formatting procedure erases all the data on the microSDXC card, after which the files CANNOT be retrieved. Set Up the microSDXC Card as Phone Storage If your microSDXC card is new or doesn't have content you want to keep, you can format the card and use it as part of the phone storage.
- Page 59 To move data between the internal storage and the microSDXC card: With the microSDXC card as part of the phone storage, you can move your photos, files and other data between the internal storage and the card any time. 1. Touch >...
-
Page 60: Sharing Your Mobile Data Connection
5. When the screen prompts the card is safely ejected, you can now remove it from the phone. To reformat the microSDXC card as portable storage: If you no longer want to use your microSDXC card as phone storage, you can reformat the card as portable storage. NOTE: Before the formatting, ensure that you have moved data and apps to the internal storage. - Page 61 NOTE: You cannot transfer files between your phone and your computer when the phone is USB tethered. 1. Connect your phone to your computer with a USB cable. 2. Touch > > Settings > More > Tethering & portable hotspot. 3.
- Page 62 NOTE: To stop sharing your data connection, switch off Bluetooth tethering. Share Your Mobile Data Connection as a Wi-Fi Hotspot You can share your phone’s data connection with other devices by turning your phone into a portable Wi-Fi hotspot. The feature needs data connection on a mobile network and may result in data charges.
-
Page 63: Connecting To Virtual Private Networks
Set Your Wi-Fi Hotspot You can change the name of your phone's Wi-Fi network (SSID), secure your portable Wi-Fi hotspot, and set other options. 1. Touch > > Settings > More > Tethering & portable hotspot. 2. Touch Set up Wi-Fi hotspot and set your name and security options as follows. -
Page 64: Connect To A Vpn
Add a VPN Touch > > Settings > More > VPN. Touch at the top right corner and fill in the information provided by your network administrator. Touch SAVE. The VPN is added to the list on the VPN screen. NOTE: You must set a lock screen pattern, PIN or password before using VPN. -
Page 65: Phone Calls
Phone Calls You can place calls from the Phone app, the Contacts app, or other apps or widgets that display contact information. Wherever you see a phone number, you can usually touch it to dial. Placing and Ending Calls Place a Call by Dialing 1. -
Page 66: Answering Or Rejecting Calls
NOTE: To redial the last call you made, just touch > > Phone > > and touch again. End a Call During a call, touch on the screen. Answering or Rejecting Calls When you receive a phone call, the incoming call screen opens, displaying the caller ID or the information about the caller that you've entered in the Contacts app. -
Page 67: Working With The Call History
Drag over to reject the call. - or - Drag over to reject the call and select a preset text message or edit one to send to the caller. - or - If the screen is unlocked, touch DISMISS to reject the call. NOTE: To edit the preset text response from within the Phone app, touch in the top search field and select Settings >... - Page 68 Add a Number From Call History as a Contact Open the call history. Touch the contact icon in front of a number. Touch on the contact information tab. To add the number to an existing contact, touch a contact in the list.
-
Page 69: Calling Your Contacts
Calling Your Contacts 1. Touch > > Phone. Your favourite contacts and frequently called contacts are displayed in the tab. 2. Touch a contact to place the call, or touch or swipe to the tab to view all your contacts, touch a contact and then touch its number to make a call. -
Page 70: Managing Multi-Party Calls
Touch to turn on or off the speaker. Touch to mute or unmute your microphone. Touch to switch to the keypad when you need to enter a code (for example, the PIN for your voicemail or bank account) during the call. -
Page 71: Switch Between Current Calls
NOTE: The call waiting and three-way call features need network support and may result in additional charges. Please contact your service provider for more information. Switch Between Current Calls When you’re on a call and another call comes in, your phone screen informs you and displays the caller ID. -
Page 72: Adjusting Your Call Settings
If one of the people you called hangs up during your call, you and the remaining caller stay connected. If you initiated the call and are the first to hang up, all callers are disconnected. To end the conference call, touch Adjusting Your Call Settings Set Contact Display Options You can set the order of the contacts displayed in the... -
Page 73: Edit Quick Response To Rejected Callers
Check Dialpad tones to play sounds when you touch the dialpad keys. Edit Quick Response to Rejected Callers 1. Touch > > Phone > (in the top search field) > Settings > Quick responses. 2. Touch a text message to edit it. Set Voicemail 1. -
Page 74: Set Speed Dials
2. Touch Fixed dialling numbers and the following options are available. Enable FDN: Input the PIN2 code to enable the FDN feature. Change PIN2: Change the PIN2 code for FDN access. FDN list: Manage the FDN list. NOTE: The PIN2 code is provided by your carrier. -
Page 75: Bar Certain Calls
1. Touch > > Phone > (in the top search field) > Settings > Calls. 2. Touch GSM call settings > Call forwarding > Voice. 3. Touch an available option to enable it. Set Caller ID and Call Waiting 1. Touch >... -
Page 76: Contacts
Contacts You can add contacts on your phone and synchronize them with the contacts in your Google account or other accounts that support contact syncing. To see your contacts, touch > > Contacts. From there, you can touch the tabs on the top of the screen to quickly switch to favourite contacts. -
Page 77: Setting Up Your Own Profile
Touch the account field above the Name field to choose where to save the contact. If a sync account is selected, the contacts will be synced automatically with your account online. Enter the contact name, phone numbers, email addresses, and other information. Touch to save the contact. -
Page 78: Importing, Exporting, And Sharing Contacts
Importing, Exporting, and Sharing Contacts You can import/export contacts from/to your nano-SIM card, the phone storage or the microSDXC card. This is especially useful when you need to transfer contacts between different devices. You can also quickly share contacts using Bluetooth, Google Drive, Gmail, Messaging, etc. -
Page 79: Share Contacts
NOTE: Touch > Show SD card if needed to find your vCard file(s). Export Contacts to the nano-SIM Card 1. Touch > > Contacts. 2. Touch > Import/Export > Export to SIM card. 3. Check the contacts you need and then touch Export Contacts to the Phone Storage or the microSDXC Card 1. -
Page 80: Working With Favourite Contacts
4. Choose how to share the contacts. Options depend on the applications and services installed. Working With Favourite Contacts In the favourite contacts tab, you can find your favourite contacts and frequently contacted contacts. Add a Contact to Favourites You can add the contacts you use frequently to FAVOURITES so that you can find them quickly. -
Page 81: Editing Contacts
3. Input the contact name or any information the contact has to search for it. The contacts matched will be listed. Editing Contacts Edit Contact Details Touch > > Contacts. Touch a contact you need to edit and then touch Edit the contact and touch Set a Ringtone for a Contact Assign a special ringtone to a contact, so you know who is... -
Page 82: Delete Contacts
Delete Contacts 1. Touch > > Contacts and touch the ALL CONTACTS tab. 2. Touch and hold the contact you want to remove. 3. Check more contacts if needed and then touch 4. Touch OK to confirm. Join Contacts As your phone synchronizes with multiple online accounts, you may see duplicate entries for the same contact. - Page 83 Separate Contact Information If contact information from different sources was joined in error, you can separate the information back into individual contacts on your phone. 1. Touch > > Contacts. 2. Touch a contact entry you have merged and want to separate, and then touch 3.
-
Page 84: Web Accounts
Web Accounts Adding or Removing Accounts You can add multiple Google accounts and Microsoft Exchange ® ActiveSync accounts. You may also add other kinds of accounts depending on the apps installed on your phone. Add an Account 1. Touch > >... -
Page 85: Configuring Account Sync
3. Touch > Remove account > REMOVE ACCOUNT. Configuring Account Sync Configure Auto Sync Setting 1. Touch > > Settings > Accounts. 2. Touch and check or uncheck Auto-sync data. When automatic sync is turned on, changes you make to information on your phone or on the web are automatically synced with each other. - Page 86 Change an Account’s Sync Settings 1. Touch > > Settings > Accounts. 2. Touch the account category and then the account. The Sync screen appears, showing a list of information the account can sync. 3. When auto-sync is enabled, switch on or off items as you need.
-
Page 87: Email
Email Touch Email in the home screen to receive and send emails from your webmail or other accounts, using POP3 or IMAP, or access your Exchange ActiveSync account for your corporate email needs. Setting Up the First Email Account 1. When you open Email for the first time, enter your email address and password. -
Page 88: Responding To An Email
Responding to an Email You can reply to or forward a message that you receive. You can also delete messages and manage them in other ways. Reply to or Forward an Email 1. Open the email you want to reply to or forward from the Inbox. 2. -
Page 89: Writing And Sending An Email
Delete an Email You can delete an email from its folder. You can also delete a batch of emails. While reading a message, touch While in a message list (for instance, the Inbox), slide a message left or right to delete it, or touch the sender images beside the messages and then touch NOTE: If you accidentally delete one, touch UNDO to retrieve it. -
Page 90: Adding And Editing Email Accounts
3. Enter the email subject and compose the email text. 4. Touch > Attach file to add audio files, images, videos and other types of files as attachments. 5. Touch at the top right of the screen to send the message. -
Page 91: Changing General Email Settings
3. Make the changes and touch when you finish. Changing General Email Settings General settings apply to all email accounts you add. 1. Open Email to get the Inbox screen. 2. Touch > Settings > General settings. 3. Make the changes and touch when you finish. -
Page 92: Messaging
Messaging You can use Messaging to exchange text messages (SMS) and multimedia messages (MMS). Opening the Messaging Screen Touch > > Messaging. The Messaging screen opens, where you can create a new message, search for messages, or open an ongoing message thread. -
Page 93: Replying To A Message
Select recipients from your contacts or call history by touching 3. Touch the text box and enter the message text. 4. If you want to send a multimedia message, touch to add a message subject, pictures, audios, videos or other files to the message. -
Page 94: Forwarding A Message
3. Touch Forwarding a Message 1. On the Messaging screen, touch the thread that has the message you want to forward. 2. Touch and hold the message and then touch Forward in the menu that opens. 3. Enter a recipient for the message and edit the content if you want. -
Page 95: Changing Message Settings
To copy a text message from the nano-SIM card to the phone storage: 1. On the Messaging screen, touch > Settings > SMS/MMS settings > Manage SIM card messages. 2. Touch and hold a message and then touch Copy to phone memory. -
Page 96: Web Browser
Web Browser Use Chrome to view web pages and search for information. Opening the Browser Touch the Home key > > Chrome to launch the web browser. Chrome also opens when you touch a web link - for example, in an email or a text message. -
Page 97: Using Multiple Browser Tabs
Using Multiple Browser Tabs You can open several web pages at the same time (one page in each tab) and switch between them freely. To open a new browser tab: Touch > New tab. A new browser tab opens. To switch between tabs: 1. -
Page 98: Changing Chrome Settings
Changing Chrome Settings You can configure a number of settings to customize the way you browse the web, including several that you can use to control your privacy. To open the Chrome settings screen, touch > Settings. -
Page 99: Camera
Camera You can use your phone to take photos and record videos. Photos and videos are stored on the microSDXC card you have installed or in the phone storage. You can copy them to your computer or access them in the Gallery app. Capturing a Photo 1. - Page 100 Number Function Switch between the front and back cameras. Set a time delay before the camera takes a picture automatically after you touch the shutter icon. Change the flash setting, only available for the back camera. Turn on or off the HDR feature. Change the camera settings.
-
Page 101: Recording A Video
4. Lightly touch Recording a Video 1. Touch > > Camera. 2. Aim the camera at the subject. You can touch any area on the screen that you want the camcorder to focus on before and during recording. NOTE: You can spread or pinch on the screen to zoom in or out before and during recording. - Page 102 1. Touch > > Camera. 2. Touch Manual. 3. Aim the camera at the subject and you can make the following adjustments. Drag to any area on the screen that you want to focus Drag to any area on the screen where you want the ...
-
Page 103: Using Other Camera Modes
Using Other Camera Modes Besides capturing photos and videos in the traditional way, your camera app offers other powerful and interesting camera modes. Touch Mode in the viewfinder screen to find them all. Filters: Use special filters to capture pictures. ... - Page 104 CAMERA Picture size: Set the image size for your photo. Point-and-shoot: When this feature is enabled, you can touch the viewfinder screen to take a photo using the front camera. Shutter sound: Turn on or off the shutter sound. ...
- Page 105 Focus lock when recording: Select whether to lock the focus point on the centre of the screen during video recording using the back camera. Location tag: Select whether to store the location information in your captured photos and videos. Storage location: Touch Save location to change the ...
-
Page 106: Gallery
Gallery Opening Gallery Touch > > Gallery to view albums of your pictures and videos. Working With Albums When you open the Gallery, all pictures and videos on your phone are displayed in a number of albums. Swipe left or right to see them all. -
Page 107: Working With Pictures
To delete albums, pictures, or videos: 1. Touch and hold an album to select it or touch and hold an item after you open an album to select a picture or a video. 2. Touch more items that you want to delete. 3. - Page 108 When viewing a picture in full screen, the following features are available. Swipe horizontally to see more pictures or videos. Pinch a picture or video to make it smaller. You'll then see a filmstrip-style view of all your pictures and videos in a row. Swipe left or right to scan through them all.
-
Page 109: Retouching Your Pictures
Retouching Your Pictures You can edit any photos you took and some other pictures in Gallery. 1. Touch > Edit while viewing a picture in full screen. 2. Touch an edit option along the bottom of the screen and edit the picture. -
Page 110: Play Music
Play Music The Play Music application works with Google Music, Google’s online music store and streaming service. You can stream via mobile data or Wi-Fi and listen to your favorite songs that you’ve added to your online Google Music library. You can also play audio files you’ve copied directly to your phone from a computer. - Page 111 Number Function Song and artist information. Touch or drag down to return to the music library. Album artwork (if available). Slide left/right to switch to the next/previous song in the playlist. Toggle repeat mode. You can repeat the current track, repeat the current playlist, or turn off repeat.
- Page 112 Number Function Give the song a thumbs-up. Playback control. Skip songs, or pause and resume playback. Give the song a thumbs-down. Turn on or off shuffle. Drag the progress bar to jump to any part of the song. Touch to see the current playlist (queue). Get more options.
-
Page 113: Managing Playlists
Managing Playlists Create playlists to organize your music files into sets of songs, so that you can play the songs you like in the order you prefer. To create a playlist or add a song to a playlist: Touch next to a song and select Add to playlist. To remove a song from a playlist: Touch >... -
Page 114: Video Player
Video Player Use the Video app to manage your video library and watch videos. Opening the Video Library Touch > > Video to view your video library, where your video files are displayed in a list. Swipe up or down to find the video you want. You can also touch to search for video files, or touch >... -
Page 115: Managing Video Files
Touch to skip to the previous or the next video. Touch to change the video ratio. Touch to rotate the video. Touch to capture a screenshot. Touch to hide the control panel. Touch to play the video in a small window and continue with other tasks on the phone. - Page 116 3. Touch Share and select how you want to share them. Trim a Video Clip 1. Touch a video to start playing it. 2. Touch on the right side of the progress bar. 3. Drag the two tabs on the progress bar to select the portion you want to keep.
-
Page 117: Fm Radio
FM Radio With the FM radio, you can search for radio channels, listen to them, and save them on your phone. Note that the quality of the radio broadcast depends on the coverage of the radio station in your area. The wired headset works as an antenna, so always connect the headset when using the radio. -
Page 118: Editing A Saved Channel
You can also drag the red line along the frequency panel or touch to switch to other channels. NOTES: Touch to add the channel to favourites. Favourite channels are put on the FM Radio main screen. Touch to view all favourite channels. ... - Page 119 To turn off FM radio immediately: Touch the switch at the top of the screen. NOTE: Touch > Exit to close the FM radio app. To record the FM radio program: Touch > Record/Stop Recording to record the current radio program.
-
Page 120: Sound Recorder
Sound Recorder Sound Recorder enables you to record voice memos and listen to them whenever you like. Recording a Voice Memo 1. Touch > > Sound Recorder. 2. Slide the HQ switch to turn on or off high quality recording. 3. -
Page 121: Playing A Voice Memo
Playing a Voice Memo To play a memo you just recorded: Touch To play any saved memo: 1. Touch at the top right of the screen to see all recordings. 2. Touch the title of a memo to play it. NOTE: Touch next to a memo to delete, rename, share, trim it,... -
Page 122: More Apps
More Apps Calculator Touch > > Calculator to use the phone’s convenient built-in calculator for some basic as well as advanced mathematical equations. NOTE: Slide left while holding the phone upright, or hold the phone on its side, to access advanced buttons. Clock Touch >... -
Page 123: Downloads
NOTES: To enable or disable existing alarms directly, just touch the switches on the right side. Touch > Settings to set more alarm options in the Alarms section. Check World Time Touch the tab in the Clock app to check local time around the world as well as the next alarm. -
Page 124: File Manager
File Manager Quickly access all of your images, videos, audio clips, and other types of files on your phone storage, the microSDXC card and the connected USB device. Touch > > File Manager. Touch at the top right to find the file you need by category. - Page 125 Chrome: Use the Chrome app to browse the Internet and get your bookmarks, browsing history, and more synced with your Google account. Drive: Store files on Google servers for free after you sign in to your Google account. You can access them on your computers, your phones and other devices, share them, or collaborate with others.
-
Page 126: Settings
Settings Touch > > Settings. The Settings app contains most of the tools for customizing and configuring your phone. Wireless and Networks Wi-Fi Touch > > Settings > Wi-Fi. You can turn Wi-Fi on or off and configure your Wi-Fi connections. See Connecting to Wi-Fi. -
Page 127: Flight Mode
You can check how much data has been used during the time cycle you set, set mobile data limit and warning, see what apps have been using mobile data, or restrict background data for individual apps. NOTE: The data usage is measured by your phone, and your carrier’s data usage accounting may differ. -
Page 128: Device
Mobile Networks Touch > > Settings > More > Mobile networks to control mobile data use, set access point names, or select mobile network or preferred network type. See Connecting to Mobile Networks. Emergency Broadcasts Touch > > Settings > More > Emergency broadcasts to configure mobile broadcast settings such as emergency alert settings, ETWS settings, etc. - Page 129 Daydream: Manage the Daydream function. When Daydream is enabled, clock, photos or animations will be displayed as a screensaver. Pulse notification light: Flash the indicator light to notify you of missed calls, new messages, and other events. Font size: Set the font size of the text on the screen.
- Page 130 Touch an app to see its information. The following options may be available: FORCE STOP: Stop the app. UNINSTALL: Uninstall the app. DISABLE/ENABLE: Disable or enable the app. Storage: Check its storage information, clear its data or cache.
- Page 131 Storage and USB Touch > > Settings > Storage & USB to view the memory information of the internal phone storage and the microSDXC card. You can choose the default location for new data, such as photos captured and voice recorded. Touch Save location and select Phone or SD card to store items in the phone storage or the installed microSDXC card.
- Page 132 Touch > Battery saver to manage battery saving mode. You can turn on or off Battery saver, or set a battery level at which Battery saver can turn on automatically. Touch > Battery optimisation. Battery optimisation helps prolong battery standby time when you're not using the phone. If there are apps that you don't want battery optimisation enabled, you can turn the feature off in those apps.
-
Page 133: Personal
NOTES: Touch next to an account to configure its options. From there, you can remove the accounts you created. When a guest user has finished using your phone, he/she can touch Remove guest in the Users menu to delete all his/her data from your phone. - Page 134 Security Touch > > Settings > Security to configure options that help keep your phone and data safe. Screen lock: Disable the screen lock or enable it with swipe, pattern, PIN, or password. See Protecting Your Phone With Screen Locks.
- Page 135 Set up SIM card lock: Lock SIM card: Activate or deactivate the PIN lock to require PIN before accessing the nano-SIM card. Change SIM PIN: Change the PIN used to access the nano-SIM card. NOTE: Put all your confidential passwords in a safe place for future use.
-
Page 136: Language And Input
Screen pinning: Keep a screen of your choice in view, so that others cannot switch to other apps and access your personal information. Touch this option to see how it works. Protecting Your Phone With Screen Pinning. Apps with usage access: Turn on or off some apps’ access to your phone usage information. -
Page 137: Backup And Reset
Text-to-speech output: Preferred engine: Select the speech synthesis engine you want to use or change its settings. Speech rate: Select how quickly you want the synthesizer to speak. Listen to an example: Play a brief sample of the ... -
Page 138: System
Backup account: Set the Google account that the data is backed up to. Automatic restore: Restore previously backed up settings and data when you reinstall an app. Network settings reset: Reset all network settings including Wi-Fi, mobile data and Bluetooth. ... -
Page 139: About Phone
Accessibility Touch > > Settings > Accessibility to configure accessibility plug-ins and services on your phone, such as using Colour inversion or Large text for users with sight problems. Printing Touch > > Settings > Printing to manage Google Cloud Print service or other printer plug-ins installed from the Google Play Store or your printer manufacturer. - Page 140 Use the upgrade package on your microSDXC card. NOTE: Visit the ZTE official handset service support website (http://www.ztedevice.com/support) and select your country or region to learn more about the above upgrade methods, as well as which phones and methods are supported.
- Page 141 Troubleshooting If you encounter problems while using the phone, or if it performs abnormally, you can refer to the chart below. If your particular problem cannot be resolved using the information in the chart, contact the dealer where you purchased the phone. Problem Possible causes Possible solution...
- Page 142 Problem Possible causes Possible solution End the call and dial The network link quality again. You may be is poor on the part of switched to a your service provider. better-quality network link or phone line. Echo or noise End the call and dial The quality of the phone again.
- Page 143 Problem Possible causes Possible solution The standby time is related to your service provider system configuration. The same If you are located in an phone used with area where signaling is different service weak, temporarily power providers’ systems will off the phone. not provide exactly the same length of standby time.
- Page 144 Problem Possible causes Possible solution Cannot turn Battery power has been Recharge the phone’s your phone depleted. battery. The nano-SIM card Take the nano-SIM card malfunctions or is to your service provider damaged. for testing. nano-SIM The nano-SIM card is Insert the nano-SIM card error inserted improperly.
- Page 145 Problem Possible causes Possible solution You have activated the Disable this feature. See Cannot Call barring feature. Bar Certain Calls. make You have activated the Disable this feature. See outgoing Fixed dialling numbers Use Fixed Dialling calls feature. Numbers. Contact your service provider.
Need help?
Do you have a question about the BLADE A512 and is the answer not in the manual?
Questions and answers