
Related Manuals for AUDIOLINE DECT6500


Summary of Contents for AUDIOLINE DECT6500
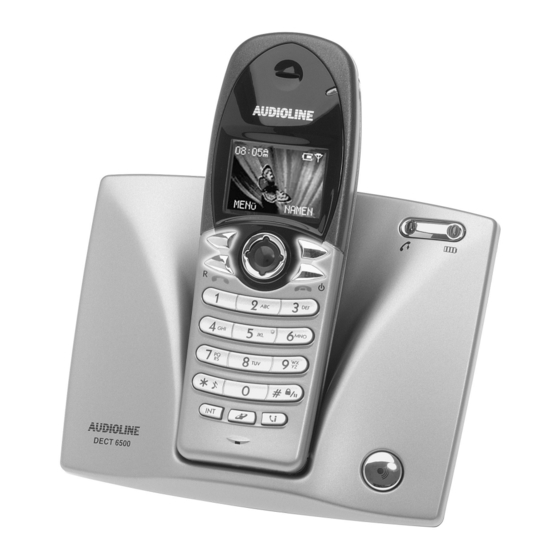
- Page 1 Schnurloses digitales DECT-Telefon Cordless digital DECT telephone Bedienungsanleitung Operating Instructions DECT6500...
- Page 2 DECT6500 Bedienungsanleitung__________________________ 1 Operating instructions________________________ 39...
-
Page 3: Table Of Contents
- Inhaltsverzeichnis - 1 Allgemeine Hinweise....................5 2 Bedienelemente ......................7 3 Inbetriebnahme......................8 3.1 Sicherheitshinweise ....................8 3.2 Verpackungsinhalt prüfen ..................8 3.3 Basisstation anschließen ..................8 3.4 Batterien einsetzen/austauschen ................8 3.5 Batteriekapazität ...................... 8 3.6 Uhrzeit einstellen...................... 8 4 Bedienung ......................... - Page 4 11.2 Externe Gespräche auf ein anderes Mobilteil verbinden........34 11.3 Konferenzgespräche führen ................... 34 11.4 An- und abmelden von Mobilteilen ................. 35 11.4.1 Anmelden von DECT6500 Mobilteilen............... 35 11.4.2 Anmelden von anderen DECT-GAP Telefonen an die Basisstation......35 11.4.3 Abmelden von Mobilteilen ..................35 12 Fehlerbeseitigung....................
-
Page 5: Allgemeine Hinweise
Übermäßige Belastungen durch Rauch, Staub, Erschütterungen, Chemikalien, Feuchtigkeit, Hitze oder direkte Sonneneinstrahlung müssen vermieden werden. Netzteil - Verwenden Sie nur das mitgelieferte AUDIOLINE Steckernetzteil, da andere Netzteile das Telefon zerstören können. Es besteht Lebensgefahr, wenn das Steckernetzteil geöffnet und nicht vom Stromnetz getrennt wird. - Page 6 - Allgemeine Hinweise - Laden des Mobilteils - Sollte sich das Mobilteil beim Laden erwärmen, so ist dies normal und ungefährlich. Laden Sie das Mobilteil nicht mit fremden Aufladegeräten, da sonst Beschädigungen auftreten können. Nebenstellenanlagen - Das Telefon kann auch an einer Nebenstellenanlage angeschlossen werden.
-
Page 7: Bedienelemente
- Bedienelemente - 2 Bedienelemente Mobilteil Gesprächsanzeige Displaytaste rechts Gespräch beenden/Mobilteil ein-aus 4-Steuertasten Tastensperre/Pause Anruflisten für verpasste, angenommene und gewählte Rufnummern Sondertelefonbuch Taste für interne Gespräche Rufton ein-/ausschalten Gesprächstaste / R-Signaltaste Displaytaste links Basisstation Gesprächsanzeige Ladekontrollleuchte PAGE-Taste... -
Page 8: Inbetriebnahme
- Inbetriebnahme - Inbetriebnahme Sicherheitshinweise ACHTUNG! Lesen Sie vor der Inbetriebnahme unbedingt die Sicherheitshinweise am Anfang dieser Anleitung. Verpackungsinhalt prüfen Zum Lieferumfang gehören: eine Basisstation ein Steckernetzteil ein Mobilteil mit Gürtelclip eine Bedienungsanleitung ein Telefonanschlusskabel zwei Standard-Akkus Basisstation anschließen Stellen Sie das Telefon in der Nähe Ihrer Telefonanschlussdose und einer Netzsteckdose auf. -
Page 9: Bedienung
- Bedienung - 4 Bedienung Das Display Das Display ist mit einer automatischen Hintergrundbeleuchtung ausgestattet, welche das Display bei jedem Tastendruck für ca. 10 Sekunden beleuchtet. Mit einer beliebigen Taste wird das Display wieder beleuchtet. Wird das Mobilteil für länger als 30 Sekunden nicht benutzt, schaltet sich automatisch der Bildschirmschoner in Form einer analogen Uhr ein. -
Page 10: Anrufe Entgegennehmen
- Bedienung - Anrufe entgegennehmen Erreicht Sie ein Anruf, ertönt der Tonruf am Mobilteil und an der Basisstation. Nehmen Sie das Mobilteil von der Basisstation oder drücken Sie die Gesprächstaste Mobilteil und die Verbindung wird hergestellt. Möchten Sie nicht gestört werden, drücken Sie die Displaytaste RUHE und das Klingelsignal wird direkt für diesen einen Anruf abgeschaltet. -
Page 11: Anruferlisten + Rufnummernanzeige (Clip)
- Bedienung - Drücken Sie die Taste Wählen Sie mit den Steuertasten, den Eintrag GESPR. ZEIT und drücken Sie OK. Wählen Sie mit den Steuertasten eine der folgenden Funktionen und bestätigen Sie mit OK. LETZTES GESP = Zeigt die Gesprächdauer des letzten Gesprächs. GEWÄHLT = Zeigt die Gesprächsdauer von allen gewählten Gesprächen. -
Page 12: Anruferlisten Einsehen
- Bedienung - 4.7.1 Anruferlisten einsehen Hinweis: Sobald ein Anruf verpasst wurde, erhalten Sie eine entsprechende Displaymeldung und Sie können über die Displaytaste ANSEHEN, direkt in die entsprechende Liste gelangen. Drücken Sie die Taste Wählen Sie mit den Steuertasten, welche Anruferliste Sie sehen möchten und drücken Sie OK. -
Page 13: Anruferlisten Löschen
- Bedienung - 4.7.2 Anruferlisten löschen Mit dem Menüpunkt LISTEN LÖSCH können Sie eine bestimmte Liste oder alle Listen löschen. Drücken Sie die Taste Wählen Sie mit den Steuertasten die Funktion LISTEN LÖSCH und drücken Sie Wählen Sie welche Liste Sie löschen möchten oder löschen Sie allen Listen mit ALLE und bestätigen Sie mit OK. -
Page 14: Paging Von Der Basisstation Zum Mobilteil
Händler, bei dem die Anlage gekauft wurde. 4.15.2 “R” Taste und das T-Net der DEUTSCHEN TELEKOM Ihr AUDIOLINE-Telefon unterstützt die wichtigsten Mehrwertdienste der DEUTSCHEN TELEKOM (z.B.: Makeln, Anklopfen, Dreier-Konferenz, u.a.). Das T-Net arbeitet mit der Einstellung "FLASH 300ms" (Einstellung siehe 9.3). Zur Freischaltung der T-Net Funktionen wenden Sie sich bitte an die DEUTSCHE TELEKOM. -
Page 15: Das Telefonbuch
- Telefonbuch - 5 Das Telefonbuch In das Telefonbuch im Mobilteil (PRIVAT) können 100 Rufnummern inklusive eines Namens gespeichert werden. Die maximale Länge einer Rufnummer beträgt 20 Stellen. Zusätzlich können 20 Telefonnummern in der Basisstation (GEMEINSAM) gespeichert werden, die dann auch beim Betrieb von mehreren Mobilteilen an jedem Mobilteil zur Verfügung stehen. -
Page 16: Gespeicherte Rufnummern Aus Dem Telefonbuch Anwählen
- Telefonbuch - TIP! Ihr Telefon kann Rufnummern auch im Schnellspeichermodus speichern. Geben Sie einfach die gewünschte Rufnummer ein und drücken Sie die Displaytaste SPEICH. Geben Sie den zugehörigen Namen ein drücken Sie erneut die Displaytaste SPEICH. Übersicht Taste 1 Leerzeichen Taste 2 À... -
Page 17: Weitere Funktionen In Telefonbüchern
- Telefonbuch - Weitere Funktionen in Telefonbüchern Im Telefonbuch können Sie weitere Menüpunkte erreichen: ANSEHEN = Mit den Steuertasten können die gespeicherten Einträge ansehen. Über MEHR erhalten Sie weitere Informationen wie BEARBEITEN, LÖSCHEN usw. HINZUFÜGEN = Speichern von Telefonbucheinträgen (siehe 5.1) DIREKTWAHL = Direktwahltasten belegen, ändern, löschen (siehe 5.4.1) STATUS... -
Page 18: Direktwahltasten Benutzen
- Telefonbuch - 5.4.2 Direktwahltasten benutzen Halten Sie die entsprechende Direktwahltaste 1 bis 9 für 2 Sekunden gedrückt. Die entsprechende Rufnummer wird im Display angezeigt und die Verbindung wird hergestellt. Sondertelefonbuch einrichten Im Sondertelefonbuch Ihres Telefons können Sie weitere 10 Rufnummern speichern. Das Sondertelefonbuch dient zur Speicherung wichtiger Rufnummern, von z.B: Ärzten, Feuerwehr oder Polizei. -
Page 19: Extras
- Extras - 6 Extras Wecker Extras Babyfon Walky-Talky Timer Stoppuhr Babycall Alarm/Weckfunktion Mit der eingebauten Weck- und Alarmfunktion können Sie eine Alarmzeit eingeben. Ist diese Uhrzeit erreicht, hören Sie für eine Minute Signaltöne vom Mobilteil und das Display zeigt die Meldung ALARM mit der aktuellen Uhrzeit. Um den Alarm zu beenden, drücken Sie entweder die Displaytaste STOP oder die Displaytaste SCHLUMM (Schlummern). -
Page 20: Interne Raumüberwachung (Babyfon)
Mit der Displaytaste ABBRUCH und danach OK können Sie die Funktion BABYFON ausschalten. Walky-Talky Bei der Verwendung von mehreren Mobilteilen des Typs DECT6500 können Sie die Mobilteile als Sprechfunkgeräte benutzen. Während der Walky-Talky-Funktion werden die Mobilteile von der Basisstation abgemeldet. Sie können Sie also so weit Sie möchten von der Basisstation entfernen. -
Page 21: Timer
- Extras - Zwischen den Mobilteilen sprechen Drücken Sie an einem Mobilteil die Displaytaste SPRECHE. Wählen Sie das gewünschte Mobilteil, welches Sie rufen möchten und drücken Sie An dem gewählten Mobilteil ertönt ein Rufton. Das Gespräch kann dort mit der Gesprächstaste entgegengenommen werden und beide Mobilteile können miteinander sprechen. -
Page 22: Babyruf
- Extras - Babyruf Mit dem Babyruf können kleinere Kinder oder auch Senioren durch das Drücken einer beliebigen Taste am Mobilteil einfach eine vorher bestimmte Telefonnummer wählen. Ausgenommen sind die Tasten und ABBRUCH. Babyruf einschalten Drücken Sie die Displaytaste MENÜ, wählen Sie mit den Steuertasten EXTRAS und bestätigen Sie mit der Displaytaste OK. -
Page 23: Displayeinstellungen
Displaynamen ändern Im normalen Betrieb erscheint im Display die Anzeige „DECT6500“. Haben Sie mehrere Mobilteile an einer Basisstation angemeldet, kann es nützlich sein, jedem Mobilteil einen eigenen Namen zu geben (max. 10 Buchstaben). Die Nummer hinter dem Namen zeigt, mit welcher Nummer das Mobilteil intern zu erreichen ist. -
Page 24: Displaysprache Einstellen
- Displayeinstellungen - Displaysprache einstellen Die Displayanzeigen sind in den Sprachen Deutsch und Englisch einstellbar. Drücken Sie die Displaytaste MENÜ, wählen Sie mit den Steuertasten DISPLAY und bestätigen Sie mit OK. Wählen Sie mit den Steuertasten SPRACHE und bestätigen Sie mit OK. Wählen Sie nun über die Steuertasten die gewünschte Sprache aus und bestätigen Sie mit OK. -
Page 25: Ruftöne Und Signaltöne Einstellen
- Ruftöne und Signaltöne einstellen - 8 Ruftöne und Signaltöne einstellen Mobilteil Töne Basis MT-Tastenton MT-Töne Ruftöne für das Mobilteil einstellen (Klingelmelodien) Ihr Mobilteil kann sich mit 20 verschiedenen Tonruf-Melodien melden, wenn Sie ein Anruf erreicht. Betreiben Sie das Telefonsystem mit mehreren Mobilteilen, können Sie für externe und interne Anrufe unterschiedliche Melodien einstellen. -
Page 26: Ruftöne Für Die Basisstation Einstellen (Klingelmelodien)
- Ruftöne und Signaltöne einstellen - Ruftöne für die Basisstation einstellen (Klingelmelodien) Drücken Sie die Displaytaste MENÜ, wählen Sie mit den Steuertasten TÖNE und bestätigen Sie mit OK. Wählen Sie mit den Steuertasten BASIS und bestätigen Sie mit OK. In der ersten Displayzeile kann mit den Steuertasten links und rechts die Lautstärke des Ruftons in fünf Stufen eingestellt werden. -
Page 27: Sonderfunktionen
- Sonderfunktionen - 9 Sonderfunktionen Auto Annahme Sonderfunkt. Wahlmodus Flashzeit Pause Vorwählen Amtskennzahl Wahlsperre Anrufe automatisch entgegennehmen Eingehende Anrufe werden automatisch entgegengenommen, wenn Sie das Mobilteil von der Basisstation nehmen. Möchten Sie, dass Anrufe nur über die Taste entgegengenommen werden, können Sie die automatische Annahme ausschalten. Drücken Sie die Displaytaste MENÜ, wählen Sie mit den Steuertasten SONDERFUNKT. -
Page 28: Flashzeit Für Nebenstellenanlagen Und T-Net
- Sonderfunktionen - Flashzeit für Nebenstellenanlagen und T-NET Haben Sie Ihr Telefon mit einer Nebenstellenanlage verbunden, können Sie alle Möglichkeiten, wie z.B. Anrufe weiterleiten, automatischen Rückruf usw. nutzen. An einer Nebenstellenanlage wird die FLASH-Zeit "100ms" (FLASH1, Werkseinstellung) oder „300ms“ (FLASH2) für T-NET benötigt. Ob Ihr Telefon an Ihrer Nebenstellenanlage einwandfrei funktioniert, erfahren Sie bei dem Händler, bei dem die Anlage gekauft wurde. -
Page 29: Amtskennzahl Beim Betrieb An Nebenstellenanlagen
- Sonderfunktionen - Drücken Sie die Displaytaste MENÜ, wählen Sie mit den Steuertasten SONDERFUNKT. und bestätigen Sie mit OK. Wählen Sie mit den Steuertasten VORWÄHLEN und bestätigen Sie mit OK. Geben Sie den PIN-Code ein (Werkseinstellung 0 0 0 0) bestätigen Sie mit OK. Wählen Sie nun über die Steuertasten die gewünschte Displayzeile. -
Page 30: Wahlsperre
- Sonderfunktionen - Wahlsperre Mit den Wahlsperren können Sie bestimmte Rufnummern sperren. Die Wahlsperren lassen sich bei mehreren Mobilteilen für jedes Mobilteil separat einstellen. Zur Programmierung wird der PIN-Code benötigt (Werkseinstellung 0 0 0 0). Drücken Sie die Displaytaste MENÜ, wählen Sie mit den Steuertasten SONDERFUNKT. -
Page 31: System
- System - 10 System Anmelden System Basiswahl MT abmelden PIN ändern Reset 10.1 Anmelden von Mobilteilen Bevor Sie weitere Mobilteile benutzen können, müssen diese vorher angemeldet werden. Weitere Hinweise zur Verwendung von mehreren Mobilteilen finden Sie im Kapitel 11. 10.2 Automatische Basiswahl Ist ein Mobilteil an mehrere Basisstationen angemeldet, können Sie hier auswählen, mit... -
Page 32: System Pin-Code Ändern
Geben Sie den aktuellen PIN-Code ein (Werkseinstellung 0 0 0 0) bestätigen Sie mit OK. Bestätigen Sie erneut mit OK und die Werkseinstellungen werden wieder hergestellt. Sprache: Deutsch Name Mobilteil: DECT6500 PIN-Code: 0 0 0 0 Menüfarbe: Blau Automatische Vorwählen: aus Rufannahme: Ein... -
Page 33: Mehrere Mobilteile
Wichtige Informationen: Über den international genormten GAP Standard können Mobilteile von Fremdherstellern in das Telefonsystem integriert werden. Allerdings stehen nur in Verbindung mit einem DECT6500 Mobilteil alle Funktionen zur Verfügung, die das DECT6500 unterstützt. Genauso können Sie ein DECT6500 Mobilteil an Basisstationen anderer Hersteller anschließen, sofern diese Geräte mit dem GAP... -
Page 34: Externe Gespräche Auf Ein Anderes Mobilteil Verbinden
- Mehrere Mobilteile - 11.2 Externe Gespräche auf ein anderes Mobilteil verbinden Haben Sie ein externes Gespräch an einem Mobilteil entgegengenommen, können Sie das externe Gespräch auf ein anderes Mobilteil weiterverbinden. Drücken Sie dazu die Taste und dann die Nummer des gewünschten Mobilteils. Nachdem das interne Gespräch an dem anderen Mobilteil entgegengenommen wurde, haben Sie folgende Möglichkeiten: A. -
Page 35: An- Und Abmelden Von Mobilteilen
- Mehrere Mobilteile - 11.4 An- und abmelden von Mobilteilen 11.4.1 Anmelden von DECT6500 Mobilteilen Ist das Mobilteil noch an keine Basisstation angemeldet, drücken Sie die Displaytaste ANMELD. Ansonsten drücken Sie die Displaytaste MENÜ. Wählen Sie dann den Menüpunkt SYSTEM und bestätigen Sie mit OK. -
Page 36: Fehlerbeseitigung
- Fehlerbeseitigung - 12 Fehlerbeseitigung Haben Sie Probleme mit Ihrem Telefon, kontrollieren Sie bitte zuerst die folgenden Hinweise. Bei technischen Problemen können Sie sich auch an unsere Hotline unter Tel. 0180 5 00 13 88 (Kosten Telekom bei Drucklegung: 12ct/min) wenden. Bei Garantieansprüchen wenden Sie sich bitte an Ihren Fachhändler. -
Page 37: Wichtige Informationen
- Wichtige Informationen - 13 Wichtige Informationen 13.1 Technische Daten Standard DECT-GAP Kanalzahl 1880 bis 1900 MHz Stromversorgung Basisstation 220/230V, 50 Hz Reichweite Innen bis zu 50m Reichweite Außen bis zu 300m Standby bis zu 120 Stunden Max. Gesprächsdauer bis zu 8 Stunden Aufladbare Standard-Akkus 2 x 1,2V/750mAh, Typ AAA Wählverfahren... -
Page 38: Konformitätserklärung/Ce-Zeichen
Sollte Ihr Gerät dennoch einen Defekt innerhalb der Garantiezeit aufweisen, wenden Sie sich bitte unter Vorlage Ihrer Kaufquittung ausschließlich an das Geschäft, in dem Sie Ihr AUDIOLINE - Gerät gekauft haben. Alle Gewährleistungsansprüche nach diesen Bestimmungen sind ausschließlich gegenüber Ihrem Fachhändler geltend zu machen. - Page 39 - Contents - 1 General Information ....................41 2 User controls ......................43 3 Setting up ........................ 44 3.1 Safety Information ....................44 3.2 Check contents of pack..................44 3.3 Connecting the base station................... 44 3.4 Fitting/changing batteries ..................44 3.5 Battery capacity......................
- Page 40 11.2 Connecting external calls to another mobile unit............ 69 11.3 Holding conference calls ..................70 11.4 Logging on and logging off mobile units..............70 11.4.1 Logging on DECT6500 mobile units ................70 11.4.2 Logging on other DECT-GAP telephones to the base station........70 11.4.3 Logging off mobile units ....................
-
Page 41: General Information
Excessive exposure to smoke, dust, vibrations, chemicals, moisture, heat or the direct rays of the sun must be avoided. Power supply - Use only the AUDIOLINE plug-in power supply provided, as other power supplies could damage the telephone. There is a risk to life if the power supply is opened and not disconnected from the mains. - Page 42 - General information - Charging the handset - It is normal for the handset to become warm when charging and is not dangerous. Do not use other manufacturer's charging equipment for charging the handset, as otherwise damage could occur. Private exchanges - The telephone can also be connected to a private exchange. You can find out from the dealer from whom the equipment was purchased whether your telephone will work on your private exchange without any problems.
-
Page 43: User Controls
- User controls - 2 User controls Mobile unit Call indicator Display button right End call/Mobile unit on-off 4-button cursor Keypad lock/Pause Caller lists for missed, accepted and dialled numbers Special phone book Button for internal calls Ring tone on/off Call button / R signal button Display button left Base station... -
Page 44: Setting Up
- Setting up - Setting up Safety Information NOTE: Before setting up, it is essential that you read the safety information at the beginning of this manual. Check contents of pack The following items are supplied: one base station one mains cable one mobile unit with belt clip one instruction manual one telephone connecting cable... -
Page 45: Operation
- Operation - 4 Operation The display The display is provided with an automatic backlight, which illuminates the display for ca. 10 seconds every time a button is pressed. The display can be re-lit with any button. If the mobile unit is not used for more than 30 seconds, the screensaver, in the form of an analogue clock, will switch on automatically. -
Page 46: Receiving Calls
- Operation - Receiving calls When a call arrives, the ring tone sounds on the mobile unit and on the base station. Lift the mobile unit from the base station or press the call button on the mobile unit and the connection will be made. If you do not want to be disturbed, press the SILENT display button and the ring tone for this one call will be switched off directly. -
Page 47: Caller Lists + Caller Display (Clip)
- Operation - Press the button. Select the CALL TIMERS entry with the cursor and press OK. Using the cursor, choose one of the following functions and confirm with OK. LAST CALL = Shows the duration of the last call. DIALLED = Shows the duration of all dialled calls. -
Page 48: Viewing The Caller List
- Operation - 4.7.1 Viewing the caller list Note: If a call is missed, there will be a corresponding message in the display and you can access the appropriate list directly by means of the VIEW display button. Press the button. -
Page 49: Switching The Mobile Unit On And Off
- Operation - Switching the mobile unit on and off You can switch off the mobile unit by pressing and holding the button. No battery power is used if the mobile unit is switched off. It will not be possible to receive calls and the handset lost your time settings. -
Page 50: R Signal Button/T-Net
4.15.2 "R" Button and the DEUTSCHE TELEKOM T-Net Your AUDIOLINE telephone supports the most important DEUTSCHE TELEKOM added value functions (e.g. brokering, call waiting, three-way conference, etc.). The T- Net works using the "FLASH 300ms" setting. (Adjustment, see 9.3). Please contact DEUTSCHE TELEKOM to gain access to T-Net functions. -
Page 51: The Phone Book
- Phone book - 5 The phone book 100 numbers including a name can be stored in the phone book in the mobile unit (PRIVATE). The maximum length for a number is 20 characters. In addition, 20 numbers can be stored in the base station (SHARED), which are then available to each mobile unit when several mobile units are in use. -
Page 52: Dialling Stored Numbers From The Phone Book
- Phone book - You can move the display cursor within the name or number using the left and right cursor buttons in order to make changes. Incorrect numbers can be deleted with CLEAR. TIP! Your phone can also store numbers in the rapid save mode. Simply enter the required phone number and press the SAVE display button. -
Page 53: Other Phone Book Functions
- Phone book - Other phone book functions Other items can be reached from the phone book menu: VIEW = You can see the entries that have been saved by using the cursor buttons. You can access other functions such as EDIT, DELETE etc. -
Page 54: Using The Quick Dialbuttons
- Phone book - 5.4.2 Using the quick dialbuttons Hold the appropriate quick dialbutton 1 to 9 pressed for 2 seconds. The corresponding phone number will be shown in the display and the connection will be made. Setting up the special phone book You can store a further 10 numbers in your telephone's special phone book. -
Page 55: Extras
- Extras - 6 Extras Alarm Clock Extras Baby Monitor WalkieTalkie Timer Stopwatch Touch&Dial Alarm/Wake-up function You can enter an alarm time using the integral wake-up and alarm function. When this time is reached you will hear signal tones from the mobile unit for one minute and the display will show the message ALARM with the current time. -
Page 56: Internal Room Monitoring (Baby Phone)
OK. Walkie-talkie When you use several Type DECT6500 handsets, you can use the mobile units as walkie-talkies. In the walkie-talkie mode, the mobile units are logged off from the base station. You can therefore be as far away from the base station as you like. It is not possible to receive external calls during this time. -
Page 57: Timer
- Extras - Calling between mobile units. Press the TALK display button on one mobile unit. Select the mobile unit you that you want to call and press OK. A ring tone will sound on the selected mobile unit. The call can be accepted there with the call button and the two mobile units will be able to speak to one another. -
Page 58: Baby Call
- Extras - Baby call Small children or even older people can easily dial a previously defined telephone number using the baby call feature by pressing any button on the mobile unit. Excluded from this are the and CANCEL buttons. Activating baby call Press the MENU display button, select EXTRAS with the cursor and confirm with the OK display button. -
Page 59: Display Settings
Changing display names In normal operation, the message "DECT6500" appears in the display. If you have logged on several mobile units to one base station, it can be useful to give each mobile unit its own name (max. 10 letters). The number after the name shows with which number the mobile unit can be called internally. -
Page 60: Changing The Display Background
- Display settings - Changing the display background Three photos are available for the display background; flower, sky and butterfly. Press the MENU display button, choose DISPLAY by means of the navigation keys and confirm with OK. Select WALLPAPER with the navigation keys and confirm with OK. Now select the required background using the navigation keys and confirm with Press the button to return to the main display immediately or choose other... -
Page 61: Setting Up Ring Tones And Signal Tones
- Setting ring tones and signal tones - 8 Setting up ring tones and signal tones Handset Sounds Base HS Key Tones HS Tones Setting up ring tones for the mobile unit Your mobile unit can respond with 20 different ring tones when a call comes through. If you are using the telephone system with several mobile units, you can set different ring tones for external and internal calls. -
Page 62: Setting Up Ring Tones For The Base Station
- Setting ring tones and signal tones - Setting up ring tones for the base station Press the MENU display button, choose SOUNDS by means of the navigation keys and confirm with OK. Select BASE with the navigation keys and confirm with OK. The volume of the ring tone can be adjusted in five steps in the first line of the display using the left and right navigation keys. -
Page 63: Special Functions
- Special functions - 9 Special functions Auto Answer Advanced Dial Mode Recall Pause Prefix PABX Call Barring Accepting calls automatically Incoming calls are accepted automatically when you lift the mobile unit from the base station. If you only want calls to be accepted by means of the button, you can deactivate the automatic acceptance facility. -
Page 64: Flash Time For Private Exchanges
- Special functions - Flash time for private exchanges If you have connected your telephone to a private exchange, you can use all the facilities such as call transfer, automatic recall, etc. The FLASH time "100ms" (FLASH1, factory setting) will be required on a private exchange. You can find out from the dealer from whom the equipment was purchased whether your telephone will work on your private exchange without any problems. -
Page 65: Outside Line Code When Using On Private Exchanges
- Special functions - Press the MENU display button, choose ADVANCED by means of the navigation keys and confirm with OK. Select PREFIX with the navigation keys and confirm with OK. Enter the PIN code (factory setting 0 0 0 0) and confirm with OK. Now select the required display line using the navigation keys. -
Page 66: Dialling Block
- Special functions - Dialling block You can block specific phone numbers by using the dialling blocks. When several mobile units are used, the dialling blocks can be set separately for each mobile unit. The PIN code will be required for programming (factory setting 0 0 0 0). Press the MENU display button, choose ADVANCED by means of the navigation keys and confirm with OK. -
Page 67: System
- System - 10 System Register System Base Select Delete HS Change PIN Reset 10.1 Logging on mobile units Before you can use additional mobile units, these must first be logged on. You will find further information on using additional mobile units in Chapter 11. 10.2 Automatic base unit selection If a mobile unit is logged on to several base stations, you can choose here the base... -
Page 68: Changing The System Pin Code
The PIN code will be required for programming (factory setting 0 0 0 0). Language: German Name of mobile unit: PIN code: 0 0 0 0 DECT6500 Menu colour: Blue Automatic call accept: on Dialling code: off FLASH time: 100ms... -
Page 69: Multiple Mobile Units
DECT6500 are only available in conjunction with a DECT6500 mobile unit. In the same way, you can use a DECT6500 mobile unit on base stations from other manufacturers, as long as these units work using the GAP standard. -
Page 70: Holding Conference Calls
11.4 Logging on and logging off mobile units 11.4.1 Logging on DECT6500 mobile units If the mobile unit has not yet been logged on to a base station, press the REG. display button. Otherwise, press the MENU display button. Then select SYSTEM from the menu and confirm with OK. -
Page 71: Logging Off Mobile Units
- Multiple mobile units - 11.4.3 Logging off mobile units Press the MENU display button and choose SYSTEM from the menu. Confirm with the OK display button and choose DELETE HS from the menu. Choose which mobile unit is to be logged off and confirm with the OK display button. -
Page 72: Troubleshooting
- Troubleshooting - 12 Troubleshooting If you have problems with your telephone, please check the following points first. For technical problems, you can also contact our hotline on Tel. 0180 5 00 13 88 (Telekom cost at the time of printing 12 cents/min). For any claims under the warranty, please refer to your dealer. -
Page 73: Important Information
- Important Information - 13 Important information 13.1 Technical data Standard DECT-GAP Number of channels 1880 to 1900 MHz Power supply Base station 220/230V, 50 Hz Range Indoors up to 50 m Range Outdoors up to 300 m Standby up to 120 hours Max. -
Page 74: Warranty
If, however, your unit should develop a fault within the warranty period, please contact the shop where you bought your AUDIOLINE unit, taking with you your purchase receipt. In accordance with these conditions, all claims under the warranty shall be made exclusively to your dealer. - Page 76 WICHTIGE GARANTIEHINWEISE Die Garantiezeit für Ihr AUDIOLINE - Produkt beginnt mit dem Kaufdatum. Ein Garantieanspruch besteht bei Mängeln, die auf Material- oder Herstellungsfehler zurückzuführen sind. Der Garantieanspruch erlischt bei Eingriffen durch den Käufer oder durch Dritte. Schäden, die durch unsachgemäße Behandlung oder Bedienung, natürliche Abnutzung, durch falsches Aufstellen oder Aufbewahren, durch...
Need help?
Do you have a question about the DECT6500 and is the answer not in the manual?
Questions and answers