Table of Contents

Related Manuals for Gigaset DL500A


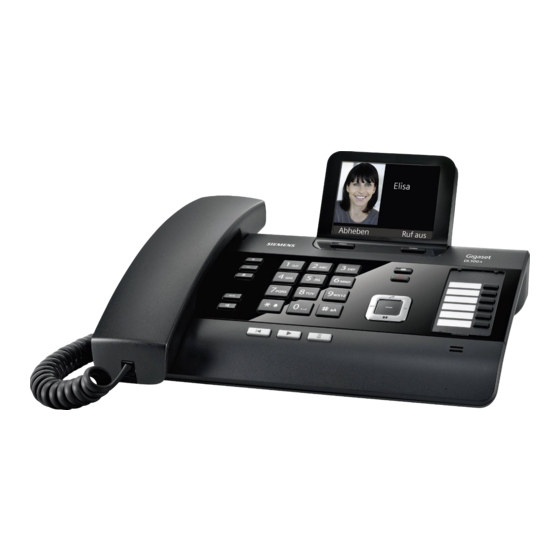
Summary of Contents for Gigaset DL500A
- Page 1 DL500 D L 5 0 0 GIGASET. INSPIRING CONVERSATION.
-
Page 2: Web Configurator - Setting The Phone Using A Pc
Web configurator – Setting the phone using a PC The Web configurator is the Web interface for your phone. It allows you to select the settings for your Gigaset DL500A via your PC's Web browser. You can use your phone's Web configurator to do the following: ¤... -
Page 3: Table Of Contents
Establishing a connection via Gigaset config ........ - Page 4 Services – Online Directory: Selecting an online directory ........25 Phonebook Transfer: Deleting directories and loading to/from the PC.
-
Page 5: Web Configurator Menu
Web configurator menu Home ¢ page 13 Settings IP Configuration ¢ page 16 Telephony Connections ¢ page 18 Number Assignment ¢ page 21 Dialling Plans ¢ page 22 Network Mailboxes ¢ page 23 E-Mail ¢ page 24 Services Info Services ¢... -
Page 6: Connecting The Pc With The Telephone's Web Configurator
There are two ways of connecting your PC to the Web configurator of the base: Via the phone's IP address in the local network; Via the Gigaset configuration service, if the phone and PC are connected to the ¢ page... -
Page 7: Establishing A Connection Via Gigaset Config
You will receive a message stating that the connection has been forwarded to your base. If several Gigaset phones can be reached via your Internet connection, you are asked which of these phones you would like to be connected to. -
Page 8: Logging In To/Off The Web Configurator
Logging in to/off the Web configurator Logging in, setting the interface language Once you have successfully established the connection, the Login Web page is dis- played in the Web browser. Figure 1 Start screen You can select the language you want the menus and Web configurator dialogues to be displayed in. -
Page 9: Logging Off
Please note If the system PIN is still set as 0000 on the base (default setting), you will be notified during login that the unit is not secure and you should change the PIN. You can deactivate this security notice for subsequent logins by select- ing the option "Don’t show this security notice again.". -
Page 10: Understanding The Structure Of The Web Configurator
Understanding the structure of the Web configurator pages The Web configurator pages (Web pages) contain the UI elements shown in Figure 2 (example). Using the Using the Using the Menu bar navigation area working area buttons (Tabs) Figure 2 Example of the structure of a Web configurator page Menu bar The Web configurator menus are displayed in the form of tab pages in the menu bar. -
Page 11: Using The Navigation Area
Log Off You will find the Log Off function to the right of the menu bar on every Web page. Please note ¢ page For an overview of the Web configurator menu, see Using the navigation area The functions of the menu selected in the menu bar are ¢... -
Page 12: Using The Buttons
Entering Cyrillic and Turkish characters In the following section, the specified maximum number of characters permitted in a field refers to Latin characters and digits (1 character = 1 byte), i.e., 1 character means 1 byte. Cyrillic and Turkish characters require 2 bytes each, e.g., with a field length of 16 characters, you can enter a maximum of 8 Cyrillic or Turkish characters. -
Page 13: Opening Web Pages
Opening Web pages A brief outline of how to navigate to the individual Web configurator functions is given below. Example Defining dialling plans: ¢ ¢ Settings Telephony Dialling Plans To open the Web page, proceed as follows after registration: ¤ Select the Settings menu in the menu bar. -
Page 14: Ip Configuration - Connecting To The Lan
IP Configuration – Connecting to the LAN Assigning the IP address Select the necessary settings for operating your phone in your local network and for connecting it to the Internet, if necessary. For more detailed explanations of the individual components/terms, see the glossary in the user guide for the phone. ¤... -
Page 15: Allowing Access From Other Networks
Preferred DNS server Enter the IP address for the preferred DNS server. DNS (Domain Name System) allows you to assign public IP addresses to symbolic names. The DNS server is required to convert the DNS name into the IP address when a connection is being established to a server. -
Page 16: Entering An Http Proxy Server (Only When Connected To An Internal Company Network)
Entering an HTTP proxy server (only when connected to an internal company network) Direct connections between network subscribers and the Internet are often not permitted within internal company or organisation networks (Intranet). In such cases, all HTTP calls from the network are "transferred" by a proxy server. The proxy server is a computer or program within the network. -
Page 17: Telephony - Connections: Change Name, Recall Of Fixed Line Network Connection
Telephony – Connections: Change name, recall of fixed line network connection Your phone comes preset with a recall for general operation of the phone on the main connection. The recall specifies the duration of the line interruption used to send control signals to the exchange or the telecommunications system (transfer (ECT), setting up a consultation call, etc.). -
Page 18: Telephony - Connections: Information About Gsm Connections
Telephony – Connections: Information about GSM connections You can make calls on your base and/or a registered handset via the GSM connec- tion of your Bluetooth GSM mobile phone (call external parties via the GSM connec- tion of the mobile phone or receive calls to the GSM connection). To do this, you can register up to five mobile telephones (i.e., save in the Known Devices list), which you can connect in alternation with your base. -
Page 19: Telephony - Number Assignment: Assigning Send And Receive Connections
Status Registered The mobile telephone is registered on the base, i.e., it is displayed in the Known Devices list. However, the mobile phone is not yet activated. The Connect Mobile option is not set for this mobile phone. No calls can be made from the base via the corresponding GSM connection. -
Page 20: Assigning Receive/Send Connections To Bases And Handsets
Assigning receive/send connections to bases and handsets, changing internal names ¤ ¢ ¢ Open the Settings Telephony Number Assignment Web page. The following is displayed for the Desktop Phone and every handset (example): The default name (INT 1 to INT 7), any name you have set, and a list of available con- nections are displayed for each handset and the base. -
Page 21: Assigning Receive Connections To The Answering Machine
Please note If all mobile phones are deleted from the list of known devices (de-regis- tered), the fixed line network connection is automatically assigned as the send connection for any device to which the GSM connection was assigned as the send connection. If a connection is not assigned to a device as a receive connection, calls to this phone number are signalled neither on the base nor any handset. -
Page 22: Telephony - Dialling Plans: Entering Your Own Area Code/Access Code
Telephony – Dialling Plans: Entering your own area code/access code On the base, save the complete code (with international code) for the area in which you are using the phone. If your base is connected to a PABX, you may have to enter an access code for exter- nal calls (external prefixes e.g., "0"). -
Page 23: Telephony - Network Mailboxes
Telephony – Network Mailboxes: Entering the network mailbox Many fixed line network providers offer answering machines on the network – these are known as network mailboxes. By saving the network mailbox number on the base, you can assign it to key 1 for fast access or call it directly by opening the message list. -
Page 24: E-Mail
E-Mail: Making e-mail settings You can use your phone to be notified about new e-mail messages on your incom- ing e-mail server and to display the incoming e-mail list and the text of the mes- sages on the handset. You must store the address or DNS name of your incoming e-mail server and your personal access data in the phone and activate the e-mail check with the incoming e-mail server, so that the phone can establish a connection to the incoming e-mail server and connect to your mailbox. -
Page 25: Services - Info Services: Configuring/Activating The Display
Select the Set button to save the settings in your phone. If text information is available and Info Services is set as the screensaver, the infor- mation appears in the idle display of the base and all registered Gigaset SL78H, SL400H or S79H handsets. -
Page 26: Services - Online Directory: Selecting An Online Directory
Services – Online Directory: Selecting an online directory You can use online phone directories (public directory, classified directory and/or your private net directory) on the base and registered handsets. You can use your telephone's Web configurator to define which online directory you wish to use. You can also elect to display the name under which the caller making an incoming call is saved in the online directory (Display of caller’s name) –... -
Page 27: Phonebook Transfer
Microsoft Outlook™ only ever transfers the first (directory) entry from the vcf file to its directory. You can use the Gigaset QuickSync program (included with the phone) to compare the directory on the base with the Outlook directory. You will find it on the enclosed CD. -
Page 28: Loading The Directory File From The Pc To The Base/Handset
Loading the directory file from the PC to the base/handset ¤ In the "Transfer directory from PC to handset." area, enter the vcf file you want to load onto the device (complete path name), or click Browse... and navigate your way to the file. ¤... -
Page 29: Understanding Directory File Content (Vcf File)
Understanding directory file content (vcf file) The following data (if available) is written into the vcf file for entry into the directory or transferred from a vcf file into the handset directory. Name First name Number Number (office) Number (mobile) E-mail address Birthday (YYYY-MM-DD) and time of the reminder call (HH:MM) separated by a "T"... -
Page 30: Management - Date & Time: Copying The Date/Time From The Time Server
Management – Date & Time: Copying the date/time from the time server The date and time are shown in the idle display of the base and registered hand- sets. They are important, for example, for stating the correct time in the answering machine list, call lists and for the "anniversary", "appointments"... - Page 31 Synchronisation will usually occur once a day (at night) if synchronisation is acti- vated. Any additional synchronisation will take place only after each system start of the base (e.g., after a firmware update or a power cut). If you register a new handset on your base, it will assume the time and date of the base without any additional synchronisation with the time server.
-
Page 32: Management - Miscellaneous: Reducing Radiation - Activating/Deactivating Eco Mode
Management – Miscellaneous: Reducing radiation – activating/deactivating Eco Mode The radiation from the registered handsets reduces automatically depending on their distance to the base. The closer the handsets are to the base, the lower the radiation. You have the following options: Eco Mode - Further reducing radiation You can further reduce the radiation from the handsets and base by using Eco Mode. -
Page 33: Management - Save & Restore: Saving And Restoring System Settings
In the Save device settings to PC area: ¤ Click the Save button next to Save settings. The base will create a file Gigaset-yyyy-mm-dd.cfg (default name; yyyy = year 4-digit format, mm = month 2-digit, dd = day 2-digit) with the configuration data. -
Page 34: Management - Firmware Update
Management – Firmware Update: Updating the base's firmware If necessary, you can load updates of the base firmware onto your base. The server on which new firmware versions are generally available to download to your base is set by default. The URL of the Internet server is displayed in the Data server field. -
Page 35: Activating/Deactivating The Automatic Version Check
When the version check is activated, the phone checks on a daily basis whether the Gigaset configuration server has a new version of the phone firmware. If a new version is available, a notification is sent to the base and the corresponding message flashes. -
Page 36: Querying The Phone Status
Querying the phone status General information about your phone is displayed. ¤ In the menu list, select the Status tab. The following information is displayed: IP Configuration area IP address The phone's current IP address within the local network. For details on assigning ¢... -
Page 37: Gsm Connections Area
GSM Connections area The mobile telephones registered via the Bluetooth interface of the base are listed: Name The Bluetooth name under which the mobile phone is entered in the list of "known devices" on the base. Status Registered The mobile phone is registered to the base, i.e. it appears in the Known Devices list. -
Page 38: Index
..... . . Gigaset config DECT transmission power .... - Page 39 Handset Online directory ........assigning receive connection selecting .
- Page 40 ........Setting the time zone remote access .
- Page 41 Frankenstr. 2a, D-46395 Bocholt Manufactured by Gigaset Communications GmbH under trademark license of Siemens AG. As of 1 Oct. 2011 Gigaset products bearing the trademark 'Siemens' will exclusively use the trademark 'Gigaset' . © Gigaset Communications GmbH 2010 All rights reserved. Subject to availability.
Need help?
Do you have a question about the DL500A and is the answer not in the manual?
Questions and answers