Table of Contents
Advertisement
Available languages
Available languages
Quick Links
Download this manual
See also:
Owner's Manual
BBQ grillware® is a registered trademark
of LF, LLC. All Rights Reserved.
Questions, problems, missing parts? Before returning to your retailer, call our customer
service department at 1-800-762-1142, 9 a.m. - 5 p.m., EST, Monday - Sunday.
®
1
ITEM #0297995
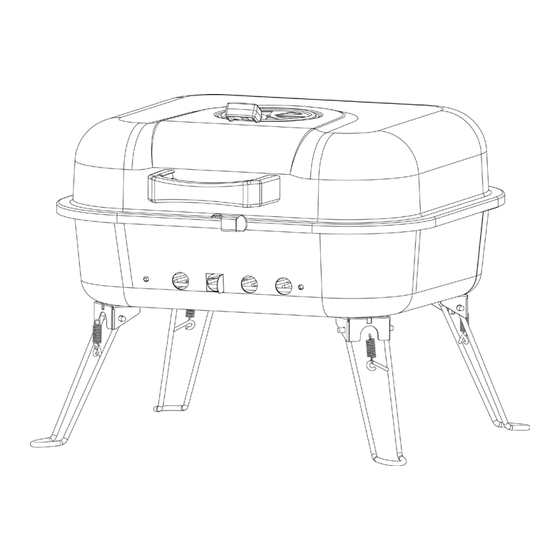
CHARCOAL GRILL
MODEL #CBT916L
Español p. 19
Advertisement
Chapters
Table of Contents

Related Manuals for BBQ CBT916L


Summary of Contents for BBQ CBT916L
-
Page 1: Charcoal Grill
® MODEL #CBT916L Español p. 19 BBQ grillware® is a registered trademark of LF, LLC. All Rights Reserved. Questions, problems, missing parts? Before returning to your retailer, call our customer service department at 1-800-762-1142, 9 a.m. - 5 p.m., EST, Monday - Sunday. -
Page 2: Table Of Contents
TABLE OF CONTENTS Safety Information ............. Package Contents . -
Page 3: Safety Information
16. To avoid burns, do not touch metal parts of grill until it has completely cooled (about 45 min.), unless you are wearing protective gear (pot holders, gloves, BBQ mittens, etc.). 17. Never touch grates (charcoal or cooking), ashes or coals to see if they are hot. - Page 4 SAFETY INFORMATION 29. Do not remove the ashes until they are completely and fully extinguished. 30. Hot briquets and coals can create a fire hazard. 31. Always empty the ash catcher and grill after each use. 32. Do not place fuel (charcoal briquets, wood or lump charcoal) directly into bottom of grill. Place fuel only on the charcoal pan/grid.
-
Page 5: Package Contents
PACKAGE CONTENTS Part Description Quantity Part Description Quantity Lid Handle Top Hinge Lid Air Vent Bottom Hinge Bottom Bowl Cooking Grid Bottom Bowl Air Vent Charcoal Grid... -
Page 6: Hardware Contents
HARDWARE CONTENTS Picture Part Description (Shown to size) M4 x 12 mm Screw M5 x 12 mm Screw M4 Wing Nut M5 Wing Nut 6.4 mm Heat Resistant Washer 5.3 mm Lock Washer 5 x 30 mm Pin 1.4 x 30 mm Cotter Pin PREPARATION Before beginning assembly of product, make sure all parts are present. -
Page 7: Assembly Instructions
ASSEMBLY INSTRUCTIONS Fig. 1 1. Attach lid air vent (B) to lid (C) using one M5 x 12 mm screw (BB) and one M5 wing nut (DD). See Fig. 1. Attach top hinges (F) to lid (C) using two M5 x 12 mm screws (BB), two 5.3 mm lock washers (FF) and two M5 wing nuts (DD). - Page 8 ASSEMBLY INSTRUCTIONS Fig. 2 2. Attach bottom bowl air vent (I) to bottom bowl (H) using two M4 x 12 mm screws (AA) and two M4 wing nuts (CC). See Fig. 2. Attach bottom hinges (G) to bottom bowl (H) using four M5 x 12 mm screws (BB), four 5.3 mm lock washers (FF) and four M5 wing nuts (DD).
- Page 9 ASSEMBLY INSTRUCTIONS Fig. 3 3. Attach legs (J) to bottom bowl (DD) using four M5 x 12 mm screws (BB) and four M5 wing nuts (DD). See Fig. 3. Note: Insert tabs on legs (J) before securing to the bottom bowl (DD). Hardware Used M5 x 12 mm Screw...
- Page 10 ASSEMBLY INSTRUCTIONS Fig. 4 4. Attach lid (C) to bottom bowl (H) using two 5 x 30 mm pins (GG) and two 1.4 x 30 mm cotter pins (HH). See Fig. 4. Hardware Used 5 x 30 mm 1.4 x 30 mm Cotter Pin...
- Page 11 ASSEMBLY INSTRUCTIONS Fig. 5 5. Insert charcoal grid (E) and cooking grid (D) into bottom bowl (H). See Fig. 5.
-
Page 12: Operating Instructions
OPERATING INSTRUCTIONS To Lock the Grill: Fig. 6a Close the lid. Slide the lock forward, till the sides of the lock cover the lid and bottom bowl. See Fig. 6a. To Unlock the Grill: Slide the lock backwards, till the lock stops, or both sides of the lock are free from the lid and bottom bowl. -
Page 13: First Use
OPERATING INSTRUCTIONS This appliance is designed for use only with quality charcoal briquets, lump charcoal and cooking wood. First Use 1. Make sure all labels, packaging and protective films have been removed from the grill. 2. Remove manufacturing oils before cooking on this grill for the first time, by operating the grill for at least 15 minutes with the lid closed. -
Page 14: Controlling Flare-Ups
OPERATING INSTRUCTIONS Indirect Cooking Not cooking directly over hot coals is ideal for slow cooking and grilling foods requiring more than 25 minutes such as most roasts, loins, chops, whole chickens, turkey, fish and baked goods. 1. Open lid and remove cooking grid. 2. -
Page 15: Tips
Tips for Better Cookouts and Longer Grill Life: 1. Place delicate foods like fish and vegetables in aluminum foil pouches and follow indirect cooking instructions, or place on upper cooking levels (warming rack). 2. To avoid losing natural juices, use long handled tongs or spatulas instead of forks and turn foods over just once during cooking. -
Page 16: Care And Maintenance
CARE AND MAINTENANCE CAUTION: All cleaning and maintenance should be done when grill is cool and with the fuel supply removed. CAUTION: DO NOT clean any grill part in a self-cleaning oven. The extreme heat will damage the finish. Notices: 1. -
Page 17: Warranty
WARRANTY Blue Rhino Global Sourcing, Inc. (“Vendor”) warrants to the original retail purchaser of this product, and to no other person, that if this product is assembled and operated in accordance with the printed instructions accompanying it, then for a period of one (1) year from the date of purchase, all parts in such product shall be free from defects in material and workmanship. -
Page 18: Replacement Parts List
REPLACEMENT PARTS LIST For replacement parts, call our customer service department at 1-800-762-1142, 9 a.m.- 5 p.m., EST, Monday-Sunday. Part Description Part # Lid Handle 55-09-098 Lid Air Vent 55-08-367 55-09-097 Cooking Grid 55-09-095 Charcoal Grid 55-09-094 Top Hinge (2) 55-08-323 Bottom Hinge (2) 55-08-325... - Page 19 ® MODELO #CBT916L Inglés p. 1 BBQ grillware® es una marca registrada de LF, LLC. Todos los derechos reservados. ¿Preguntas, problemas, piezas faltantes? Antes de volver a la tienda, llame a nuestro Departamento de Servicio al Cliente al 1-800-762-1142, de lunes a domingo de 9 a.m. a...
- Page 20 ÍNDICE Información de seguridad ............21 Contenido del paquete .
-
Page 21: Información De Seguridad
INFORMACIÓN DE SEGURIDAD Lea y comprenda completamente este manual antes de intentar ensamblar, usar o instalar el producto. Si tiene preguntas relacionadas con el producto, llame al Servicio al Cliente al 1-800- 762-1142, de lunes a domingo de 9 a.m. a 5 p.m., hora estándar del Este. ADVERTENCIAS Y PRECAUCIONES: 1. - Page 22 INFORMACIÓN DE SEGURIDAD 25. Cuando cocine, tenga a su alcance materiales para la extinción del fuego. En caso de que se produzca un incendio por el aceite o la grasa, no intente apagarlo con agua. Use un extintor de incendios a base de polvo químico seco tipo BC o apáguelo con tierra, arena o bicarbonato. 26.
-
Page 23: Contenido Del Paquete
CONTENIDO DEL PAQUETE Pieza Descripción Cantidad Pieza Descripción Cantidad Manija de la tapa Bisagra superior Orificio de ventilación de la Bisagra inferior tapa Fuente inferior Tapa Orificios de ventilación de la Rejilla para cocción fuente inferior Rejilla para el carbón Pata... -
Page 24: Aditamentos
ADITAMENTOS Imagen Pieza Descripción Cant. (tamaño real) Tornillo de M4 x 12 mm Tornillo de M5 x 12 mm Tuerca mariposa M4 Tuerca mariposa M5 Arandela resistente al calor de 6,4 mm Arandela de seguridad de 5,3 mm Pasador de 5 x 30 mm Pasador de chaveta de 1,4 x 30 mm... -
Page 25: Instrucciones De Ensamblaje
INSTRUCCIONES DE ENSAMBLAJE Fig. 1 1. Fije el orificio de ventilación de la tapa (B) a la tapa (C) con un tornillo M5 x 12 mm (BB) y una tuerca mariposa M5 (DD). Consulte la figura 1. Fije las bisagras superiores (F) a la tapa (C) con dos tornillos M5 x 12 mm (BB), dos arandelas de seguridad de 5,3 mm (FF) y dos tuercas mariposa M5 (DD). - Page 26 INSTRUCCIONES DE ENSAMBLAJE Fig. 2 2. Fije el orificio de ventilación de la fuente inferior (I) a la fuente inferior (H) con dos tornillos M4 x 12 mm (AA) y dos tuercas mariposa M4 (CC). Consulte la figura 2. Fije las bisagras inferiores (G) a la fuente inferior (H) con cuatro tornillos M5 x 12 mm (BB), cuatro arandelas de seguridad de 5,3 mm (FF) y cuatro tuercas mariposa M5...
- Page 27 INSTRUCCIONES DE ENSAMBLAJE Fig. 3 3. Fije las patas (J) a la fuente inferior (DD) con cuatro tornillos M5 x 12 mm (BB) y cuatro tuercas mariposa M5 (DD). Consulte la figura 3. Nota: Inserte las lengüetas en las patas (J) antes de fijarlas a la fuente inferior (DD).
- Page 28 INSTRUCCIONES DE ENSAMBLAJE Fig. 4 4. Fije la tapa (C) a la fuente inferior (H) con dos pasadores de 5 x 30 mm (GG) y dos pasadores de chaveta de 1,4 x 30 mm (HH). Consulte la figura 4. Aditamentos utilizados Pasador de 5 x 30 mm Pasador de...
- Page 29 INSTRUCCIONES DE ENSAMBLAJE Fig. 5 5. Inserte la rejilla para el carbón (E) y la rejilla para cocción (D) en la fuente inferior (H). Consulte la figura 5.
-
Page 30: Instrucciones De Funcionamiento
INSTRUCCIONES DE FUNCIONAMIENTO Para cerrar la parrilla: Fig. 6a Cierre la puerta. Deslice el cierre hacia delante hasta que los lados del cierre cubran la tapa y fuente inferior. Consulte la figura 6a. Para abrir la parrilla: Deslice el cierre hacia atrás hasta que se detenga o ambos lados del cierre estén libres de la tapa y fuente inferior. -
Page 31: Primer Uso
INSTRUCCIONES DE FUNCIONAMIENTO Este electrodoméstico está diseñado sólo para usarse con briquetas de carbón, carbón en trozos y madera para leña de calidad. Primer uso 1. Asegúrese de que se hayan quitado todas las etiquetas, láminas protectoras y de embalaje de la parrilla. -
Page 32: Cocción
INSTRUCCIONES DE FUNCIONAMIENTO 6. Con la tapa abierta o cerrada, cocine hasta que la comida alcance la temperatura interna deseada. Nota: Si necesita briquetas adicionales, saque la comida de la rejilla para cocción y, usando guantes de protección, retire la rejilla para cocción y coloque las briquetas adicionales sin mover las cenizas calientes. - Page 33 INSTRUCCIONES DE FUNCIONAMIENTO Use un extintor de incendios a base de polvo químico seco tipo BC o apáguelo con tierra, arena o bicarbonato. Las llamaradas son parte de la cocción de carnes en una parrilla y aderezos del sabor único que da asar un alimento.
-
Page 34: Consejos
CUIDADO Y MANTENIMIENTO PRECAUCIÓN: La limpieza y el mantenimiento deben realizarse cuando la parrilla está fría y sin combustible. PRECAUCIÓN: NO limpie ninguna pieza de la parrilla en un horno con autolimpieza. El calor extremo daña el acabado. Avisos: 1. Los limpiadores abrasivos dañan este producto. 2. -
Page 35: Garantía
GARANTÍA Blue Rhino Global Sourcing, Inc. (“el proveedor”) garantiza al comprador minorista original de este producto, y a ninguna otra persona, que si este producto se ensambla y se usa de acuerdo con las instrucciones impresas incluidas, ninguna de las piezas del producto presentará defectos de fabricación en el material ni en la mano de obra durante un (1) año desde la fecha de compra. -
Page 36: Lista De Piezas De Repuesto
LISTA DE PIEZAS DE REPUESTO Para pedir piezas de repuesto, llame a nuestro departamento de servicio al cliente al 1-800-762-1142, de lunes a domingo de 9 a.m. a 5 p.m., hora estándar del Este. Pieza Descripción Pieza # Manija de la tapa 55-09-098 Orificio de ventilación de 55-08-367...
Need help?
Do you have a question about the CBT916L and is the answer not in the manual?
Questions and answers