Table of Contents
Advertisement
Quick Links
100275091_2000533998_Rev C
™
F I R E T U B E C O M B I
Noble Combi Boiler
Installation & Service Manual
Models: 110 - 199
WARNING
This manual must only be used
by a qualified heating installer
/ service technician. Read all
instructions, in this manual before
installing. Perform steps in the
order given. Failure to comply
could result in severe personal
injury, death, or substantial
property damage.
Save this manual for future reference.
Advertisement
Table of Contents

Subscribe to Our Youtube Channel
Related Manuals for Lochinvar NKC 110


Summary of Contents for Lochinvar NKC 110
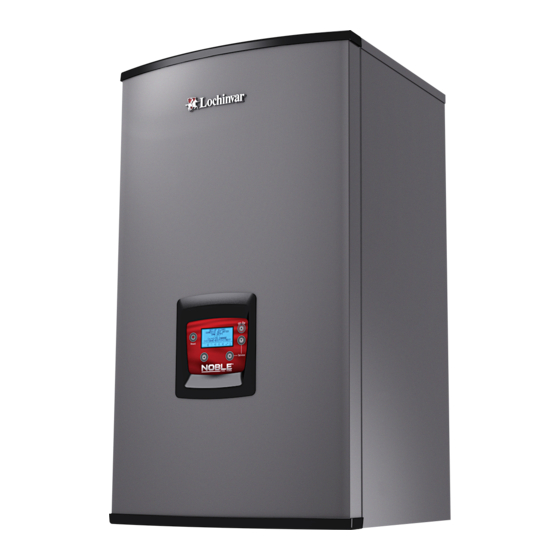
- Page 1 100275091_2000533998_Rev C ™ F I R E T U B E C O M B I Noble Combi Boiler Installation & Service Manual Models: 110 - 199 WARNING This manual must only be used by a qualified heating installer / service technician. Read all instructions, in this manual before installing.
-
Page 2: Table Of Contents
Contents HAZARD DEFINITIONS..............2 Chilled Water System ................ 33 PLEASE READ BEFORE PROCEEDING ......3 Freeze Protection ................33 THE NOBLE COMBI BOILER -- HOW IT WORKS ....4-5 General Piping Information ............. 33 RATINGS .................... 6 Near Boiler Piping Components ............. 34 1. -
Page 3: Please Read Before Proceeding
Installation & Service Manual ™ F I R E T U B E C O M B I Please read before proceeding Installer – Read all instructions, in this WARNING DO NOT install units in rooms or WARNING manual before installing. Perform steps environments that contain corrosive in the order given. -
Page 4: The Noble Combi Boiler - How It Works
Installation & Service Manual ™ F I R E T U B E C O M B I The Noble Combi Boiler - How it works... 1. Heat exchanger 16. Gas connection pipe Allows system water to flow through specially designed Threaded pipe connection of 1/2". - Page 5 Installation & Service Manual ™ F I R E T U B E C O M B I The Noble Combi Boiler - How it works... (continued) FRONT LEFT RIGHT BACK DIR #2000528036 00 DIR #2000528036 Bottom View Front Outside View DIR #2000528036 00 DIR #2000528036 00 Front Inside View...
-
Page 6: Ratings
Installation & Service Manual ™ F I R E T U B E C O M B I Ratings LOW LEAD CONTENT Combi Other Specifications AHRI Rating AFUE Input AHRI Heating Model Number Capacity Ratings Vent/Air Boiler Water SH Water DHW Water Water, Note: Change “N”... -
Page 7: Determine Boiler Location
Installation & Service Manual ™ F I R E T U B E C O M B I Determine boiler location Installation must comply with: This appliance is certified as an indoor WARNING appliance. Do not install the appliance • Local, state, provincial, and national codes, laws, outdoors or locate where the appliance will regulations, and ordinances. - Page 8 Installation & Service Manual ™ F I R E T U B E C O M B I Determine boiler location Figure 1-1 Closet Installation - Minimum Required Clearances For closet installations, CPVC, WARNING polypropylene, or stainless steel 1" MINIMUM CLEARANCE vent material MUST BE used in AROUND VENT PIPE 6"...
-
Page 9: Provide Air Openings To Room
Installation & Service Manual ™ F I R E T U B E C O M B I Determine boiler location (continued) Residential garage installation If you do not provide the recommended NOTICE service clearances shown, it may not be Precautions possible to service the boiler without removing it from the space. -
Page 10: Corrosive Contaminants And Sources
Installation & Service Manual ™ F I R E T U B E C O M B I Determine boiler location When using an existing vent system to Table 1A Corrosive Contaminants and Sources install a new boiler: Products to avoid: Failure to follow all instructions can result WARNING Spray cans containing chloro/fluorocarbons... -
Page 11: Removing A Boiler From Existing Common Vent
Installation & Service Manual ™ F I R E T U B E C O M B I Determine boiler location (continued) When removing a boiler from existing common vent system: Do not install the Noble Combi Boiler into g. Any improper operation of the common venting system DANGER should be corrected so the installation conforms with a common vent with any other appliance. -
Page 12: Prepare Boiler
Installation & Service Manual ™ F I R E T U B E C O M B I Prepare boiler Remove boiler from wood pallet 1. If boiler is already installed, you must turn off the gas supply, turn off the power, and allow the boiler to cool 1. -
Page 13: Mounting The Boiler
Installation & Service Manual ™ F I R E T U B E C O M B I Prepare boiler Mount the wall bracket using the 2 1/4" lag bolts (continued) provided. Make sure the top edge of the bracket is away After converting to LP, check combustion WARNING from the wall. -
Page 14: General Venting
Installation & Service Manual ™ F I R E T U B E C O M B I General venting Direct venting options - Sidewall Vent DIR #2000534592 00 DIR #2000534593 00 Figure PVC/CPVC Concentric Sidewall Figure 3-1 Two-Pipe Sidewall Termination - See Termination - See page 25 for more details page 22 for more details Direct venting options - Vertical Vent... -
Page 15: Install Vent And Combustion Air Piping
Installation & Service Manual ™ F I R E T U B E C O M B I General venting (continued) Install vent and combustion air piping The Noble Combi Boiler vent and air piping can be installed The Noble Combi Boiler must be vented and DANGER through the roof or through a sidewall. -
Page 16: Sizing
Installation & Service Manual ™ F I R E T U B E C O M B I General venting Sizing WARNING Using air intake materials other than those specified can result in personal injury, The Noble Combi Boiler uses model specific combustion air death or property damage. -
Page 17: Optional Room Air
Installation & Service Manual ™ F I R E T U B E C O M B I General venting (continued) Optional room air Please read the information given in Table 1A, page 10, Optional room air is intended for NOTICE listing contaminants and areas likely to contain them. -
Page 18: Pvc/Cpvc
Installation & Service Manual ™ F I R E T U B E C O M B I General venting PVC/CPVC: Work from the boiler to vent or air termination. Do not exceed the lengths given in this manual for the air or vent This product has been approved for use with the PVC/CPVC piping. -
Page 19: Polypropylene
Installation & Service Manual ™ F I R E T U B E C O M B I General venting (continued) Polypropylene: The installer must use a specific vent NOTICE starter adapter at the flue collar connection, This product has been approved for use with polypropylene supplied by the vent manufacturer to vent with the manufacturers listed in Table 3E. -
Page 20: Stainless Steel Vent
Installation & Service Manual ™ F I R E T U B E C O M B I General venting Stainless steel vent: Installation of a stainless steel vent system NOTICE should adhere to the stainless steel vent This product has been approved for use with stainless steel manufacturer’s installation instructions using the manufacturers listed in Table 3G. -
Page 21: Sidewall Direct Venting
Installation & Service Manual ™ F I R E T U B E C O M B I Sidewall direct venting Vent/air termination – sidewall If using the sidewall termination: Follow instructions below when WARNING 3. The air piping must terminate in a down-turned elbow determining vent location to avoid as shown in FIG. - Page 22 Installation & Service Manual ™ F I R E T U B E C O M B I Sidewall direct venting Vent/air termination – sidewall Figure 4-2A Clearance to Gravity Air Inlets w/Field Supplied Fittings Figure 4-1C Alternate Venting Arrangement (if Space Allows) w/Field Supplied Fittings TO BOILER INTAKE AIR...
-
Page 23: Prepare Wall Penetrations
Installation & Service Manual ™ F I R E T U B E C O M B I Sidewall direct venting (continued) Prepare wall penetrations Figure 4-5A Multiple Vent Terminations w/Field Supplied Fittings (must also comply with Figure 4-1A) Air pipe penetration: Cut a hole for the air pipe. -
Page 24: Sidewall Termination - Optional Concentric Vent
Installation & Service Manual ™ F I R E T U B E C O M B I Sidewall direct venting Sidewall termination – optional concentric vent Description and usage 3. Cut one (1) hole (5 inch diameter for #100140480 The manufacturer offers optional concentric combustion air installations or 4 inch diameter for #100140485 installations) and vent pipe termination kits (Factory Kit #100140480 - 3"... - Page 25 Installation & Service Manual ™ F I R E T U B E C O M B I Sidewall direct venting (continued) Sidewall termination – optional concentric vent models Figure 4-8 Concentric Vent Dimensional Drawing Instead of cementing the smaller pipe to NOTICE 5.
- Page 26 Installation & Service Manual ™ F I R E T U B E C O M B I Sidewall direct venting Sidewall termination – optional concentric vent Figure 4-10 Concentric Vent Sidewall Attachment Multiventing sidewall terminations DO NOT use field-supplied couplings to CAUTION extend pipes.
-
Page 27: Vertical Direct Venting
Installation & Service Manual ™ F I R E T U B E C O M B I Vertical direct venting Vent/air termination – vertical Follow instructions below when WARNING Figure 5-1A PVC/CPVC/Polypropylene Vertical determining vent location to avoid Termination of Air and Vent possibility of severe personal injury, death or substantial property damage. -
Page 28: Prepare Roof Penetrations
Installation & Service Manual ™ F I R E T U B E C O M B I Vertical direct venting Vent/air termination – vertical Prepare roof penetrations Figure 5-2 Vertical Terminations with Multiple Boilers Air pipe penetration: Cut a hole for the air pipe. Size the air pipe hole as close as desired to the air pipe outside diameter. -
Page 29: Vertical Termination - Optional Concentric Vent
Installation & Service Manual ™ F I R E T U B E C O M B I Vertical direct venting (continued) Vertical termination – optional concentric vent Description and usage 2. Cut one (1) hole (5 inch diameter for #100140480 installations The manufacturer offers an optional concentric combustion or 4 inch diameter for #100140485 installations) into the air and vent pipe termination kit. - Page 30 Installation & Service Manual ™ F I R E T U B E C O M B I Vertical direct venting Vertical termination – optional concentric vent DO NOT use field-supplied couplings to Do not operate the appliance with CAUTION WARNING extend pipes.
-
Page 31: Alternate Vertical Concentric Venting
Installation & Service Manual ™ F I R E T U B E C O M B I Vertical direct venting (continued) Alternate vertical concentric venting This appliance may be installed with a concentric vent arrangement where the vent pipe is routed through an Figure 5-8 Concentric Vent Example 1 existing unused venting system;... - Page 32 Installation & Service Manual ™ F I R E T U B E C O M B I Vertical direct venting Existing vent as a chase Follow all existing termination and clearance requirements and allowable pipe lengths. Use only approved venting materials listed in the General Venting Section of this manual.
-
Page 33: Hydronic Piping
Installation & Service Manual ™ F I R E T U B E C O M B I Hydronic piping System water piping methods General piping information All boiler piping must contain an oxygen IMPORTANT The Noble Combi Boiler is designed to function in a closed barrier. -
Page 34: Near Boiler Piping Components
Installation & Service Manual ™ F I R E T U B E C O M B I Hydronic piping Near boiler piping components WARNING The National Standard Plumbing Code, the National Plumbing Code of 1. Boiler system piping: Canada and the Uniform Plumbing Boiler system piping MUST be sized per the pipe Code limit the pressure of the heat requirements listed in Table 6A. - Page 35 Installation & Service Manual ™ F I R E T U B E C O M B I Hydronic piping (continued) Figure 6-2 Pressure Drop vs. Flow Table 6A Temperature Rise Applications NKC110 NKC150 Delta T FT/HD Eq Ft of 1" Pipe Delta T FT/HD Eq Ft of 1"...
- Page 36 Installation & Service Manual ™ F I R E T U B E C O M B I Hydronic piping Figure 6-3 Single Boiler - Primary / Secondary Piping PRESSURE REDUCING VALVE PRESSURE BACKFLOW GAUGE PREVENTER MAKE UP WATER SEPARATOR SYSTEM SUPPLY SENSOR MAY SUBSTITUTE LOW LOSS HEADER...
- Page 37 Installation & Service Manual ™ F I R E T U B E C O M B I Hydronic piping (continued) Figure 6-4 Single Temperature Zoned with Circulators ZONE #1 PRESSURE PRESSURE ZONE #2 ZONE #3 ZONE #4 GAUGE REDUCING VALVE BACKFLOW FLOW CHECK PREVENTER...
- Page 38 Installation & Service Manual ™ F I R E T U B E C O M B I Hydronic piping Figure 6-5 Multiple Boilers - Single Temperature Zoned with Circulators Number of Units Model Required Pipe Sizes 1" 1-1/4" 1-1/4" 1-1/2" 2"...
- Page 39 Installation & Service Manual ™ F I R E T U B E C O M B I Hydronic piping (continued) Figure 6-6 Single Temperature Piped with Air Handler PRESSURE PRESSURE GAUGE REDUCING VALVE BACKFLOW PREVENTER MAKE UP WATER HANDLER AIR SEPARATOR EXPANSION TANK...
-
Page 40: Domestic Water Piping
Installation & Service Manual ™ F I R E T U B E C O M B I Domestic water piping Water chemistry Scalding Any damage or failure resulting from improper water This combi heater can deliver scalding temperature water chemistry, or heating anything other than potable water. -
Page 41: Domestic Water Piping Diagrams
Installation & Service Manual ™ F I R E T U B E C O M B I Domestic water piping (continued) Figure 6-7 Combi DHW Piping BOILER EXPANSION TANK UNION (TYPICAL) PRESSURE RELIEF VALVE (REQUIRED, FIELD SUPPLIED) ASSE 1070 ANTI-SCALD FLOW MIXING VALVE... - Page 42 Installation & Service Manual ™ F I R E T U B E C O M B I Domestic water piping Figure 6-8 DHW Recirculation w/Dedicated Return BOILER Note: Aquastat for DHW recirculation pump or thermostatic shut off valve must be used to stop recirculation water fl...
- Page 43 Installation & Service Manual ™ F I R E T U B E C O M B I Domestic water piping (continued) Figure 6-9 DHW Piping w/Recirculation Return Through Cold Line BOILER Note: Aquastat for DHW recirculation pump or thermostatic shut off valve must be used to stop recirculation water fl...
-
Page 44: Gas Connections
Installation & Service Manual ™ F I R E T U B E C O M B I Gas connections Connecting gas supply piping 1. Remove the front access panel and refer to FIG. 7-1 2. Support piping with hangers, not by the boiler or its to pipe gas to the boiler. -
Page 45: Natural Gas
Installation & Service Manual ™ F I R E T U B E C O M B I Gas connections (continued) Natural gas: Failure to apply pipe sealing compound WARNING as detailed in this manual can result Pipe sizing for natural gas in severe personal injury, death, or substantial property damage. -
Page 46: Check Inlet Gas Supply
Installation & Service Manual ™ F I R E T U B E C O M B I Gas connections Table 7A Natural Gas Pipe Size Chart Capacity of Schedule 40 Metallic Pipe in Cubic Feet of Natural Gas Per Hour (based on .60 specific gravity, 0.30"... -
Page 47: Gas Pressure
Installation & Service Manual ™ F I R E T U B E C O M B I Gas connections (continued) Gas Pressure 14. Shut off the gas supply at the manual gas valve in the gas piping to the appliance. The gas pressure must remain between 4 inches w.c. -
Page 48: Field Wiring
Installation & Service Manual ™ F I R E T U B E C O M B I Field wiring Installation must comply with: For field wiring on Combi units, reference NOTICE the Combi Installation and Service 1. National Electrical Code and any other national, state, Manual provided with the unit. - Page 49 Installation & Service Manual ™ F I R E T U B E C O M B I Field wiring (continued) Thermostat Flow switch 1. A flow switch is used to guarantee flow through the boiler 1. Connect the room thermostat or end switch (isolated before allowing it to fire.
- Page 50 Installation & Service Manual ™ F I R E T U B E C O M B I Field wiring Figure 8-4 Low Voltage Field Wiring Connections...
-
Page 51: Condensate Disposal
Installation & Service Manual ™ F I R E T U B E C O M B I Condensate disposal Condensate drain Use materials approved by the authority NOTICE having jurisdiction. In the absence of other 1. This boiler is a high efficiency appliance that produces authority, PVC and CPVC pipe must comply with ASTM D1785 or D2845. -
Page 52: Startup
Installation & Service Manual ™ F I R E T U B E C O M B I Start-up Freeze protection Fill water Check/control fill water chemistry Ethylene glycol is toxic, DO NOT use as WARNING your freeze protection. It has a sweet aroma Conduct water quality testing prior to IMPORTANT which children and pets could mistake as... - Page 53 Installation & Service Manual ™ F I R E T U B E C O M B I Start-up (continued) Oxygen prevention Fill and test water system 1. Fill system only after ensuring the water meets the Eliminate all system leaks. Continual CAUTION requirements of this manual.
-
Page 54: Check For Gas Leaks
Installation & Service Manual ™ F I R E T U B E C O M B I Start-up Check for gas leaks Check thermostat circuit(s) Before starting the boiler, and during 1. Disconnect the external wire connected to the room WARNING initial operation, smell near the floor and thermostat terminal on the connection board. -
Page 55: Start The Boiler
Installation & Service Manual ™ F I R E T U B E C O M B I Start-up (continued) Final checks before starting the boiler Check gas piping 1. Check around the boiler for gas odor following the ... - Page 56 Installation & Service Manual ™ F I R E T U B E C O M B I Start-up Figure 10-2 Operating Instructions Move switch to the “OFF” position.
-
Page 57: Home Screen
Installation & Service Manual ™ F I R E T U B E C O M B I Start-up (continued) Noble Combi Boiler control module Use the control panel (FIG. 10-3) to set temperatures, operating conditions, and monitor boiler operation. Figure 10-3 Control Panel DISPLAY RESET BUTTON... - Page 58 Installation & Service Manual ™ F I R E T U B E C O M B I Start-up Setup wizard MAX SH SETPT - SPACE HEAT SETPT (COLDEST DAY) Th e Noble Combi Boiler control has a Setup Wizard feature •...
-
Page 59: Service Mode
Installation & Service Manual ™ F I R E T U B E C O M B I Start-up (continued) DHW SETPT Figure 10-6 Service Menu • Th is is the desired set point temperature of Domestic Hot Water (DHW) generated by the unit. - Page 60 Installation & Service Manual ™ F I R E T U B E C O M B I Start-up ► ▼ Set domestic hot water (DHW) operation 3. Press the buttons (simultaneously) for 5 seconds to enter Service Mode. Verify DHW operation 4.
-
Page 61: Operating Information
Installation & Service Manual ™ F I R E T U B E C O M B I Operating information General Parameters in the set points menu: How the boiler operates SH SETPT (COLD DAY) • Space heating water set point temperature, or the The Noble Combi Boiler uses an advanced stainless steel heat space heating water set point temperature when exchanger and electronic control module that allows fully... - Page 62 Installation & Service Manual ™ F I R E T U B E C O M B I Operating information Parameters in the installer menu: Enter the installer password GENERAL Submenu To enter the installer password, use the ▲ and ▼ buttons to •...
-
Page 63: Control Inputs And Outputs
Installation & Service Manual ™ F I R E T U B E C O M B I Operating information (continued) Control inputs and outputs DHW flow switch The Noble Combi Boiler is factory equipped with a DHW flow Room thermostat switch connected to the control that detects the presence of The room thermostat input tells the boiler to provide heat for DHW water flow rates greater than 0.32 gpm. - Page 64 Installation & Service Manual ™ F I R E T U B E C O M B I Operating information Outdoor air reset Outdoor Air Shutdown The Noble Combi Boiler uses an advanced non-linear Outdoor air shutdown specifi es the outdoor air temperature at outdoor reset curve to improve system efficiency by reducing which the Space Heating demand is blocked.
-
Page 65: Cascade
Installation & Service Manual ™ F I R E T U B E C O M B I Operating information (continued) Cascade The control monitors the temperature difference between the inlet and the outlet sensor. If this difference exceeds 55°F the When multiple Noble Combi Boilers are installed, they can control will reduce the maximum fan speed. -
Page 66: Sequence Of Operation
Installation & Service Manual ™ F I R E T U B E C O M B I Operating information Sequence of operation Space heat temperature regulation Operating temperature (target) Th e cold domestic water enters the plate heat exchanger through The boiler control module senses water temperature and the DHW inlet connection, fl ow switch, and strainer. - Page 67 Installation & Service Manual ™ F I R E T U B E C O M B I Operating information (continued) OPERATION DISPLAY 1. Upon a call for heat, the control turns on the appropriate pumps. The flow switch and/or LWCO must close. 2.
- Page 68 Installation & Service Manual ™ F I R E T U B E C O M B I Operating information OPERATION DISPLAY 6. If flame is detected, it holds the firing rate steady for a few seconds to let the flame stabilize, then it begins to modulate the firing rate based on a set point or some other command.
-
Page 69: Maintenance Maintenance And Annual Startup
Installation & Service Manual ™ F I R E T U B E C O M B I Maintenance Maintenance and annual startup Table 12A Service and Maintenance Schedules Owner maintenance Service technician (see the Noble Combi Boiler User’s Information (see the following pages for instructions) Manual for instructions) General:... -
Page 70: Inspect Boiler Area
Installation & Service Manual ™ F I R E T U B E C O M B I Maintenance Follow the Service and maintenance procedures given throughout this manual and in component literature WARNING shipped with the boiler. Failure to perform the service and maintenance could result in damage to the boiler or system. -
Page 71: Check Boiler Relief Valve
Installation & Service Manual ™ F I R E T U B E C O M B I Maintenance (continued) Check expansion tank 2. After following the warning directions in this manual, if the relief valve weeps or will not seat properly, replace the 1. -
Page 72: Removal Of Combustion Chamber Lining
Installation & Service Manual ™ F I R E T U B E C O M B I Maintenance Handling ceramic fiber materials Figure 12-2 Burner Assembly REMOVAL OF COMBUSTION CHAMBER LINING TOP PLATE The combustion chamber insulation in WARNING this appliance contains ceramic fiber material. - Page 73 • Follow the “To Turn Off Gas to Appliance” instructions 1. Shut down boiler: for the boiler in Section 10 - Startup of the Lochinvar • Follow the “To Turn Off Gas to Appliance” instructions Combi Boiler Installation and Operation Manual.
- Page 74 Installation & Service Manual ™ F I R E T U B E C O M B I Maintenance Figure 12-3 Remove flow sensor and flow switch 5. When the unit stabilizes, begin to slowly shut off the assembly isolation valve on the outlet piping of the boiler (see FIG. 12-5).
-
Page 75: Troubleshooting
Installation & Service Manual ™ F I R E T U B E C O M B I Troubleshooting Check control module fuses Label all wires prior to disconnection WARNING when servicing controls. Wiring errors can cause improper and ALWAYS check control module fuses NOTICE dangerous operation. - Page 76 Installation & Service Manual ™ F I R E T U B E C O M B I Troubleshooting Checking temperature sensors The boiler temperature sensors (inlet water, outlet water, system water, flue, and outdoor air) are all resistance type devices. The following tables show the correct values for the sensors at various temperatures.
-
Page 77: Corrective Action
Installation & Service Manual ™ F I R E T U B E C O M B I Troubleshooting (continued) Table 13-3 Troubleshooting Chart - Noisy System FAULT CAUSE CORRECTIVE ACTION Supply problem. Natural • Refer Section Connections pressures should be between 4 inches w.c. detailed information concerning the gas supply. - Page 78 Installation & Service Manual ™ F I R E T U B E C O M B I Troubleshooting Table 13-4 Troubleshooting Chart - Fault Messages Displayed on Boiler Interface FAULT DESCRIPTION CORRECTIVE ACTION MEMORY The control module has detected parameter •...
- Page 79 • Verify that the boiler is piped properly into the heating system. Refer to Section 6 - Hydronic Piping for the proper piping methods for the Lochinvar Combi Boiler. • Check 120 vac to boiler pump motor on a call for heat.
- Page 80 Installation & Service Manual ™ F I R E T U B E C O M B I Troubleshooting Table 13-4 (continued from previous page) Troubleshooting Chart - Fault Messages Displayed on Boiler Interface FAULT DESCRIPTION CORRECTIVE ACTION • Inspect spark electrode and associated wiring for damage and connection.
- Page 81 Refer to Section 6A - Hydronic Piping the setting of the manual reset high limit. has been corrected. for the proper piping methods for the Lochinvar Combi Press the RESET button Boiler. on the display to reset.) • Check 120 vac to boiler pump motor on a call for heat.
- Page 82 • Verify that the boiler is piped properly into the heating system. Refer to Section 6 - Hydronic Piping The temperature rise across the heat for the proper piping methods for the Lochinvar Combi exchanger has exceeded the set parameters Boiler. for the boiler.
- Page 83 Installation & Service Manual ™ F I R E T U B E C O M B I Troubleshooting (continued) Table 13-4 (continued from previous page) Troubleshooting Chart - Fault Messages Displayed on Boiler Interface ERROR CODE DESCRIPTION CORRECTIVE ACTION •...
- Page 84 Installation & Service Manual ™ F I R E T U B E C O M B I Troubleshooting Table 13-4 (continued from previous page) Troubleshooting Chart - Fault Messages Displayed on Boiler Interface FAULT CAUSE CORRECTIVE ACTION • Verify DHW flow is at least 0.4 gpm. •...
- Page 85 Installation & Service Manual ™ F I R E T U B E C O M B I Troubleshooting (continued) Table 13-4 (continued from previous page) Troubleshooting Chart - Fault Messages Displayed on Boiler Interface FAULT CAUSE CORRECTIVE ACTION • Wait until DHW demand has ended, then combi unit should provide heated water to the space heating A DHW demand is present.
-
Page 86: Combustion Analysis Procedure
Noble Combi Boiler. or Obstruction • Check for obstructions at the vent/air intake terminals. • Refer to Section 7 - Gas Connections for the proper gas supply for the Lochinvar Combi Gas Supply Pressure Boiler. • Refer to page 72 of this manual for burner removal. -
Page 87: Diagrams
Installation & Service Manual ™ F I R E T U B E C O M B I Diagrams Figure 14-1 Ladder Diagram (Standard) 120VAC NEUTRAL GROUND JUNCTION BOX 120V SUPPLY "L" 120V SUPPLY "N" INTEGRATED CONTROL SYSTEM PUMP "L" SYSTEM PUMP X1-2 X1-6... -
Page 88: Wiring Diagram (Standard)
Installation & Service Manual ™ F I R E T U B E C O M B I Diagrams Figure 14-2 Wiring Diagram (Standard) DISPLAY LOW VOLTAGE 120 VAC HIGH VOLTAGE INTEGRATED CONNECTION BOARD CONTROL JUNCTION X1-3 BOX DEPICTS OPTONAL ITEMS SHIELD CASCADE X1-2... - Page 89 Installation & Service Manual ™ F I R E T U B E C O M B I Notes...
- Page 90 Installation & Service Manual ™ F I R E T U B E C O M B I Notes...
- Page 91 Installation & Service Manual ™ F I R E T U B E C O M B I Notes...
- Page 92 Revision A (PCP #3000004508 / CN #500004666) initial release. Revision B (PCP #3000005203 / CN #500005353) reflects the addition of the DHW flow switch filter cleaning section and the Noble logo. Revision C (PCP #3000005203 / CN #500005353) reflects updates made to the mixing valve statements.
Need help?
Do you have a question about the NKC 110 and is the answer not in the manual?
Questions and answers