
Related Manuals for Jensen JBS-225


Summary of Contents for Jensen JBS-225
- Page 1 Wall Mountable Bluetooth Music System with CD USER MANUAL JBS-225 PLEASE READ THIS USER MANUAL COMPLETELY BEFORE OPERATING THIS UNIT AND RETAIN THIS BOOKLET FOR FUTURE REFERENCE.
- Page 2 The serial number of this product is found on its back cover. You should note the serial number of this unit in the space provided as a permanent record of your purchase to aid in identification in the event of theft of loss. Model Number: JBS-225 Serial Number: ____________________...
-
Page 3: Important Safety Instructions
WARNING TO PREVENT FIRE OR SHOCK HAZARD, DO NOT USE THIS PLUG WITH AN EXTENSION CORD, RECEPTACLE OR OTHER OUTLET UNLESS THE BLADES CAN BE FULLY INSERTED TO PREVENT BLADE EXPOSURE. TO PREVENT FIRE OR SHOCK HAZARD, DO NOT EXPOSE THIS APPLIANCE TO RAIN OR MOISTURE. The Caution Marking is located at the back enclosure of the apparatus. - Page 4 Refer all servicing to qualified service personnel. Servicing is required when the apparatus has been damaged in any way, such as power-supply cord or plug is damaged, liquid has been spilled or objects have fallen into the apparatus, the apparatus has been exposed to rain or moisture, does not operate normally, or has been dropped.
- Page 5 CAUTION Follow the advice below for safe operations. ON PROTECTION AGAINST LASER ENERGY EXPOSURE o As the laser beam used in this compact disc player is harmful to the eyes, do not attempt to disassemble the casing. o Stop operation immediately if any liquid or solid object should fall into the cabinet. o Do not touch the lens or poke at it.
- Page 6 radiate radio frequency energy and, if not installed and used in accordance with the instructions, may cause harmful interference to radio communications. However, there is no guarantee that interference will not occur in a particular installation. If this equipment does cause harmful interference to radio or television reception, which can be determined by turning the equipment off and on, the user is encouraged to try to correct the interference by one or more of the following measures:...
- Page 7 INSTALLATION OPTIONS ATTACHING THE STAND (See Illustrations Below) A. Turn the unit over as shown below, and align the mounting blocks on the top of the stand, with the mounting openings located on the bottom of the main unit. Once in place, the 4 mounting tabs on the stand will align with the 4 rectangular mounting slots located on the bottom of the unit.
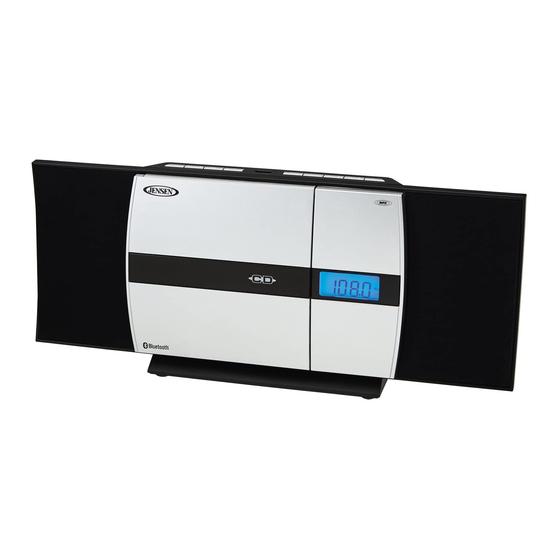
- Page 8 LOCATION OF CONTROLS MAIN UNIT...
- Page 9 1. LEFT SPEAKER 12. VOLUME DOWN (-) BUTTON 2. CD COMPARTMENT 13. CD DOOR OPEN/CLOSE BUTTON 3. DETACHABLE STAND 14. VOLUME UP (+) BUTTON 4. REMOTE SENSOR 15. CD/BLUETOOTH SKIP NEXT FM TUNE+ BUTTON 5. RIGHT SPEAKER 16. CD/BLUETOOTH SKIP PREVIOUS FM TUNE- BUTTON 6.
- Page 10 GETTING STARTED ACCESSORIES INCLUDED Carefully remove the unit and all accessories from the package. Please verify that you have all the following accessories before recycling the gift box. • Main Unit and Stand • User Manual • Remote control • Wall mounting instruction sheet •...
- Page 11 Battery Precautions Replacement of batteries must be done by an adult. The supply terminals are not to be short-circuited. Non-rechargeable batteries are not to be recharged. Exhausted batteries are to be removed. Only batteries of the equivalent type are to be used. Batteries are to be inserted with the correct polarity.
- Page 12 CHECKING THE CLOCK (REMOTE CONTROL ONLY) The unit will show current time in standby mode. To check the current time in Power ON mode, press and hold the TIME SET Button on remote control, the current time will show for 10 seconds and then return to the previous screen.
- Page 13 SNOOZE FUNCTION Press the SNOOZE Button on remote control once to terminate the alarm mode temporarily, and the alarm will re-start again after 9 minutes on each press. To cancel the SNOOZE mode, press the POWER Button once. The alarm icon “ stops flashing.
- Page 14 Release the button to continue playing your selection. 10. To stop playing, press the STOP Button. 11. Turn off the JBS-225 when you are done listening. SKIP AND SEARCH MODE 1. During Play or Pause mode, tap the SKIP NEXT...
- Page 15 Make sure your Smartphone or Bluetooth device has the NFC feature, and it is turned ON (enabled). Turn on the JBS-225 power, press the MODE Button on main unit or remote control to enter Bluetooth mode, the Bluetooth “bt” message will be shown in display and flashing.
- Page 16 PAIRING (Linking) a BLUETOOTH ENABLED cell phone OR OTHER BLUETOOTH ENABLED DEVICE to the JBS-225 If the JBS-225 has never been paired with a Bluetooth device before. You need to follow the pairing instructions below to link the JBS-225 with your Bluetooth device.
- Page 17 unit to obtain the desirable volume setting. • Press the POWER Button on main unit or remote control to turn off the unit when you have finished listening. Don't forget to switch off the power of your external device as well. PRESET EQ (REMOTE CONTROL ONLY) This unit provides 4 different EQ modes to enhance your listening experience.
- Page 18 CAUTION: Before charging, please refer to the user manual of the device you wish to charge to make sure the charging current requested does not exceed 1A (1000mA). Overloading the charging circuit may damage the unit permanently and void the warranty. The USB charging port of this unit supplies a DC 5V output at 1000 mA maximum current to charge your smart phone or portable device battery and it cannot support any other voltage...
- Page 19 TROUBLESHOOTING GUIDE If you experience difficulties in the use of this music system, please check the following or call 1-800-777-5331 for Customer Service. Symptom Possible Cause Solution The unit does not The unit is disconnected from the Reconnect to the AC outlet. respond (no power) AC outlet.
- Page 20 SPECIFICATIONS Power requirement: Main unit AC input: 120V ~ 60Hz 29 W USB output: 5V 1000 mA Remote control: 1 x 3V CR2025 Lithium Battery Frequency Range Radio Band: FM 87.5 ~ 108 MHz At Spectra, environmental and social responsibility is a core value of our business.
- Page 21 90 DAY LIMITED WARRANTY AND SERVICE VALID IN THE U.S.A. ONLY SPECTRA MERCHANDISING INTERNATIONAL, INC. warrants this unit to be free from defective materials or factory workmanship for a period of 90 days from the date of original customer purchase and provided the product is utilized within the U.S.A. This warranty is not assignable or transferable.
Need help?
Do you have a question about the JBS-225 and is the answer not in the manual?
Questions and answers
The blue light in the clock of the stereo keeps blinking on and off
The blue light is blinking on and off in the Jensen JBS-225 stereo clock because the unit is in Bluetooth search mode. This happens when the JBS-225 has never been paired with a Bluetooth device before or cannot find the last paired device. The flashing "bt" on the LCD indicates that the device is searching for a Bluetooth connection.
This answer is automatically generated
Thank you so much
It didn’t work
I need help to get the blue light on the stereo to stay on
To keep the blue light on the Jensen JBS-225 stereo from turning off, ensure that the unit remains in Bluetooth mode and stays connected to a Bluetooth device. When the JBS-225 is successfully paired, the display will show "BT" steadily, and the Bluetooth icon will remain ON. If the connection is lost or the unit enters pairing mode, the light may start flashing or turn off. Keep your Bluetooth device connected and within range to maintain the steady blue light.
This answer is automatically generated
It’s in the clock
Lost the remote to my JBS-225. Is it possible to get a replacement?
Yes, you can get a replacement remote for the Jensen JBS-225. It is available for purchase at a price of $29.44 and usually ships in 2 to 4 weeks.
This answer is automatically generated
Will you help me get the blue light on the clock to stop flickering on and off
Because I connected it to my phone and it didn’t work
Well it’s in the clock