Advertisement
Table of Contents
- 1 Table of Contents
- 2 Load and Accessories
- 3 Tires
- 4 Engine Number
- 5 Meters and Indicators
- 6 Starting the Engine
- 7 Engine Break-In
- 8 Maintenance and Service
- 9 Cleaning and Assembly of the Air Filter
- 10 Brake Fluid
- 11 Battery Maintenance
- 12 Cleaning Your Motorcycle
- 13 Storage of Your Motorcycle
- 14 Electrical Diagram
- Download this manual
Advertisement
Table of Contents

Subscribe to Our Youtube Channel
Related Manuals for SSR RAZKULL 125


Summary of Contents for SSR RAZKULL 125
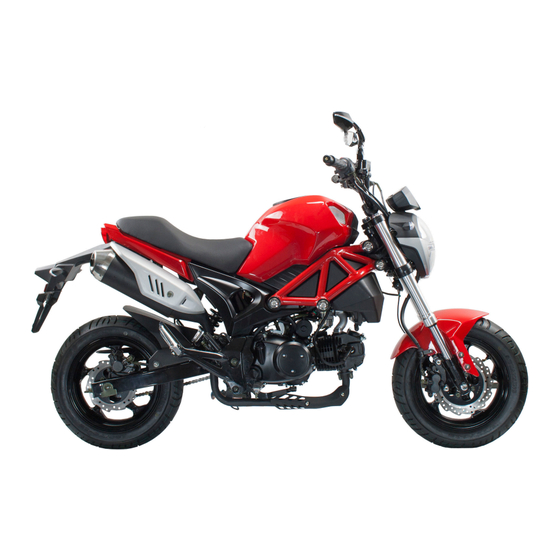
- Page 1 RAZKULL 125 OWNER’S MANUAL...
- Page 2 / repair, and thus minimize the likelihood of failure of your motorcycle and maintain optimum performance. Any SSR Motorsports dealer can provide you and your new motorcycle with any needed service you may require. You can find your closest dealer by following this internet link: http://www.ssrmotorsports.com/store/dealer_locator.php...
-
Page 3: Table Of Contents
TABLE OF CONTENTS Safe-driving of the motorcycle............3 Check and Adjustment of the Front Brake System....27 The protective device..............4 Removing the Rear Wheel.............27 Notice of Parts Replacement............4 Brake Fluid..................28 Load and Accessories..............4 Battery Maintenance...............30 Tires....................6 Fuse Location and Replacement...........31 VIN and Engine Number Locations..........7 Adjustment of the Rear Brake Light Switch........32 Component Names and Locations..........8 Cleaning your Motorcycle.............32... - Page 4 Safe Operation of your Motorcycle Operation: Be sure to use the utmost caution when riding a motorcycle. Do not drive until all of the safety requirements outlined here are fully understood Safety Driving Operations: 1. Check the motorcycle before every ride to avoid accidents from damaged or warn out parts. 2.
- Page 5 Protective Gear 1. Always wear a helmet, riding parts, a riding jacket, glasses and gloves when riding to ensure your safety. 2. The exhaust system will be very hot while riding, the rider should wear clothing which covers the leg and wear riding boots to avoid being burned. 3.
-
Page 6: Load And Accessories
Load 1. Keep the center of gravity of cargo at a low position near the center of motorcycle. Loads carried on the motorcycle should be distributed onto the two sides equally to reduce unbalancing of the motorcycle. If the center of gravity of the load is far away from the center of gravity of the motorcycle, the riding balance will be affected. -
Page 7: Tires
Tires The proper tire pressures help keep the best stable and comfortable riding and increase the life span of the tire. Items Data Tire Size Front: 120/70-12 Rear: 120/70-12 Tire Pressures Front: 33 psi ± 1.5 Rear: 33 psi ± 1.5 If you find any damage, please contact your local dealer or repair station. -
Page 8: Engine Number
The motorcycles VIN number is punched into the right side of the steering stem of the motorcycle frame. PRODUCTION LABEL The production label is riveted on the left of the frame. ENGINE NUMBER The engine number is punched into the right side of the engine crankcase cover. - Page 9 Device and Operation Description 1.) Rear View Mirror 2.) Left Handlebar Switch 3.) Speedometer 4.) Front Brake Lever 5.) Ignition Switch Assy. 6.) Throttle 7.) Right Handlebar Switch...
- Page 10 1.) VIN Number 4.) Front Left Footrest 2.) Engine Number 5.) Main Support 3.) Gear Shift Pedal 6.) Rear Left Footrest...
- Page 11 1.) Rear Right Footrest 2.) Front Right Footrest 3.) Rear Brake Pedal...
-
Page 12: Meters And Indicators
Meter and Indicator Lights The meter is located in between the handlebars in front of the handlebar clamp. 1.) Left Turn Signal Indicator Light: this light is on when the left turn signal light is turned on. 2.) Headlight High Beam Indicator: when the high beam is on this lamp will light. - Page 13 gnition Switch The ignition switch (1) is located at the middle bottom of the gauge cluster. OFF: All circuits are off, the speedometer cluster is off. The engine cannot be start- ed. The key can be removed. ON: All the circuits are on, the speedometer cluster is on. The engine can be start- ed.
- Page 14 REDLINE OF THE RPM METER NOTES: Do not allow the engine RPM to stay in the redline area of the meter (1), even if the engine has been broken in. It is easy to rev the engine to the redline if the engine is revved while in neutral, take care not to do so.
- Page 15 Fuel Tank and Fuel The capacity of the fuel tank is 2.9 gallons. Use only unleaded gasoline whose octane rating is 91 or above. To open the fuel tank cap: 1. Fuel Tank Cap (1), 2. Insert the ignition switch key into the fuel tank cap (2), 3.
- Page 16 Fuel Petcock The fuel petcock (1) is located under the left side of the fuel tank cover, just below the fuel filter that is attached to the carburetor. The petcock has three positions: turn the petcock switch handle to the “•” position, the fuel will be shut off. When you do not use your motorcycle, set the lever to this position.
- Page 17 Operation Guide Check prior to operation: Conduct an overall check before using the motorcycle, especially the following items: Check the lubrication oil level - add lubrication oil if necessary and check if any oil leakage has occurred. Check the fuel level - fill the fuel tank if necessary and check if any fuel leakage is occurred. Check the front and rear brakes - check the function of the front and rear brakes.
-
Page 18: Starting The Engine
Starting the Engine (1) 1. Turn the fuel petcock to the “ON” position. 2. Insert the key into the ignition switch and turn it to the “ON” position. 3. Make sure the transmission is in the neutral position, neutral indication lamp is on, or if the transmission is located in any gear, pull in the clutch lever. -
Page 19: Engine Break-In
Engine Break-In Procedures In order to make sure your new motorcycle will run for years to come you must break-in the engine. The break-in mileage of a newly purchased motorcycle is 600 miles. The primary 600 mile break-in is very important for the per- formance and service life of the engine. - Page 20 Driving the Motorcycle: 1.) Turn on the ignition switch, pull in the clutch lever firmly and start the motorcycle (if the engine is cold, use the choke lever) 2.) Accelerate the engine gradually and release the clutch lever slowly, match these two operations to ensure stable starting. 3.) Control your driving speed by using the throttle.
-
Page 21: Maintenance And Service
Maintenance and Service Check and change the engine oil, clean the oil-filter mesh screen Check the engine oil level before driving every day. The engine oil level gauge (1) is located on the rear of the right crankcase cover, which is used to measure the engine oil level. - Page 22 Spark Plug and Replacement 0.6~0.7mm Spark plug specification: B8RTC 1.) Remove the spark plug cap, remove the spark plug with the wrench in the tool kit. Clean any carbon deposits and dirt from the spark plug with a steel wire brush. 2.) Check whether the electrode of spark plug is damaged or not and the side electrode is eroded.
-
Page 23: Cleaning And Assembly Of The Air Filter
Cleaning and Assembly of the Air Filter Clean the air filter after driving the first 600 miles. You should clean your air filter more often if driving in a dusty area. The air filter is a foam filter core. 1.) Remove the bracket (1) and then remove the fuel tank decoration cover (2). 2.) In order to remove the air filter upper cover, please remove the 8 screws (3), then take out the air filter element. - Page 24 Check and Adjustment of Valve Clearance 1.) Remove the ignition timing hole cover, the small cover in the left crankcase cover and the two valve tappet covers. 2.) Turn the rotor of the engine counterclockwise and align the “T” mark with the ignition timing hole cover in the same position.
- Page 25 Adjustment of the Throttle 1.) Check the throttle grip. Make sure that the throttle can be easily rotated from open to close without binding or catching. 2.) Check the throttle cable to carburetor, make sure it is routed properly and is not binding or sticking.
- Page 26 Adjustment and Lubrication of the Drive Chain Check the tension of the drive chain. Apply chain lubricant if the chain is dry. 1.) Using your finger move the chain up and down, a moving range of 10-20mm is allowed. 2.) Check the chain function by turning the rear wheel. Apply chain lubricant if it is not rotating freely until it no longer binds or is dry.
- Page 27 Hydraulic Disc Brake Inspection 1.) The front brake lever should have a firm feeling when operated. 2.) Check the brake fluid level within the master cylinder (1) : keep the bike upright on a flat surface, turn the handlebars to the right, and check the level mark, the fluid level in the master cylinder should be at the upper mark on the window.
-
Page 28: Brake Fluid
Brake Fluid 1.) Front brake hydraulic brake oil grade is DOT 3/4. Do NOT use any other type of brake fluid, such as silicon or petroleum based brake flu- id, otherwise it will damage the brake system seriously. 2.) Never use brake fluid from expired or open containers; also do not use brake oil left in the last maintenance or brake oil in long time stor- age, because these brake fluid has absorbed moisture the air con- tained. - Page 29 Rear Tire Assembly & Disassembly 1.) Support the motorcycle via a rear swingarm stand or tied down to a motorcycle lift with the wheels off of the ground and balanced. 2.) Loosen the chain adjuster nuts (2) on both sides so that the chain can be lifted off of the rear sprocket and set gently on the swingarm end.
-
Page 30: Battery Maintenance
Battery Maintenance The battery is located under the seat. This motorcycle uses a 12V4A.h. battery. Check the battery according to the periodic maintenance table and the driving distance listed on said table prior to driving. Please follow the safety instructions for batteries strictly when installing a new battery. - Page 31 The fuse is located near the battery. The rated current of the fuse is 10A. If the fuse blows OPEN often, which indicates a short circuit, please take your motorcycle to an authorized SSR Dealership for repair. If the fuse blows, DO NOT use anything other than a fuse to re- CLAMP place a blown fuse.
-
Page 32: Cleaning Your Motorcycle
Rear Brake Light Switch Adjustment Adjusting method: If the rear brake lamp does not light up immediately, turn the adjust- ment nut (2) clockwise. If the brake lamp lights up too early, turn the adjustment nut (2) in a counter clockwise direction. The rear brake light switch (1) is located at the rear of en- gine on the right side at the top of the rear brake master cylinder. - Page 34 *These repairs can be performed by the vehicle owner if they are familiar with the repair or adjustment out- lined in this owner’s manual. If not, have these repairs performed by an authorized SSR Motorsports dealer. ** These repairs should be performed by a licensed and trained motorcycle mechanic.
-
Page 35: Storage Of Your Motorcycle
Storage of your motorcycle If your motorcycle needs to be stored for a long time (60 days or longer), necessary maintenance work shall be done to maintain the performance of the motorcycle and prolong service life. After a thorough cleaning, store it as follows: 1.) Remove all fuel from the fuel tank, fuel circuit and carburetor float bowl chamber. - Page 36 ITEM DATA ENGINE TYPE 1P52FMI-F BORE X STROKE 52.4mmX 57.8mm CYLINDER WORKING CAPACITY 125ML 125-21A COMPRESSION RATIO 9.7:1 LXWXH 1780mmX1033mmX775mm SPARK PLUG CLEARANCE 0.6-0.7mm WHEEL BASE 1210mm VALVE CLEARANCE INTAKE 0.05mm MIN. GROUND CLEARANCE 165mm EXHAUST 0.05mm NET WEIGHT 234 lbs. BATTERY 12V4H MAX LOAD...
-
Page 37: Electrical Diagram
ELECTRICAL DIAGRAM... - Page 38 Please note that if the emission system components are replaced with any non-oem parts or if any modifications are made to these systems SSR Motorsports will not be responsible for...
Need help?
Do you have a question about the RAZKULL 125 and is the answer not in the manual?
Questions and answers