Table of Contents
Advertisement
Advertisement
Table of Contents

Related Manuals for SSR Buccaneer 250i


Summary of Contents for SSR Buccaneer 250i
- Page 1 Buccaneer 250i Owner’s Manual...
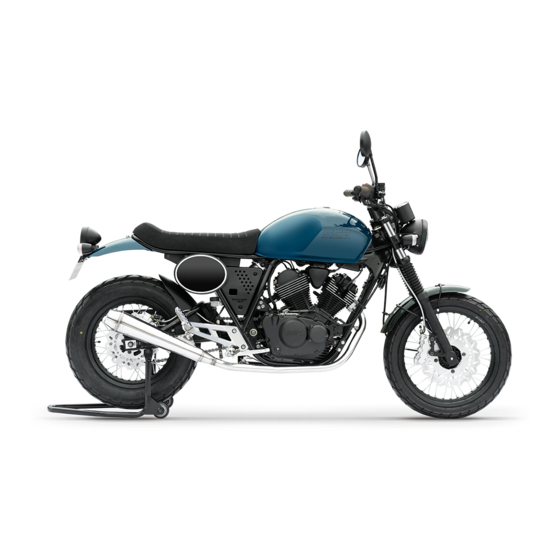
- Page 2 Preface Thank you for purchasing the SSR Buccaneer 250i fuel injected motorcycle, it will bring you years of pleasurable riding in a safe to operate package. Riding a motorcycle is one of the most exciting past times. For your safety, you should read this owner’s manual carefully and follow these instructions before...
-
Page 3: Important Notice
Important Notice . Vehicle load capabilities This motorcycle is designed for one driver and one passenger only. 2. Road conditions for driving This motorcycle is only suitable for driving on roads. 3. Please read this manual carefully. Following the instructions outlined here will make your motorcycle more durable and stable. -
Page 4: Special Notice
If you connect the battery to the wrong terminals check the main fuse immediately. Even if the main fuse is not blown you should take your motorcycle to a SSR dealership for inspection. An incorrect connection could lead to electrical system damage. -
Page 5: Table Of Contents
Table of Contents Preface Shifting Gears..........11 Important Notice Riding Up Slopes..........11 Special Notice Using the Brakes and Stopping....11 Safety Information............1 Inspections and Maintenance........12 Safe Riding..............1 Maintenance Schedule.........12 Riding Gear..............1 Engine Oil Change........14 Helmet................1 Spark Plug............15 Riding in Rain..............1 Throttle Cable Adjustment......15 Motorcycle VIN Number..........2 Clutch Adjustment.........15 Part Description............3... -
Page 6: Safety Information
Safety information Clothing: Safety Regulations: 1. For safety reasons, the rider must wear 1. Before riding check over your vehicle, in a helmet, glasses and boots, gloves and a case of accident or damage parts. riding jacket/pants. A passenger should also 2. -
Page 7: Motorcycle Vin Number
Motorcycle VIN Number Vehicle Identification Number (VIN) and the engine number are used for registration of your motorcycle. Please record your num- bers for future use. VIN Number is stamped into the vehicle frame on the right side of the steering stem (1). -
Page 8: Part Description
Parts Description (1) Left Mirror (7) Right Mirror (14) Rear Footrest (2) Clutch Lever (8) Front Brake Lever (15) Rear Brake (3) Left Handlebar (9) Throttle Grip (16) Front Brake Switch (10) Fuel Tank (17) Side Stand (4) Ignition Switch (11) Oil Filler Cap (18) Shifter Lever (5) Speedometer... -
Page 9: Speedometer
• Speedometer (5) Speedo (1) Turning Signal Indicator This shows your driving speed. (6) Odometer When the left turn signal is on, the left indicator will flash. This records the total driving distance. (7) Gear Position Indicator When the right turn signal is on, the right indicator will flash. -
Page 10: Parts
Parts “ ” position: To prevent theft, when you park please use this handlebar lock function. • Key Turn the handlebars to the left, press down This vehicle comes with two the key and turn the key to “ “ position, it keys, both can be use to will lock the handlebars. -
Page 11: Right Handlebar Switch
When the switch is in the “ “ position, the When the switch is in “ “ position, the low engine cannot be started. beam is on. (4) Turn Signal Switch Warning: Press the left side turn signal “ “ the left Only use the Engine Kill Switch for emer- side turn signal light will flash. -
Page 12: Fuel Tank
• Fuel Tank • Gear Shift Lever When the speedometer’s low fuel level This vehicle is equipped with an internal 5 warnging light is on, please add gasoline speed transmission engine. Neutral is locat- immediately. ed between first and second gear. When you First open the dust cover (1), then insert the shift gears, please follow the warnings. -
Page 13: Rear Brake Pedal
• Rear Brake Pedal • Rear Shock Absorber Press down on the rear This vehicles rear shock brake pedal (as pictured). absorber includes a spring When the brake pedal is and liquid dampening, the operated, the taillight will shock absorber can be turn on. -
Page 14: Gasoline And Engine Oil Information
Gasoline and Oil Information Engine Break-In • Gasoline • Top speed Please use unleaded gasoline. Please use During the first 1,000 miles of operation, do the octane of #91or above. not run the engine at high speed or accel- erate too quickly. RPM’s should not exceed Caution: 80% of the maximum RPM. -
Page 15: Pre-Ride Inspection
• Before Riding Check the engine oil level before operating Item Checks Points your motorcycle every time. 1) Stable • First Service Maintenance Handlebar 2) Turning Flexibility 3) Not Loose The first 600 mile maintenance is the most important service to have performed. Please 1) Brakes feel firm Brakes tighten all hardware and change the oil. -
Page 16: Riding Your Motorcycle
Riding your Motorcycle Caution: • Engine Starting New riders tend to use only rear brake, Please turn the key to “ “ position, if in this will cause the rear brakes to wear out neutral gear, the indicator will be on. rapidly and will make braking distances •... -
Page 17: Inspections And Maintenance
Maintenance The follow chart shows the maintenance schedule. When each service interval is reached you must perform the services outlined below. Suspension, Engine, Electronic System, Fuel Injection and Tires are key components. These items may require a professional technician to perform. - Page 18 * When the mileage exceeds the highest mileage on the table, please restart the table at the 600 mile interval. * If riding in a dusty environment clean the air filter and chain more frequently.
-
Page 19: Engine Oil Change
• Oil Change and Oil Level Check Follow these steps to clean the oil filter. Check the engine oil level (1.) Use a wrench to remove the oil filter cap. before you start the engine. (2.) Using clean dry rag to clean the oil filter When checking the oil level, cap and engine surface. -
Page 20: Spark Plug
• Spark Plug Steel throttle cables. (A) throttle pull cable Use a small wire brush (B) throttle push cable. Please follow these or a spark plug cleaner to steps to adjust the throttle clean the carbon deposits grip travel distance. from the plug in the first 600 1. -
Page 21: Idle Adjustment
This vehicle’s engine adjusts idle automati- you may need to adjust the chain more fre- cally. If adjustment is needed, please contact quently. an authorized SSR dealer. Warning: • Throttle Body The drive chain should be inspected be- The engine idle may decrease due to pollution fore every ride. -
Page 22: Brakes
To help you make the adjustment, the swing- • Brake arm is marked with notches you can use for This vehicle uses front and rear disc brakes. reference from side to side. The chain should Correct operation of the brakes is very im- have 10-20mm of slack. -
Page 23: Tires
• Brake Fluid Level 3. Check brake pad wear. As the brake pads wear, the brake cylinder Warning: fluid will decrease If the brake system or brake pads require as the fluid fills the replacement take your vehicle to an au- brake pistons. -
Page 24: Seat
If operating your motorcycle in dusty environ- Warning: ments clean the air filter more often. DO NOT repair damaged tires. Underi- 1. Remove seat (1), flated or overinflated tires will lead to gas tank (2), then you abnormal or premature wear. These condi- will see the air box (3). -
Page 25: Catalytic Converter
• Catalytic Converter See the diagram to the In order to meet emission standards, this right for fuel system vehicle’s muffler is equipped with a catalytic flow. converter. The converter uses titanium as a • Parts Lubrication catalyzer, it cleans harmful exhaust which in- Proper lubrication will cludes Co, Oxycarbide and Oxynitride. -
Page 26: Battery
• Battery • Preparing a new battery for installation: The battery is under the seat and is a Remove the foil seal from the top of the bat- non-serviceable type. Once the battery has tery, fill with electrolyte solution and loosely been filled with electro- install the cover and let stand for 30 minutes. -
Page 27: Fuse
• Fuse Replacement If no bubbles can be seen, gently pat the top of the electrolyte bottle 2 or 3 times. The fuse box is located under E. After the battery is completely filled re- the drivers seat, next to the move the electrolyte container and discard. -
Page 28: Headlight
• Headlight adjustment 2. Remove lens cover, The headlight beam can be replace the bulb with a adjusted vertically. The adjust- new bulb. ment bolts (1) are located on 3. Remove the parking both sides of the headlight lamb bulb (3) replace bucket. -
Page 29: Vehicle Storage Information
• Front/Rear Turn Signal Bulb Replace- Caution: ment Gasoline stored for long periods of time 1. Rotate the turn signal lens clockwise, with deteriorate. If storing fuel for longer remove the bulb and replace with a 12V 10W than 30 days use a stabilizer product. bulb. -
Page 30: Specification
Specifications Frame Size & Weight Front suspension......Hydraulic monoshock Length............80.31 inches Rear shock absorber........Hydraulic Width............30.91 inches Front brake.............Disc Height............40.95 inches Rear brake..............Disc Wheel Base..........56.30 inches Front tire............100/80-17 Weight............319.67 lbs. Rear tire............130/90-15 Front wheel axle load........145.50 lbs. Electrical System Rear wheel axle load........174.16 lbs. Battery.............12V 9AH Engine Magneto..........Permanent magnet... -
Page 31: Electrical Diagram
B/Br Gr/W Gr/W Lg/R Gr/W Lg/R B/Br Br/R B/Br Gr/W Lg/R Br/R Gr/W Gr/R Lg/R Br/B Br/Y Gr/R B/Br Br/R Br/W Br/Y G/W R/W Br/B Br/W R/B Y/R...
Need help?
Do you have a question about the Buccaneer 250i and is the answer not in the manual?
Questions and answers
Break caliper belakang jammed walaupun sudah servis caliper masalah tetap berulang