Table of Contents
Advertisement
Quick Links
Advertisement
Chapters
Table of Contents

Subscribe to Our Youtube Channel
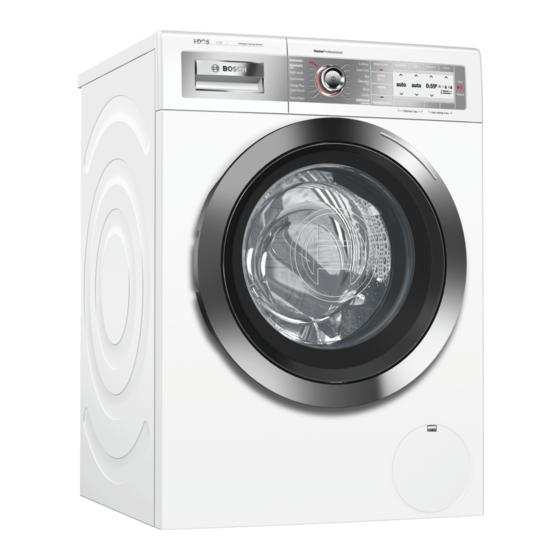
Related Manuals for Bosch WAY32890AU


Summary of Contents for Bosch WAY32890AU
- Page 1 Washing machine WAY32890AU en Instruction Manual and Installation Instructions...
-
Page 2: Your New Washing Machine
Your new washing machine Display rules : Warning! You have chosen a Bosch washing machine. This combination of symbol and signal word indicates a possibly dangerous Please take a few minutes to read and situation. Not heeding the warning can become familiar with the advantages of cause death or injuries. -
Page 3: Table Of Contents
Contents e n I n s t r u c t i o n M a n u a l a n d I n s t a l l a t i o n I n s t r u c t i o n s Intended use. - Page 4 Appliance settings ..36 Positioning and connecting . . 47 Included with the appliance ..47 Sensors ....36 Safety instructions .
-
Page 5: Intended Use
Intended use Intended use For private domestic use only. ■ I n t e n d e d u s e The washing machine is suitable for ■ washing machine-washable fabrics and hand-washable wool in detergent solution. To be operated with cold mains ■... -
Page 6: Safety Instructions
Safety instructions If you lean on the washing Safety instructions ■ machine door when it is open, the washing machine Electrical safety may tip over and cause S a f e t y i n s t r u c t i o n s injuries. -
Page 7: Safety For Children
Safety instructions Safety for children Warning Risk of poisoning! Warning Detergents and care products Danger of death! may be poisonous if If children play with the washing consumed. machine, they may get into life- Keep detergents and care threatening situations or injure products out of the reach of themselves. -
Page 8: Environmental Protection
Environmental protection Information on energy and water ■ Environmental consumption: ~ Page 12 The displays provide information protection about the relative level of energy and water consumption in the selected Packaging/used appliance programmes. E n v i r o n m e n t a l p r o t e c t i o n The more display segments are Dispose of packaging in an visible, the higher the respective... -
Page 9: Main Points In Brief
Main points in brief Main points in brief M a i n p o i n t s i n b r i e f Plug into the mains. Open the washing Sort the laundry. To switch on, press Turn on the tap. machine door. -
Page 10: Getting To Know The Appliance
Getting to know the appliance Getting to know the appliance Washing machine G e t t i n g t o k n o w t h e a p p l i a n c e Service flap Detergent drawer with illuminated displays for the i-DOS dispenser on the drawer handle ~ Page 31... -
Page 11: Control Panel
Getting to know the appliance Control panel All the buttons are sensitive i-DOS i I w, i-DOS w Note: (except for the main switch) and only ~ Page 24, need to be pressed lightly. An overview of all settings that can be selected ~ Page 16 Main switch Buttons Child lock 3 sec. -
Page 12: Display Panel
Getting to know the appliance Display panel Main menu after selecting the programme e.g. Easy Care The arrows on the display panel indicate in which direction the programme default settings can be changed using the buttons located above and below. To change, select the button under the programme highlighted in black and change the programme. - Page 13 Getting to know the appliance Options button selected and select, for example, the Rinse Hold ($) option: Using the buttons under the two left- hand arrows, select the option. Using the two right-hand arrows, select the displayed value. The selected options are active immediately and are displayed on the display panel.
-
Page 14: Laundry
Laundry Some examples of soiling levels can Laundry be found on ~ Page 15 – Light: Do not prewash, select the P repare the laundry SpeedPerfect setting if L a u n d r y necessary Caution! – Normal Damage to the appliance/fabrics –... -
Page 15: Detergent
Detergent Saving energy and detergent Detergent For light and normal soiling, you can C orrect selection of detergent save energy (lower washing D e t e r g e n t temperature) and detergent. The care label is crucial for selecting the correct detergent, temperature and Saving Soiling/note... -
Page 16: Overview Of Programmes
Overview of programmes Overview of programmes Programmes on the programme selector O v e r v i e w o f p r o g r a m m e s Programme/Type of laundry/Instructions Settings Name of the programme Max. load Brief explanation of the programme and for which fabrics it is suitable. - Page 17 Overview of programmes Programme/Type of laundry/Instructions Settings 4 kg Mixed load of cottons and synthetic fabrics Ž - 40 °C 0 - 1600** rpm ¦, (, T, Ï, Z, p, %, $, Á Detergent è, fabric softener è Delicates / Silk 2 kg Delicate, washable fabrics, e.g.
- Page 18 Overview of programmes Programme/Type of laundry/Instructions Settings Dark Wash 3.5 kg Dark-coloured cottons and dark-coloured easy-care fabrics; Ž - 40 °C Turn items inside-out before washing. 0 - 1200** rpm ¦, (, T, Ï, Z, p, %, $, Á Detergent è, fabric softener è Outdoor * Max.
- Page 19 Overview of programmes Programme/Type of laundry/Instructions Settings Shirts Max. 2 kg Non-iron shirts or blouses made of cotton, linen, synthetic fibres or Ž - 60 °C blended fabrics 0 - 800** rpm Notes ¦, (, T, Ï, Z, p, %, $, Shirts/blouses are only given a short spin on the ■...
- Page 20 Overview of programmes Programme/Type of laundry/Instructions Settings Drum Clean 0 kg Programme for cleaning and caring for the drum and the outer tub, 80, 90 °C e.g. before running the first wash cycle, if washing frequently at a low 1200 rpm temperature (40 °C or lower) or if an odour has developed after a prolonged period of non-use.
- Page 21 Overview of programmes Programme/Type of laundry/Instructions Settings Textileguard * Max. 1 kg Wash cycle followed by waterproofing of membrane-coated Ž - 40 °C weatherproof and outdoor clothing or water-resistant fabrics 0 - 800** rpm Select a programme. ¦, (, Ï, Z, $, Á Add special detergent for outdoor clothing to compartment v u.
-
Page 22: Starching
Overview of programmes Programme/Type of laundry/Instructions Settings Auto. Intensive * Max. 6 kg More intensive treatment of the laundry; 60 °C The degree of soiling and the type of fabric are automatically detected 1400** rpm and the washing sequence and intelligent dosing are adjusted $, Á... -
Page 23: Programme Default Settings
Programme default settings Finished in Programme default The programme duration is shown after settings selecting the programme. Before starting the programme, you The programme default settings are P r o g r a m m e d e f a u l t s e t t i n g s displayed in the main menu after can preselect the programme end in hourly increments (h = hour) up to a... -
Page 24: I-Dos Settings
Programme default settings i-DOS settings i-DOS i for fabric softener Dosage strengths Your washing machine has an intelligent dosing system for liquid detergent and High: high level of softness ª fabric softener (or detergent when using Medium: medium level of softness ©... -
Page 25: Additional Programme Settings/Options (* Depending On The Model)
Additional programme settings/options Pre-wash * Additional programme settings/options Settings that can be selected: (* depending on the on – off model) For heavily soiled laundry. The settings/options that are available Notes A d d i t i o n a l p r o g r a m m e s e t t i n g s / o p t i o n s depend on the model. -
Page 26: Less Ironing
Additional programme settings/options Less Ironing * Rinse Hold * Settings that can be selected: Settings that can be selected: on – off on – off Reduces creasing thanks to a special The washing remains in the water after spin sequence followed by fluffing and the last rinse cycle. -
Page 27: Operating The Appliance
Press the # button. The appliance is settings for each washing cycle. switched on. To do this, repeatedly press the The Bosch logo appears on the display corresponding button until the required and all indicator lamps light up. setting is displayed. ~ Page 23 The Cottons programme set at the factory is then always displayed. -
Page 28: Select Additional Programme
Individual laundry Additional programme settings/options items may cause an unbalanced ~ Page 25 load. Wait until the Bosch logo no longer ■ Placing laundry into the drum appears before adding laundry. The load screen appears when the ■... -
Page 29: Start The Programme
Operating the appliance Start the programme Note: Foam detection If Foam has been detected also Make sure that no items of laundry are appears on the display panel, the trapped between the door and the washing machine has detected too rubber seal, and close the door. -
Page 30: Adding Laundry
Operating the appliance Adding laundry Cancel the programme After starting the programme, you can For programmes at high temperatures: add or remove laundry if necessary. Press the A button. To cool down laundry: Select Press the A button to do this. Rinse / Freshen Up. -
Page 31: Removing Laundry/Switching Off The Appliance
Intelligent dosing system Removing laundry/switching Intelligent dosing off the appliance system Open the loading door and remove Intelligent dosing system in the laundry. Follow the information I n t e l l i g e n t d o s i n g s y s t e m on the display panel. -
Page 32: Initial Use/Filling The Dispensers
Intelligent dosing system Initial use/filling the Filling the dispensers: dispensers The dispenser covers in the detergent drawer are marked with the following Refer to the manufacturer's instructions symbols: when choosing your detergent and fabric softener. We recommend the use ß Standard/universal detergent ■... -
Page 33: Everyday Use
Intelligent dosing system Everyday use Depending on the programme, Note: the selection (on/off) as well as the relevant dosage strength that has been Illuminated displays on the drawer selected for i-DOS i I w and i-DOS w handle: are saved until they are changed, even when the machine is switched off. -
Page 34: Dispenser Content For I-Dos I I W
Intelligent dosing system Dispenser content for My water hardness: i-DOS i I w Instead of fabric softener, a second liquid detergent can be used in the i-DOS i I w dispenser. Notes When switching the i-DOS i I w ■ Below is an example of detergent dispenser content from fabric dosages on a packaging label:... -
Page 35: Manual Dosage
Intelligent dosing system Manual dosage Notes When dosing all detergents, ■ In addition to intelligent dosing, you can cleaning aids and cleaning agents, manually add cleaning aids (e.g. always follow the manufacturer's softener, bleach or stain remover) to instructions. compartment v u, if necessary. If dosing detergent manually, do not ■... -
Page 36: Appliance Settings
Appliance settings To change the settings, press and hold Appliance settings both basic settings 3 sec. buttons for approx. 3 seconds. ~ Page 13 You can change the following appliance A p p l i a n c e s e t t i n g s settings: Notes The settings are retained after the... -
Page 37: Aquasensor
Cleaning and maintenance AquaSensor Cleaning and depending on the model maintenance During the rinse cycle, the AquaSensor checks the degree of turbidity (turbidity Warning C l e a n i n g a n d m a i n t e n a n c e is caused by dirt and detergent residue) Danger of death! of the rinsing water. -
Page 38: Machine Housing/Control Panel
Cleaning and maintenance Machine housing/control i-DOS detergent draw and its panel housing Wipe the housing and the control Emptying the dispensers: ■ panel with a soft, damp cloth. The dispensers have emptying Remove the detergent residue outlets with removable sealing plugs ■... - Page 39 Cleaning and maintenance Cleaning the dispensers/detergent drawer: The detergent drawer can be removed completely to allow you to clean to dispensers after you have emptied them. a) Empty the dispensers before removing the drawer. – Protect the rear drawer connector Only put the drawer handle Note: against water, detergent or fabric-...
-
Page 40: The Drain Pump Is Blocked, Emergency Draining
Cleaning and maintenance The drain pump is blocked, emergency draining Warning Risk of scalding! When you wash at high temperatures, the water gets very hot. If you come into contact with the hot water, you may be Put the service flap back on, lock it into place and close it. -
Page 41: Filter In The Water Supply Blocked
Faults and what to do about them. Filter in the water supply Faults and what to do blocked about them. First, reduce the water pressure in the Emergency release supply hose: F a u l t s a n d w h a t t o d o a b o u t t h e m . Turn off the tap. -
Page 42: Information On The Display Panel
Faults and what to do about them. Information on the display panel Display Cause/remedy Re-fill the The i-DOS dispensers are below the minimum fill level; top up ~ Page 32. i-DOS i I w , w dispenser i-DOS i I w, i-DOS set i-DOS i I w , i-DOS w to off. -
Page 43: Faults And What To Do About Them
Faults and what to do about them. Display Cause/remedy Drum care This instruction reminds you to carry out the Drum Clean 90 °C programme information: or a 60 °C programme to clean and care for the drum and the outer tub. Notes Run the programme without laundry. - Page 44 Faults and what to do about them. Faults Cause/remedy Water is not visible in the Not a fault – the water is below the visible area. drum. The spin result is not Not a fault – the unbalanced load detection system has interrupted the spin ■...
-
Page 45: After-Sales Service
After-sales service Faults Cause/remedy In the "Reload" status, The water level is too high. It is not possible to add laundry. Close the door ■ A flashes very quickly immediately, if necessary. and a signal sounds. Press the A button to continue the programme. ■... -
Page 46: Consumption Rates
Consumption rates Consumption rates Energy and water consumption, programme duration and C o n s u m p t i o n r a t e s residual moisture for the main washing programmes (approximate values) Programme Additional Load Energy Water Programme function... -
Page 47: Positioning And Connecting
Positioning and connecting ( Mains cable Positioning and 0 Bag: connecting Installation and operating ■ instructions Included with the appliance Customer services location ■ P o s i t i o n i n g a n d c o n n e c t i n g directory* Check the machine for transport Note:... -
Page 48: Safety Instructions
Positioning and connecting Safety instructions Installation surface The washing machine be stable Warning Note: so that it does not move around. Risk of injury! The installation surface must be firm The washing machine is very heavy. ■ ■ and level. Be careful when lifting/transporting Soft floors/floor coverings are not the washing machine. -
Page 49: Installing The Appliance In A Kitchenette
Positioning and connecting Installing the appliance in a Take the hoses out of the holders. kitchenette Warning Danger of death! There is a risk of electric shock if you touch live components. Do not remove the appliance covering plate. Unscrew and remove all four transport brace screws. -
Page 50: Hose And Cable Lengths
Positioning and connecting Hose and cable lengths Water inlet Left-hand connection Warning ■ Danger of death! There is a risk of electric shock if you touch live components. Do not immerse the Aqua-Stop safety valve in water (it contains an electric valve). -
Page 51: Water Outlet
Positioning and connecting Water outlet Optimum water pressure in the supply network Warning At least 100 kPa (1 bar) Risk of scalding! Maximum 1000 kPa (10 bar) When you are washing at high When the tap is open, the water flow temperatures, there is a risk of scalding rate is at least 8 l/min. -
Page 52: Levelling
Positioning and connecting Levelling Connection Drainage into a washbasin Align the appliance using a spirit level. ■ Incorrect alignment may result in loud noises, vibrations and machine "movement". Loosen the lock nuts using a WAF17 spanner, by turning it in a clockwise direction. -
Page 53: Electrical Connection
Positioning and connecting Electrical connection The mains plug can be accessed at ■ all times. The mains cable is not kinked, Warning ■ squashed, altered or cut through. Danger of death! The mains cable does not come into There is a risk of electric shock if you ■... -
Page 54: Before Washing For The First Time
Positioning and connecting Before washing for the first Transportation time E.g. when moving house The washing machine was thoroughly Caution! tested before leaving the factory. To Risk of damage to the appliance remove any water that may be left over caused by detergent/fabric softener from the test, run the first wash cycle leaking from the dispensers. -
Page 55: Aqua-Stop Warranty
Aqua-Stop warranty Installing the transport braces: Aqua-Stop warranty Remove the covers and keep them in a safe place. Only for appliances with Aqua-Stop Use a screwdriver if necessary. A q u a - S t o p w a r r a n t y In addition to warranty claims against the vendor based on the purchase agreement and to our appliance... - Page 56 0344 892 8979 (Calls charged at local or mobile rate.) 01450 2655 (0.03 € per minute at peak. Off peak 0.0088 € per minute.) You can find the contact information for all countries in the attached after-sales service directory. Robert Bosch Hausgeräte GmbH Carl-Wery-Straße 34 81739 München, GERMANY *9001109736*...
Need help?
Do you have a question about the WAY32890AU and is the answer not in the manual?
Questions and answers