Table of Contents
Advertisement
Available languages
Available languages
Quick Links
User's Manual
Welcome
Thank you very much for purchasing this product. It is a pico projector with DLP
technology inside. The DLP Technology, known for great cinema projectors,
provides rich colors and high contrast to this Pico Projector. Integrated with media
player, Office and PDF reader, and versatile connection options including HDMI,
AV-in, USB and Micro SD-card slot make this product the best solution for mobile
use.
Before you start, you are recommended to read this manual step by step to obtain
the best results with your new Pico Projector. We wish you a lot of fun.
Safety Notice
1. Keep the device and packaging materials out of the reach of infants and children.
2. Avoid subjecting the power adapter and other contacts to dripping or splashing
water and dry your hands before you use it. Do not place objects filled with liquids
such as vases, etc. on or near the device.
3. Make sure that the used power outlet is always readily available and never hidden.
In case of emergency, use the power adapter to separate the device from the power
network.
4. Keep your device away from all flames such as candles and do not set them up in
the vicinity of the device.
5. Keep the unit at least 10 cm away from other objects. Make sure the ventilation is
not covered by newspapers, tablecloths, curtains, etc.
6. For your own safety, do not use the projector during thunderstorms or lightning.
7. Relative Humidity is 25% ~ 80%, non-condensing.
8. The battery is integrated with the device. Do not dissemble and modify. The battery
should be replaced by an authorised service center only.
9. Ensure that the ambient room temperature is within 5 ~ 35°C
10. Wait before using if the device has been moved from a cold location into a warm one.
Any condensation that has formed may in certain circumstances destroy the device.
As soon as the device has reached room temperature it can be used without risk.
11. Handle the product with care. Avoid contact with sharp objects. Keep device away
from metallic objects.
12. Place the projector on a flat surface. Any collision or falling to the ground is likely to
damage the product.
13. Do not drop or disassemble the product otherwise the warranty voids. Opening or
removing covers may expose you to dangerous voltage or other hazards. Refer all
servicing to an authorized service center.
14. Use only the accessories supplied by the manufacturer.
15. Both product and user's manual are subject to further improvement or supplement
without further notice.
Downloaded From projector-manual.com Aiptek Manuals
Page 1
Advertisement
Chapters
Table of Contents

Related Manuals for AIPTEK PocketCinema V60


Summary of Contents for AIPTEK PocketCinema V60
- Page 1 Refer all servicing to an authorized service center. 14. Use only the accessories supplied by the manufacturer. 15. Both product and user’s manual are subject to further improvement or supplement without further notice. Downloaded From projector-manual.com Aiptek Manuals Page 1 ...
-
Page 2: Fcc Compliance Statement
Batteries and rechargeable batteries are not to be disposed in your domestic waste! Please recycle them at your local recycling point. Together we can help to protect the environment. Downloaded From projector-manual.com Aiptek Manuals Page 2 ... -
Page 3: Table Of Contents
Getting Started__________________________________ 6 Preparing the content ____________________________ 7 Projecting from External AV Source ________________ 8 Function and Operations ________________________ 10 Notice for Long-time Projection ___________________ 18 Troubleshooting _______________________________ 18 Specifications _________________________________ 19 Downloaded From projector-manual.com Aiptek Manuals Page 3 ... -
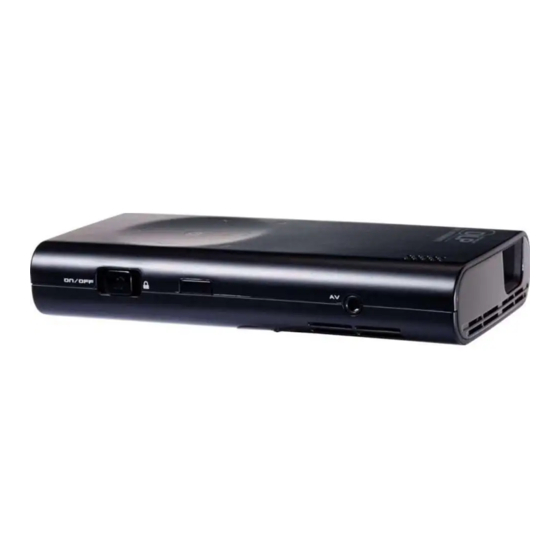
Page 4: Knowing Your Device
Headphone/Speaker Connector Tripod Socket Stand IR Receiver Keypad Keypad Lock LED Indicator Power ON/OFF Micro SD Card Slot USB Connector HDMI Connector DC IN Keypad Menu Exist Up Right Left OK Down Downloaded From projector-manual.com Aiptek Manuals Page 4 ... -
Page 5: Remote Control
Projector AC Adapter Exchangeable power plug Remote Control HDMI Cable (A to A type) USB Cable USB Adapter Pouch User Manual Tripod Downloaded From projector-manual.com Aiptek Manuals Page 5 ... -
Page 6: Getting Started
Use the navigation keys to select ‘Setting’ and press (OK) to enter the submenu. Select ‘Language’ and press (OK) to enter the language list. Select your preferred language and confirm with (OK). Press (Exist) to return to Main Menu. Downloaded From projector-manual.com Aiptek Manuals Page 6 ... -
Page 7: Preparing The Content
Use the navigation keys to select ‘Setting’ and press (OK) to enter the submenu. Select ‘Memory’ and press (OK) to enter the memory options. Select your preferred memory source and confirm with (OK). Press (Exist) to return to Main Menu. Downloaded From projector-manual.com Aiptek Manuals Page 7 ... -
Page 8: Projecting From External Av Source
Illustration for the three kinds of Projection Mode: 16:9 Aspect Ratio Smartphone (Source) Screen Letterbox (16:9) Pan & Scan (4:3) Theme mode (4:3) Projection Screen Downloaded From projector-manual.com Aiptek Manuals Page 8 ... - Page 9 If you have iPhone 4S, New iPad, iPad2, iPad and iPod touch 4th, use 30pin Apple Digital AV Adapter and iPhone 4S A-to-A HDMI cable to connect with the Projector to make mirror projection. Downloaded From projector-manual.com Aiptek Manuals Page 9 ...
-
Page 10: Function And Operations
You can copy selected file to another memory source or delete it. This function allows users setup Setting preference settings including Brightness, Key Sensitivity, Language, and Memory. Downloaded From projector-manual.com Aiptek Manuals Page 10 ... -
Page 11: Projecting Videos
Play current video or track once Normal Play current folder Repeat One Play current video or track repeatedly Repeat All Play current folder repeatedly Play current folder repeatedly in random Random order Downloaded From projector-manual.com Aiptek Manuals Page 11 ... -
Page 12: Projecting Photos
Previous / Next picture (page) Enter to Pan mode Return to full screen Pan up, down, left, right Return to Zoom mode Return to full screen Downloaded From projector-manual.com Aiptek Manuals Page 12 ... - Page 13 1. On the Main menu, select the ‘Document’ and press the button to enter the Document Mode. 2. Navigatethe folders and files and press to open the selected document. 3. Press the Left/Right ( ) button to move to previous/next page. Downloaded From projector-manual.com Aiptek Manuals Page 13 ...
-
Page 14: Playing Music
6. Press (Menu) to enter the music setting. 1) Sound: Turn the audio ON or Off. 2) Playback: Select the playback setting as Table A (Page 11). Downloaded From projector-manual.com Aiptek Manuals Page 14 ... -
Page 15: Using Headphones
Select and press “Delete” to delete the selected file. Press to cancel and return to file list. Setting Change the default setting of projectional brightness, keyboard sensitivity, lanaguge, and memory devices Downloaded From projector-manual.com Aiptek Manuals Page 15 ... - Page 16 Note: The projector will be automatically switched to Enhanced mode when connect the supplied AC adapter. 2. Keypad Sensitivity This item allows users to set the key sensitivity (available setting value is 1~3). The higher value indicates higher sensitivity. Downloaded From projector-manual.com Aiptek Manuals Page 16 ...
- Page 17 Reset the projector to factory default setting. - Firmware Update Firmware update information is available on our website. Pleae follow up the instruction on the website for the update. - Information Detail information about the projector. Downloaded From projector-manual.com Aiptek Manuals Page 17 ...
-
Page 18: Notice For Long-Time Projection
Occasionally, you may need to reset your Micro Projector. This can be useful when a program is not performing properly. Push the Power switch downward for 10 seconds to RESET your device. Downloaded From projector-manual.com Aiptek Manuals Page 18 ... -
Page 19: Specifications
Dimensions ( L x W x H ) 135 x 65 x 22 mm Weight 190 g Humidity 20 – 80%, 80% (Max.), non-condensing. Operating Temperature 5 ° C – 35 ° C. Downloaded From projector-manual.com Aiptek Manuals Page 19 ... - Page 20 Risiken aussetzen. Alle Wartungsarbeiten von Fachpersonal durchführen lassen. 14. Verwenden Sie ausschließlich vom Hersteller angebotenes Zubehör. 15. Sowohl das Produkt als auch das Benutzerhandbuch unterliegen fortlaufenden Verbesserungen oder Ergänzungen ohne vorherige Mitteilung. Downloaded From projector-manual.com Aiptek Manuals Seite 1...
- Page 21 Sie bitte möglichst alle Komponenten recyceln. Batterien und Akkus dürfen nicht mit Hausmüll zusammen entsorgt werden! Bitte entsorgen Sie sie an der lokalen Recyclingstelle. Zusammen leisten wir einen wertvollen Beitrag zum Schutz unserer Umwelt. Downloaded From projector-manual.com Aiptek Manuals Seite 2...
- Page 22 Paketinhalt _____________________________________ 5 Erste Schritte ___________________________________ 6 Inhalt vorbereiten________________________________ 7 Projektion von einer externen AV-Quelle ____________ 8 Funktionen und Bedienung ______________________ 10 Hinweis für längere Projektion ____________________ 18 Fehlerbehebung________________________________ 18 Technische Daten ______________________________ 19 Downloaded From projector-manual.com Aiptek Manuals Seite 3...
-
Page 23: Produktübersicht
Benutzerhandbuch Produktübersicht Projektor Lüftungsschlitze Projektionsobjektiv Fokusrad Lautsprecher Kopfhörer / Lautsprecheranschluss Stativgewinde Ständer IR Empfänger Tastenfeld Tastenfeldsperre LED Anzeige Strom EIN/AUS Micro-SD-Kartensteckplatz USB-Anschluss HDMI-Anschluss DC IN Tastenfeld Menü Beenden Hoch Rechts Links Down Downloaded From projector-manual.com Aiptek Manuals Seite 4... -
Page 24: Paketinhalt
Bitte überprüfen Sie, ob sich die folgenden Artikel im Paket befinden: Projektor Netzteil Abnehmbarer Stromstecker Fernbedienung HDMI Kabel (A auf A Typ) USB-Kabel USB Adapter Tragetasche Handbuch Stativ Downloaded From projector-manual.com Aiptek Manuals Seite 5... -
Page 25: Erste Schritte
(OK), um das Untermenü aufzurufen. Wählen Sie „Sprache“ und drücken Sie auf (OK), um die Sprachliste aufzurufen. Wählen Sie die gewünschte Sprache aus und bestätigen Sie mit (OK). Drücken Sie auf (Beenden), um zum Hauptmenü zurückzukehren. Downloaded From projector-manual.com Aiptek Manuals Seite 6... -
Page 26: Inhalt Vorbereiten
(OK), um das Untermenü aufzurufen. Wählen Sie „Speicher“ und drücken Sie auf (OK), um die Speicheroptionen aufzurufen. Wählen Sie die gewünschte Speicherquelle aus und bestätigen Sie mit (OK). Drücken Sie auf (Beenden), um zum Hauptmenü zurückzukehren. Downloaded From projector-manual.com Aiptek Manuals Seite 7... -
Page 27: Projektion Von Einer Externen Av-Quelle
Verwenden Sie die „Menü Taste“, um zwischen drei Projektionsmodi zur Optimierung der visuellen Qualität auszuwählen. Abbildung der drei unterschiedlichen Projektionsmodi: 16:9 Anzeigeformat Smartphone (Quelle) Anzeige Letterbox (16:9) Pan & Scan (4:3) Themenmodus (4:3) Projektionsanzeige Downloaded From projector-manual.com Aiptek Manuals Seite 8... - Page 28 Wenn Sie ein iPhone 4S, New iPad, iPad2, iPad und iPod touch 4 besitzen, verwenden Sie den Apple Digital AV-Adapter und das iPhone 4S A-zu-A HDMI Kabel, um das Gerät für eine Spiegelprojektion an den Projektor anzuschließen. Downloaded From projector-manual.com Aiptek Manuals Seite 9...
-
Page 29: Funktionen Und Bedienung
Liste kann eine Vorschau von Fotos und Videos angezeigt werden. Sie können eine ausgewählte Datei auf eine andere Speicherquelle kopieren oder sie löschen. Mit dieser Funktion können Benutzer Einstellungen Einstellungen wie Helligkeit, Tastenempfindlichkeit, Sprache und Speicher einrichten. Downloaded From projector-manual.com Aiptek Manuals Seite 10... - Page 30 Das aktuelle Video oder den aktuellen Titel ein Mal wiedergeben Normal Aktuellen Ordner wiedergeben Einmal Das aktuelle Video oder den aktuellen Titel wiederholen wiederholt wiedergeben Alle Aktuellen Ordner wiederholt wiedergeben wiederholen Aktuellen Ordner wiederholt in zufälliger Zufall Reihenfolge wiedergeben Downloaded From projector-manual.com Aiptek Manuals Seite 11...
- Page 31 Dokument: Die Vergrößerungsstufen sind 1x ~ 8x.) Vorheriges/Nächstes Bild Schwenkmodus aufrufen Zum Vollbild zurückkehren Schwenk Nach oben, unten, links, rechts schwenken Zum Zoommodus zurückkehren Zum Vollbild zurückkehren Downloaded From projector-manual.com Aiptek Manuals Seite 12...
- Page 32 2. Steuern Sie durch die Ordner und Dateien und drücken Sie auf , um das ausgewählte Dokument zu öffnen. 3. Drücken Sie die Links/Rechts ( ) Taste, um zur vorherigen/nächsten Seite zu gelangen. Downloaded From projector-manual.com Aiptek Manuals Seite 13...
- Page 33 Um das Display anzuschalten, berühren Sie das Tastenfeld, um die Projektionsfunktion zu aktivieren. Drücken Sie auf (Menü), um die Musikeinstellung aufzurufen. 1) Ton: Schalten Sie den Ton EIN oder AUS. 2) Wiedergabe: Wählen Sie den Wiedergabemodus gemäß Tabelle A (Seite 11). Downloaded From projector-manual.com Aiptek Manuals Seite 14...
- Page 34 Wählen und drücken Sie „Löschen“, um die ausgewählte Datei zu löschen. Drücken Sie auf , um abzubrechen und zur Dateiliste zurückzukehren. Einstellungen Ändern Sie die Standardeinstellung für Projektionshelligkeit, Tastenempfindlichkeit, Sprache und Speichergeräte. Downloaded From projector-manual.com Aiptek Manuals Seite 15...
- Page 35 Anmerkung: Der Projektor wird automatisch in den Erweiterten Modus geschaltet, wenn das beiliegende Netzteil angeschlossen wird. 2. Tastenempfindlichkeit Mit dieser Option können Benutzer die Tastenempfindlichkeit einstellen (verfügbare Einstellungswerte sind 1 ~ 3). Je höher der Wert, desto höher die Empfindlichkeit. Downloaded From projector-manual.com Aiptek Manuals Seite 16...
- Page 36 Setzt den Projektor auf die Werkseinstellungen zurück. - Firmware Aktualisierung Informationen zur Firmware Aktualisierung sind auf unserer Webseite verfügbar. Bitte folgen Sie den Anweisungen auf der Webseite, um die Aktualisierung durchzuführen. - Informationen Detailinformationen über den Projektor. Downloaded From projector-manual.com Aiptek Manuals Seite 17...
-
Page 37: Hinweis Für Längere Projektion
Von Zeit zu Zeit werden Sie Ihren Micro Projektor vielleicht zurücksetzen müssen. Dies könnte hilfreich sein, wenn ein Programm nicht richtig ausgeführt wird. Schieben Sie den Ein/Aus-Schalter 10 Sekunden lang nach unten, um das Gerät ZURÜCKZUSETZEN. Downloaded From projector-manual.com Aiptek Manuals Seite 18... -
Page 38: Technische Daten
Modus Normal: 7,5 W Ökomodus: 6,3 W Abmessungen (L x B x H) 135 x 65 x 22 mm Gewicht 190 g Feuchtigkeit 20 - 80%, 80% (Max.), nicht-kondensierend. Betriebstemperatur 5°C - 35°C. Downloaded From projector-manual.com Aiptek Manuals Seite 19... - Page 39 Confiez toute réparation à un centre de service autorisé. 14. Utiliser exclusivement les accessoires fournis par le fabricant. 15. Le produit et le manuel de l'utilisateur sont soumis à de nouvelles améliorations ou suppléments sans préavis. Downloaded From projector-manual.com Aiptek Manuals Page 1...
- Page 40 Piles et accumulateurs ne doivent pas être jetés dans les ordures ménagères! Veuillez les recycler à votre centre de recyclage local. Ensemble nous pouvons aider à protéger l’environnement. Downloaded From projector-manual.com Aiptek Manuals Page 2...
- Page 41 Pour commencer ________________________________ 6 Preparer le contenu ______________________________ 7 Projection depuis la source AV externe _____________ 8 Fonction et Opérations __________________________ 10 Notification pour projection de longue durée________ 17 Dépannage ____________________________________ 18 Spécifications _________________________________ 19 Downloaded From projector-manual.com Aiptek Manuals Page 3...
-
Page 42: Connaître Votre Appareil
Interface Trépied Support Récepteur IR Clavier Verrouillage Clavier Indicateur LED Mise en marche/Arrêt Emplacement pour Carte Micro SD Connecteur USB ENTRÉE DC Connecteur HDMI Clavier Menu Quitter Haut Droit Gauche Downloaded From projector-manual.com Aiptek Manuals Page 4... -
Page 43: Contenu De L'emballage
Veuillez vérifier que les éléments suivants se trouvent dans votre emballage : Projecteur Secteur C.A. Prise d'alimentation échangeables Télécommande Câble HDMI (Type A à A) câble USB Adaptateur USB Étui Manuel de l'utilisateur Trépied Downloaded From projector-manual.com Aiptek Manuals Page 5... -
Page 44: Pour Commencer
(OK) pour entrer dans le sous-menu. Sélectionnez "Langue" et pressez sur (OK) pour entrer dans la liste des langues. Sélectionnez votre langue préférée et confirmez avec (OK). Pressez (Quitter) pour revenir au menu principal. Downloaded From projector-manual.com Aiptek Manuals Page 6... -
Page 45: Preparer Le Contenu
(OK) pour entrer dans le sous-menu. Sélectionnez 'Mémoire' et pressez sur (OK) pour entrer dans les options de mémoire. Sélectionnez votre source de mémoire souhaitée et confirmez avec (OK). Pressez sur (quitter) pour revenir au menu principal. Downloaded From projector-manual.com Aiptek Manuals Page 7... -
Page 46: Projection Depuis La Source Av Externe
Illustration pour les trois types de mode de projection : Format d'image 16 :9 Smartphone (Source) Écran Boîte aux lettres (16 :9) Panoramique et Scan (4 :3) Mode Thème (4 :3) Écran de projection Downloaded From projector-manual.com Aiptek Manuals Page 8... - Page 47 Si vous avez l'iPhone 4S, Nouvel iPad, iPad2, iPad et iPod touch 4em génération, iPhone 4S utiliser l’adaptateur 30 broches d’Apple AV et câble HDMI A-à A pour connecter avec le projecteur pour faire une projection miroir. Downloaded From projector-manual.com Aiptek Manuals Page 9...
-
Page 48: Fonction Et Opérations
Vous pouvez copier le fichier sélectionné à une autre source de mémoire ou le supprimer. Cette fonction permet aux utilisateurs de configurer Réglage les paramètres de préférences, y compris la Luminosité, Clé de sensibilité, Langue et Mémoire. Downloaded From projector-manual.com Aiptek Manuals Page 10... - Page 49 Passer la vidéo ou la piste une fois Normal Lecture dossier en cours Lecture la vidéo actuelle ou une piste Répéter un répétitivement Répéter Tout Lecture dossier actuel répétitivement Lecture dossier actuelle répétitivement dans un Aléatoire ordre aléatoire Downloaded From projector-manual.com Aiptek Manuals Page 11...
- Page 50 Document : Les niveaux d'agrandissement sont 1x ~ 8x.) Image Précédente/Suivante Entrez en mode Pan Retour au mode plein écran Pano haut, bas, gauche, droite Revenir au mode Zoom Retour au mode plein écran Downloaded From projector-manual.com Aiptek Manuals Page 12...
- Page 51 Mode document. 2. Naviguer dans les dossiers et fichiers, puis presser sur pour ouvrir le document sélectionné. 3. Pressez le bouton Gauche/Droit ( ) pour vous déplacer vers la page précédente/suivante. Downloaded From projector-manual.com Aiptek Manuals Page 13...
- Page 52 2) Lecture : Sélectionnez le réglage de la lecture comme Tableau A. (Page 11) Note : Le projecteur prend en charge les formats audio suivants: Format du fichier Extension de fichier *.mp3 *.wav *.ogg Downloaded From projector-manual.com Aiptek Manuals Page 14...
- Page 53 Ce paramètre permet aux utilisateurs de modifier la luminosité en choisissant soit mode éco ou mode Amélioré. En mode Eco, la luminosité est réduite, mais la consommation d'énergie est plus basse (suggérer pour mode batterie) qu'en mode Normal et amélioré. Downloaded From projector-manual.com Aiptek Manuals Page 15...
- Page 54 Cet article permet aux utilisateurs de régler la sensibilité de la touche (la valeur de réglage disponible est de 1 ~ 3). La valeur plus élevée indique une sensibilité élevée. 3. Langue Cette option permet aux utilisateurs de sélectionner la langue du système d’affichage. Downloaded From projector-manual.com Aiptek Manuals Page 16...
-
Page 55: Notification Pour Projection De Longue Durée
Il est normal que le projecteur s’échauffe lors d’une utilisation continue en raison de sa haute performance. Si le projecteur fonctionne pendant une longue période et surchauffe, l'icône de haute température ( ) apparaît sur l'écran. Le système entrera alors automatiquement en mode veille. Downloaded From projector-manual.com Aiptek Manuals Page 17... -
Page 56: Dépannage
Occasionnellement, vous pouvez avoir besoin de réinitialiser votre Projecteur Micro. Cela peut être utile lorsqu'un programme ne fonctionne pas correctement. Pressez sur l'interrupteur d'alimentation vers le bas pendant 10 secondes pour RÉINITIALISER votre appareil. Downloaded From projector-manual.com Aiptek Manuals Page 18... -
Page 57: Spécifications
Mode Eco : 6,3 W Dimensions (L x L x H) 135 x 65 x 22 mm Poids 190 g Humidité 20 - 80%, 80% (Max.), sans condensation. Température de 5°C - 35°C. fonctionnement Downloaded From projector-manual.com Aiptek Manuals Page 19... - Page 58 Обслуживание изделия должно проводиться только авторизованными сервисными центрами. 14. Используйте только принадлежности, поставляемые производителем. 15. Данное изделие и руководство пользователя могут быть изменены без предварительного уведомления в целях их дальнейшего улучшения или внесения дополнений. Downloaded From projector-manual.com Aiptek Manuals Страница 1...
- Page 59 По окончании срока службы этого изделия следует утилизировать все его компоненты. Батареи и перезаряжаемые аккумуляторы запрещается выбрасывать вместе с бытовыми отходами! Утилизируйте их в ближайшем пункте утилизации. Давайте вместе участвовать в защите нашей природы. Downloaded From projector-manual.com Aiptek Manuals Страница 2...
- Page 60 Начало работы _________________________________ 6 Подготовка контента ____________________________ 7 Проецирование от внешнего источника АВ-сигнала 8 Функции и элементы управления _______________ 10 Сведения о длительном проецировании _________ 18 Устранение неполадок _________________________ 18 Характеристики _______________________________ 19 Downloaded From projector-manual.com Aiptek Manuals Страница 3...
-
Page 61: Знакомство С Устройством
фокусировки Hаушники/Разъем внешнего динамика Гнездо штатива Подставка Приемник ИК Клавиатура Блокировка кнопок СД-индикатор Выключатель питания Гнездо карты Micro SD Разъем USB Разъем HDMI Вход DC IN Клавиатура Меню Выход Вверх Вправо Влево Вниз Downloaded From projector-manual.com Aiptek Manuals Страница 4... -
Page 62: Содержимое Упаковки
Убедитесь, что упаковка содержит следующие компоненты: Проектор Адаптер переменного тока Сменная вилка питания Пульт Кабель HDMI (типа A—A) Кабель USB Переходник USB Чехол Руководство пользователя Штатив Downloaded From projector-manual.com Aiptek Manuals Страница 5... -
Page 63: Начало Работы
выберите пункт «Настройка», и нажатием кнопки (OK) войдите в подменю. Выберите пункт «Язык», и нажмите (OK) для открытия списка языков. Выберите нужный язык, и подтвердите его кнопкой (OK). Нажмите (Выход) для возврата в главное меню. Downloaded From projector-manual.com Aiptek Manuals Страница 6... -
Page 64: Подготовка Контента
выберите пункт «Настройка», и нажатием кнопки (OK) войдите в подменю. Выберите пункт «Память», и нажмите (OK) для входа в меню выбора накопителей. Выберите нужный источник памяти, и подтвердите его кнопкой (OK). Нажмите (Выход) для возврата в главное меню. Downloaded From projector-manual.com Aiptek Manuals Страница 7... -
Page 65: Проецирование От Внешнего Источника Ав-Сигнала
Примечание: Большинство видеоисточников имеют формат кадра 16:9. Для оптимизации качества изображения выберите кнопкой «Menu» один из трех режимов проецирования. Иллюстрация трех режимов проецирования: Формат кадра 16:9 Экран смартфона (источник) Letterbox (16:9) Pan & Scan (4:3) Theme (4:3) Проекционный экран Downloaded From projector-manual.com Aiptek Manuals Страница 8... - Page 66 разъемом Apple) Для зеркального проецирования с устройств iPhone 4S, New iPad, iPad2, iPhone 4S iPad и iPod Touch 4 подсоедините проектор кабелем HDMI типа A—A к 30-контактному адаптеру Apple Digital AV, подсоединенному к устройству. Downloaded From projector-manual.com Aiptek Manuals Страница 9...
-
Page 67: Функции И Элементы Управления
формата файлов. Возможен предварительный ФАЙЛ просмотр выделяемых в списке файлов Фото и Видео. Выбранный файл можно удалить или скопировать на другой носитель. Позволяет настроить такие параметры, как Настройка Яркость, Чувствительность кнопок, Язык и Память. Downloaded From projector-manual.com Aiptek Manuals Страница 10... - Page 68 <Таблица A> Однократное воспроизведение текущего Без повтора трека или видео. Обычный Воспроизведение текущей папки. Повторять воспроизведение текущего трека Один или видео. Все Повторять воспроизведение текущей папки. Повторять воспроизведение текущей папки в Случайно случайном порядке. Downloaded From projector-manual.com Aiptek Manuals Страница 11...
- Page 69 Документ: Доступные уровни увеличения — 1x ~ 8x.) Предыдущее/следующее изображение Включение режима сдвига Возврат к полноэкранному изображению Сдвиг Сдвиг вверх, вниз, влево, вправо и Возврат в режим увеличения Возврат к полноэкранному изображению Downloaded From projector-manual.com Aiptek Manuals Страница 12...
- Page 70 1. Выберите пункт «Документ» в главном меню и нажмите для входа в режим Документ. 2. Выберите папку и файл, и нажмите для открытия выбранного документа. 3. Кнопками влево/вправо ( ) перейдите к предыдущей/следующей странице. Downloaded From projector-manual.com Aiptek Manuals Страница 13...
- Page 71 Экран автоматически гаснет через 20 секунд для экономии электроэнергии. Для включения экрана просто коснитесь клавиатуры, чтобы активировать проецирование. Нажмите кнопку (Меню) для входа в режим настройки музыки. 1) Звук: Включение/выключение звука. 2) Воспроизведение: Выбор режимов воспроизведения, аналогично таблице A (стр. 11). Downloaded From projector-manual.com Aiptek Manuals Страница 14...
- Page 72 Удаление файла Чтобы удалить выбранный файл, выберите пункт «Удалить» и нажмите Чтобы отменить действие и вернуться в список файлов, нажмите Настройка Изменение стандартных настроек проектора: яркости, чувствительности клавиатуры, языка и устройств памяти. Downloaded From projector-manual.com Aiptek Manuals Страница 15...
- Page 73 когда проектор работает в батарейном режиме. Примечание: При подсоединении прилагаемого адаптера питания, проектор автоматически переключается в режим Яркий. 2. Чувствительность кнопок Позволяет задать чувствительность кнопок (диапазон значений: 1~3). Чем выше значение, тем выше чувствительность. Downloaded From projector-manual.com Aiptek Manuals Страница 16...
- Page 74 Сброс всех настроек проектора к заводским значениям. - Обновление микропрограммы Информацию об обновлении микропрограммы можно получить на нашем вебсайте. Для обновления микропрограммы выполните указания на нашем вебсайте. - Информация Подробная информация о проекторе. Downloaded From projector-manual.com Aiptek Manuals Страница 17...
-
Page 75: Сведения О Длительном Проецировании
загрязнения или перекрытия вентиляционных отверстий и применяйте проектор в хорошо вентилируемых местах. Сброс устройства Иногда возникает необходимость сбросить настройки микропроектора. Это бывает полезно при неполадках с программой. Для СБРОСА устройства прижмите выключатель питания на 10 секунд. Downloaded From projector-manual.com Aiptek Manuals Страница 18... -
Page 76: Характеристики
Обычный режим: 7,5 Вт Экономичный режим: 6,3 Вт Размеры (Д x Ш x В) 135 x 65 x 22 мм Вес 190 г Влажность 20% - 80% (макс. 80%), без конденсации. Температура эксплуатации 5°C - 35°C. Downloaded From projector-manual.com Aiptek Manuals Страница 19... - Page 77 注意: 大多數的視訊內容長寬比均為 16:9 。請用「選單鈕」選擇三種投影模式之 一,以獲得最佳的視覺品質。 三種投影模式的效果顯示如下: 16:9 長寬比 智慧型手機 ( 來源 ) 畫面 Letterbox (16:9) Pan & Scan (4:3) Theme mode (4:3) ( 字幕盒 ) ( 橫移且填滿 ) ( 主題模式 ) 投影畫面 Downloaded From projector-manual.com Aiptek Manuals 第 8 頁...
- Page 78 참고: 대부분의 비디오 컨텐츠는 16:9 비율입니다. “메뉴 버튼”으로 3 가지 투사 모드 중 하나를 선택하여 화면 품질을 최적화 합니다. 3 가지 종류의 투사 모드 그림: 16:9 화면비율 스마트폰 (소스) 화면 레터박스 (16:9) 팬 & 스캔 (4:3) 테마 모드 (4:3) 투사 화면 Downloaded From projector-manual.com Aiptek Manuals 페이지 8...
- Page 79 أغلب محتوى الفيديو يعرض بنسبة مالحظة لتحسين جودة الصورة شكل توضيحي ألنواع أوضاع العرض الثالثة 16:9 نسبة العرض إلى االرتفاع شاشة الھاتف المصدر الذكي Letterbox (16:9) (4:3) وضع السمة (4:3) تحريك ومسح ضوئي شاشة العرض Downloaded From projector-manual.com Aiptek Manuals صفحة...
Need help?
Do you have a question about the PocketCinema V60 and is the answer not in the manual?
Questions and answers