Table of Contents
Advertisement
Advertisement
Table of Contents

Related Manuals for Simrad GN70


Summary of Contents for Simrad GN70
- Page 1 GN70/MX610/MX612 Operator and Installation Manual ENGLISH navico.com/commercial...
- Page 3 The Wheelmark The GN70/MX610/MX612 system is produced and tested in accordance with the European Marine Equipment Directive MED 96/98/EC as amended by directive (EU) 2015/559. This means that the systems comply with the highest level of tests for nonmilitary marine electronic navigation equipment existing today.
- Page 4 In case of any queries, refer to our websites: www.navico.com/commercial and www.simrad-yachting.com About this manual This manual is a reference guide for operating the Simrad GN70/MX610/MX612 navigation system. The manual will be continuously updated to match new software releases. The latest available manual version can be downloaded from our websites.
-
Page 5: Table Of Contents
Contents Introduction GN70/MX61x Front Panel and Keys CDU pages Basic operation Light/Power key PAGE key MENU key Dialog boxes MOB (Man-Over-Board)/Mark key Main pages Menu overview Quick Menus Settings dialog and submenus Tools dialog and submenus Tools page AIS (Vessel info) - Page 6 HS80/HS80A/MX575C/MX575D D/GPS compass unit MX610JB smart junction box unit MX612JB smart junction box unit Wiring Wiring guidelines GN70 or MX61x navigation system; basic wiring principles CAN bus Power supply NMEA 2000 and SimNet devices IEC61162-1/2 (NMEA 0183) Devices Alarm interface...
-
Page 7: Introduction
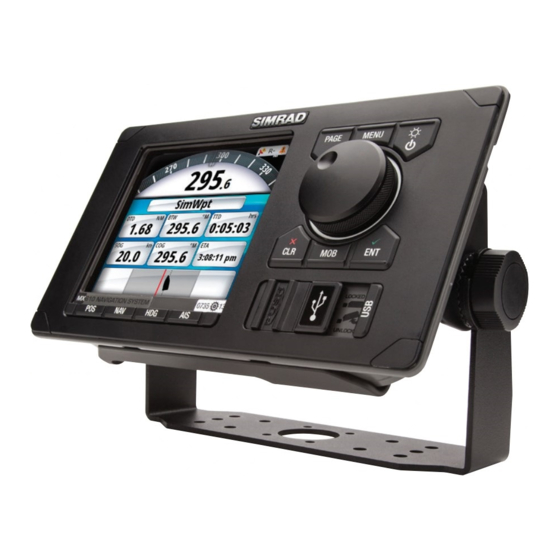
Introduction GN70/MX61x Front Panel and Keys 1 2 3 MENU PAGE 9 10 11 Description PAGE key: Brings up different screen page every time this key is pressed or to change tab in the settings and tools menu. MENU key: Brings up the quick menu dialog box. -
Page 8: Cdu Pages
Appears on all navigation screens. It indicates the GPS and RAIM status or if an alert is present Normally, the status bar blinks off every 4 seconds to show what is behind it. This is not an alert condition. Introduction | GN70/MX610/MX612 Operator and Installation Manual... - Page 9 1.0.42.235 or higher. GPS/GLONASS selection By default, the SIMRAD CDU is set to navigate using the GPS satellite system. When using the MX521B smart antenna or the HS80A/MX575D smart GPS compass models, the SIMRAD CDU can be controlled to navigate using combined solutions from GPS and GLONASS satellites.
- Page 10 Not enough satellites are available. RAIM requires 5 (or RAIM Caution more) satellites for proper operation. Active alert. Red icon for alarms, yellow for warning, see Alert condition also “Alert indications” on page 54. 10 | Introduction | GN70/MX610/MX612 Operator and Installation Manual...
-
Page 11: Basic Operation
You can also view the main pages directly by pressing the hot keys at the bottom of the display. The PAGE key is also used to change tabs or toggle between the Tools and Settings screens of the main menu. | 11 Basic operation | GN70/MX610/MX612 Operator and Installation Manual... -
Page 12: Menu Key
Pressing the ENT key after selecting the required value(s) will select the entry. Highlight the OK button and press ENT will save the entry. A dialog is closed without saving by pressing the CLR key. 12 | Basic operation | GN70/MX610/MX612 Operator and Installation Manual... -
Page 13: Mob (Man-Over-Board)/Mark Key
¼ Note: vessel. Cancel MOB navigation The GN70/MX61x will continue navigating towards the MOB point until you cancel this navigation. To cancel MOB, press the MENU key, highlight “Cancel navigation” then press the ENT key. Press any hot key to exit. -
Page 14: Main Pages
Pressing the NAV key the third time will show the NAV3 page showing the COG, SOG, TWA, TWD, TWS and VMG information. *) Not for GN70. 14 | Basic operation | GN70/MX610/MX612 Operator and Installation Manual... - Page 15 PLOT page. The PLOT is under the AIS key. Plotter orientation Possible orientation of the plotter is North Up or Course Ship’s location Always located in the middle of the plot screen. | 15 Basic operation | GN70/MX610/MX612 Operator and Installation Manual...
-
Page 16: Menu Overview
Tracks Status Vessels info Message Icon Filters ( Wpt, Rte, Tracks listings) Hide all Hide safe Hide farther than (2Mi) Main Menu Hide slower than (2 MPH) 16 | Menu overview | GN70/MX610/MX612 Installation and Installation Manual... -
Page 17: Settings Dialog And Submenus
-Settings tab is used to turn on/off alerts and set limits. -History tab lists all previous alerts. -Active tab shows alerts that are still active. The alert is removed from the list when the cause is corrected. | 17 Menu overview | GN70/MX610/MX612 Installation and Installation Manual... -
Page 18: Units Settings
Tracks settings Shows the tracks list dialog and logging type. Units settings Controls the units used for distance, depth, speed and heading. 18 | Menu overview | GN70/MX610/MX612 Installation and Installation Manual... -
Page 19: Tools Dialog And Submenus
Provides the status display of the GPS satellites and differential correction status. Press the PAGE key to change tab to DGPS status screen. Press MENU to toggle Automatic, Database or Manual beacon | 19 Menu overview | GN70/MX610/MX612 Installation and Installation Manual... - Page 20 Change tab by pressing the PAGE key. Sun/Moon tool Calculates the sun and moon setting and rising. Tide tool Calculates the tides based on manually entered tide harmonics taken from the Admiralty Tide Table book. 20 | Menu overview | GN70/MX610/MX612 Installation and Installation Manual...
-
Page 21: Tools Page
Tools page Several tools are available to help you operate the GN70/MX61x unit. To bring up the TOOLS page, press the MENU key then scroll to Tool and Settings menu. Press the PAGE key to change tab from SETTINGS to TOOLS. Turn the knob to highlight the desired icon and press the ENT key to select it. -
Page 22: Ais (Vessel Info)
AIS (Vessel info) Status-All Provides a list of all AIS target vessels with their information when the GN70/MX61x is connected to the AIS transponder via the NMEA 2000 network. Pressing the MENU key will show a dialog box that allows you to sort the list based on names, distance, bearing, status, type, CPA and TCPA to other vessels. -
Page 23: Trip Log
Using the rotary knob, scroll to the top of dialog box and enter the station ID number, name of the place and all the Harmonic constants taken from the Admiralty Tide Station book. Highlight the SAVE button. Press the ENT key. Press the CLR key to exit. | 23 Tools page | GN70/MX610/MX612 Operator and Installation Manual... -
Page 24: System Configuration
At the first time turn on of the GN70/MX61x the display will ask you to do an auto selection of data sources. You can have it perform an auto selection by pressing the ENT key. It will search for all available source of position, navigation, compass from an internal SimNet priority list. - Page 25 Manual Source Selection You can manually select the preferred source. This is useful if you have more than one of the same type of device (i.e. multiple GPS antenna units) on the network. Available sources are listed as shown in the example below. You select active source by ticking the preferred unit.
-
Page 26: Device List
The GN70/MX61x can use GPS antennas or data sources that all other products on the N2K network use, or you may select individual sources for the GN70/MX61x system. If the group is set to “Simrad”, any changes to a source will also affect other similar display systems on the network. - Page 27 Press the CLR key to exit the data list screen. Highlight the Close button and press the ENT key or press the CLR key several times to exit. You may also press any hot key to directly go to that screen. Changing baud rate There are cases where you may need to change the baud rate speed of the NMEA 0183 port of the MX61xJB to match a NMEA “talker“or “listener”.
- Page 28 The illustration below shows a network of three GN70/MX61x units (two on the bridge and one in the remote area). The two units on the bridge can be made to belong to one group (i.e.
- Page 29 HS80A/MX575D D/GPS Compass Antenna Offset The difference between the compass lubber line and the boat’s center line should be compensated for. This can be done in two ways, namely: physically rotating the compass antenna so the heading is corrected or by entering an offset value using the procedure below.
- Page 30 NMEA 0183 Output over TCP/IP (LAN) The GN70/MX61x has the capability to output NMEA 0183 over the Ethernet (LAN) port. Since there is no bandwidth restrictions in LAN, all listed NMEA messages are transmitted (see message table below). The data of the sentences comes from the data source selected.
- Page 31 The MX610JB has four RS-422 NMEA 0183 data ports while the MX612JB has twelve RS-422 NMEA 0183 ports. When the GN70/MX61x CDU senses the presence of the MX61xJB junction box, it will provide a list of port numbers based on the CDU model. Limit the number of NMEA messages to eight per port.
- Page 32 Bearing - Origin to destination Waypoint location Routes Set alarm state Depth ECHO Water speed and heading Heading, deviation and variation Heading, True Compass Rate of turn True heading and status AIS data 32 | System Configuration | GN70/MX610/MX612 Operator and Installation Manual...
- Page 33 For navigation applications that require more than 1 position per second data output, the GN70/MX61x can configure the GS70 antenna and the MX610JB junction box NMEA ports to output the NMEA sentences up to 10 Hz. Use the setup procedure below to turn on the...
- Page 34 GLONASS satellites. The GPS+GLONASS selection becomes available only when the GS70/ MX521B or MX575D/HS80A antenna model is in use. Autonomous GPS position fix is indicated by a “GP” icon in the status bar while GPS+GLONASS is indicated by “GN” icon. 34 | System Configuration | GN70/MX610/MX612 Operator and Installation Manual...
- Page 35 GPS/GLONASS selection By default, the SIMRAD CDU is set to navigate using the GPS satellite system. When using the GN70/MX521B smart antenna or the HS80A/MX575D smart D/GPS compass models, the SIMRAD CDU can be controlled to navigate using combined solutions from GPS and GLONASS satellites.
- Page 36 Reset Procedures In order to access the RESET functionality, the following software versions have to be in place: • GN70/MX61x CDU - s/w version 1.0.42.235 (or newer), • MX61xJB junction box - s/w version 1100 100121 (or newer) How to RESET the Junction Box: (MX610JB & MX612JB) Press the MENU key.
- Page 37 How to RESET the SIMRAD Antenna: (MX521, MX521A, MX521B, HS80A, MX575C & MX575D) Press the MENU key. Scroll to Tools & Settings, press ENT. Scroll to GPS icon, press ENT. Scroll to Antenna Reset menu, press ENT. Select Cold Reset or Factory Default, press ENT.
- Page 38 To bring up the HDOP history screen, do the following: Press the MENU key. Scroll to Tools & Settings, press ENT. Press PAGE and scroll to Satellites, press ENT. Press PAGE twice to change tab to HDOP. 38 | System Configuration | GN70/MX610/MX612 Operator and Installation Manual...
-
Page 39: Waypoints, Routes & Tracks
Waypoints A waypoint is a location on the chart defined by unique latitude and longitude coordinates. They can be created in the GN70/MX61x using the following methods: • Saving the vessel position •... -
Page 40: Routes
Press the PAGE key to tab to Routes. Highlight the route you wish to modify. Press the ENT key. Using the rotary knob, move the highlight to the route table. Press the ENT key. 40 | Waypoints, Routes & Tracks | GN70/MX610/MX612 Operator and Installation Manual... - Page 41 On Select Route menu, scroll to required route, press ENT key. The Start Route message will be prompted, forward, reverse or cancel route. Highlight action and press rotary knob. | 41 Waypoints, Routes & Tracks | GN70/MX610/MX612 Operator and Installation Manual...
-
Page 42: Tracks
The track is made up of a series of track points connected by line segments whose length depends on the frequency of track recording. You can select to position track points based on time settings, distance, or by letting the GN70/ MX61x system position a waypoint automatically when a course change is registered. - Page 43 Find from Vessel- Track window, select a track from list below. Press MENU key, scroll to Show option, press ENT key. The selected track will be displayed in the plot screen. | 43 Waypoints, Routes & Tracks | GN70/MX610/MX612 Operator and Installation Manual...
-
Page 44: Navigating With The Gn70/Mx61X
You can start navigation to any waypoint or route from the NAV screen by using the Goto menu, displayed by pressing MENU key. ¼ Note: When the GN70/MX61x starts navigating, the cross track limits will be indicated on the NAV screen. Navigate a Route Start navigating a route by pressing the NAV key, then pressing the MENU key and then activating the Goto menu and scroll to Route. - Page 45 Datum Most paper charts are made in the WGS84 format, which also is used by the GN70/MX61x system. If your paper charts are in a different format, you can change the datum setting accordingly to match your paper chart.
-
Page 46: Navigation Panels
If the XTD exceeds the defined off course limit, this will be indicated with a red arrow including the distance from the track line. If the off course alarm is enabled, and the XTD exceeds the defined off course limit., the alarm will activate. 46 | Navigating with the GN70/MX61x | GN70/MX610/MX612 Operator and Installation Manual... - Page 47 (i.e. SOG xxxxx Kn and COG xxxxx M) (see above picture). The GN70/MX61x can display the Lat/Long data in several coordinate formats. To change the L/L format: Press the MENU key to bring up the quick menu.
-
Page 48: Hdg Screens
Highlight the Data sources... menu. Press the ENT key. Highlight Compass, then press the ENT key. Press the ENT key to change the group (if none is selected) to SIMRAD -for all SIMRAD prod- ucts. Highlight the Compass source then press the ENT key. -
Page 49: Advance Data Source Selection
Scroll down to Heading and then press the ENT key. Toggle to T (True) or M (Magnetic) and then press ENT key to accept. Press any hot keys to exit. | 49 HDG screens | GN70/MX610/MX512 Operator and Installation Manual... -
Page 50: Using Ais (Plot)
If a SIMRAD AIS transponder or DSC transceiver device is connected to the NMEA 2000 network, the GN70/MX61x can display the AIS target information in the AIS page. You can also see messages and position for DSC transmitting devices within range. If none is available, the plotter screen can show the waypoints, routes and tracks. -
Page 51: Viewing Information About Ais Targets
Sets the range for lost vessels. If a vessel is lost within this range this will trigger an alarm Vessel message Controls whether an alarm shall be activated when a message is received from an AIS target | 51 Using AIS (PLOT) | GN70/MX610/MX612 Operator and Installation Manual... -
Page 52: Vessel Settings Panel
You need to have your own MMSI (Maritime Mobile Service Identity) number entered in the GN70/MX61x system to be able to receive addressed messages from AIS and DSC vessels. It is also important to have the MMSI number entered to avoid seeing your own vessel as an AIS target on the plotter. - Page 53 (true) motion in the chart or relative to your vessel. Different line style is used on the extension lines to indicate motion as shown below. Absolute motion Relative motion | 53 Using AIS (PLOT) | GN70/MX610/MX612 Operator and Installation Manual...
-
Page 54: Alert System
Alert system The GN70/MX61x system continuously checks for dangerous situations and system faults while the system is running. When an alert situation occurs, an alert message will pop up on the screen and the status indicator on the top-right corner of the display will show the alert icon. -
Page 55: Acknowledging A Message
List of all active messages • Alert history Alert events, including alert type and time/date • Alert settings List of all alerts that can be enabled and configured by the user | 55 Alert system | GN70/MX610/MX612 Operator and Installation Manual... - Page 56 To setup the alert limits, press the PAGE key to change the tab to Settings. Use the rotary knob to scroll up or down through the different alert settings and press the ENT key to affix the check mark and specify limit values. 56 | Alert system | GN70/MX610/MX612 Operator and Installation Manual...
- Page 57 Not possible to send or receive network data Low CAN bus voltage* <9 V Type A = Alert Type W = Warning *) See also “Trouble shooting” on page 59 | 57 Alert system | GN70/MX610/MX612 Operator and Installation Manual...
-
Page 58: Using The Simulator
Highlight Press the NAV key to exit and verify the displayed Lat/Long. Using the simulator mode, you can create waypoints, routes and calculate range and bearing to destination waypoint. 58 | Using the simulator | GN70/MX610/MX612 Operator and Installation Manual... -
Page 59: Maintenance
Maintenance Preventive maintenance The GN70/MX61x display and antenna unit does not contain any field serviceable components, therefore the operator is required to perform only a very limited amount of preventative maintenance. It is recommended that you use an optional protective sun cover when the display unit is not in use. - Page 60 Replace N2K power supply or MX61xJB junction box unit. Low CAN bus voltage Check cable length, bus load and bus supply feeding point. If possible, check if fault disappears by disconnecting some units. 60 | Maintenance | GN70/MX610/MX612 Operator and Installation Manual...
-
Page 61: Software Upgrades
Software upgrades Software upgrade of the GN70/MX61x display unit and MX61xJB junction box can be accomplished using USB memory stick or a PC. The GN70 software upgrade can only be done using a PC. The latest software files and upgrade instructions for the GN70/MX61x and junction box can be downloaded from the SIMRAD professional website: www.navico.com/commercial... - Page 62 Software update of the junction box may fail if no external 12 VDC is applied. The external 12 V can be supplied by a second MX61x system by interconnecting the two networks during the upgrade. 62 | Maintenance | GN70/MX610/MX612 Operator and Installation Manual...
- Page 63 Copy the *.upd file to your PC (not a network location). Connect the GN70/MX61x directly to your computer with a LAN network cable. Completely cut the 12-24 VDC power to the MX61x unit by using the power supply switch or circuit breaker.
-
Page 64: List Of Components
List of components The tables below list parts that are included in GN70/MX61x GPS and DGPS navigation kits. as well as optional items such as, cables and accessories that are available from your dealers. MX610 DGPS navigation system (P/N 000-10919-001) - Page 65 Part number CZONE, NMEA 2000 EXTENSION 0.5 m 000-10816-001 CZONE, NMEA 2000 EXTENSION 2.0 m 000-10817-001 CZONE, NMEA 2000 EXTENSION 5.0 m 000-10814-001 CZONE, NMEA 2000 EXTENSION 10 m 000-10815-001 | 65 List of components | GN70/MX610/MX612 Operator and Installation Manual...
- Page 66 Micro-C, Field Connector 000-10404-001 N2K-PWR-RD - NMEA 2000® power cable 000-0119-75 NMEA2000 Terminator kit 000-0127-52 CZONE, NMEA 2000 FEMALE RESISTOR 000-10820-001 CZONE, NMEA 2000 MALE RESISTOR 000-10821-001 N2K-EXP-KIT,MICRO-C,STARTER KIT 000-0124-69 66 | List of components | GN70/MX610/MX612 Operator and Installation Manual...
-
Page 67: Mounting
Mounting General The standard mounting of the GN70/MX61x display is in-dash or panel mount. If there is a need to bracket mount the unit, an optional U-bracket assembly can be ordered separately. Mounting location The GN70/MX61x unit should be mounted with special regard to the unit’s easy access for operation and maintenance, environmental protection, temperature range, cable connection and cable length. - Page 68 Align the bracket base with the cradle and partially screw in the bracket knobs one at a time. Adjust the unit for best viewing angle, and tighten the bracket knobs. 68 | Mounting | GN70/MX610/MX612 Operator and Installation Manual...
-
Page 69: Antenna Systems
Antenna systems Several Itype-approved antenna models can be used with the GN70/MX61x, namely: • MX521A/B - GPS/DGPS smart antenna (NMEA 0183 interface). - Standard • HS80/HS80A or MX575C/D D/GPS compass unit (N2K or NMEA 0183 interface) - Option • GS70 - GPS/WAAS smart antenna (N2K interface) - Option As a general rule, the antenna unit must be located in the open where it will have a good view of the sky aournd it. -
Page 70: Mx61Xjb Junction Box
Preferably mount the junction box with the cable entries exiting downwards. Mount the cable retainer included with the MX610 J-Box on the wall beneath the unit. MX610JB mounting MX612JB Mounting 70 | Mounting | GN70/MX610/MX612 Operator and Installation Manual... -
Page 71: Gn70/Mx610/Mx612 Display Unit (Mechanical Dimensions)
GN70/MX610/MX612 display unit (mechanical dimensions) 54 mm (2.13”) 65 mm (2.56”) 135 mm (5.31”) 32 mm (1.26”) 144 mm (5.67”) 220 mm 252 mm (8.66”) (9.92”) | 71 Mounting | GN70/MX610/MX612 Operator and Installation Manual... -
Page 72: Gs70 Antenna Unit
GS70 antenna unit MX521A/MX521B smart D/GPS antenna unit 72 | Mounting | GN70/MX610/MX612 Operator and Installation Manual... -
Page 73: Hs80/Hs80A/Mx575C/Mx575D D/Gps Compass Unit
HS80/HS80A/MX575C/MX575D D/GPS compass unit MX610JB smart junction box unit 211 mm (8.29") 197 mm (7.77") 185 mm (7.27") 60 mm (2.36") 180 mm (7.08") 80 mm (3.15") 48 mm (1.88") | 73 Mounting | GN70/MX610/MX612 Operator and Installation Manual... -
Page 74: Mx612Jb Smart Junction Box Unit
MX612JB smart junction box unit 100 mm 340 mm (13.38”) (3.94”) 320 mm (12.60”) 253 mm (9.84”) 109 mm (4.29”) MX612JB JUNCTION BOX 250 mm (9.94”) 74 | Mounting | GN70/MX610/MX612 Operator and Installation Manual... -
Page 75: Wiring
In systems with the MX61xJB junction box the CAN bus is powered by the junction box. The GN70/MX61x model have separate power supply cable and can be wired directly to 12-24 VDC. Other SimNet/NMEA devices are powered by the CAN bus. -
Page 76: Can Bus
6 m (20 ft). FEMALE In a default GN70/MX61x system the CAN bus backbone expands from the MX610JB, which supplies power to the backbone. There will always be a female connector in the expanding end of the backbone cables. -
Page 77: Power Supply
Terminating the CAN bus The CAN bus must have a 120 Ohm terminator at each end of the backbone. In a default GN70/MX61x system the CAN bus can be powered and terminated from the junction box PCB, enabled by the micro switch. - Page 78 N2K system with balance load Powering the GN70/MX61x display units The GN70/MX61x control units are powered directly from a 12 V DC or 24 V DC source. The units are protected against reverse polarity, under voltage and over voltage. Color...
-
Page 79: Nmea 2000 And Simnet Devices
The MX61xJB board uses the serial RS422 (IEC 61162-1/2) standard and can be configured in the GN70/MX61x display for different baud rates, up to 38,400 baud (default baud rate is 4800). Sentence output by the GN70/MX61x can be individually turned on or off. The default NMEA sentence setting is off. -
Page 80: Alarm Interface
Alarm interface External alarm An external alarm can be connected to the GN70/MX61x display unit. The alarm signal has an open contact for an alarm buzzer or an external alarm relay as illustrated below. The alarm voltage is the same as the main supply voltage. The maximum load on the external alarm output is 0.75 Amp. - Page 81 ENT key. Press CLR or any of the hot keys to exit. Ext. MOB Switch 12 - 24 V DC External MOB switch connection Color Description Black Battery (-) Blue External Alarm Yellow External MOB Battery (+), 12 - 24 V DC | 81 Wiring | GN70/MX610/MX612 Operator and Installation Manual...
- Page 82 For alarm panel using serial interface, refer to “IEC61162-1/2 (NMEA 0183) Devices” on page 79. From the GN70/MX61x unit we are using the same two wires (red and blue) as for external alarm relay connection. Under normal operation you will see 12/24 V between these two wires. In an alarm situation, or when power is lost, you will see no voltage.
- Page 83 GN70/MX61x with MX521 smart antenna and MX525A sensor connections GN70/MX61x Option MX521 MX521A MX521B MXB5 ANT. 12/24V DC Coax Cable MX525 MX525A MX61xJB 12/24V DC Ports 3&4 Where: Port 1 N2K Backbone Drop line Port 2 NMEA 0183 line GN70/MX610, MX610JB junction box and MX521/MX525 diagram...
-
Page 84: Normal Operation
MX61xJB PCB Terminals MX525A SIMNET TERMINATION PORT1 PORT2 3-Meter Power/Data Cable +12-24 VDC REMOTE PORT3 PORT4 SUPPLY Ext. RTCM PRPL @4800 Baud NMEA 0183 PORT CONNECTOR TERMINALS MX525A to MX61x JB wiring diagram 84 | Wiring | GN70/MX610/MX612 Operator and Installation Manual... - Page 85 12/24V DC MX610JB 12/24V DC Ports 3&4 Port 1 Where: Port 2 N2K Backbone Drop line NMEA 0183 line GN70/MX61x system with MX575C GPS compass diagram MX575C/MX575D GPS Compass MX61xJB PCB Terminals SIMNET TERMINATION PORT1 PORT2 12-24 VDC REMOTE PORT3...
- Page 86 MX612JB junction box antenna connection 86 | Wiring | GN70/MX610/MX612 Operator and Installation Manual...
- Page 87 HS80/HS80A GPS Compass GN70/MX610/MX612 12/24V DC MX61xJB Junction Box 12/24V DC Ports 4 Ports 3 Port 1 Where: Port 2 N2K Backbone Drop line NMEA 0183 line HS80/HS80A N2K connection | 87 Wiring | GN70/MX610/MX612 Operator and Installation Manual...
-
Page 88: Specifications
Black and grey Cable inlet 1 Power/alarm, 1 Micro-C, LAN connectors * LEN - NMEA 2000 Load Equivalent Number. Where 1 LEN draws about 50 mA current from the N2K network. 88 | Specifications | GN70/MX610/MX612 Operator and Installation Manual... -
Page 89: Mx61Xjb Junction Box
NMEA 0183 Ver. 4.0 Serial ports (+/-5 V) 422 Serial ports (+/-5 V) 4800 (default) configurable by GN70/MX61x. Port 2, 6 and 10 RX are for RTCM data only. Baud rate Port 3 (antenna), 7 and 11 are high speed ports and will reset to 19,200 baud at power on. - Page 90 15 V DC, +/- 5%, 4 A max bus supply 5%, 4 A max ENVIRONMENT Temperature, -25°C to +60°C -15°C to +55°C operation Temperature, -40°C to +85°C -30°C to +70°C storage Protection IPX6,7 (Exposed category) 90 | Specifications | GN70/MX610/MX612 Operator and Installation Manual...
- Page 91 (N2K adapter option) Mounting Surface mount or Pole Material Plastic White -top, dark gray - Color White White w/ red band bottom ¼ * LEN - Load Equivalent Number @ 50 mA. | 91 Specifications | GN70/MX610/MX612 Operator and Installation Manual...
-
Page 92: Gn70/Mx61X Connector Pinouts
(Bare) Shield NET S (+12 V) Black NET C (-) White NET H Blue NET L Ethernet ¼ Note: Both straight and crossed Ethernet cables may be used for software upload! 92 | Specifications | GN70/MX610/MX612 Operator and Installation Manual... -
Page 93: Supported Data
* Option for MX521A, MX521B, MX525A and MX575C, MX575D, HS80 and HS80A antenna connection. ** High speed ports, restores to 19,200 after restore or power cycle. *** Dedicated RTCM data input port. Output is selectable. GN70/MX61x communications (via NMEA 0183) NMEA 0183 Sentence Message Data Type √... - Page 94 RAIM feature 129545 GNSS RAIM output 129546 GNSS RAIM settings 129542 GNSS Pseudorange noise statistics 129547 GNSS Pseudorange error statistics RTCM correction 129549 Ext. RTCM correction data 130852 RTCM feedback to GN70/MX61x 94 | Specifications | GN70/MX610/MX612 Operator and Installation Manual...
- Page 95 GNSS Data GPVTG GNVTG COG/SOG data Where: $GPxxx - NMEA message header when autonomous GPS system is used $GNxxx - NMEA message header when combined GPS and GLONASS system is used | 95 Specifications | GN70/MX610/MX612 Operator and Installation Manual...
-
Page 96: List Of Abbreviations
Speed Over Ground STEER Course to steer towards next waypoint Speed Through Water Time To Destination WAAS Wide Area Augmentation System Waypoint (followed by waypoint name) Cross Track Distance 96 | List of abbreviations | GN70/MX610/MX612 Operator and Installation Manual... -
Page 97: Index
Panel 40 Keys 7 Selecting start point 44 Power key 11 Satellite status 22 Listings 21 Ship’s location 15 Alerts 22 SimNet basics and terminology 76 Satellites 22 Simulator 58 Sun/moon 23 Advanced settings 58 | 97 Index | GN70/MX610/MX612 Installation... - Page 98 Panel 39 Settings 42 Trouble shooting 59 Vessel settings panel 52 Vessel status listing 22 Waypoints 39 Alarm settings 40 Edit 39 Panel 39 Positioning 39 Waypoints, Routes & Tracks 39 Wiring guidelines 75 98 | Index | GN70/MX610/MX612 Installation...
- Page 100 N2584...
Need help?
Do you have a question about the GN70 and is the answer not in the manual?
Questions and answers