Table of Contents
Advertisement
Advertisement
Table of Contents
Troubleshooting

Related Manuals for Audiovox D1812PKG


Summary of Contents for Audiovox D1812PKG
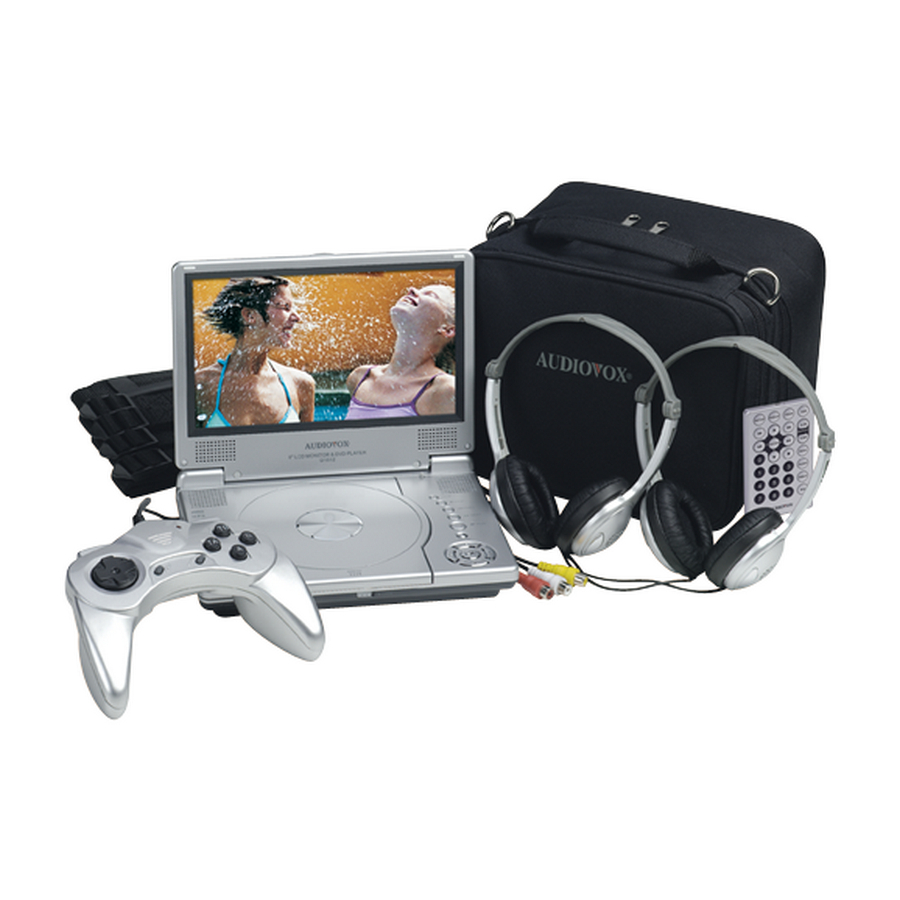
- Page 1 D1812PKG PORTABLE 8" LCD MONITOR AND DVD PLAYER IN A BAG...
- Page 2 An LCD panel and/or video monitor may be installed in a motor vehicle and visible to the driver if the LCD panel or video monitor is used for vehicle information, system control, rear or side observation or navigation. If the LCD panel or video monitor is used for television reception, video or DVD play, the LCD panel or video monitor must be installed so that these features will only function when the vehicle is in “park”...
-
Page 3: Table Of Contents
Content A. Introduction ... 4 B. Cautions and Warnings ... 4 C. Contents ... 6 D. Powering and Installation ... 7 E. Vehicle Installation...7 F. Controls, Indicators, and Connectors ... 9 G. Loading and Playing a Disc ... 10 H. Setup... 11 I. -
Page 4: Introduction
A. Introduction Thank you for choosing the D1812PKG. The main features include a 8" Wide Screen (16:9 Aspect Ratio) Liquid Crystal Display (LCD) monitor, a DVD player and a game controller with 30 built-in games. The unit applies the latest state of the art electronics and is de- signed for use in hotels, offices, vehicles or your home. - Page 5 Keep the unit away from an open flame such as,.fire, candle etc,. It is hazardous to replace the battery incorrectly. Replace the battery only with the same or equivalent type. In order to protect the enviromnent please dispose of the battery properly. Do not use the unit in temperatures higher than 104 degrees Fahrenheit or 40 de- grees Celsius.
-
Page 6: D. Powering And Installation
C. Contents 1. 1 x 8’’ LCD Monitor & DVD Player 2. 1 x AC to DC Adapter 3. 1 x Remote Control with battery (CR2025) 4. 1 x Instruction Manual 5. 1 x Audio/Video Adapter Cable 6. 1 x DC Power Adapter 7. -
Page 7: Powering And Installation
E. Vehicle Installation Make sure that the unit is placed into the bag with the clear plastic covering on the right side of the unit. Load the disc into the DVD compartment and then adjust the retaining cord across the top portion of the unit. - Page 8 2. Installing the system between the driver/passenger seat (Refer to Figure 3) 1). Take one strap and connect the latch to the upper metal ring on the left side of the bag. Attach the “S” hook to the same ring after looping the strap around the headrest of the driver’s seat.
-
Page 9: Controls, Indicators, And Connectors
F. Controls, Indicators, and Connectors 1. Unit View (Refer to Figure 4) 1) LCD Panel Shut Off Switch 2) Wide Button 3) Stop Button 4) Previous Button 5) Next Button 6) Play Button 7) Menu 8) Up Button 9) Right Button 10) OK/Enter Button 11) Down Button 12) Left Button... -
Page 10: Loading And Playing A Disc
2. Remote Control View (Refer to Figure 5) 1) Setup Button 2) Previous Button 3) Reverse Scan Button 4) UP/DOWN/LEFT/RIGHT/ ENTER Buttons 5) Numeric Keypad 6) Play Button 7) Pause Button 8) Audio Button 9) Stop Button 10) Menu Button 11) Forward Button 12) A-B Repeat/1/All Button... -
Page 11: Setup
H. Setup Press ‘SETUP’ to display the Main screen of the Setup Menu on the screen. Press ‘SETUP’ again to exit the Setup Menu and the unit will resume it’s last playback mode. 1) Press “SETUP”, the ‘General Setup Page’ will be displayed. a).Select ‘TV Display’... - Page 12 d). Select ‘Screen Saver’ using the UP/DOWN button, and then press the RIGHT button to enter the submenu. Choose Screen Saver on or off using the UP/DOWN button and then press ENTER to confirm the setting. Press the LEFT button to return. *On: Enables screen saver *Off: Disables screen saver (off) *NOTE: The DVD player will enter the Screen Saver mode after ap-...
- Page 13 b).Select ‘TV Type’ using the UP/DOWN button, and then press the RIGHT button to enter the submenu. Choose TV Type using the UP/ DOWN button and then press ENTER to confirm the setting. Press the LEFT button to return. c).Select ‘Angle Mark’ using the UP/DOWN buttton, and then press the RIGHT button to enter the submenu.
- Page 14 2) Select the “Video Quality Setup” page by using the LEFT/RIGHT but- tons. Press “Enter” to enter the video quality set up page. Main SETUP Menu VIDEO QUALITY a).Select “Brightness by using the UP or DOWN buttons, then press “Enter”. You can change the Brightness by pressing the LEFT or RIGHT buttons.
- Page 15 c).Select “Hue” (Tint) by using the UP or DOWN buttons, then press “Enter”. You can adjust the Hue by pressing the LEFT or RIGHT but- tons. To exit “Hue” (Tint) Setting, press “Enter”again to return to the main Menu. d).Select “Saturation” (color) by using the UP or DOWN buttons, then press “Enter”.
- Page 16 3).With no disc inside the player select “password” using the LEFT or RIGHT buttons, press ‘ENTER’ to enter the password setup page, then press the RIGHT button to enter the submenu . PASSWORD CHANGE Menu Press ‘ENTER’ to enter the Password Change Page. Input the Old Password or the Default Password, the New Password, and the Con- firmed New Password.
- Page 17 4).With no disc in the player select ‘PREFERENCES’ using the LEFT or RIGHT buttons, then press ‘ENTER’ to enter the preferences page. a. Select ‘AUDIO’ using the DOWN button, then press ‘RIGHT’ to enter the submenu. Select the audio language you desire using the UP or DOWN buttons, then press ‘ENTER’...
- Page 18 Note: Language and subtitle selection is only available for discs that are recorded in the above listed languages. If the selected, language is not available, the player will play and display on the screen the original recorded language contained in the disc. c.
- Page 19 e. Select ‘DEFAULT’ using the DOWN button, then press RIGHT to en- ter the submenu. Press ENTER to make all of the settings return to the factory-set mode. Loading Factory Setting NOTE: The parental setting is not affected by the default reset func- tion.
-
Page 20: Basic Operation
I. Basic Operation POWER OPEN PLAY SLOW PAUSE STOP NEXT PREVIOUS FORWARD REVERSE LEFT/RIGHT/UP/DOWN ENTER NUMBERS RETURN MENU REPEAT DISPLAY ANGLE SUBTITLE AUDIO ZOOM SETUP Turn the unit on/off Remove/load the disc Start Play/Execute item or setting Play at 1/2, 1/4, 1/8 or 1/16 times speed Still Picture (1 time) Stop at the present playing point / (2 times) Stop playing... -
Page 21: Menu
J. MENU A DVD is divided into sections called titles and chapters. When you play a DVD, a root menu of the disc will appear on the screen of your TV or Monitor. The contents of the menu vary from disc to disc. Press MENU during playback to display the DVD root menu. - Page 22 c. Press ‘DISPLAY’ a 3rd time to display the Elapsed Time for the chapter. The heading will disappear automatically in 3 seconds. Chapter Elapsed Time Screen Display d. Press ‘DISPLAY’ a 4th time to display the Remaining Time for the chapter.
- Page 23 Angle Screen Display 3. SUBTITLE During disc playback press ‘SUBTITLE’ to select the subtitle language you desire*, with the current Subtitle Language Number (1) and the total Number of Subtitle Languages (2) displayed. If there are mul- tiple languages press ‘SUBTITLE’ again to select another subtitle lan- guage.
- Page 24 4. AUDIO During playback press ‘AUDIO’ to select the audio language you de- sire*, with the current Audio Channel Number (1) and the total num- ber of Audio Channels (2) displayed. Press AUDIO again to select another audio language. The audio display will disappear automati- cally if the ‘AUDIO’...
- Page 25 6. A-B REPEAT a. During playback press ‘A-B’ once to set the Starting Point A. A-B Repeat Starting Point Screen Display b. Press ‘A-B’ a second time to set the Ending Point B and the player will repeatedly play the part between Point A and Point B. A-B Repeat Ending Point Screen Display c.
- Page 26 7. REPEAT a. During playback press ‘REPEAT’ once to repeatedly play the cur- rent chapter. hapter Repeat ON Screen Display b. During playback press ‘REPEAT’ twice to repeatedly play the current title. Title Repeat ON Screen Display c. During playback press ‘REPEAT’ three times to repeat All Chapters and Titles.
-
Page 27: Playing Audio Cds
d. Press “REPEAT” a 4th time, to resume normal playback. L. PLAYING AUDIO CD’s When playing an audio CD press the DISPLAY button on the remote to view playback time information. The options below show you what information is available using this function. a. - Page 28 c. Press ‘DISPLAY’ two times and TOTAL ELAPSED appears along with the current track playing and the total time that the CD has been playing. TOTAL ELAPSED Screen Display d. Press ‘DISPLAY’ three times and TOTAL REMAIN appears along with the current track playing and the amount of time remaining on the CD.
-
Page 29: Playing Mp3 Discs
M. PLAYING MP3 DISCS MP3 is a format for storing digital audio. An audio CD-quality song is compressed into the MP3 format with very little loss of audio quality while taking up much less disc space. CD-R /RW discs that have been encoded in MP3 format are compatible with this system. - Page 30 Use the ( NEXT ) button to move to the next song. Press the (PREVIOUS) button to move to the beginning of the previous song. Using The Repeat Feature The default mode for the Repeat feature is OFF. Pressing REPEAT consecutively changes the repeat options: •...
-
Page 31: Playing Jpeg Files
N. Playing JPEG file 1) Load the JPEG Disc into tray. 2) Select JPEG file by pressing “UP/DOWN” button. 3) You can preview the JPEG file by pressing “Play” or “ENTER”. 4) Pressing the “Left Key“ will rotate the picture counterclockwise. Pressing the “Right Key“... - Page 32 i. Press “display” 9th time, “EXTEND FROM CENTER H” will dis- play on the screen, the picture will refresh from horizontal center to both sides. j. Press “display” 10th time, “EXTEND FROM CENTER V” will display on the screen, the picture will refresh from vertical cen- ter to both sides.
-
Page 33: Connecting To A Tv Or Another Monitor
O. Connecting to a TV or another monitor ( Refer to Figure 6) You can also connect the DVD player to a TV to enjoy high quality stereo audio and video on another monitor. To connect the DVD player to a monitor requires the purchase of an audio/video cable. The cable is readily available at most electronic retailers. -
Page 34: Rechargeable Battery Installation And Use
P. Rechargeable Battery Installation and Use The player utilizes a set of long-life Ni-Mh batteries for a portable power supply. Ni-MH batteries feature high storage capacity and low level of degradation. This means the Ni-MH batteries do not have “Memory Effect” and thus can be recharged safely regardless of whether the battery is fully or only partially discharged. - Page 35 2.Recharge efficiency will degrade when environmental temperatures drop below 50 3. Please remove the battery from the player and store it properly if the player is not to be used for long time. During this period , please recharge the battery at least once every two months to maintain the battery in optimum codition.
-
Page 36: Troubleshooting
Q. Troubleshooting PROBLEM No sound or distorted sound Can’t advance through a movie The icon ( appears on screen Picture is distorted No forward or reverse scan SOLUTION • Make sure the DVD player is connected properly. Make sure all cables are securely inserted into the appropriate jacks. -
Page 37: Troubleshooting (Cont)
Troubleshooting (Cont) PROBLEM IR sensor inoperative Disc won’t play Play starts, but then stops immediately SOLUTION • Verify that the batteries in the remote are fresh. • Verify that the remote sensor eye is not obstructed. • Check the type of disc you put into disc tray. -
Page 38: Installation And Using
R. INSTALLATION AND USE Game Console Left and Right Direction 2. Installation 1) Turn the DVD player on then plug the jack from the game console into DVD’s E Port. The controller POWER LED will light. 2) Slide the AV IN/OUT SWITCH on the DVD player to the IN position, and the game picture will be displayed on the screen. -
Page 39: Game Instructions
S. GAME INSTRUCTIONS Features 1. 30 Built-in Games 2. Batteries Not Required Runner Car You must race down a long city street before running out of fuel Also you must watch out for other vehicles and road hazards. Pick up moneybags to get bonus points and P blocks to add more fuel. - Page 40 Aero Engine There is a fierce battle taking place in outer space. You are commanding a battleship flying in between planets fighting against the alien force. Pick up one blue power sphere for double fire, pick up two blue power spheres for triple fire. D-Pad: 8 directions A: Fire TA: Continuous fire...
- Page 41 Spin Ball Roll the ball down the track to reach the end of the maze within the given time. You must pick up the key to open the door to the next level. During the course you can also pick up objects to gain the extra points.
- Page 42 Bolt fighter A fighter plane is engaging enemy fighter planes in the sky over land and sea . If you defeat the huge enemy fighter planes, you will advance to the next level. During the course you can pick up objects for extra points and features.
- Page 43 Move Fun There are several types of objects on the screen. Move an object to combine three or more of the same objects that are connected in a straight line. D-Pad: Select the objects A: Confirm the selection GP Race Race your motorcycle along the city street.
- Page 44 Elfland Destroy the monsters which are the same color as your elf to save Elfland. If you want to eliminate the other monsters, just jump into the corresponding paint bucket and color yourself the same color as the monster, otherwise you will lose. D-Pad: 4 directions A: Jump TA: Continuous Jump...
- Page 45 Paint Master Paint the entire runway without leaving any blank spaces within the time alotted but watch out for the enemy. You can move the baffle to block the enemies attack. If you cannot finish within the alotted time, the enclosed enemy will come out and leave his footprint on the screen.
-
Page 46: Specifications
T. Specifications Supported Media formats: DVD/CD/MP3 Color system: NTSC/PAL Screen size: 8’’ DVD video format: Horizontal 720 pixel, vertical 480 pixel (NTSC) Frequency response: DVD (PCM 96 kHz/24 bits ): 20 Hz to 44 Hz Video output: 1.0 Vp-p/75 Ohm, unbalanced Video S/N: Better than 35 dB Audio output: 2 x 0.4 W Audio S/N: Better than 35 dB... - Page 47 AUDIOVOX ELECTRONICS CORP. (the Company) warrants to the original retail purchaser of this product that should this product or any part thereof, under normal use and conditions, be proven defective in material or workmanship within 90 days from the date of original purchase, such defect(s) will be repaired or replaced with reconditioned product (at the Company's option) without charge for parts and repair labor.
Need help?
Do you have a question about the D1812PKG and is the answer not in the manual?
Questions and answers