Table of Contents
Advertisement
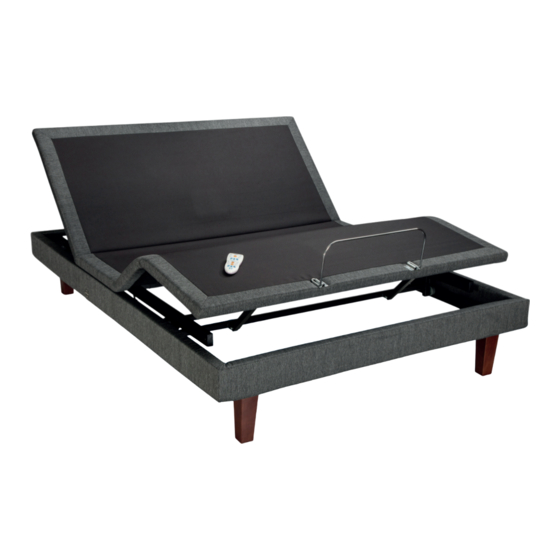
Adjustable Base - Deluxe Model
O W N E R ' S M A N U A L
The Sealy Posturematic
Adjustable base is designed to be used
®
in conjunction withthe Sealy Optimum
mattress.
®
Advertisement
Table of Contents

Related Manuals for Sealy posturematic


Summary of Contents for Sealy posturematic
- Page 1 Adjustable Base - Deluxe Model O W N E R ’ S M A N U A L The Sealy Posturematic Adjustable base is designed to be used ® in conjunction withthe Sealy Optimum mattress. ®...
- Page 3 The Sealy Posturematic Adjustable Base -Deluxe ® Model Number: SEALY-AU-SPEC-7686 Reference Codes: Queen: SA-ABF-WWM-N6S220-U-US-9V2-SR-299-20301525M Single XL: SA-ABF-WWM-N6S220-U-US-9V2-SR-299-20300915M...
-
Page 4: Safety Precautions
Safety Precautions ATTENTION! N O T E : This Adjustable Base is designed exclusively for IMPORTANT SAFETY INSTRUCTIONS. Unauthorised modifications to this product could in-home use. PLEASE READ THESE INSTRUCTIONS void the electrical portion of your warranty. THOROUGHLY BEFORE USING H O S P I T A L D I S C L A I M E R : N O T E : THIS PRODUCT. - Page 5 P R O D U C T R A T I N G S C O N S U M E R S W I T H P A C E M A K E R S S M A L L C H I L D R E N A N D P E T S W A R N I N G It is possible that the (optional) vibrating feature Lift Motor Restrictions —...
-
Page 6: Parts List
Parts List Before discarding any packing materials, check the Adjustable Base carton and verify all items in the parts list are included. ( B ) MATTRESS RETAINER BRACKET (1)* ( A ) REMOTE CONTROL (1) ( C ) BED LEG (4) ( D) 2 x AA BATTERIES, 2 x 9V BATTERIES * Indicates part is attached to base for shipping purposes. - Page 7 ( E ) OUTER HEADBOARD BRACKET (2) (J) WRENCH (1) (H) 8mm NUT (6) ( F ) HEADBOARD BRACKET BOLT (6) * To order the Head Bracket Kit please contact Sealy Customer Support, 1300 130 221. * Indicates part is attached to base for shipping purposes.
- Page 8 Installation Guide S T E P 1 S T E P 4 S T E P 8 For safety reasons, the following should be Return bed to flat or level position. performed by 2 people. Carefully lift the bed frame unit out of the shipping carton with the S T E P 5 S T E P 9 : A T T A C H I N G T H E ‘...
- Page 9 IMPORTANT! Place the open side of the outer headboard Measure the distance from the centre of one FAILURE TO FOLLOW THE INSTALLATION STEPS bracket (E) onto the exposed square tube of the mounting hole in the headboard to the centre of AS THEY APPEAR IN THIS GUIDE COULD RESULT IN inner headboard bracket (D) to create a tight fit the other.
-
Page 10: Using The Remote Control
Using the Remote Control A: Under Bed Light LED Signature Light (on back of Remote) light. (button on back of remote control) B: Raises the Head D: Raises the Foot H E A D A N D F O O T P O S I T I O N of the Bed of the Bed Use to raise or lower the head and foot... - Page 11 The massage feature is programmed with an • It is not necessary to face the receiver to operate the remote control. Remote signal minutes of is best transmitted within 3 metres of continuous use. the receiver. S A F E T Y Hold down for 2 seconds to stop massage.
- Page 12 Programming the Remote Control Follow steps 1 through 6 below to use the remote control with 1 power base. N O T E : To use the remote control with 2 power bases, repeat the steps for the second power Programming by the user is only needed on base using the same remote.
- Page 13 Lowering the Bed in a Power Outage Your Adjustable Base is equipped with an emergency lowering feature. N O T E : Follow the steps below in the event that your base is in the raised position during The 2 alkaline 9 volt batteries are only rated for a power outage.
-
Page 14: Troubleshooting
Troubleshooting In the event the Adjustable Base fails to operate, investigate the problems and possible solutions provided below. R E M O T E C O N T R O L L E D R E M O T E C O N T R O L F U N C T I O N M A S S A G E M O T O R S S E E M I L L U M I N A T E S A N D A P P E A R S K E Y S W I L L N O T I L L U M I N A T E... - Page 15 Tie Strap Installation for Split Adjustable Base Systems S T E P 1 S T E P 4 While using a split system, it is important to adhere to the following installation instructions. Complete the installation of two bases While one installer carefully lifts the left side of Proper use of the included tie straps will securely side-by-side according to the Complete the base, the other installer slips the other side of...
- Page 16 IF YOU EXPERIENCE ANY TROUBLE WITH YOUR ADJUSTABLE BASE WITHIN THE WARRANTY PERIOD, PLEASE CONSULT THE TROUBLESHOOTING GUIDE PROVIDED WITH YOUR FRAME AND ONLINE (IF APPLICABLE). IF PROBLEMS PERSIST, PLEASE CALL. CUSTOMER SERVICE TOLL FREE NUMBER: 1300 130 221 Please have your receipt ready and available.
- Page 17 Sealy at its option and in SEALY GUARANTEES THAT WE WILL, AT Y E A R S 4 T H R O U G H 1 0 : P R O R A T E D its sole discretion.
- Page 20 IF PROBLEMS PERSIST, PLEASE CALL. CUSTOMER SERVICE TOLL FREE NUMBER: 1300 130 221 Please have your receipt ready and available. THANK YOU AND ENJOY YOUR ADJUSTABLE BASE! Model Number: SEALY-AU-SPEC-7686 Reference Codes: Queen: SA-ABF-WWM-N6S220-U-US-9V2-SR-299-20301525M Single XL: SA-ABF-WWM-N6S220-U-US-9V2-SR-299-20300915M Serial Number ©2016 Sealy of Australia...
Need help?
Do you have a question about the posturematic and is the answer not in the manual?
Questions and answers
How to unpair 2x remote control devices so the single bases can operate individually.
The provided context does not include specific instructions for unpairing two Sealy Posturematic remote control devices. However, to operate each base individually, you can reprogram each remote to its respective base by following the pairing steps separately for each base:
1. Insert batteries into the remote (2 x AA).
2. Ensure each adjustable base is plugged into a working grounded outlet.
3. On one base, press and hold the “Learn” button for 3 seconds until the LED light flashes.
4. Press any button on the remote you want to pair with that base. When the receiver light stays on, pairing is complete.
5. Repeat the steps above for the second base and second remote.
This process effectively assigns a separate remote to each base, achieving individual operation.
This answer is automatically generated