
Related Manuals for Seagate Pro 2-Bay


Summary of Contents for Seagate Pro 2-Bay
- Page 1 Seagate NAS Pro 2-Bay | 4-Bay | 6-Bay モデル: SRPS20 | SRPS40 | SRPS60 このドキュメントのオンライン最新版にアクセスするには このドキュメントのオンライン最新版にアクセスするには ここをクリックしてください。最新のコンテンツ、展開可能な図解、分かりやすいナビゲーション、検索機 能もあります。...
-
Page 2: Table Of Contents
........................NAS Pro 2-Bay . - Page 3 ........................NAS Pro 2-Bay LEDs .
- Page 4 9 Software ................... 10 Hard Drive Maintenance .
-
Page 5: Regulatory Compliance
20cm between the radiator & your body. This transmitter must not be co-located or operating in conjunction with any other antenna or transmitter. Seagate NAS Pro 2-Bay | 4-Bay | 6-Bay 4/28/15... -
Page 6: Industry Canada
EMC Directive 2004/108/EC: EN 60950-1:2006/AC:2011: Information technology equipment - Safety - Part 1: General requirements EN 55022: 2010/AC:2011: Information technology equipment - Radio disturbance characteristics Limits and methods of measurement Seagate NAS Pro 2-Bay | 4-Bay | 6-Bay 4/28/15... - Page 7 Hereby, Seagate, declares that this Desktop NAS is in compliance with the essential requirements and other relevant provisions of Directive 2004/5/EC. Español Por medio de la presente Seagate declara que el Desktop NAS cumple con los requisitos [Spanish] esenciales y cualesquiera otras disposiciones aplicables o exigibles de la Directiva 2004/5/CE.
-
Page 8: Power Source
Seagate declara que este Desktop NAS está conforme com os requisitos essenciais e [Portuguese] outras disposições da Directiva 2004/104/CE. Slovensko Seagate izjavlja, da je ta Desktop NAS v skladu z bistvenimi zahtevami in ostalimi [Slovenian] relevantnimi določili direktive 2004/104/ES. Slovensky Seagate týmto vyhlasuje, že Desktop NAS spĺňa základné... -
Page 9: Safety Guidelines
Safe handling The Seagate NAS Pro 2-Bay | 4-Bay | 6-Bay must run with all of its parts and units in place. In order to comply with applicable safety, emission, and thermal requirements, the cover should not be removed and all drives and/or empty drive trays must be installed according to the instructions (see Setup). -
Page 10: Environment
NAS from tipping or being pushed over during installation or in normal use. Do not add any load onto the Seagate NAS Pro when it is placed onto the surface. Doing so can prevent proper airflow and affect operation. -
Page 11: Equipm Ent Handling Precautions
Data security Any loss, corruption, or destruction of data while using a Seagate hard drive or a Seagate hard drive system is the sole responsibility of the user, and under no circumstances will Seagate be held liable for the recovery or restoration of this data. -
Page 12: Introduction
What is in this manual Thank you for purchasing a Seagate NAS Pro 2-Bay | 4-Bay | 6-Bay. Featuring an intuitive interface, multiple levels of security, and remote access, your Seagate NAS Pro gives you the advanced file sharing tools to manage your company’s data. -
Page 13: Minimum System Requirements
Important info: Save your packaging. In the event that the product should need to be repaired or serviced, it must be returned in its original packaging. Minimum system requirements Important info: Your Seagate NAS Pro must be connected to a DHCP server to allow proper automatic remote server setup. Client types... -
Page 14: Client Types
The latest versions of: Internet Explorer Firefox Safari Chrome Important info: External forces as network activity, hardware, distance, and setup can affect your Seagate product’s performance. For optimal performance, use Gigabit Ethernet equipment. Seagate NAS Pro 2-Bay | 4-Bay | 6-Bay 4/28/15... -
Page 15: System Overview
trays Specifica ons Storage management The Seagate NAS Pro runs on Seagate NAS OS. Use the NAS OS administration tool to create volumes, shares, users, groups, and much more. See Software. Enclosure dimensions NAS Pro 2-Bay Seagate NAS Pro 2-Bay | 4-Bay | 6-Bay... - Page 16 Seagate NAS Pro 2-Bay | 4-Bay | 6-Bay 4/28/15...
- Page 17 NAS Pro 4-Bay Seagate NAS Pro 2-Bay | 4-Bay | 6-Bay 4/28/15...
- Page 18 Seagate NAS Pro 2-Bay | 4-Bay | 6-Bay 4/28/15...
- Page 19 NAS Pro 6-Bay Seagate NAS Pro 2-Bay | 4-Bay | 6-Bay 4/28/15...
- Page 20 Seagate NAS Pro 2-Bay | 4-Bay | 6-Bay 4/28/15...
-
Page 21: Enclosure Weight
NAS Pro 2-Bay Disks Disk capacity Weight (Kg / lbs) 1.75 / 3.86 2.81 / 6.19 2.82 / 6.22 2.83 / 6.24 NAS Pro 4-Bay Disks Disk capacity Weight (Kg / lbs) Seagate NAS Pro 2-Bay | 4-Bay | 6-Bay 4/28/15... -
Page 22: Nas Pro 6-Bay
5.16 / 11.38 6.18 / 13.62 6.21 / 13.69 6.24 / 13.76 Temperature ranges Ambient environment Temperature range Standard (operating) +0ºC to +40ºC Storage (non-operating) -20ºC to +60ºC Humidity Environment Humidity range Seagate NAS Pro 2-Bay | 4-Bay | 6-Bay 4/28/15... -
Page 23: Electrical
0% to 95% non-condensing Electrical The included power supply is meant for use with your specific Seagate NAS Pro. It is not compatible with power supplies provided with other hard drive enclosures produced by Seagate, an affiliate of Seagate, or a third party. -
Page 24: Nas Pro 4-Bay
4. SuperSpeed USB 3.0 Port: Connect a compatible USB storage device to the port. 5. Hard drive bays: Bays for the hard drives. For details on LED behavior, see System LEDs. NAS Pro 4-Bay Seagate NAS Pro 2-Bay | 4-Bay | 6-Bay 4/28/15... -
Page 25: Nas Pro 6-Bay
6. SuperSpeed USB 3.0 Port: Connect a compatible USB storage device to the port. 7. Hard drive bays: Bays for the hard drives. For details on LED behavior, see System LEDs. NAS Pro 6-Bay Seagate NAS Pro 2-Bay | 4-Bay | 6-Bay 4/28/15... -
Page 26: Rear Panel View
6. SuperSpeed USB 3.0 Port: Connect a compatible USB storage device to the port. 7. Hard drive bays: Bays for the hard drives. For details on LED behavior, see System LEDs. Rear panel view NAS Pro 2-Bay Seagate NAS Pro 2-Bay | 4-Bay | 6-Bay 4/28/15... -
Page 27: Nas Pro 2-Bay
6. Ventilation: Keeps your NAS Pro's power supply unit cool during operation. Be sure not to block the fan exhaust when using the product. 7. Kensington lock: Secure the NAS Pro to a desk using a compatible cable. NAS Pro 4-Bay Seagate NAS Pro 2-Bay | 4-Bay | 6-Bay 4/28/15... -
Page 28: Nas Pro 6-Bay
6. Ventilation: Keeps your NAS Pro's power supply unit cool during operation. Be sure not to block the fan exhaust when using the product. 7. Kensington lock: Secure the NAS Pro to a desk using a compatible cable. NAS Pro 6-Bay Seagate NAS Pro 2-Bay | 4-Bay | 6-Bay 4/28/15... -
Page 29: Usb Ports
NAS. Capacity limitations do not apply. Your Seagate NAS Pro also has a one-touch backup button on its front. Run the NAS OS Backup Manager to configure the one-touch button for automated backups to a compatible DAS. - Page 30 Seagate NAS Pro 2-Bay | 4-Bay | 6-Bay 4/28/15...
-
Page 31: System Leds
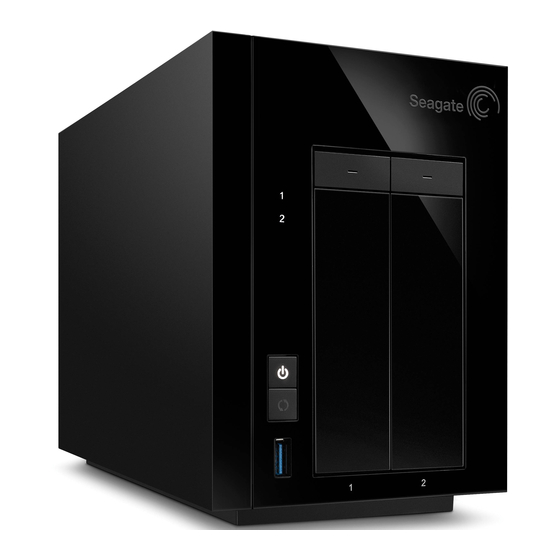
System LEDs The Seagate NAS Pro 2-Bay | 4-Bay | 6-Bay features two sets of LEDs that provide information on the system status. Review the illustrations below for the LED locations on the chassis. Status and drive LEDs NAS Pro 2-Bay LEDs 1. -
Page 32: Nas Pro 6-Bay Leds
1. Hard drives 2. Status (power button) NAS Pro 6-Bay LEDs Seagate NAS Pro 2-Bay | 4-Bay | 6-Bay 4/28/15... -
Page 33: Led Behavior
RAID synchronization; software update Blinking red Warning or notice Solid red Error LED indica ons The status and hard drive LEDs work together to provide up-to-date details on your NAS's health. Seagate NAS Pro 2-Bay | 4-Bay | 6-Bay 4/28/15... -
Page 34: General Use
Solid or blinking Temperature is high. Check the environment temperature and the white ventilation. Solid red Solid or blinking Temperature is critical. The product will shut off due to the high white temperature. Seagate NAS Pro 2-Bay | 4-Bay | 6-Bay 4/28/15... - Page 35 Review the LED behavior below if your Seagate NAS Pro is connected to a UPS. Status LED Hard drive LED State Blinking red and off Solid or blinking white UPS battery error. Solid red Solid or blinking white UPS critical error or it is not available.
-
Page 36: Setup
Setup The Seagate NAS Pro 2-Bay | 4-Bay | 6-Bay is available with hard drives or without hard drives. Models without hard drives are also known as diskless enclosures. Refer to the links below for instructions on how to set up your Seagate NAS Pro. -
Page 37: Step 2 - Power On The Nas Pro
Cable management: Careful management of cables is recommended for optimal operation. It prevents potential hazards and allows for easier maintenance. Step 2 – Power on the NAS Pro 1. Push the power button on the front of the NAS Pro. Seagate NAS Pro 2-Bay | 4-Bay | 6-Bay 4/28/15... - Page 38 2. The NAS Pro can take several minutes to boot. Wait for the LED to turn solid before moving to the next step. Seagate NAS Pro 2-Bay | 4-Bay | 6-Bay 4/28/15...
-
Page 39: Step 3 - First Login
Step 3 - First login Seagate NAS Pro 2-Bay | 4-Bay | 6-Bay 4/28/15... -
Page 40: Nas: Diskless Enclosure
Log in to the NAS Pro from a computer on the network: 1. Launch a web browser. 2. Enter http://discover.seagate.com 3. Follow the on-screen instructions to complete the installation. NAS: Diskless enclosure Step 1 - Cables Connec ons Seagate NAS Pro 2-Bay | 4-Bay | 6-Bay 4/28/15... -
Page 41: Step 2 - Power On The Nas
Step 2 – Power on the NAS When first booting a diskless Seagate NAS Pro, the device must be placed into recovery mode. To enter recovery mode, make certain to: Push the recovery button as instructed below. - Page 42 2. Hold the recovery button while applying a short push on the power button on the front of the NAS Pro. To make certain that the NAS Pro enters recovery mode, continue to push the recovery button for five seconds after releasing the front power button. Seagate NAS Pro 2-Bay | 4-Bay | 6-Bay 4/28/15...
-
Page 43: Step 3 - Insert Hard Drives
Consider the following before inserting hard drives into the enclosure: Seagate recommends installing the hard drives into the diskless enclosure from left to right. Empty trays must stay in the bays for proper airflow. Make certain that you are properly grounded before touching the hard drives. - Page 44 2. Gently bend the left side of the tray and connect the hard drive to the two pins on the right. 3. Release the left side of the tray and connect the remaining two pins to the hard drive. Seagate NAS Pro 2-Bay | 4-Bay | 6-Bay 4/28/15...
-
Page 45: Step 4 - First Login
> Step 4 - First login The NAS Pro can take a few minutes to boot. Wait for the power button LED to turn solid before following the steps below. Seagate NAS Pro 2-Bay | 4-Bay | 6-Bay 4/28/15... - Page 46 Log in to the NAS from a computer on the network: 1. Launch a web browser. 2. Enter http://discover.seagate.com. Seagate NAS Pro 2-Bay | 4-Bay | 6-Bay 4/28/15...
- Page 47 3. Follow the on-screen instructions to complete the installation. Seagate NAS Pro 2-Bay | 4-Bay | 6-Bay 4/28/15...
-
Page 48: Operation
Use the front power button to power on or power off the Seagate NAS Pro 2-Bay | 4-Bay | 6-Bay. You can also shut down the device or place it into deep sleep using NAS OS. Follow the directions below if the device is connected to a power source and turned off or in deep sleep. -
Page 49: Powering Off The Product
2. Use NAS OS to turn the NAS Pro off or apply a short push to the power button. See the note below regarding a short push and a long push. The LEDs will turn off once the system has shut down. Seagate NAS Pro 2-Bay | 4-Bay | 6-Bay 4/28/15... -
Page 50: Short Push
NAS Pro, forcing it to shut down immediately. A long push is not recommended as it may result in data loss. Therefore, it should only be used when troubleshooting a problem. Seagate NAS Pro 2-Bay | 4-Bay | 6-Bay 4/28/15... -
Page 51: Lcd Menu
LCD Menu The Seagate NAS Pro 4-Bay and 6-Bay feature an LCD menu on the front of the device. It provides important information when booting or powering off the NAS Pro. You can also check general hardware and operating system settings while the NAS Pro is powered on. Review the table below for further details on the LCD menu. - Page 52 Seagate NAS Pro 2-Bay | 4-Bay | 6-Bay 4/28/15...
- Page 53 So ware Your Seagate NAS Pro 2-Bay | 4-Bay | 6-Bay runs on Seagate NAS OS. Use the NAS OS web-based administration tool to: Allocate the NAS's drives into volumes Add and manage apps Configure RAID Set up the network and Ethernet ports...
-
Page 54: Hard Drive Maintenance
Hard Drive Maintenance The Seagate NAS Pro 2-Bay | 4-Bay | 6-Bay is a desktop hard drive enclosure. Review the details below for hard drive module locations and, where applicable, replacement. Important info: Refer to the product's Warranty before performing any hardware repairs or ... -
Page 55: 3.5-Inch Hard Drive
When handling hard drives, make sure that they are placed (and stored) on a cushioned surface. If you are replacing a 3.5-inch hard drive with a 2.5-inch hard drive, make certain to use the screws included with the NAS. Note: Seagate hard drives are optimized for use with your NAS. See Seagate NAS HDD ... - Page 56 3. Release the left side of the tray and connect the remaining two pins to the hard drive. 4. Insert the hard drive tray into the NAS Pro’s bay. Push it into the bay as far as it will go before closing the tray handle. Seagate NAS Pro 2-Bay | 4-Bay | 6-Bay 4/28/15...
-
Page 57: 2.5-Inch Hard Drive/Ssd
2.5-inch hard drive/SSD Installing a 2.5-inch hard drive/SSD requires the following: Screws included with your Seagate NAS Pro One or more 2.5-inch hard drives or SSD A standard Philips head screwdriver Seagate NAS Pro 2-Bay | 4-Bay | 6-Bay 4/28/15... - Page 58 2.5-inch hard drive is equal to or greater than the disk you are replacing. 1. Remove a hard drive tray from the Seagate NAS Pro. It can be empty or filled with a hard drive you want to replace.
-
Page 59: Image A
Image A Image B 4. Align the screw holes on the hard drive tray with the screw holes on the bottom of the 2.5-inch hard drive or SSD. Seagate NAS Pro 2-Bay | 4-Bay | 6-Bay 4/28/15... - Page 60 5. Use the included screws to fix the 2.5-inch hard drive or SSD to the hard drive tray. Use four screws. Seagate NAS Pro 2-Bay | 4-Bay | 6-Bay 4/28/15...
- Page 61 6. Insert the hard drive tray into the empty slot. Seagate NAS Pro 2-Bay | 4-Bay | 6-Bay 4/28/15...
- Page 62 7. Repeat the steps above for each 2.5-inch hard drive or SSD. 8. Run Seagate NAS OS to manage the new storage. Seagate NAS Pro 2-Bay | 4-Bay | 6-Bay 4/28/15...
-
Page 63: Getting Help
Warranty to understand your warranty rights and responsibilities. Note: Seagate is dedicated to providing high quality products that enrich the lives of our customers. To help Seagate offer the best customer support, we encourage you to create an account and register your product at https://www.onlineregister.com/seagate/. - Page 64 A: Navigate to the NAS OS Settings page and review Firmware. Q: How do I know if the firmware is the latest version? A: The NAS OS automatically checks for updates and will prompt you when new firmware is available. Seagate NAS Pro 2-Bay | 4-Bay | 6-Bay 4/28/15...
-
Page 65: Nas Os Rescue
NAS OS Rescue The NAS OS rescue tool is preconfigured on your Seagate NAS Pro. In addition to installing NAS OS, it can act as a bootable rescue tool to help you troubleshoot technical problems. The NAS OS rescue includes three recovery options: Recover data: Enable FTP Access to the data on your NAS OS device. - Page 66 3. Use a thin pointed object (e.g. paperclip, thin screwdriver, etc.) to push the recovery button. See System Overview for the location of the recovery button. 4. Hold the recovery button while pushing the power button. Continue to push the recovery button for five seconds. Seagate NAS Pro 2-Bay | 4-Bay | 6-Bay 4/28/15...
- Page 67 5. Wait for the LED to turn solid. Seagate NAS Pro 2-Bay | 4-Bay | 6-Bay 4/28/15...
- Page 68 6. From a computer on the network, launch a web browser and enter http://discover.seagate.com. Seagate NAS Pro 2-Bay | 4-Bay | 6-Bay 4/28/15...
- Page 69 7. Choose Find. 8. Select your NAS and choose Connect. 9. Enter the NAS’s MAC address and choose Connect. 10. Choose an option and follow the on-screen prompts to complete the rescue. Seagate NAS Pro 2-Bay | 4-Bay | 6-Bay 4/28/15...
Need help?
Do you have a question about the Pro 2-Bay and is the answer not in the manual?
Questions and answers