Table of Contents
Advertisement
Quick Links
Advertisement
Table of Contents

Related Manuals for Seagate ST320005SHA10G-RK - BlackArmor NAS 420 Server


Summary of Contents for Seagate ST320005SHA10G-RK - BlackArmor NAS 420 Server
- Page 1 BlackArmor® NAS 440/420 User Guide...
- Page 2 Seagate reserves the right to change, without notice, product offerings or specifications. Seagate Technology LLC 920 Disc Drive Scotts Valley CA 95066 U.S.A. Open Source and License Source Information For information about the open source and licenses used with Seagate products, please see the Seagate Web site at www.seagate.com/support...
-
Page 3: Table Of Contents
Optional Steps ..........25 Creating a Seagate Global Access Account ..... 25... - Page 4 Contents 4. Getting the Most from Your BlackArmor® Server ... . . 27 Introduction ..........27 Your Role as a BlackArmor Administrator .
- Page 5 Contents 5. Tips for BlackArmor® Users ......47 Introduction ..........47 Understanding Your BlackArmor User Account .
-
Page 6: Preface
About This Guide This User Guide provides all the information you need to successfully set up and use your Seagate BlackArmor® NAS 440/420 (BlackArmor server). This guide contains complete setup instructions, as well as reference information about the components and features of your BlackArmor server. It also provides an overview of how you can get the most out of your BlackArmor server as your needs grow and change over time. -
Page 7: System Requirements
BlackArmor Quick Start Guide (printed) • BlackArmor Manager Help • BlackArmor Discovery Help • BlackArmor Backup User Guide • BlackArmor Backup Help • Readme file For more information, please refer to the Seagate Web site at www.seagate.com. BlackArmor® NAS 440/420 User Guide (Version 3) -
Page 8: All About The Seagate Blackarmor® Nas 440/420
Introduction 2. All About the Seagate BlackArmor® NAS 440/420 • Introduction • About the BlackArmor Server • What You Can Do With the BlackArmor Server • The Difference Between a BlackArmor Administrator and User • How to Get Started Introduction This chapter introduces the components and features of your BlackArmor®... -
Page 9: Features Of The Blackarmor Server
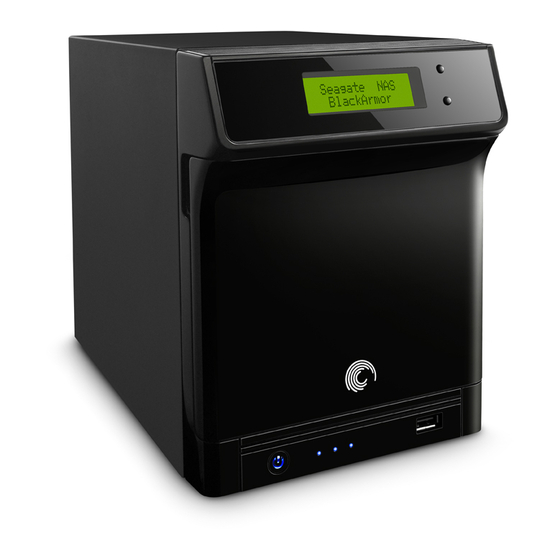
About the BlackArmor Server • BlackArmor Manager—A tool embedded in the server that helps you set up, modify, and monitor your BlackArmor server from your computer (or even remotely) using a Web browser. • BlackArmor Backup—Software that helps you back up files, applications, and even operating systems to your BlackArmor server. - Page 10 About the BlackArmor Server • A Reset button that lets you reset your BlackArmor server user name and password to their original settings. LCD Screen LCD Screen Navigation Buttons Server Door—Covers Four Disk Drives (Not Shown) USB Port 1 Power Button System Status LED LAN 2 LED LAN 1 LED...
-
Page 11: What You Can Do With The Blackarmor Server
What You Can Do With the BlackArmor Server What You Can Do With the BlackArmor Server In general, you can use your BlackArmor server to: • Create a central storage place for the files you want to share with other people on your local network or over the Internet. -
Page 12: About Blackarmor Users
Save and share files on the BlackArmor server • Back up files to the BlackArmor server • Access the BlackArmor server over the Web, using Seagate Global Access • Download large Web files directly to the BlackArmor server • Access music, video, and photos (if the BlackArmor server is set up as a media server) •... -
Page 13: Blackarmor Users Start Here
How to Get Started 10. (Optional) Turn your BlackArmor server into a media server so that BlackArmor users can access music, photos and videos (see page 22). 11. Continue with BlackArmor Users Start Here in the next section to begin using your BlackArmor server to save, protect, and share your own files. -
Page 14: Getting Started With Your Blackarmor® Server
Introduction 3. Getting Started with Your BlackArmor® Server • Introduction • Setup Steps for Administrators • Getting Started as a BlackArmor User Introduction This chapter provides step-by-step instructions for installing and setting up your BlackArmor® server and software. If you are not a BlackArmor administrator, skip to page 24. Note: For an overview of the setup steps, see “How to Get Started”... -
Page 15: Setup Steps For Administrators
Setup Steps for Administrators Setup Steps for Administrators If you are not a BlackArmor administrator, skip to page 24. Installing the BlackArmor Server and Software Before you begin: • Ensure that your computer meets the requirements listed on page 8. •... -
Page 16: Connecting To The Server
Setup Steps for Administrators 3. Insert the installation CD into your computer. The installation wizard opens automatically. Install both BlackArmor Discovery and BlackArmor Backup unless you are already using another backup software program. 4. Click Next. 5. Click Next to accept the default installation location; or, click Browse to select a custom location, then click Next. -
Page 17: Completing The Initial Setup
7. Select the network mode you want, then click Next. By default, the BlackArmor server’s network mode is set to DHCP. Unless you are part of a large corporation with an IT department, Seagate highly recommends using the DHCP network mode. -
Page 18: Creating User Accounts
Setup Steps for Administrators To create custom shares: 1. In the menu bar, select Storage, click Shares, then click the Add icon. 2. Enter a name for the new share. To make the share easy to recognize on the server, give it a name that’s descriptive and easy to remember. -
Page 19: Distributing Blackarmor User Information
A copy of this guide and the section the user should read to get started with the BlackArmor server (“BlackArmor Users Start Here” on page 14) You can create copies of the software for each BlackArmor user from the supplied CD or download what you need from www.seagate.com/support BlackArmor® NAS 440/420 User Guide (Version 3) -
Page 20: Making Blackarmor Accessible Using Seagate Global Access
Global Access in BlackArmor Manager. Seagate Global Access is a service that you can use to view, download, share, and work with the files stored on your BlackArmor server from anywhere in the world. You can also use Global Access to upload files to your BlackArmor server. -
Page 21: Connecting A Usb Printer To Your Blackarmor Server
1. Log in to the server with your user account. 2. In the Menu bar, select Global Access. 3. If not entered, enter your Seagate Global Access email address and password. 4. Click Sign In to Your Account. See the Global Access user documentation for help granting other people access to your private share. -
Page 22: Next Steps For Administrators
Setup Steps for Administrators Your BlackArmor server can also function as an iTunes server so that BlackArmor users can stream music directly to a network computer with iTunes installed, or to an iPod® connected to a network computer. 4. Set a recurring time for the server to check for new music. You can set the time from every five minutes to once a day. -
Page 23: Getting Started As A Blackarmor User
Getting Started as a BlackArmor User The remainder of this guide introduces the server’s features and provides some recommendations to help you create a storage system that meets your needs. Note: Don’t forget that you are also a BlackArmor user. To begin storing, backing up, and sharing your files, continue with Getting Started as a BlackArmor User. -
Page 24: Optional Steps
Creating a Seagate Global Access Account Seagate Global Access is a service that you can use to view, download, share, and work with the files stored on your BlackArmor server from anywhere in the world, share files stored on a private share, or share your files with anyone outside of your network. - Page 25 Web page where you can open a Global Access account. Follow the on-screen instructions to open the account and log in to Global Access. Click the Help button on the Global Access Web site for instructions on using Seagate Global Access.
-
Page 26: Getting The Most From Your Blackarmor® Server
Introduction 4. Getting the Most from Your BlackArmor® Server • Introduction • Your Role as a BlackArmor Administrator • Your BlackArmor Server’s Default Settings • Managing BlackArmor Volumes, Shares and Storage • Managing BlackArmor Users • Protecting Your BlackArmor Files with Network Backups •... -
Page 27: Your Role As A Blackarmor Administrator
Your Role as a BlackArmor Administrator Your Role as a BlackArmor Administrator BlackArmor administrators have full access to all features and settings on the BlackArmor server, and to all files stored on it. Your role as a BlackArmor administrator is to: •... -
Page 28: Your Blackarmor Server's Default Settings
IP addresses automatically to all the systems on a network. (Static mode requires that all IP addresses be assigned and changed manually.) Unless you are part of a large corporation with an IT department, Seagate highly recommends using the DHCP network mode. -
Page 29: Managing Blackarmor Volumes, Shares And Storage
BlackArmor server is not preconfigured to be accessed over the Web. Enable Seagate Global Access if you want to be able to access the files on your BlackArmor server from anywhere in the world, or share your files with anyone outside of your network, like business clients or friends (see page 21). -
Page 30: Working With Volumes
Managing BlackArmor Volumes, Shares and Storage • Volume C: Media Files You could then create one or more folders (shares) in each volume to suit your needs: • Volume A: Business Files • Share 1: Client Files • Share 2: Financial Files •... - Page 31 RAID. (Also known as a JBOD a.‘Just a Bunch of Disks’. Seagate recommends that only users familiar and comfortable with RAID technology make changes to the server’s RAID protection. Creating New Volumes As a BlackArmor administrator, you can create all the shares you want in the default volume, or you can create more volumes using BlackArmor Manager.
-
Page 32: Working With Shares
Managing BlackArmor Volumes, Shares and Storage Working with Shares Shares on the BlackArmor server can be either public (open to everyone, with some restrictions) or private (restricted to selected user accounts). As a BlackArmor administrator, you can create, modify, or delete shares at any time, as required. -
Page 33: Setting Storage Space Limits For Blackarmor Users
Managing BlackArmor Volumes, Shares and Storage Special Features of Shares These features are available on any share. You can enable or disable them, as required for the purpose of the share: • File Protocol Support—Files are shared between computers on a network using standard file protocols. -
Page 34: Setting Grace Time For Exceeded Quotas
Managing BlackArmor Volumes, Shares and Storage Setting Grace Time for Exceeded Quotas As a BlackArmor administrator, you can set a grace time limit, which allows a quota to exceed its storage limitations for a period of time. If the quota is reached, you can temporarily allow an additional 100 megabytes (MB) of storage space to be used. -
Page 35: Managing Blackarmor Users
Managing BlackArmor Users Managing BlackArmor Users This section describes the features of a user account and provides an overview of how to set up new accounts using BlackArmor Manager. For step-by-step instructions for using BlackArmor Manager, refer to the online Help. Working with User Accounts Everyone who will be using your BlackArmor server needs a unique user account. -
Page 36: Protecting Your Blackarmor Files With Network Backups
Protecting Your BlackArmor Files with Network Backups Protecting Your BlackArmor Files with Network Backups Your BlackArmor server has two LAN ports, one of which must be used to connect the server to your local network (port 1 by default). The server’s two LAN ports can be configured for link aggregation, which means you can connect both LAN ports to your network at the same time for failover protection: the other link (port) takes over if one link fails. -
Page 37: Setting Up Aggregation Failover
Setting up Aggregation Failover The authentication information displays. This information is used when restoring backed up files. 5. Enter an authentication name and password for all aliases. 6. Select the storage volume. 7. Enter an alias name, then click Add new alias. 8. -
Page 38: Monitoring Your Blackarmor Server
Monitoring Your BlackArmor Server Monitoring Your BlackArmor Server BlackArmor Manager and the BlackArmor server itself provide many ways to monitor the server’s activity and status: • Monitoring Status with the Server’s LCD Screen • Monitoring Status with the Server’s LEDs •... -
Page 39: Using Email Alerts To Monitor Server Status
You can use BlackArmor Manager to notify you by email when the status of the server changes or when a server setting is modified. You can set BlackArmor Manager to send email alerts to up to five people. You must have a Seagate Global Access account to receive email messages. -
Page 40: Checking Disk Drive Status Using Smart
Changing the BlackArmor Server’s Advanced Settings Checking Disk Drive Status Using SMART Note: Only BlackArmor administrators can complete a SMART diagnosis. You can use BlackArmor Manager to perform SMART diagnoses on the server’s disk drives. SMART stands for Self-Monitoring Analysis and Reporting Technology, a technology built into disk drives that let them automatically monitor their own health and report on possible problems. -
Page 41: Dynamic Domain Name System (Dns) Settings
Dynamic DNS is a way of maintaining the link between an unchanging domain name (like www.seagate.com) and the constantly changing IP address of a computer that uses DHCP instead of a static IP address. A DDNS service keeps track of changing IP addresses and forwards all network traffic for your domain name to whatever the current IP address is. -
Page 42: Uninterruptible Power Supply (Ups) Settings
Changing the BlackArmor Server’s Advanced Settings You add SSL support to your BlackArmor server by entering an SSL certificate and key pair. Uninterruptible Power Supply (UPS) Settings An uninterruptible power supply is a power supply that has a battery in it that maintains power to a computer or server in the event of a power failure. -
Page 43: Maintaining Your Blackarmor Server
You should update your server’s firmware (essentially, software that’s built into the server) as new versions become available, to ensure that you have the most up-to-date features and functionality. You can find the new versions of BlackArmor firmware on the Seagate Web site at www.seagate.com. -
Page 44: Resetting Your Blackarmor Server
Seagate Web site at www.seagate.com for new firmware versions, download the firmware files, and start the update yourself. Seagate recommends using automatic updates to ensure that your server is always running the latest, strongest version of the BlackArmor firmware. Resetting Your BlackArmor Server Follow these steps to reset the BlackArmor server’s name, DHCP setting (network mode) -
Page 45: Tips For Blackarmor® Users
Introduction 5. Tips for BlackArmor® Users • Introduction • Understanding Your BlackArmor User Account • Accessing Shares and Files on the BlackArmor Server • Backing Up Your Files • Accessing Your BlackArmor Files Over the Web • Downloading Large Web Files to Your BlackArmor Server •... -
Page 46: Storage Space Limitations
Understanding Your BlackArmor User Account Private Shares Private shares are password protected and restricted to use by people designated by your BlackArmor administrator. Once the BlackArmor administrator creates a user account, you can limit access to a private share by: •... -
Page 47: Grace Time Limits For Quotas
Windows Explorer). See page 24 for help mounting/mapping shares to your computer. • Remotely, over the Web, using Seagate Global Access (if your BlackArmor administrator has enabled Global Access on the BlackArmor server). For more information about Global Access, see page 25. -
Page 48: Backing Up Your Files
Backing Up Your Files Backing Up Your Files To protect your important files from loss, corruption, or accidental deletion, you should complete and maintain regular file backups using BlackArmor Backup. You can also back up files by downloading them from your BlackArmor server to an external USB drive, or uploading them from a USB drive to the server. -
Page 49: Accessing Your Blackarmor Files Over The Web
Global Access account so you can access your BlackArmor server files over the Web. Seagate Global Access is a service that you can use to view, download, and work with the files stored on your BlackArmor server from anywhere in the world, share files stored on a private share, or share your files with anyone outside of your network. -
Page 50: Retrieving Deleted Files From The Recycle Bin
Retrieving Deleted Files from the Recycle Bin Retrieving Deleted Files from the Recycle Bin Shares on your BlackArmor server may be protected by the BlackArmor Manager Recycle Bin. When the Recycle Bin is enabled on a share, BlackArmor Manager saves files deleted from the share so that they may be retrieved if you need them back. -
Page 51: Solving Problems
Try using a different Ethernet cable. I can’t connect to the server over the Web. Check that the server has Global Access enabled. See “Making BlackArmor Accessible Using Seagate Global Access” on page 22. BlackArmor® NAS 440/420 User Guide (Version 3) -
Page 52: I Can't Open Blackarmor Manager
If you are an administrator, consider removing some of the files currently stored on the server. A firmware upgrade failed. Try to upgrade the firmware manually. For further assistance, contact Seagate Support at www.seagate.com/support I can’t get streaming music from the BlackArmor server. -
Page 53: Removing And Replacing A Disk Drive
Note: Only Seagate hard drives can be used for replacement. Failure to use Seagate replacement parts can and will forfeit the warranty period of the BlackArmor NAS 440/420. WARNING: ESD Precautions Electrostatic discharge (ESD) can damage the processor, hard drives, main board, memory modules (RAM), and other BlackArmor components. - Page 54 Removing and Replacing a Disk Drive 5. Locate the failed hard drive. Ensure that there is no activity on the drive by checking its LED—it should not be illuminated. Warning: Never remove more than one drive at a time. Failure to do so will result in data loss.
-
Page 55: Replacing A Hard Drive
Removing and Replacing a Disk Drive 8. Position (hold) the hard drive/carrier so that the drive label is facing up and the text is readable (not upside down). 9. Carefully bend the left side of the plastic carrier outward to release the failed drive from the carrier. -
Page 56: Technical Specifications
7. Technical Specifications Network Connection • 2 10/100/1000 Ethernet RJ-45 network connectors USB Ports • 4 USB 2.0 ports (1 at front, 3 at rear) Power Supply • 90W external power supply (full range AC input; 19V DC output) Disk Drives •... -
Page 57: Glossary
8. Glossary access level Also known as permission level, the amount of access any person has to the BlackArmor® server. BlackArmor Manager has two permission levels: administrator and user. administrator A BlackArmor administrator is responsible for the BlackArmor server and all its settings. An administrator can set up or delete user accounts, group accounts, and shares;... -
Page 58: Link Aggregation
group account In BlackArmor Manager, a collection of user accounts grouped together to make it faster and easier to manage access to shares. All users in a group have the same level of access to any particular share. See also user account. hot-swap To remove and replace a disk drive without first powering off the server. -
Page 59: Remote Access
NTP (Network Time Protocol) server Synchronizes the date and time of computers and servers on a network, based on Coordinated Universal Time (UTC). parity Data created in volumes with RAID 5 protection that’s used to reconstruct files if one of the disk drives in the server fails. -
Page 60: Ssl Certificate
Internet. “RSA” stands for Rivest, Shamir, and Adelman, who invented the technology. Seagate Global Access A service that you can use to view, download, share, and work with the files stored on your BlackArmor server from anywhere in the world. You can also use Global Access to upload files to your BlackArmor server. - Page 61 However, compared to an equal-sized group of independent disks, a striped volume provides faster performance. Uninterruptible Power Supply. A power supply that has a battery in it that maintains power to a computer or server in the event of a power failure. A UPS is intended to provide enough power for you to save whatever files you’re working on and properly power off the computer or server;...
-
Page 62: Kit Contents
Index Index default administrator password 17 default server settings 29 default settings resetting the server 45 administrator password 17 Discovery Tool 9 administrators 7 disk drives 10 allocating space to users 34 SMART diagnosis 41 limiting storage space 34 domains 43 setting time limits 49 door of server 11 time limits for storage 49... - Page 63 Index LCD screen 10 door 11 LCD screen navigation buttons 11 email alerts 40 LEDs 10 initial connections 17 link aggregation 10 LAN ports 10 LCD screen 10 LEDs 10 maintaining the server 44 maintenance 44 manual firmware updates 44 Power button 11 monitoring Power port 11...
- Page 64 Index system requirements 8 user accounts System Status LED 11 default settings 29 technical specifications 59 volumes time limits 49 RAID 31 troubleshooting 53 Web access updating the firmware 44 default settings 30 UPS 43 Web access protocol 43 USB ports 10 workgroups 43 BlackArmor®...
Need help?
Do you have a question about the ST320005SHA10G-RK - BlackArmor NAS 420 Server and is the answer not in the manual?
Questions and answers