Table of Contents
Advertisement
Available languages
Available languages
Advertisement
Chapters
Table of Contents

Related Manuals for Magefesa PRACTIKA PLUS


Summary of Contents for Magefesa PRACTIKA PLUS
- Page 1 Instructive & Warranty Super fast pressure cooker PRACTIKA PLUS PRACTIKA PLUS...
-
Page 2: Table Of Contents
IM09_USAv1 PAGE 1. GENERAL DESCRIPTION. 2. SAFETY INFORMATION. 3. CONGRATULATIONS. 4. ADVANTAGES OF YOUR PRACTIKA PLUS PRESSURE COOKER. 5. MAIN COMPONENTS AND FEATURES. 6. DIRECTIONS FOR PROPER USE. 7. USING THE PRESSURE COOKER FOR THE FIRST TIME. 8. FILLING THE PRESSURE COOKER. -
Page 3: General Description
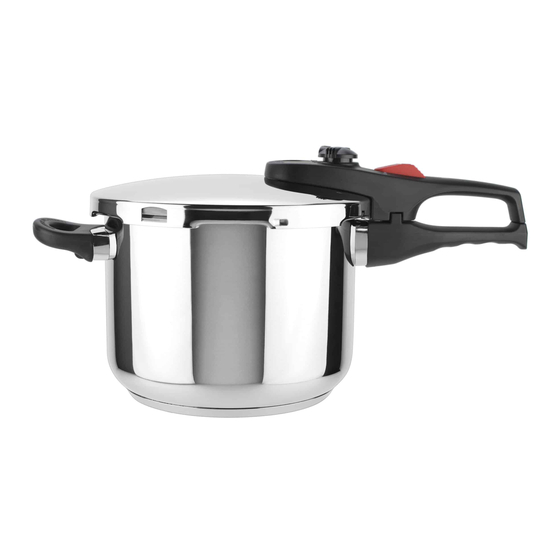
1. GENERAL DESCRIPTION PARTS OF THE PRESSURE COOKER 1. Lid. 8. Gasket. 2. Red Pressure sensor. 9. Helper handle. 3. Pressure Regulating valve. 10.Lower handle. 4. Open button. 11.Pressure cooker pot. 5. Lid handle. 12.Tri-ply thermo base. 6. Safety window. 13.Optional steamer insert &... -
Page 4: Pressure Cooker
15. After normal cooking pressure has been reached, reduce the heat so that all the liquid inside the cooker does not escape as steam. (See section 11) 16. Only use authentic replacement parts manufactured and distributed by MAGEFESA. You can buy them at www.magefesausa.com. - Page 5 With your Practika Plus you will save money at home. You will be able to cook up to 3 times faster than with traditional cookware so your electricity or gas bill will be reduced considerably.
-
Page 6: Main Components And Features
5. MAIN COMPONENTS AND FEATURES INCORPORATED SAFETY DEVICES This model of pressure cooker has been designed with 5 security systems. Prior to use it, please take time to get familiar with these important components and how they work. The 5 safety systems are as follows: With this system the pressure cooker will be automatically locked only if lid and Easy Lock: body are correctly aligned according with closing instructions referred in section # 10 of this... - Page 7 As a final safety system, the pressure cooker is designed with a Lid edge Safety Window: special window on the edge of the lid. If an overpressure happens and the other security systems get clogged at a range between (26.1 to 45.4 psi) - (1.8 to 3.0 bar) the gasket will be deformed to depressurize the pressure cooker getting out the over pressure through this window.
- Page 8 TOWARDS YOUR FACE SINCE THERE MAY BE INTENSE COOKING STEAM STILL INSIDE THE UNIT. THE "PRACTIKA PLUS" PRESSURE COOKER IS MADE FROM HIGH-QUALITY HEAVY-GAUGE 18/10 STAINLESS STEEL AND ITS THERMO HEAT CONDUCTIVE BASE MAKES IT SUITABLE FOR ALL COOKING SURFACES INCLUDING...
-
Page 9: Directions For Proper Use
This product is intended for domestic cooking surfaces only, do not use pressure cooker for other than its intended use. MAGEFESA pressure cookers are particularly suitable for foods that normally require a long cooking time, like: - Soups, meats (joints, goulash, stews etc), vegetables, potatoes / some cereals and pulses, desserts. - Page 10 8. FILLING 1. Never fill the pot more than 2/3 of its capacity including the maximum quantity liquid you have added (FIG. A1). 2. When cooking food that expand during cooking such as rice or dried vegetables do not fill the unit over 1/2 of its capacity (FIG.
-
Page 11: Checking The Valve
9. CHECKING THE VALVE The valves are safety devices. Always check them to be sure they are not clogged. Red pressure sensor checking: Take the lid and turn it back. Just at the back side of the lid handle you will see a limit. -
Page 12: Cooking Under Pressure
6. To start generation pressure, turn the regulator valve from release steam position to I or II. If you keep the pressure regulator valve at release steam position the necessary inner pressure will not be generated. FIG.1 FIG.2 FIG.3 11. COOKING UNDER PRESSURE Place the cooker properly closed on a heat source according to the size of the pressure cooker base. -
Page 13: Releasing Steam Pressure And Opening
- Never open the pressure cooker towards your face since there may be intense cooking steam still inside the unit. - Always face safety vent on the side of the lid away from yourself while cooking. - When changing pressure levels/moving the pressure regulating valve, we recommend to protect your hands with a heat resistant mitten. - Page 14 There is no remaining pressure in the cooker when the “Red pressure sensor / Safety valve” (7) remains in its lowest position. After all pressure has been released, for opening the cooker, slide the pressure cooker red button forward. Grasp the bottom of the base handle with your left hand and with your right hand on the lid handle slowly rotate the lid counter clockwise.
-
Page 15: Cleaning And Care Instructions
13. CLEANING AND CARE INSTRUCTIONS To maintain your pressure cooker in its original state, this one should be washed with warm water, mild dish-washing soap and a non abrasive cleaning pad after each use. SEE THE FOLLOWING INSTRUCTIONS (FIG. 7a, 7b, 7c, 7d). Never use dishwasher to clean you pressure cooker. - Page 16 REGULATING AND SAFETY VALVES: FIG.7e Place the pressure regulating valve (3) in position , remove all pieces and clean each piece (FIG. 7e) as instructed. This valve contains 4 pieces: the upper cap, the spring, the silicone cylinder cover and the inner plastic limit.
- Page 17 If you are unsure about using your pressure cooker or the safety systems, do not use it and contact your retailer or MAGEFESA. For your reference, here we mention some practical tips and some common problems you...
- Page 18 CASE: STEAM LEAKING AROUND THE LID POSSIBLE REASONS: SUGGESTIONS: 1.- Pressure cooker lid it is not correctly 1.- Open again, and carefully proceed to closed. close the lid according with section 10. 2.- Silicone gasket is not in place, or is dirty 2.- Check the silicone gasket is clean and or worn.
-
Page 22: Recipes
18. RECIPES The cooking times listed in the following tables may vary slightly according to food type, storage and quality. BASIC BEEF STEW Flour and season meat. Heat oil in cooker over medium heat. Add the meat INGREDIENTS and cook uncovered until well browned. (The longer you brown the meat, 1-1/2 pounds stew meat the darker your sauce will turn be). - Page 23 SWISS STEAK Cut steaks into serving size pieces. Flour and season meat. Heat oil in INGREDIENTS cooker over medium heat. In small batches, add the meat and cook until 1-1/2 pounds round steak, well browned. Remove meat, set aside. In cooker mix water, wine, reserved cut 1/2 inch thick stewed tomato liquid, bouillon and spices.
- Page 24 LAMB STEW Flour and season meat. Heat 2 tablespoons oil in cooker over medium heat. INGREDIENTS Add the meat and cook uncovered until well browned . Remove cooker from 2 pounds lean lamb stew meat, cut heat. Remove meat from cooker and set aside. Put 1/4 cup of the water in into 1-1/2 in cubes cooker and stir to loosen browned particles.
- Page 25 WHOLE ROAST CHICKEN Spray interior of cooker base with non-stick cooking spray. Heat oil in cooker INGREDIENTS over medium heat. Place chicken in cooker and brown gently, turning to brown Non-stick cooking spray all sides as evenly as possible, until golden. Remove cooker from heat and remove chicken from cooker.
- Page 26 SALMON STEAKS AND WINE Place basket in cooker. Arrange onion slices in basket. Place fish steaks on INGREDIENTS top of onion. Pour wine over fish and sprinkle on salt and pepper to taste. 4 small or 2 large pink (If you have a favorite seasoning for fish, sprinkle that on instead). Arrange lemon slices over the fish.
- Page 27 FISH STEW Put all ingredients in cooker. Bring to a boil over medium heal, stirring INGREDIENTS occasionally, close cover and bring to pressure. Lower heal and cook for 5 2 pounds (combined total) minutes. Remove from heal. Reduce pressure using the Natural Release of two or three varieties of method.
-
Page 28: Spare Parts
SPARE PARTS We have select the most important spare parts for you from a multiple of spare parts. I remember that you can consult our web: www.magefesausa.com for more information SPARE SPARE PART SPARE NAME EAN 13 UPC-A NUMBER CODE PRÁCTIKA PLUS 4 09REMEASCP3 - Helper handle... - Page 29 Instructivo y Garantía Olla a presión super-rápida PRACTIKA PLUS PRACTIKA PLUS...
- Page 30 CONTENIDO IM10_GRALv1 PÁGINA 1. DESCRIPCIÓN GENERAL. 2. INFORMACIÓN DE SEGURIDAD. 3. AGRADECIMIENTOS. 4. VENTAJAS DE LA OLLA A PRESIÓN PRÁCTIKA PLUS. 5. DESPIECE DE COMPONENTES Y CARACTERÍSTICAS. 6. GUÍA PARA UN USO CORRECTO. 7. INSTRUCCIONES PARA EL PRIMER USO. 8. LLENADO DE LA OLLA A PRESIÓN. 9.
-
Page 31: Descripción General
1. DESCRIPCIÓN GENERAL PARTES DE LA OLLA A PRESIÓN 1. Tapa. 8. Junta de silicona. 2. Sensor de presión. 9. Asa lateral. 3. Válvula de regulación de presión. 10. Mango inferior. 4. Botón de apertura. 11. Cuerpo. 5. Mango superior. 12. -
Page 32: Información De Seguridad
15. Reduzca el calor cuando la presión haya alcanzado su máximo para que el líquido no salga en forma de vapor (Ver apartado 11). 16. Utilice exclusivamente recambios originales de MAGEFESA. Usted puede adquirirlos a través de nuestra web: www.magefesausa.com 17. -
Page 33: Agradecimientos
Gracias por elegir la olla a presión MAGEFESA Práctika Plus. Agradecemos su confianza en nuestra marca. La olla a presión MAGEFESA que usted acaba de adquirir, es una de las mejores que existen en el mercado. Diseñada en España por profesionales de alto nivel y cualificación, la olla MAGEFESA le proporcionará... -
Page 34: Despiece De Componentes Y Características
5. DESPIECE DE COMPONENTES Y CARACTERÍSTICAS DISPOSITIVOS DE SEGURIDAD INCORPORADOS Este modelo de olla ha sido diseñado con 5 sistemas de seguridad. Antes de utilizarla por primera vez, por favor, dedique un tiempo en familiarizarse con estos dispositivos y cómo se trabaja con ellos. - Page 35 Si ocurriera una sobrepresión y los anteriores sistemas de Ventana de seguridad (7): seguridad se obstruyeran o no funcionaran en un tramo comprendido de 26.1-45.4 psi (1.8-3.0 bar) la junta de silicona (8) se deformaría para descomprimir la presión en la olla a través de la ventana que se encuentra en el borde de la tapa.
- Page 36 OTRAS CARACTERÍSTICAS. 1. La triple base o tri-capa está especialmente diseñada para una resistencia extra y una distribución uniforme del calor. 2. El espesor de la base es mayor que el de las ollas a presión comunes, lo que aporta una absorción extra del calor.
-
Page 37: Guía Para Un Uso Correcto
Este producto está destinado únicamente para uso doméstico, no le intente dar otro uso distinto al mencionado. La olla a presión MAGEFESA es apta para alimentos que requieren un tiempo largo de cocción como: - Sopas, carnes (estofados, guisados, etc), vegetales, patatas, algunos cereales y postres. - Page 38 8. LLENADO DE LA OLLA 1. Nunca llene la olla más de 2/3 de su capacidad incluyendo el cantidad máxima líquido que tenga que añadir (FIG. A1). 2. Cuando cocine alimentos que aumenten su tamaño, como arroz, legumbres… no llene la olla por encima de 1/2 de su capacidad (FIG.
-
Page 39: Cierre De La Olla A Presión
9. COMPROBACIÓN DE LAS VÁLVULAS Las válvulas son los dispositivos de seguridad más importantes de su olla a presión, Siempre debe revisarlas para asegurarse que no están obstruídas. 1. Sensor de presión: Retire la tapa y gírela. En la parte trasera del mango verá... - Page 40 6. Para generar presión, gire la válvula de regulación de presión a la posición I o II. Si mantiene la válvula reguladora de presión en la posición no se generará presión alguna en el interior de la olla a presión. FIG.1 FIG.2 FIG.3...
-
Page 41: Liberación De Vapor Y Apertura De La Olla
- Nunca abra la olla a presión en dirección a su cara ya que todavía puede haber vapor muy caliente en el interior de la unidad. - Por su seguridad, procure que la ventana de seguridad de la tapa (6) no se encuentre dirigida hacia used mientras la olla esté... - Page 42 No habrá presión en la olla mientras el sensor de presión (2) se encuentre en su posición más baja. Después de que toda la presión haya sido liberada, para poder abrir la olla, deslice el botón de apertura (4) hacia delante. Agarre el mango del cuerpo (10) con su mano izquierda, y con la derecha sujete el mango de la tapa (5) y gírelo suavemente en sentido contrario de las agujas del reloj para poder abrir la...
-
Page 43: Limpieza E Instrucciones De Mantenimiento
13. LIMPIEZA E INSTRUCCIONES DE MANTENIMIENTO Para mantener su olla a presión en perfecto estado de uso y conservación, le recomendamos lavarla después de cada uso con agua tibia, jabón para vajillas y una esponja o estropajo no abrasivo. POR FAVOR, VEA LAS SIGUIENTES INSTRUCCIONES (FIG. 7a, 7b, 7c, 7d) Nunca use el lavavajillas para lavar su olla a presión. - Page 44 VÁLVULAS DE REGULACIÓN Y SEGURIDAD: Coloque la válvula de regulación (3) en la posición , saque todas las piezas y límpielas una a una. (FIG. 7e) Esta válvula contiene 4 piezas: tapa superior, muelle, tope de plástico y cubierta cilíndrica de silicona.
-
Page 45: Solución De Problemas
Si tiene alguna duda sobre su funcionamiento o sobre su sistema de seguridad, no la utilice y contacte con su vendedor o con MAGEFESA. Para su referencia, aquí le mencionamos algunos consejos prácticos y problemas comunes que puede experimentar al usar su olla a presión:... - Page 46 CASO: ESCAPE DE VAPOR POR LA TAPA POSIBLES RAZONES: SUGERENCIAS: 1. La tapa no está correctamente cerrada. 1. Abra de nuevo la olla y proceda a cerrar 2. La junta de silicona no está en su lugar, la tapa correctamente. está...
-
Page 50: Recetas
18. RECETAS ESTOFADO DE TERNERA Condimente y reboce la carne. Caliente el aceite en la olla a fuego medio. INGREDIENTES Añada la carne y cocínela sin tapa hasta que esté bien dorada. (Cuanto 500 gr. de carne más dorada esté la carne, más oscura se volverá la salsa) Añada el caldo caliente y la cebolla. - Page 51 BISTEC SUIZO Corte los filetes en el tamaño de las piezas. Rebócelo y sazónelo al gusto. INGREDIENTES Caliente el aceite en una olla a fuego medio. En pequeñas tandas, añada 500 gr. de redondo de carne la carne y cocínela hasta que esté bien dorada. Saque la carne a un lado. en lonchas de 1,5 cm En la olla mezcle agua, vino, el líquido del guiso de tomate, caldo y especias.
- Page 52 ESTOFADO DE CORDERO Reboce y sazone la carne. Caliente dos cucharadas soperas de aceite en INGREDIENTES la olla a fuego medio. Añada la carne y cocine sin tapa hasta que esté bien 1 kg. de cordero en trozos dorada. Retire la olla del fuego. Saque la carne a otro recipiente. Ponga 1/4 3 cucharadas de harina de un vaso de agua en la olla y remueva para quitar las partículas del asado.
- Page 53 POLLO ASADO Rocíe la base de la olla con un spray anti-adherente. Ponga el aceite en la INGREDIENTES olla a fuego medio. Añada el pollo y deje que se haga bien, cogiendo por Spray antiadherente para ambos lados color hasta que llegue a dorarse. Retire la olla del fuego y pase el pollo a otro recipiente.
- Page 54 FILETES DE SALMÓN AL VINO Introduzca el cestillo en el interior de la olla. Añada la cebolla en anillos. Sitúe los INGREDIENTES filetes de pescado encima de la cebolla. Vierta el vino sobre el pescado y eche 6 filetes de salmón de la sal y la pimienta al gusto.
- Page 55 GUISADO DE PESCADO Introduzca los ingredientes en la olla. Llévelo hasta su ebullición a un fuego INGREDIENTES medio y remuévalo de vez en cuando. Cierre la tapa para que gane presión. 1 Kg. de dos o tres variedades A fuego bajo, cocínelo durante 5 minutos. Retírelo del fuego. Deje que pierda de pescado sin escamas y sin la presión de manera natural.
-
Page 56: Repuestos
SPARE PARTS Hemos seleccionado los repuestos más importantes de su olla a presión. Recuerde que puede consultar nuestra web: www.magefesausa.com para más información NÚMERO CÓDIGO NOMBRE EAN 13 UPC-A REPUESTO REPUESTO PRÁCTIKA PLUS 4 09REMEASCP3 - Asa lateral PRÁCTIKA PLUS 6 - 8 - TRIO 09REMEASCPP PRÁCTIKA PLUS 4 - 6 - 8 - TRIO - Válvula...
Need help?
Do you have a question about the PRACTIKA PLUS and is the answer not in the manual?
Questions and answers