
Subscribe to Our Youtube Channel
Related Manuals for La Germania LUEP51-90-S


Summary of Contents for La Germania LUEP51-90-S
- Page 1 LUEP51-90-S MODEL LUEP51-90-S UPRIGHT COOKER Installation instructions This cooker is approved for use with Natural and Propane gases User instructions Leave instructions with the owner...
-
Page 2: Table Of Contents
Contents Contents Important information ❍ Introducing your new cooker ❍ Notes on disposal ❍ Before connecting your new cooker ❍ Safety considerations Installation instructions ❍ Statutory regulations ❍ Gas supply ❍ Electrical supply ❍ Instructions ❍ Vertical clearances ❍ Overhead clearances ❍... - Page 3 ❍ Fan grilling ❍ Shelf positions Description of oven functions 18-20 ❍ Oven light ❍ Conventional cooking ❍ Upper element ❍ Lower element ❍ Radiant grilling ❍ Fan grilling ❍ Fan forced cooking ❍ Defrosting Oven cooking tips Electronic control functions 21-22 ❍...
-
Page 4: Important Information
Important information Introducing your new cooker We thank you and congratulate you on your choice. This carefully designed product, manufactured with the highest quality materials, has been carefully tested to satisfy all your cooking demands. We therefore request that you read and follow these easy instructions which will allow you to obtain excellent results right from the start. -
Page 5: Safety Considerations
specialist. In the event of a damage that occurs as a result of improper connection, the warranty will be void. ❍ Our appliances meet the applicable safety regulations for electrical appliances, Repairs may be performed only by customer service engineers trained by the manufacturer. Inexpert repairs may entail serious injury to you, the user. -
Page 6: Installation Instructions
Installation instructions Statutory regulations This appliance shall be installed in accordance with the manufacturer’s installation instructions, local gas fitting regulations, municipal building codes, electrical wiring regulations, and AS 5601 the Australian Standard for gas installations. Refer also AS 5601 for gas pipe sizing tables. Gas supply Check that the data plate shows the appliance is suitable for the available gas supply. -
Page 7: Side Clearances To Vertical Surface
than 600mm, or an overhead exhaust fan, 750 mm. Side clearances to vertical surface:- If the distance measured from the periphery of the nearest burner to any vertical combustible surface, is less than 200 mm, the surface shall be protected in accordance with clause 5.12.1.1 and 5.12.1.2 of AS 5601. -
Page 8: Electric & Gas Connection
Electric & gas connection Electrical connection The electric lead and plug are for connection onto a 15 Amp socket. A 15 Amp socket is to be within 1 m of the appliance. The lead is situated at the left hand side of the cooker. Gas regulator The gas connection is via 1/2”... -
Page 9: Energy Consumption
Energy consumption Burners Gas type Pressure (kPa) Injector (mm) Mj/hr Watts Small Natural 0.90 3.85 2.75 0.54 3.25 Medium Natural 1.18 7.12 (x2) 2.75 0.70 5.75 Large Natural 1.55 12.5 2.75 0.92 11.25 Natural 1.65 13.1 2.75 0.95 13.1 Oven/Grill 3000 W Test the operation of the cooker before leaving Note: These burners have no aeration adjustment. -
Page 10: Support Legs
Support legs The cooker is suppllied with four support legs. The legs are fitted to the cooker with two alternative methods of fixing, either screw- in type legs or push-on type legs. Method of fixing screw-in type legs Before fitting the legs remove the four transit supports. (One for each corner). -
Page 11: Anti-Tilt Restraint
Anti-tilt restraint Once legs are adjusted to the correct height, fit the anti-tilt restraint bracket. 1. Locate cooker in desired position and mark rear leg positions. 2. Remove cooker and locate the mid point of the cooker at the rear and on the floor, measure out from the wall 95mm to mark the position of the fixing hole. -
Page 12: Upstand Installation
Upstand installation This cooker is fitted with an upstand. The upstand is located at the rear top of the cooker. The upstand is fixed along the rear of the cooker hob. Fixing points for locating the upstand are at either end of the hob. 1. -
Page 13: Cooktop Burner Operation
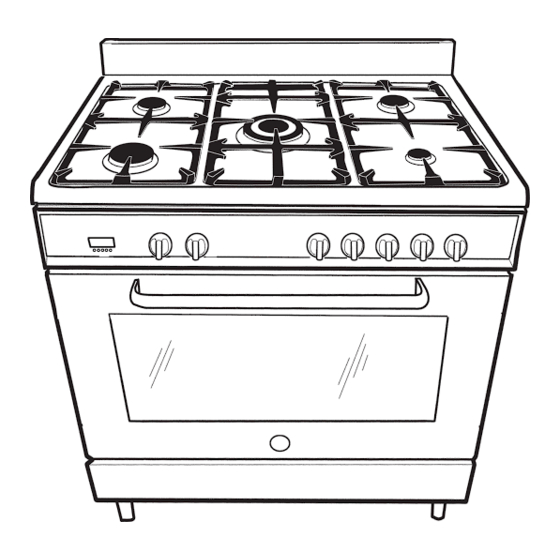
Cooktop burner operation For cookers fitted with Control panel lay-out a glass lid the glass lid must always be in the open position when the cooktop burners are operating. 10. Left front burner control 1. Electronic programmer knob 2. Timer button 11. -
Page 14: Cooktop Burner Adjustment
1. To operate the individual cooktop burners depress the appropriate control knob and turn anti-clockwise to the spark symbol. Push to activate the electronic ignition and keep knob depressed for 5 seconds to activate the flame failure device. Once the flame is lit, turn knob to desired setting. 2. -
Page 15: Oven/Grill Operation
Oven/grill operation For cookers fitted with a Accessories glass lid the glass lid ❍ 1 universal pan with wire grid must always be in the ❍ 2 wire shelves open position when the oven is operating. ❍ 1 aluminium baking tray First time use Thoroughly clean the appliance and accessories with warm soapy water before using them for the first time. -
Page 16: Oven Functions
The oven and grill functions are both contained within the one oven compartment and can be used in conventional mode or with the fan. In order to operate the grill or the oven, both the thermostat control knob and the function selector control knob must be activated. -
Page 17: Grilling (Door Closed)
For cookers fitted with required temperature is reached. The indicator light will cycle a glass lid the glass lid ON and OFF as the element cycles ON and OFF to maintain must always be in the the oven temperature. open position when the Grilling (door closed) grill is operating. - Page 18 Description of oven functions When the function selector control knob is set to one of these nine positions the orange thermostat indicator light activates, indicating that the oven is being energised and the light turns on and off as the elements cycle on and off to maintain the required temperature.
- Page 19 Radiant grilling These modes use radiant heat provided by the centre part of the grill element and centre plus outer element respectively. Shelf positions 2 or 3 should be used. Ideal for quick browning of small quantities of food such as cheese on toast. ❍...
-
Page 20: Oven Cooking Tips
Defrosting Thermostat setting 0˚C. In this mode the fan circulates cold air inside the oven. In this way frozen food can be evenly defrosted. For best results when defrosting place the food on the wire rack in the universal pan. Oven cooking tips ❍... - Page 21 Electronic control functions The electronic timer allows for manual or electronic operation. the timer graphic symbols are shown in the figure below. To program the oven press the desired function button and adjust the required time using the buttons. Setting time of day When first switching on power to appliance, or after a power failure, the timer display flashes 0.00.
- Page 22 At the completion of the cooking time an audible signal will sound. To turn off the signal press the symbol. Semi automatic operation with end cooking In this mode the oven will turn itself off when the preset end of cooking time is reached. 1.
-
Page 23: Cooking Chart
Cooking chart Function Recommended shelf Shelves Shelves Shelf 3 Shelf Shelf position shelf 2, 3 2, 3 2 or 3 4 or 5 shelf or 4 or 4 Type of cooking ✔ ✔ Roast lamb, beef, poultry ✔ ✔ Steak ✔... - Page 24 Trouble shooting chart Problem Possible cause Action Burners don’t light Power to appliance turned off Turn on power supply Hotplate burner difficult Burner cap damp or incorrectly Dry and reposition cap to light positioned Spark ignitor clogged with grease Clean ignitor Burner ports clogged Clean ports Spark igniter does not function...
- Page 25 Cakes not cooked Temperature too high Reduce temperature through to centre Oven overloaded Cook fewer items Food pale on top Temperature too low Raise temperature - refer to chart Insufficient cooking time Increase cooking time Sides too high on cake tin Use smaller tin Incorrect position Refer to cooking chart...
- Page 26 Cleaning Cleaning hob ❍ Once the appliance is cold, clean it with a sponge and soapy water. Remove any spills immediately. This will avoid unnecessary effort later. ❍ Allow burners and trivets to cool down before cleaning them. ❍ The burners and trivets must be cleaned regularly to keep them in good condition.
- Page 27 Cleaning oven shelf supports To remove the shelf supports remove the knurled knobs either side, lift the wire rack and swing forwards. Cleaning oven glass door The oven door may be removed for cleaning. To remove the oven door follow the steps below: 1.
- Page 28 Service information Always disconnect the gas supply and power before servicing Service and the cooker. maintenance must be After service always check connections for gas soundness at carried out by an connections with soapy water. NEVER use a naked flame to check authorised person for leaks.
- Page 29 To replace thermostat Follow access procedure as per the heading ‘To replace gas control valves’. Please note that the thermostat has a fixed control - no adjustment is necessary. 1. Remove the rear panel of the cooker by unscrewing 7 phillips head retaining screws.
- Page 30 To replace electronic control box Follow procedure described as per the heading ‘Access to under hob area’. 1. The electronic control box is clamped to the RHS burner support bracket. 2. Unplug the electronic connectors. Mark the connectors to replace them in the correct order. 3.
- Page 31 To remove the oven door 1. Swing the spring levers upwards, lift door slightly and remove by pulling forward. Store in a safe place. 2. To replace engage the hinges into the hinge holes, place door in horizontal position and swing hinge lugs downwards. 3.
- Page 32 8. Ensure that both hinge levers are placed in the upwards position and relocate the hinges into the oven frame. Swing the levers back to the horizontal position and close the door. To replace oven fan Pull cooker forwards to gain access to the rear of the cooker. 1.
- Page 33 1. Remove cooker rear cover by unscrewing 7 phillips head screws. 2. Disconnect electric wiring to the element at the rear of the oven. 3. Remove the screw securing the element in position at the front of the oven roof. 4.
- Page 34 Service information Wiring diagrams Oven/grill Upper element RG Grill element Lower element MV Fan motor MVT Cooling fan motor interrupting wire L Oven lamp (L=Line, brown LAT Thermostat orange wire); the other one lamp is the contact ‘1’ Electronic for correct programmer programmer Thermal cut out...
- Page 35 Part no: W1885 Revision D - 2006...
Need help?
Do you have a question about the LUEP51-90-S and is the answer not in the manual?
Questions and answers