Humanware Prodigi Connect 12 User Manual
Touch-controlled
personal vision assistant system f
Hide thumbs
Also See for Prodigi Connect 12:
- User manual (68 pages) ,
- Getting started (7 pages) ,
- User manual (80 pages)
Table of Contents
Advertisement
Advertisement
Table of Contents

Subscribe to Our Youtube Channel
Related Manuals for Humanware Prodigi Connect 12


Summary of Contents for Humanware Prodigi Connect 12
-
Page 3: Table Of Contents
CONTENTS Contents ............1 Chapter 1: Introduction ......... 3 Chapter 2: Getting to know your Prodigi ..5 Box Contents ..........5 Prodigi Connect at a glance ...... 6 Setting up ..........13 Chapter 3: Using Prodigi ......18 The Button Banner ........18 Magnifying .......... - Page 4 Removing Distance Camera from Stick 49 Viewing text files in Prodigi ..... 50 Chapter 4: Choosing your contrast ..... 52 Chapter 5: Changing your Settings .... 55 Visual ............58 Audio ............59 Gestures and Controls ......60 General ........... 61 About ............
-
Page 5: Chapter 1: Introduction
Prodigi. If you have any questions about your system, please contact HumanWare Customer Service by consulting the contact information in the back of this user guide. Copyright 2016 by Technologies HumanWare Inc., all rights reserved. - Page 6 Technologies HumanWare Inc. Page 4...
-
Page 7: Chapter 2: Getting To Know Your Prodigi
CHAPTER 2: GETTING TO KNOW YOUR PRODIGI BOX CONTENTS Protective Carrying Case Prodigi Tablet 12.2 Power Supply USB Recharge Cable Folding Stand 5 replaceable stylus tips Distance Viewing (Optional) o Distance Camera o Smartphone attachment o Camera Stick o Wrist strap o Micro USB cable... -
Page 8: Prodigi Connect At A Glance
PRODIGI CONNECT AT A GLANCE Front Face 1. Back Button (not a physical button) 2. Home Button 3. History Button (not a physical button) 4. MicroSD slot 5. USB slot 6. Speaker 7. Stylus 8. Headphone slot Note: Tablet is inserted in stand upside down intentionally, for better camera usage. - Page 9 Bottom Edge 1. Volume Down-Up 2. Power Button Back Side 1. Camera 2. LED Page 7...
- Page 10 Button Banner 1. Back button 2. Settings button 3. Light Button 4. Capture/Read Button 5. Zoom Out Button 6. Zoom In Button Page 8...
- Page 11 1. Open Banner Button Folding stand Page 9...
- Page 12 Distance camera 1. Distance camera 2. Distance camera stick Page 10...
- Page 13 Front view Back view (with battery cover removed) Page 11...
- Page 14 Top view 1. Power button 2. Microphone 3. Power/Charge/Movie light Left view 1. Zoom lever 2. Shutter button Page 12...
-
Page 15: Setting Up
IMPORTANT: It is essential to keep the Quick Start guide provided with your Sony distance camera as it contains your camera’s pairing information. SETTING UP 1. On a flat and stable surface, hold your Prodigi stand in an upright position making sure the panel with the word “PULL”... - Page 16 2. Next, unfold the top panel until it is roughly parallel with the lower panel. Page 14...
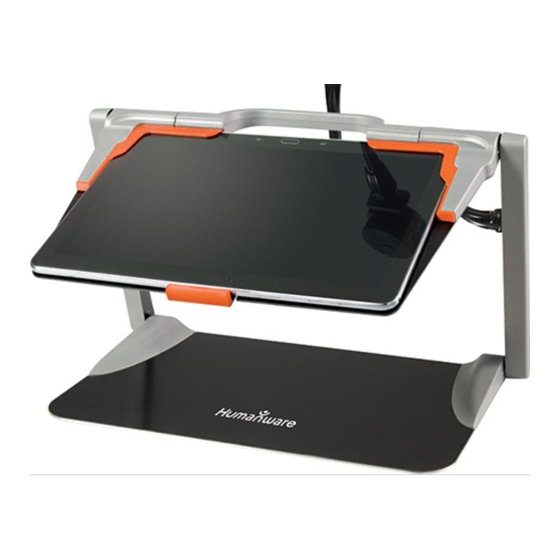
- Page 17 3. Hold your tablet with the screen side facing you, making sure the Samsung logo is upside down. Carefully insert your tablet into the slot and slide it forward until you reach the back end of the slot. Lock the front bracket to fasten your tablet onto the folding stand.
- Page 18 4. Connect the USB Recharge Cable to the Power Supply. 5. Carefully connect the cable to the recharge port and plug it to an outlet. The recharge port is located on the left side of the tablet. IMPORTANT: Use caution while inserting the cable into the Recharge Port.
- Page 19 IMPORTANT: Do not close your folding stand with your tablet in it when the recharge cable is plugged in. You could damage the recharge cable or tablet. 6. Allow the tablet to charge until the battery is full (initial charge is 8 hours). 7.
-
Page 20: Chapter 3: Using Prodigi
CHAPTER 3: USING PRODIGI THE BUTTON BANNER Most of Prodigi Connect’s actions are performed through the Virtual Button banner located at the bottom of your screen. If you wish to hide this banner to better see your screen, do a downward swipe on your screen (move your hand downwards while touching the screen with a finger). -
Page 21: Magnifying
Tap this button or swipe upward to display the Button Banner. MAGNIFYING Power on the tablet. Properly align the tablet above the document or object you wish to view. It is recommended to use the Folding stand to stabilize your tablet above the document you wish to view. - Page 22 Tap the Light button to turn on the tablet’s light if the display is too dark. Tap the Zoom In-Out buttons to adjust the zoom level. To increase character size, tap the Zoom In button (+). To decrease character size, tap the Zoom Out button (-).
- Page 23 Decrease the distance between 2 fingers to zoom out, and increase the distance to zoom in: To toggle between color, positive, and negative contrasts, simply swipe vertically on the right side of the tablet’s screen (see Chapter 4: Choosing your contrast for more details).
- Page 24 camera’s autofocus. This is useful when the right focus is displayed for the document and you want to lock its position, or when you are performing a manual task like writing on a piece of paper, and want to prevent your tablet from refocusing on your hand or pencil, for example.
-
Page 25: Capturing
CAPTURING Using the folding stand, properly align the tablet above the document or object you wish to capture. Tap the Capture button to capture your document or tap and hold your finger on the screen for 2 seconds. ... -
Page 26: Full Page Capture
Tap the Back button if you want to return to Magnifier Live mode. FULL PAGE CAPTURE To capture a full page: Make sure the angle of your folding stand is approximately 90° (you may need to adjust this later). ... -
Page 27: Multi-Capture
Tip: to capture more text, you can raise the tablet further from the document, allowing more view angle. MULTI-CAPTURE To capture a multipage document, toggle to Multi-Capture mode by swiping vertically on the left side of the tablet’s screen: Note: You can also toggle to Multi-Capture mode in the Settings. - Page 28 You can now capture a multipage document. Align the tablet above the first page of the document you wish to capture and press the Capture button. Proceed in the same way for each page you wish to capture. Your multipage document will be saved in the Gallery for future use.
-
Page 29: Reading
READING Once you make a capture, the Capture button will change from a camera image to a play symbol. This is now the Read button. Tap Read or long press anywhere on the screen for 2 seconds to scroll and read aloud the text according to your reading preferences. - Page 30 While paused, tap Back to exit reading view, and Back again to return to the camera view. To resume, tap Read again or long press. When in magnifier mode, reading mode allows you to zoom in and out of your captured document.
- Page 31 To instantly zoom to an area of interest, perform a single tap on the area you wish to view and the image will zoom at that location at your preferred zoom level. If you are in a zoomed level over 1X, you can move around your zoomed document by doing a Pan Gesture (slowly move your finger on the screen without lifting it).
- Page 32 Note: Text can be presented in 3 different formats (Reading Modes): it can be changed in the settings to a single line in the Line mode, a column in the Column mode (default), or you can read text without losing its configuration in the Page mode.
- Page 33 To set a different Reading Mode, tap the Settings button to access the Settings menu and select Reading Mode. Swipe up to change your Reading Mode. Tap Back to exit the Settings menu. You can increase the speech rate by swiping to the left (sliding and releasing your finger...
- Page 34 Note: You can also increase or decrease the speech rate from the Settings. Tap the Settings button, select Speech Rate, and swipe up to change the value. Tap Back to exit Settings. To deactivate Speech, simply double tap on the screen. Alternatively, tap the Settings button, select Speech, swipe up to select Documents only or off.
-
Page 35: Using The Carousel Menu
Tap Back to stop reading and return to camera view. USING THE CAROUSEL MENU Prodigi has 4 main applications – Distance camera (only available if distance camera option is purchased), Magnifier, Gallery, and Settings. They are presented one by one in the carousel menu: To access the carousel menu from the Magnifier:... - Page 36 The currently selected application is positioned in the center of the screen: Swipe left or right in the carousel menu to select an application. To launch a selected application, simply tap. To cancel and return to the carousel menu, tap Back.
-
Page 37: Viewing Saved Documents
VIEWING SAVED DOCUMENTS The Gallery contains all the documents you have saved. Select and tap on the Gallery icon in the carousel menu: Swipe left or right in the Gallery to flip through your saved documents. The currently selected document is in the center of the screen. -
Page 38: The Action Menu
You can toggle between color, positive, negative, and Diamond Edge™ (if the image contains text) contrasts, and adjust the brightness in the same way as with Magnifier (see section Magnifying for more information). Once you are in a zoomed level over 1X, you can move around your zoomed document by doing a Pan Gesture. - Page 39 Rename a document or category Delete a document, category, or the content of a category Move a document to a category Export the text from document to a text file in Android file system Move an image captured with the distance camera to the Gallery for Diamond Edge processing ...
- Page 40 To rename a document or category Long press on the document or category you wish to rename. Tap Rename or Rename category. Type in the new name of your document or category. Tap DONE (Enter key on keyboard). To create a new Category ...
- Page 41 Export the text from a document to a text file in Android file system Long press on the document whose text you wish to export. Tap Export OCR text. The OCR (optical character recognition) text will be saved as a text file in the Root of your tablet.
- Page 42 To delete, replace, insert, or append a page in a multipage document Open the multipage document you wish to modify. To delete a page, long press on the page you wish to delete and tap Yes to confirm deletion.
-
Page 43: Using The Distance Camera
USING THE DISTANCE CAMERA Prodigi™ Connect 12 features a distance camera that can be extremely useful when you need a better view of something at a distance, such as a presentation or the teacher’s slides during a lecture. Your distance camera connects wirelessly, has a battery duration of 4 hours, and can be set up to 30 feet (10 meters) from Prodigi. - Page 44 You can attach your camera to a desk Page 42...
- Page 45 You can attach your camera to the side of the folding stand’s frame Page 43...
- Page 46 You can attach your camera to the top of the folding stand’s frame Page 44...
- Page 47 DO NOT use the distance camera unless it is attached to a solid object. Page 45...
- Page 48 Enter the Carousel menu by tapping the Back button in the magnifier mode. Select the Distance Camera icon, then tap. PlayMemories Mobile, Sony’s camera capture software, will open. Note: PlayMemories offers many features and functionalities that are not specified in this guide.
-
Page 49: Viewing Distance Camera Images
You should hear a confirmation sound and briefly see the picture you just took, then return to the camera’s live view. You can zoom in or out in PlayMemories by tapping or tapping and holding the virtual “W” and “T” buttons on the right side of your screen. - Page 50 To view pictures taken with the distance camera: Select and tap on the Gallery icon in the carousel menu. Swipe right until you have selected the Distance camera picture icon (a spyglass in front of a folder), then tap once. ...
-
Page 51: Reading With The Distance Camera
READING WITH DISTANCE CAMERA To read a picture taken with the distance camera, you will need to transfer the picture from the Distance category to the root of the Gallery. In the Distance category of your Gallery (a folder with a spyglass), hold your finger on the image you wish to move. -
Page 52: Viewing Text Files In Prodigi
With your other hand, locate the square bracket located underneath the camera, and slide the top section it to the left (while looking at the back of your camera) until the camera is detached from the stick. Warning: The camera is very fragile, so make sure you are holding it properly before removing it from the stick. - Page 53 Select and tap on the Gallery icon in the carousel menu. Swipe until the Text icon is selected, then Tap to open the text section of the Gallery. Swipe until the Paste icon is selected, then Tap to paste the text you copied earlier.
-
Page 54: Chapter 4: Choosing Your Contrast
The text you pasted will now be saved in the Text section of the Gallery and will be named with the first word of your text. CHAPTER 4: CHOOSING YOUR CONTRAST Prodigi allows you to view documents, pictures and objects in 3 types of contrast: color, positive or negative. - Page 55 Prodigi also allows you to toggle between the different contrasts by swiping on the right edge of the touchscreen: Color contrast is useful if you want to view documents, objects, and photographs in their original color. Positive contrast shows text and images in 2 colors according to your selected color combination, the default combination being Black on White.
- Page 56 your combination is Black on White, negative contrast will show text and images in White on Black. This is useful if you wish to reverse the contrast of a text that contains different contrasts. Diamond Edge™ contrast combines the best of both worlds;...
-
Page 57: Chapter 5: Changing Your Settings
CHAPTER 5: CHANGING YOUR SETTINGS (Note: The values marked with a star (*) are default settings.) To quickly configure your system while viewing a document, you can tap the Settings button to access the Settings menu. The currently selected item is announced and highlighted by a rectangular frame. - Page 58 The Settings menu lists the battery charge level and the most frequently used settings: Brightness (Change the brightness of a live or captured image): 0 to 100% (50%*) Note: To change brightness, select the brightness option and tap the screen. Prodigi will take you to magnifier view where you can adjust your brightness by tapping the Zoom In-Out buttons.
- Page 59 You can further customize your system by selecting All Settings at the end of the Settings menu. You can also access these Settings by selecting and opening the Settings application in the carousel menu: The Settings contain 5 main menus: Visual, Audio, Gestures and Controls, General, and About.
-
Page 60: Visual
VISUAL The Visual menu contains 2 submenus: 1. Display contains the following settings: Screen Brightness (Change screen’s brightness level): 1 to 100% (60%*) Mode: Live*, Multi-Capture Contrast: Diamond Edge (if captured image contains text), Color*, Positive, Negative (see chapter 4) ... -
Page 61: Audio
Button Banner: Auto*, Hidden, Always 2. Text contains the following settings: Reading Mode: Page, Column*, Line Reading Speed: Very slow, Slow, Normal*, Fast, Very fast Highlight (Column and Line modes only. Highlight on spoken words): Display*, Hide ... -
Page 62: Gestures And Controls
GESTURES AND CONTROLS The Gestures and Controls menu allows you to enable and disable the following gestures. They are activated by default: Swipe on left edge / Mode: Toggle between Live and Multi-Capture modes. Swipe on right edge / Contrast: Toggle between Color, Positive, Negative, and Diamond Edge™... -
Page 63: General
GENERAL The General menu contains the following items: System Language: Language Language 2, Other (will connect to the Internet to find downloadable language packs) WI-FI Setup (Help of a sighted person is required to configure wireless network) Tablet Auto Shutoff: 3 min*, 5 min, 10 min ... -
Page 64: Chapter 6: Accessing Android
CHAPTER 6: ACCESSING ANDROID The Prodigi Connect Tablet allows you to access Android applications. Please note that HumanWare provides limited support for Android and Android applications. To access Android from anywhere in Prodigi, simply press the Home button, and you will be directed to the Android desktop icon choices. -
Page 65: Chapter 7: Recharging Your Tablet
CHAPTER 7: RECHARGING YOUR TABLET Maximizing operating efficiency: In a working situation where you need the Tablet intermittently, you can enter Standby mode when you are not using the Tablet by pressing Power. The screen will power off. Wake Tablet by pressing the Power button. - Page 66 IMPORTANT: The tablet becomes warm during recharging. Do not recharge the tablet near a heat source. IMPORTANT: Do not close your folding stand while recharging. Doing so could damage your cable or the tablet. To recharge the battery: Connect the USB Recharge Cable to the Tablet Power Supply.
-
Page 67: Chapter 8: Recharging Your Distance Camera
There is a risk of overheating, fire or explosion if the battery is put in a fire, heated, subjected to impact, put in contact with water, or if its terminals are shorted. CHAPTER 8: RECHARGING YOUR DISTANCE CAMERA Your Sony camera has a battery life of 4 hours and will eventually need to be recharged. -
Page 68: Chapter 9: Software Update
CHAPTER 9: SOFTWARE UPDATE SETTING UP YOUR WI-FI Before initiating a software update, the WI-FI network needs to be configured. Tap the Settings button to access the Settings, and select All Settings. Tap to open. Select General and tap. Select WI-FI Setup and tap. -
Page 69: Automatic Update
AUTOMATIC UPDATE When WI-FI is configured, Prodigi will automatically check every week for updates. If there is an update available, Prodigi will notify you and ask you if you wish to update your tablet. When this occurs: Tap Install to install the latest update. ... - Page 70 Prodigi will verify if your software is up to date or if an update is available. If an update is available and you wish to install it, tap Install. If you wish to cancel, tap Cancel. If you chose to install the update, Prodigi will download the update and show the download progress.
-
Page 71: Chapter 10: Troubleshooting
CHAPTER 10: TROUBLESHOOTING If the screen is blank: Zoom out of the image for minimum magnification. The Tablet could be powered off or in Standby Mode. Tap Power to power it on or to exit Standby Mode. If colors are difficult to detect: ... - Page 72 If the image/text is out of focus or blurry: Use the Zoom In-Out buttons to zoom in and then out of the image so as to trigger the camera’s focus. If needed, capture a new image of your document. ...
- Page 76 ACCD-0131 REV 03...
Need help?
Do you have a question about the Prodigi Connect 12 and is the answer not in the manual?
Questions and answers