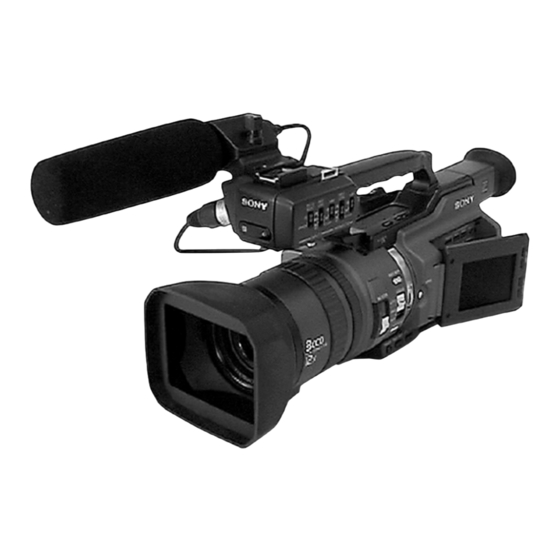
Sony DSR-PD170 Quick Start Manual
Ccd minidv camcorder
Hide thumbs
Also See for DSR-PD170:
- Service manual (418 pages) ,
- Operating instructions manual (176 pages) ,
- Brochure & specs (6 pages)
Table of Contents
Advertisement
Quick Start Guide
This guide introduces you to the basic way of recording/playback.
Installing the microphone
Install the supplied microphone with the model name (ECM-NV1) facing upward. Be sure
to connect the microphone plug to the INPUT1 connector.
Connecting the power cord
Use the battery pack when using your camcorder outdoors
Connect the plug with its v mark
facing toward the LCD panel side.
AC Adaptor (supplied)
Inserting a cassette
1
While pressing
the small blue
button on the
EJECT switch,
slide it in the direction
of the arrow.
to INPUT1
2
Push the middle
portion of the back of
the cassette to insert it.
Insert the cassette into
the cassette
compartment with the
window facing out
and the write-protect
tab facing upward.
Window
Write-protect tab
Open the DC IN jack
cover.
3
Close the cassette
compartment by
pressing the PUSH
mark on it.
4
Close the cassette lid
by pressing the
PUSH button on the
cassette lid.
PUSH
<<3>>
Advertisement
Table of Contents

Related Manuals for Sony DSR-PD170


Summary of Contents for Sony DSR-PD170
-
Page 1: Quick Start Guide
Quick Start Guide This guide introduces you to the basic way of recording/playback. Installing the microphone Install the supplied microphone with the model name (ECM-NV1) facing upward. Be sure to connect the microphone plug to the INPUT1 connector. to INPUT1 Connecting the power cord Use the battery pack when using your camcorder outdoors Connect the plug with its v mark... - Page 2 Recording a picture Viewfinder Open the shutter of the When the LCD panel is closed, use the hood with a lens cap. viewfinder placing your eye against its eyecup. For more information about attaching the hood with a lens cap. Press START/ Set the POWER switch to STOP.
-
Page 3: Installing The Microphone
Installing the microphone Install the supplied microphone. Be sure to connect the microphone plug to the INPUT1 connector. (1) Attach the wind screen to the microphone. (2) Loosen the microphone holder screw and open the cover. (3) Place the microphone into the holder with the model name (ECM-NV1) facing upward, close the cover, and tighten the screw. -
Page 4: Preparing The Power Supply
Preparing the power supply Installing the battery pack Install the battery pack to use your camcorder outdoors. (1) Lift up the viewfinder. (2) Insert the battery pack in the direction of the V mark on the battery pack. Slide the battery pack until it clicks. To remove the battery pack Lift up the viewfinder. -
Page 5: Charging The Battery Pack
Preparing the power supply Charging the battery pack Use the battery pack after charging it. Your camcorder operates only with the “InfoLITHIUM” battery pack (L series). (1) Open the DC IN jack cover and connect the AC Adaptor supplied with your camcorder to the DC IN jack with the plug’s v mark facing toward the LCD panel side. -
Page 6: Connecting To A Wall Outlet
•The DC IN jack has source priority. This means that the battery pack cannot supply any power if the power cord is connected to the DC IN jack, even when the power cord is not plugged into a wall outlet. Using a car battery Use the Sony DC Adaptor/Charger (optional). -
Page 7: Inserting A Cassette
Inserting a cassette (1) Install the power source. (2) While pressing the small blue button on the EJECT switch, slide it in the direction of the arrow. After the cassette lid is opened, the cassette compartment automatically opens. (3) Push the middle portion of the back of the cassette to insert it. Insert the cassette in a straight line deeply into the cassette compartment with the window facing out and the write-protect tab facing upward. -
Page 8: Recording A Picture
— Recording – Basics — Recording a picture Your camcorder automatically focuses for you. (1) Open the shutter of the hood with a lens cap. (2) Install the power source and insert a cassette. See “Step 2” to “Step 4” (p.11 to 17) for more information. -
Page 9: Adjusting The Brightness Of The Lcd Screen
Recording a picture Adjusting the brightness of the LCD screen To adjust the brightness of the LCD screen, press LCD BRIGHT + or –. The battery life is longer when the LCD panel is closed. Use the viewfinder instead of the LCD screen to save the battery power. -
Page 10: After Recording
Recording a picture After recording (1) Set the POWER switch to OFF (CHG). (2) Close the LCD panel. (3) Eject the cassette. (4) Remove the battery pack. Adjusting the viewfinder If you record pictures with the LCD panel closed, check the picture with the viewfinder. Adjust the viewfinder lens to your eyesight so that the images in the viewfinder come into sharp focus. -
Page 11: Using The Zoom Feature
Recording a picture Using the zoom feature To zoom using the zoom lever/handle zoom lever Press the power zoom lever a little for a slower zoom. Press it deeper for a faster zoom. Using the zoom function sparingly results in better-looking recordings. “T”... - Page 12 Recording a picture Using the digital zoom – Zoom greater than 12× Zoom greater than 12× is performed digitally, if you set D ZOOM to 24× or 48× in the menu settings. The digital zoom function is set to OFF as a default setting (p. 105). If you use the digital zoom function, the picture quality deteriorates.
-
Page 13: Spot Light
Recording a picture Spot light This function prevents people’s faces, for example, from appearing excessively white when shooting subjects lit by strong light, such as in the theater. Press SPOT LIGHT in standby, recording, or memory mode. indicator appears on the LCD screen or in the viewfinder. To cancel, press SPOT LIGHT again. -
Page 14: Playing Back A Tape
— Playback – Basics — Playing back a tape You can monitor the playback picture on the LCD screen. If you close the LCD panel, you can monitor the playback picture in the viewfinder. You can also control playback using the Remote Commander supplied with your camcorder. (1) Install the power source and insert the recorded tape. - Page 15 Playing back a tape When monitoring on the LCD screen You can turn the LCD panel over and move it back to the camcorder body with the LCD screen facing out. When you close the LCD panel You cannot monitor the sound from the speaker. However, when the LCD panel is turned over to view on the LCD screen, you can monitor the sound from the speaker.
-
Page 16: Various Playback Modes
Playing back a tape Various playback modes To operate video control buttons, set the POWER switch to VCR. To view a still picture (playback pause) Press X during playback. To resume normal playback, press N or X. To advance the tape Press M in stop mode. - Page 17 Playing back a tape Note on DV-formatted tapes You can play back DV-formatted tapes on this camcorder if the tape is recorded in SP mode. “DV SP” appears on the LCD screen or in the viewfinder during playback. You cannot play back DV-formatted tapes recorded in LP mode. If you insert the cassette recorded in a PAL system The camcorder automatically identify the system, and playback starts.
-
Page 18: Shooting With All The Pixels - Prog. Scan
Shooting with all the pixels – PROG. SCAN To import moving images to your PC to view still images, we recommend you record in progressive recording mode. To use progressive recording mode, follow the procedure below. Still images produced this way are more stable than those recorded on tapes in normal mode, and thus are more suitable for analyzing high-speed action such as sports scenes. -
Page 19: Using The Guide Frame
Using the guide frame You can easily make the picture be on a horizontal line using the guide frame. The guide frame is not recorded. (1) Press MENU to display the menu in standby, recording, or memory mode. (2) Turn the SEL/PUSH EXEC dial to select , then press the dial. -
Page 20: Using The Wide Mode
Using the wide mode You can record a 16:9 wide picture to watch on a 16:9 wide-screen TV (16:9WIDE). Black bands appear on the screen during recording in the 16:9WIDE mode [a]. The picture during playing back in the 4:3 mode on a wide-screen TV [b] or a normal TV [c]* is compressed in the widthwise direction. -
Page 21: Shooting With Manual Adjustment
Shooting with manual adjustment Under normal conditions, this unit automatically makes various adjustments as it shoots. However, you can adjust the following functions manually to suit your preference. Functions you can adjust by setting the AUTO LOCK selector to the center (auto lock release) position Iris, gain, shutter speed, and white balance Functions you can adjust in menu settings... -
Page 22: Adjusting The Iris
Shooting with manual adjustment Adjusting the iris Adjust the iris manually depending on the depth of field. (1) Set the AUTO LOCK selector to the center (auto lock release) position while the camcorder is in standby, recording, or memory mode. (2) Press IRIS. -
Page 23: Adjusting The Gain
Shooting with manual adjustment Adjusting the gain (1) Set the AUTO LOCK selector to the center (auto lock release) position while the camcorder is in standby, recording, or memory mode. (2) Press GAIN. The gain indicator appears on the LCD screen or in the viewfinder. -
Page 24: Adjusting The Shutter Speed
Shooting with manual adjustment Adjusting the shutter speed (1) Set the AUTO LOCK selector to the center (auto lock release) position while the camcorder is in standby, recording, or memory mode. (2) Press SHUTTER SPEED. The shutter speed indicator appears on the LCD screen or in the viewfinder. -
Page 25: Using The Nd Filter
Shooting with manual adjustment Using the ND filter Using the ND filter (the ND filter 1 setting corresponds to 1/4 of the quantity of light and the ND filter 2 setting corresponds to 1/32 of the quantity of light), you can record a picture clearly by adjusting light amounts, even if you shoot under too bright conditions. -
Page 26: Shooting With The Zebra Pattern
Shooting with manual adjustment Shooting with the zebra pattern You can set the camcorder to display a zebra pattern (diagonal stripes) in the portion of the picture on the LCD screen or in the viewfinder with a subject whose brightness exceeds a certain level. -
Page 27: Releasing The Steadyshot Function
Shooting with manual adjustment Releasing the SteadyShot function When the SteadyShot function is working, the camcorder compensates for camera- shake. You can release the SteadyShot function when you do not need to use it. The indicator appears on the LCD screen or in the viewfinder. Do not use the SteadyShot function when shooting a stationary object with a tripod. -
Page 28: Adjusting The White Balance
Adjusting the white balance White balance adjustment makes white subjects look white and allows more natural color balance for camera recording. Normally, white balance is automatically adjusted. You can obtain better results by adjusting the white balance manually when lighting conditions change quickly or when recording outdoors: e.g., neon signs, fireworks. - Page 29 Adjusting the white balance If you have selected in step 3 When you set the white balance to one-push white balance mode, the setting is locked and maintained even if lighting conditions change. You can achieve recording with natural colors without the image being affected by ambient light. (With the indicator on the screen) (1) Aim a white object such as paper fully.
-
Page 30: Adjusting The Recording Level Manually - Sound Recording Level
Adjusting the recording level manually – Sound recording level You can adjust the recording sound level. Use headphones to monitor the sound when you adjust it. You can adjust the channel 1 and channel 2 separately. Selecting the channel to be adjusted manually (1) Set the POWER switch to CAMERA or VCR. -
Page 31: Adjusting The Recording Level
Adjusting the recording level manually– Sound recording level To adjust the recording level automatically Set AGC CH1 to ON when you automatically adjust the recording level of the channel 1. And set AGC CH2 to ON when you automatically adjust the recording level of the channel 2. When the recording level is adjusted manually The recording level indicator appears at the lower-right on the LCD screen or in the viewfinder. -
Page 32: Connecting An Optional External Microphone
Connecting an optional external microphone You can get your desired audio quality, connecting multiple microphones or an optional microphone to your camcorder. (1) Loosen the microphone holder screw and open the cover. (2) Detach the supplied microphone and unplug the cable from the camcorder. (3) Connect the microphone (optional) to the INPUT1 or INPUT2 connector. - Page 33 Connecting an optional external microphone When the wind is blowing hard Set CH1 or CH2 of WIND to ON in the menu settings according to the input (p. 105). We recommend that you set MIC NR to OFF in the menu settings in the following cases: •When you use the external microphone at a distance from the camcorder.
- Page 34 Presetting the adjustment for picture quality – Custom preset You can preset the camcorder to record the picture with the desired picture quality. When presetting, adjust the picture by shooting a subject and checking the picture displayed on a TV using the menu settings. (1) Press CUSTOM PRESET to display the CUSTOM PRESET menu in standby or memory mode.
-
Page 35: Presetting The Adjustment For Picture Quality
Presetting the adjustment for picture quality Items to be adjusted Meaning Item Adjustment value COLOR LVL Color intensity Decreases color intensity y Increases color intensity Sharpness SHARPNESS Softer y Sharper WB SHIFT White balance Bluish y Reddish AGC LIMIT Auto Gain-limit 6 dB/12 dB/OFF RESET Sets items above to the default... -
Page 36: Focusing Manually
Focusing manually You can gain better results by manually adjusting the focus in the following cases: •The autofocus mode is not effective when shooting – subjects through glass coated with water droplets – horizontal stripes – subjects with little contrast with backgrounds such as walls and sky •When you want to change the focus from a subject in the foreground to a subject in the background •Shooting a stationary subject when using a tripod...
Need help?
Do you have a question about the DSR-PD170 and is the answer not in the manual?
Questions and answers
how can i take photo on the 32mb memory stick. inserted. p.s. i dont have a cassette inserted.
To take a photo with the Sony DSR-PD170 using a 32MB Memory Stick without a cassette inserted, follow these steps:
1. Insert the 32MB Memory Stick into the camcorder.
2. Set the POWER switch to MEMORY, ensuring the LOCK switch is in the unlock position.
3. Lightly press the PHOTO button until the desired still image appears. The green “z” mark will stop flashing and remain lit, indicating focus and brightness adjustments are set.
4. Press the PHOTO button fully to capture the image. The shutter will click, and the image will be saved to the Memory Stick.
A cassette is not required for this process.
This answer is automatically generated