Table of Contents
Advertisement
Quick Links
Advertisement
Table of Contents

Related Manuals for Goodmans GDVD200CDG


Summary of Contents for Goodmans GDVD200CDG
- Page 1 DVD / CD PLAYER GDVD200CDG OPERATION MANUAL HELPLINE PHONE NUMBER 08708 730080...
-
Page 2: Table Of Contents
TABLE OF CONTENTS INTRODUCTION This instruction manual is important to you. Plese read it. In a short time it shows exactly how to connect, operate, and adjust this unit for best performance. It can save you money. It shows simple things to do and check before you call for help and save the cost of unnecessary service or call out charge. -
Page 3: Important Safeguards
IMPORTANT SAFEGUARDS For your own safety read following instructions carefully before attempting to connect this DVD Player to the mains. Mains Supply 230V~ 50Hz - AC only This unit is designed to operate on a 230V~ 50Hz supply only. Connecting it to other power sources may damage it. -
Page 4: Caution And Important Note
To achieve the utmost in enjoyment and performance, please read this manually carefully before attempting to operate the unit in order to became familiar with its features, and assure you years of faithful, trouble free performance and listening pleasure. Important Notes •... -
Page 5: Important Notes
IMPORTANT NOTES Hearing is very important to you and to us so please take care when operation this equipment. It is strongly recommended that you follow the listed guidelines in order to prevent possible damage or loss of hearing. ESTABLISH A SAFE SOUND LEVEL •... -
Page 6: Introduction
Getting Started Before attempting to connect, operate or adjust this product, please read these instruction completely and keep this manual for future reference. Dear customers : May we take this opportunity to thank you for purchasing this DVD Player. We strongly recommend that you carefully study the operating instructions before operating the unit. -
Page 7: Disc Types
Getting Started Disc types Disc size 12cm single side, single layer / single side, double layer Audio & Video PAL and NTSC DVD disc Playback time 135min / 240min max. Disc size 12cm / 8cm Audio CD disc Playback time 74min/20min max. * Player is CD-R, CD-RW compatible. -
Page 8: Safety Precautions
Safety precautions Warning Attention To avoid electrical shock, do not open the If smoke, malodor or unrelated noise are cabinet, refer servicing to qualified person- emitted from the unit, turn off the power and nel only. disconnect the AC power cord. Warning Attention Keep the unit away from flower vases, tubs,... -
Page 9: Location Of Controls
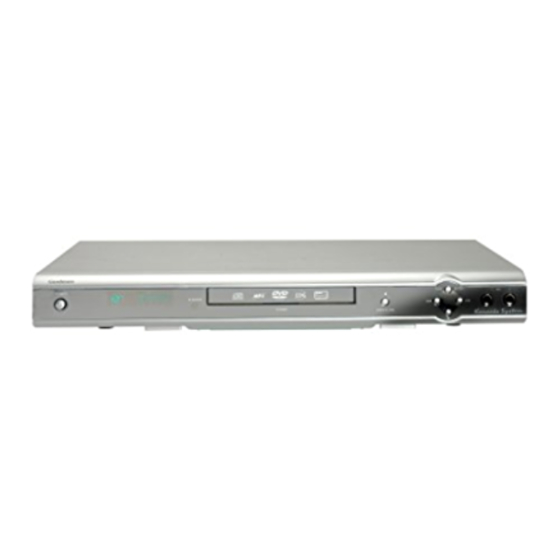
Front Panel Control 7. Skip Backward Button 1. Power On/Off 8. Play/Enter Button 2. Display 9. Skip Forward Button 3. Remote Sensor 4. Disc Tray 10. Stop Button 11. MIC 1, 2 Jacks 5. Standby Indicator 6. Open/Close Button Rear Panel Control 5. -
Page 10: Location Of Remote Control Unit
Getting Started Battery installation (remote control unit) 1. Remove the battery cover. 2. Insert two batteries (AAA) making sure the polarity (+/-) matches the marks inside the unit. 3. Replace the cover. – Do not attempt to recharge, short-circuit, disassemble, heat or throw the batteries into the fire. -
Page 11: Connection
Connect To TV Caution : Turn off all the equipment before any installation. This unit provides several types of video and audio signals output. They are : • Scart Output • RCA Output • S-Video Output User can choose a suitable connection type to connect the player to TV. 1. - Page 12 4. Configure the TV System The DVD Player supports PAL, NTSC and Multi-system TV type. In case there is no picture output on the screen, please switch your player TV mode in the Setup menu for proper TV System configuration. 1.
-
Page 13: Dvd Operation
OPERATION TV Selection Turn on the TV, the DVD player and the Audio Amplifier System (if any). 1. Press the “TV/VIDEO” button on the TV. 2. Select the Video Mode (TV). Note: If there are more than 1 AV channel for the TV, select the channel you have con- nected to the DVD player. - Page 14 SYSTEM SETUP In stop mode, press SETUP button and highlight SYSTEM setup then press ENTER button to confirm. To select the desired item by using the direction buttons ( / , / ), then press ENTER button to confirm the selected item. •...
-
Page 15: Language Setup
• DEFAULT : RESTORE SYSTEM SETUP Choose this option to resume all the setup options to default SCREEN SAVER TV TYPE settings. PASSWORD RATING DEFAULT RESTORE EXIT SETUP LANGUAGE SETUP In stop mode, press SETUP button and press direction buttons to highlight LANGUAGE setup then press ENTER button to confirm. -
Page 16: Video Setup
VIDEO SETUP In stop mode, press SETUP button and press direction buttons to highlight VIDEO setup then press ENTER button to confirm. • BRIGHTNESS VIDEO SETUP Using direction button to move the scroll and adjust the BRIGHTNESS – – CONTRAST –... - Page 17 • MIC VOL KARAOKE SETUP Using direction button to move the scroll and adjust the ECHO – – microphone volume. MIC VOL – – – – – – EXIT SETUP – – 4 (default) • KARAOKE SETUP ECHO – Using direction button to move the scroll and adjust the MIC VOL –...
- Page 18 • DYNAMIC RANGE FULL DIGITAL SETUP AUDIO OUT – – FULL DYNAMIC RANGE – – 6 / 8 4/8 (default) – – 4 / 8 EXIT SETUP – – 2 / 8 – – OFF When LINE OUT is selected, choose this setting to adjust the line out ratio and get different effect.
- Page 19 Repeat Mode This function is applicable for DVD and CD audio but with different effects. • For DVD disc playback, user can choose to repeat the current chapter, current title and disc. Subsequent button press of the REPEAT button can change between these three options. •...
-
Page 20: Picture Cd Operation
AVC (Auto vocal cut) When AVC is selected to ON, the original singer sound will be cut automatically while the user is singing. Note: The AVC function may not action for some CD-G disc or some song, in this case to set the AVC to “OFF”... -
Page 21: Trouble Shooting
TROUBLE SHOOTING Check the following guide for the possible cause of a problem before contacting service. Correction Cause Symptom No Power • Plug the power cord into the wall • The power cord is disconnected. outlet and unit securely. • Insert a disc. (Check that the DVD or au- •... -
Page 22: Specification
SPECIFICATION GENERAL Power source AC 230V 50Hz Power consumption Mass 2.5 Kg External dimensions (WxHxD) 430 X 48 x 253 mm Operating conditions Temperature: 5°C to 35°C Operation status Horizontal Operating humidity 5% to 90% CD/DVD Laser Semiconductor laser, wavelength 650nm Signal system PAL 625/50, NTSC 525/60 Frequency response (audio)
Need help?
Do you have a question about the GDVD200CDG and is the answer not in the manual?
Questions and answers