
Related Manuals for Grundig GLED2211HDV Series


Summary of Contents for Grundig GLED2211HDV Series
- Page 1 MEGLIO HD LED LCD TV GLED2211HDV Series Toll Free Service and Warranty: 1800 509 394 The Gold Technical Support Line: 1902 215 259 (Charges will apply at $2.95 per minute for gold technical support only)
-
Page 2: Introduction
Introduction Thank you for buying this GRUNDIG product, which is designed to give you many years of trouble-free service. You may already be familiar with using a similar unit, but please take the time to read these instructions. Safety is important Your safety is very important. -
Page 3: Table Of Contents
CONTENTS Introduction ................- 0 - Safety Instructions ..............- 2 - Unpacking .................. - 4 - TV Stand Installation ..............- 5 - Wall Mount Bracket Installation ..........- 5 - View of the TV and Functions ........... - 6 - Remote Control ................. -
Page 4: Safety Instructions
Safety Instructions 1. Please read these operating instructions carefully before you operate this unit. Do not use this television near water. Clean with a dry cloth only, to clean up dust, water drops or smudges from the screen or cabinet. Also make sure you disconnect the TV when you are cleaning the unit. 4. -
Page 5: Installation Notes
All repairs to this TV should only be performed by a qualified technician. 16. Be cautious of this safe mark and beware to the below warning WARNING To prevent fire or shock hazard, do not expose this unit to water or moisture. Do not remove any parts as there are no user serviceable parts inside. -
Page 6: Unpacking
Unpacking Please make sure that the following items are included with your LED LCD TV. If any item is missing, please contact the warranty line. LED LCD TV Operation Manual Remote Control DC Adaptor Power Cord RCA Cable RF Input Adaptor Lead Cigarette Adapter - 4 -... -
Page 7: Tv Stand Installation
TV Stand Installation The Meglio HD LED TV comes with its base stand attached. To easily disassemble the TV stand, please open the plastic stand cap as shown in the middle picture below. Then unscrew the four stand screws. Once these have been removed you can now remove the stand as shown in the last picture. -
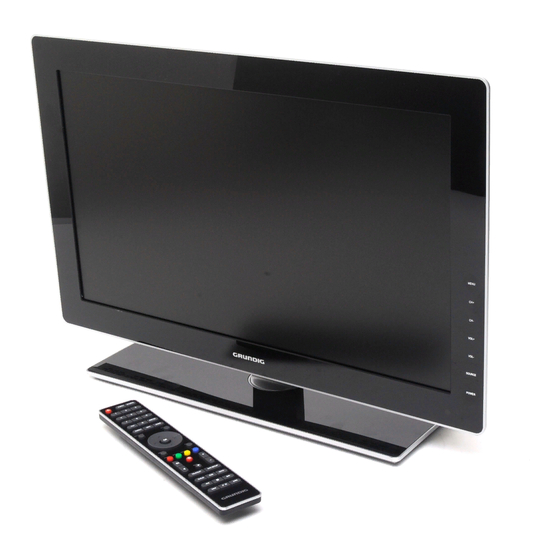
Page 8: View Of The Tv And Functions
View of the TV and Functions Front View Back View - 6 -... - Page 9 LED LCD TV Key HDMI1 Input Functions The HDMI Input allows you to connect your HDMI Power Indicator Cable for greater definition. In Power On Mode the indicator will turn off. In HDMI2 Input The HDMI Input allows you to connect your HDMI Standby mode the indicator will turn white.
-
Page 10: Remote Control
Remote Control - 8 -... -
Page 11: Remote Control Key Functions
Remote Control Key Functions Standby Button: Press the Standby Button to switch the TV on or off. Numeric Buttons: Press the Numeric Buttons to select a channel or select a page or select a track number in DVD mode. FAV Button: Press the FAV Button to display the Favourite Menu in DTV mode. Aspect Button: Press the Aspect Button to scroll through &... - Page 12 Navigation Button: Press the Up arrow to scroll up through the Menus, or to scroll upwards through the channel list. OK Button: Press the OK Button to confirm settings. ► Navigation Button: Press the Right arrow to scroll up through the Menus, or to increase the volume level.
-
Page 13: Remote Control Battery Installation
Remote Control Battery Installation The remote control requires two AAA batteries. Below are steps to assist you with replacing the batteries. 1. Open the back cover of the battery compartment. 2. Install the batteries into the battery tray. There is +/- polarity marking in the battery compartment. - Page 14 VHF Antenna UHF Antenna Mixer Input terminal of antenna 75ΩCo-axis cable Antenna Input 2. Ensure you connect your Right and Left audio sources (including DVD, VCR, Camcorder and PC) to the Left and Right Audio Input jacks ‘L’ and ‘R’. 3.
-
Page 15: Basic Operations
1) Touch POWER on the unit or press the STANDBY Button on the remote control to turn the TV on or off. The GRUNDIG brand logo light will be turned off when the unit has been powered on. When the unit is in Standby mode the Grundig brand will be illuminated. - Page 16 After auto tuning, the amount of programs found and stored will be shown on the display and the first channel (channel "1") will begin to play automatically. To change between Digital TV (DTV) and Analog TV (ATV), press the SOURCE Button on the remote control to select the preferred mode.
-
Page 17: Main Menu Operations
modes. Music Movie Sports Personal Standard 10) Press the INFO Button to display the information of the channel playing. Press the Up or Down arrow to scroll up through the information. Press the Right arrow to display the information of the next channel, and press the Left arrow to return to the information of the current channel. -
Page 18: Channel Menu
Channel Menu The TV Channel Menu will allow you to change the channel setting or search for new or weak stations with access to Auto Tuning, ATV Manual Tuning, DTV Manual Tuning, Programme Edit and Signal Information. To enter the TV Channel Menu press the MENU Button and the Channel Menu will appear. - Page 19 ATV Manual Tuning Use the ▼ or ▲ Buttons to select ATV Manual Tuning in the Channel Menu. Then press the ◄or ► Buttons to select the individual ATV channel (frequency) you wish to store. Then use the Arrow Buttons to highlight the search option and press ok, this will activate the manual tune.
-
Page 20: Picture Menu
Programme Edit Press the ▲or▼ Buttons to select Programme Edit in the Channel Menu. Then press the OK Button to enter the sub-Menu. Then you will need to select the programme you wish to edit, press the ▲or▼ Buttons to do so. Press either the FAV, BLUE or RED Buttons to set the channel to the Favourite, Skip or Delete list respectively. - Page 21 Picture Mode There are four different Picture modes: Standard, Dynamic, Mild and Personal. You are only able to set the Contrast, Brightness, Colour or Sharpness in Personal mode. To change the Picture Mode, press the OK Button to enter the submenu and then press the ▲...
-
Page 22: Sound Menu
Sound Menu ◄ or ► Button To enter the Sound Menu, press the MENU Button, then press the to select the Sound Menu and press the OK Button to enter. ▲ or ▼ Button to select the options you wish Once in the Sound Menu, press the to adjust. -
Page 23: Time Menu (In Tv Mode Only)
You can now set the AD volume level to ON. Time Menu (in TV mode only) To enter the Time Menu, press the MENU button, then press the ◄ or ► button to select the Time Menu, and press the OK button to confirm. Press the ▲... -
Page 24: Lock Menu
Auto Standby You can set the TV to Auto Standby if the TV is not active after 3H, 4H, 5H or you can set to OFF. Press the ▲ or ▼ button to scroll through and select the available time. OSD Timer You can set your OSD Menu to automatically turn off after 5s, 10s, 15s, 20s, 25s or 30s. -
Page 25: Setup Menu
To change the password, press the OK Button to select Set Password and a pop-up Menu will appear to enter your new password. The default password is “0000”, you will need this in order to set your new password and follow the onscreen prompts. Block Program To block a program from being watched, select Block Program and press the ▲... - Page 26 OSD Language Press the ▼ or ▲ Buttons to select OSD Language. Then press the OK Button to enter sub-Menu. Then use the ▼, ▲, ◄ or ► Buttons to select the language. The default language is English. Hearing Impaired (only for DTV) Press the ▼...
- Page 27 the OK Button and then the Right or Left Button to select the particular partition for recording. For example C or D partition, etc. The recording file will be saved in the partition you selected. If you are using a USB device for recording, you can only select USB for recording.
- Page 28 Notes: No matter which size is booked for recording, all the data in the allocated partition of the Hard Disc Drive file will be lost after formatting. Please ensure that you start with a blank partition on your Hard Disk to ensure you don’t lose any data.
-
Page 29: Epg Menu
TV. Grundig logo light You may set the Grundig logo light to OFF or On in Standby (default setting). If the OFF option is set, the brand logo light will be always off no matter if your TV is in Standby or Power ON mode. - Page 30 ► Button. To see what is going to be broadcast after the current program, press the Press the◄ Button to move to the current program information. To view a ▲ or ▼ different channel, press the Buttons. If you wish to book a program to watch later, press the Navigation Buttons to highlight the program you want to book as Recording or for watching later.
-
Page 31: Dtv Recording
Display (Green Button) Press the GREEN Button to view the detailed information of the current program. Remind (Blue Button) If you wish to book a program to watch later press the BLUE Button to enter the Reminder sub-Menu. In the Reminder Menu, press the Right or Left Button to choose the program you would like to book for viewing. -
Page 32: Time Shift
Notes: Ensure the storage device used to record is inserted into the USB Input on the back of the unit and is compatible for recording. If your storage device is not compatible, you will be asked to format it. Press the MENU button to enter the PVR File System to format your device. - Page 33 PHOTO/MUSIC/ MOVIE /TEXT Press the Buttons to select the icon, then enter your storage device to view the files. Press the OK Button to play the file. Press the RED Button to delete the file you selected from your storage device. Press the I<< or >>I Button to view the previous or next file.
-
Page 34: Dvd Player Operation
sub-Menu. Press the ◄ / ► Button to adjust display size. Phase Press the ▼ / ▲ Button to select Phase, then press the OK Button to enter sub-Menu. Press the ◄ / ► Button to adjust. Position Reset Press the ▼ / ▲ Button to select Position Reset, then Press the OK Button to reset to the default settings. -
Page 35: System Setup
4. In playing a MP3 disc you can program the order in which tracks play. Press the RED/PROG Button and a table will be displayed. Press the Navigation or Numeric Buttons to program the tracks in your favorite order. PROG 1 _ _: _ _ 5 _ _: _ _ 9 _ _: _ _:... -
Page 36: Language Setup
RATING You could set the rating options according to your preference. The rating restriction is divided into eight different categories from KID SAFE to ADULT. The default setting is ADULT. DEFAULT SETTING Press the ▼ or ▲ Buttons to select Reset and press the OK Button to enter the guide. -
Page 37: Digital Setup
DIGITAL SETUP DYNAMIC RANGE The Dynamic Range allows you to adjust the compression ratio for different audio effect. When you select FULL, the peak signal value is smallest and when you select OFF, the peak signal value is biggest. DUAL MONO the▲,▼,◄... -
Page 38: Troubleshooting
If you have any issues or queries about the functions of this TV, please check the below table as we have provided you with FAQs to assist with any issues. If this table is not of assistance, please contact the Grundig warranty line 1800 509 394. Issue... -
Page 39: Specifications
Specifications Model No. GLED2211HDV Series Screen size 21.5 inches Screen format 16:9 Resolution 1920*1080P Contrast 1000:1 Brightness 250 cd/m² Display colours 16.7M View angle 170° (horizontal) / 160° (vertical) Response time 5 ms TV system DTV: DVB-T ATV: PAL I/BG/L/DK Audio: MPEG2 Audio Layer I&II... -
Page 40: Display Modes (Only Vga)
Net weight 4.9Kgs Gross weight 7.3Kgs Power supply DC 12V 3.3A, AC110~240V, 50Hz/60Hz Power Consumption Max 40W Design and specifications are subject to change without prior notice. Display Modes (only VGA) Horizontal Freq. Vertical Freq. Mode Resolution (KHz) (Hz) 640X350 31.469 70.086 720X400... - Page 41 1680X1050 65.290 59.954 1280X720 52.500 70.000 VESA 1280X1024 74.620 70.000 VESA DMT/DTV 1920X1080p 67.500 60.000 Display modes which are not listed in the above table, may not be supported, by this unit. For an optimal picture it is recommended to choose a mode listed in the table above.
-
Page 42: Warranty
In the unlikely event that your product fails to work normally, please contact Grundig Warranty on 1800 509 394 (Australia) or 0800 450 259 (New Zealand) and have your receipt of purchase on hand.
Need help?
Do you have a question about the GLED2211HDV Series and is the answer not in the manual?
Questions and answers