Table of Contents
Advertisement
Quick Links
Gradient
S742
47" / 120 cm
23" / 58 cm
16.5" ~ 18.5" / 42 ~ 47 cm
9" / 22.8 cm Penumatic x 2pcs
10" / 26cm Penumatic x 2pcs
300 lb /135 kg
4mph /6 kph
20 miles / 32 km
56" / 142 cm
Head / Rear
12V / U1 (36AH) x 2 pcs
Intelligent, regenerative and electromagnetic brakes
2 rear anti-tip wheels
Front / Rear
1. Fish-on 187 lb /85 kg
5A off-board
S742
6
2.Captain 213 lb / 97 kg
1
Advertisement
Table of Contents

Subscribe to Our Youtube Channel
Related Manuals for Merits S742


Summary of Contents for Merits S742
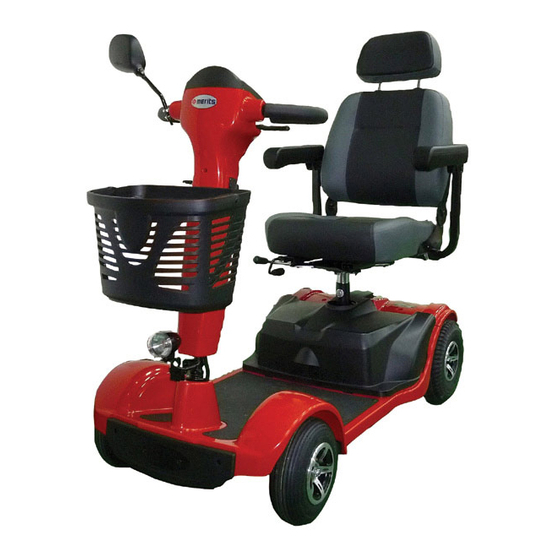
- Page 1 S742 S742 47” / 120 cm 23” / 58 cm 16.5” ~ 18.5” / 42 ~ 47 cm 9” / 22.8 cm Penumatic x 2pcs 10” / 26cm Penumatic x 2pcs 300 lb /135 kg 4mph /6 kph 20 miles / 32 km 56”...
-
Page 2: Table Of Contents
S742 Table of Contents Introduction Practice before operating Safety Instructions Safety Considerations Driving Outdoors Driving on Hills Getting to Know Your Scooter Parts to the Scooter Batteries Controls (Analog dashboard) Operating Your Scooter Seat Adjustment Tiller Angle Adjustment Freewheel Mode... -
Page 3: Practice Before Operating
Practice Before Operating A = Forward B = Reverse... - Page 4 S742...
-
Page 5: Safety Considerations
Safety Considerations... - Page 6 S742...
-
Page 8: Driving Outdoors
S742 Driving Outdoors... -
Page 10: Driving On Hills
S742 Use cautionwhen driving on hills... - Page 12 S742 S742...
-
Page 13: Batteries
Batteries Charge the batteries completely (8-12 hours) prior to first use. The Scooter is supplied with closed battery packs which contains two 36Amp, 12 Volt sealed lead acid ba tteries. The battery packs are situated under the front of the seat and can be removed by lifting them away from the chassis. - Page 14 S742 Charge Socket Circuit Breaker Tiller Charge Socket...
-
Page 15: Controls (Analog Dashboard)
Controls (Analog dashboard) Status LED Battery Gauge Horn Lights Maximum Speed Knob Thumb / Finger ‘Wig-Wag’ Lever Thumb / Finger Lever (Wig-Wag) The thumb levers control the reverse and forward motion of the scooter – see ‘Starting To Drive’ for operation. Remember, more pressure = more speed. Release the thumb lever and the scooter will automatically come to a safe stop as the electromagnetic brake is applied. - Page 16 S742 Maximum Speed Knob The speed control enables you to set the maximum speed of the scooter. Turn clockwise to increase the maximum speed and anti-clockwise to decrease. Always start at a slow speed until accustomed with the characteristics of your scooter.
- Page 17 Steering Steering the scooter is light and easy. Ensure you give obstacles a wide clearance to avoid the rear wheels catching. When steering through limited spaces, turn the tiller in the direction that you wish to go and apply power gently. The scooter can turn very tightly with complete stability at slow speeds.
-
Page 18: Seat Adjustment
S742 Seat adjustment... -
Page 19: Tiller Angle Adjustment
Tiller Angle Adjustment Mid-way up the tiller stem is the angle adjustment lever. Gently pull the lever towards the rear of the scooter and adjust the tiller to the desired angle and release the lever to lock in position. Ensure the tiller is fully secure before using the scooter. -
Page 20: Freewheel Mode
S742 Freewheel Mode Brake Release / Freewheel Operation The brake release lever is situated at the right rear of the scooter. This lever allows you to disengage the drive mechanism and push the scooter in ‘freewheel’ mode. To disengage the drive, pull the lever upward to the ‘disengaged’... - Page 21 The Scooter is designed to be quickly and easily disassembled without tools into sections for transportation and storage: Guidelines for Disassembly Follow the guide for the easy disassembly of your scooter: (Ensure the scooter is switched off before disassembling) 1. Lift the basket up and off the bracket. 2.
- Page 22 S742 Release the battery pack locking lever and lift the packs out of the chassis. The packs are labelled ‘A’ (RH) and ‘B’ (LH). Pack ‘A’ is removed first. Release Paddle Assembly is the reverse of the above procedure. The Scooter is now separated into four components for easy transportation or storage.
-
Page 23: Maintenance
Maintenance Product Life Expectancy Your scooter has been designed to provide the user with a long, reliable life provided it is correctly maintained and regularly serviced by an authorised dealer. However, due to inevitable wear and tear and technological improvements it is recommended that the average useable life of this scooter is five years. -
Page 24: Troubleshooting
S742 Troubleshooting Circuit Breaker Your scooter is fitted with the latest in electronic controls that are programmed to protect the electrical system from abnormal overloads. Fitted for extra protection is a circuit breaker, which is located on the battery pack. Should there be a situation where your scooter stops for no apparent reason please check that the circuit breaker has not tripped. - Page 25 If the freewheel device has been operated with the scooter switched on, the scooter will not operate until the key switch has been turned off and on again. Should a fault occur, the status led on the tiller head will indicate a flash sequence which relates to the fault in the table below.
- Page 26 S742...
- Page 28 S742...
- Page 30 Rev. 0. 11/11/2010...
Need help?
Do you have a question about the S742 and is the answer not in the manual?
Questions and answers