Epson l800 User Manual
Hide thumbs
Also See for l800:
- Service manual (107 pages) ,
- Start here (4 pages) ,
- Quick start manual (2 pages)
Table of Contents
Advertisement
Advertisement
Table of Contents

Related Manuals for Epson l800


Summary of Contents for Epson l800
- Page 1 Load a CD/DVD 34 Print a CD/DVD From Your Computer 37 Refill Ink 48 Check Ink Levels 48 Purchase EPSON Ink Bottles 51 Precautions on Refilling Ink 52 Refill Ink Tanks 52 Adjust Print Quality 58 Clean the Print Head 58...
-
Page 2: Home
Home Welcome to the L800 User’s Guide. -
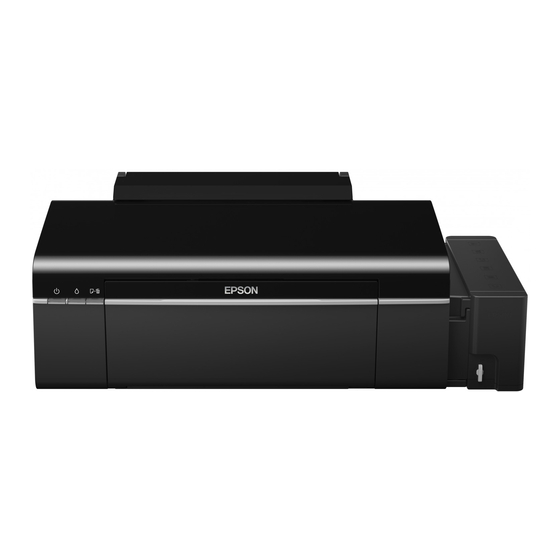
Page 3: Product Parts
Product Parts Use these illustrations to identify the parts on your product. Paper support Sheet feeder Printer cover Edge guide Ink tank unit Output tray extensions Front cover Output tray Power inlet USB port... -
Page 4: Control Panel Buttons And Lights
Print head Ink tubes Ink tanks Control panel Transportation lock Control Panel Buttons and Lights Control Panel Buttons Button Function Press to turn the printer on and off. Press to move the print head to its home position. When the ink light is off, press and hold for at least 3 seconds to clean the print head. -
Page 5: Control Panel Lights
Control Panel Lights Light Description On when the printer is on. Flashes when the printer is receiving data, printing, charging ink, or cleaning the print head. On when the ink level of one or more ink tanks may have reached the lower line. -
Page 6: Load Paper
Load Paper Before you print, load paper for the type of printing you will do. Load Paper for Documents or Photos Load Envelopes General Paper Information Load Paper for Documents or Photos You can print documents and photos on a variety of paper types and sizes. 1. - Page 7 4. Insert paper, glossy or printable side up and short edge first, against the right side of the sheet feeder and place it behind the tabs on the edge guides. If you are inserting a stack of paper, fan the sheets first and tap the stack on a flat surface to even the edges.
-
Page 8: Load Envelopes
Tip: Load only the recommended number of sheets. Load paper short edge first, no matter which way your document or photo faces. Load letterhead or pre-printed paper top edge first. Do not load paper above the arrow marks on the edge guide. Check the paper package for any additional loading instructions. - Page 9 2. Open the front cover, then extend the output tray. 3. Squeeze the tab on the edge guide and slide it to the left.
-
Page 10: General Paper Information
4. Load up to 10 envelopes against the right side. Load them printable side up and flap edge left and behind the tabs on the edge guides. Tip: Press each envelope flat before loading it or load one envelope at a time. 5. - Page 11 EPSON Photo Paper Glossy 20 sheets EPSON Premium Photo Paper Glossy EPSON Premium Photo Paper Semi-gloss EPSON Ultra Premium Photo Paper Glossy EPSON Premium Presentation Paper Matte EPSON Premium Presentation Paper Matte Double-sided 1 sheet EPSON Photo Quality Self-adhesive Sheets EPSON Iron-on Cool Peel Transfer paper * Availability of media varies by country.
- Page 12 Sheet Paper type Size Part number count EPSON Premium Photo Paper Glossy 4 × 6 inches (102 × 152 S041808 S041727 5 × 7 inches (127 × 178 S041464 8 × 10 inches (203 × 254 S041465 Letter (8.5 × 11 inches S042183 [216 ×...
- Page 13 Note: Availability of paper types varies by country. You can purchase genuine EPSON ink and paper from an EPSON authorized reseller. To find the nearest one, contact Epson. Borderless Paper Types and Sizes Borderless paper type Borderless paper size EPSON Photo Paper Glossy 4 ×...
- Page 14 Select this paper Type or Media For this paper/media Type setting Envelopes Envelope...
-
Page 15: Print From Your Computer
Print From Your Computer After you connect the printer to your computer and install its software, you can print documents and photos from your computer. Follow the instructions in these sections to print documents and photos: Windows Printing Mac OS X Printing To print on CDs/DVDs, follow the steps in Print on a CD or DVD. - Page 16 2. Select EPSON L800 Series. 3. Click Properties or Preferences. Note: If you don’t see these buttons, click Setup, Printer, or Options, then click Properties or Preferences on the next screen. Your printer settings window opens:...
- Page 17 Follow the steps in these sections to select settings, print, and control printing: Select Basic Options Change Print Layout Select Advanced Options Print Your Document or Photo Check Printing Status Change Default Print Settings Select Basic Options There are two ways to select basic printing options: •...
- Page 18 If the settings are correct for your print job, click the preset and print. To create your own presets, click on the Advanced tab, select your settings, and then click on the Save Settings button. To delete a preset you created, click Add/Remove on the Shortcuts tab, select the preset, and click Delete.
- Page 19 Tip: For information about an option, move the mouse over the setting or right-click it to access the Help utility. Note: When printing borderless photos, part of the image will be cropped because this option enlarges the image slightly beyond the paper size. Adjust the image to the size of the paper and set the margins in your application to zero.
- Page 20 See a summary of your settings (click Show Settings) • Return to the default settings (click Reset Defaults) • Access the Epson support website (click Online Support; website is available in Spanish and Portuguese) When you’re finished, you’re ready to print. Change Print Layout...
- Page 21 • To size your printed document or photo, click the Reduce/Enlarge Document checkbox and select sizing options. • To print on both sides of your paper, select On for 2-sided printing and adjust the margins or select Folded Booklet as necessary. •...
- Page 22 1. Select the paper type setting that matches the paper you loaded. 2. Select the print quality setting for your document or photo, such as Fast Economy for the fastest printing or Photo or Photo RPM for the best print quality. Note: Available print quality settings depend on the selected paper type setting.
- Page 23 • Select different print layout settings • Select basic printing options When you’re finished, you’re ready to print. Print Your Document or Photo After selecting your print settings, click OK to save them and return to the Print window. Click OK or Print to start printing. During printing, you can check printing status.
- Page 24 To check ink status, click Check Ink Levels. If you see an error during printing, see Solve Problems for solutions. Note: You can also cancel printing by pressing the printer’s paper button. Change Default Print Settings When you change your print settings from within a program, the changes apply only while you’re printing at that time.
-
Page 25: Mac Os X Printing
3. Select the language you want to display. 4. Click OK to close the driver screen. The language used on the driver screen changes to your selection the next time you access it. Mac OS X Printing You can print using any Mac OS X printing program. Follow the steps in these sections to print from your Mac: Open Your File for Printing Select Basic Print Options... - Page 26 After opening your file for printing, open the print window to select your print options. 1. Open the File menu and select Print. 2. Select the name of your EPSON product as the Printer setting. 3. If necessary, click the Show Details button or the button next to the Printer setting to expand the print window.
- Page 27 These settings appear on the screen: 7. Select the Media Type setting that matches the paper you loaded. 8. Select a Print Quality for your document or photo. Available settings depend on the selected Media Type setting. You can also: •...
- Page 28 • Select different print layout settings • Manage colors When you’re finished, you’re ready to print. Select Page Setup Options Depending on your application, you may be able to select the paper size and orientation settings, and adjust the size of your printed document or photo, from the print window. Note: If you don’t see these settings in the print window, check for them in your application before printing.
- Page 29 1. Select Color Matching in the pop-up menu. 2. Select from the following options, if necessary: EPSON Color Controls lets you manage color using controls in your printer software, or turn off color management. ColorSync prints using standard color profiles for your product and paper to help match image colors.
- Page 30 Manual Settings lets you select manual color adjustments. Click the arrow next to Advanced Settings and select settings for Brightness, Contrast, Saturation, and individual color tones. You can also select a color Mode setting for printing photos and graphics and the Fix Red-Eye setting to reduce or remove red-eye in photos.
- Page 31 2. Select from these options: • To cancel printing, click the print job and click Delete. • To pause printing for a specific print job, click the print job and click Hold. To resume printing, click the print job marked “Hold” and click Resume. •...
- Page 32 5. Select the following options: • Thick paper and envelopes prevents ink from smearing when you print on envelopes or other thick paper. • Skip Blank Page to ensure that pages without text or images are not printed • Quiet Mode for quieter printing when Plain Paper/Bright White Paper is selected as the Media Type •...
-
Page 33: Guidelines For Printing On Cds And Dvds
If you’re using discs where the printable area extends to within 0.16 inch (4 mm) of the edge of the center hole, you may need to adjust the inner diameter setting in the File menu of the EPSON Print CD software. -
Page 34: Load A Cd/Dvd
Do not turn the printer off with a CD or DVD loaded in it. Always remove the disc first. • You can set the printable area for your discs using EPSON Print CD. Make sure the settings you choose are appropriate for the CD or DVD you are printing on; otherwise, you may stain the CD/DVD tray or disc. - Page 35 If you’re using discs where the printable area extends to within 0.16 inch (4 mm) of the edge of the center hole, you may need to adjust the inner diameter setting in the File menu of the EPSON Print CD software.
- Page 36 6. Place the disc on the CD/DVD tray with the white or printable side face-up. Make sure the disc lies flat in the tray. To print on a small disc (8-cm), place the small CD/DVD adapter on the tray first, then place the disc inside the adapter.
-
Page 37: Print A Cd/Dvd From Your Computer
Now you can print on the CD/DVD using the EPSON Print CD software on your computer. After printing, remove the printed CD/DVD. Print a CD/DVD From Your Computer If you installed the EPSON Print CD software when you installed your product software, you can use it to create designs and print on CDs/DVDs. - Page 38 3. Select the image you want to use. • Click the File tab. • Click Browse, select the folder where your image is located, and click OK. • Select the image you want to use and click OK to use the image as is. •...
- Page 39 Text Color, and other tabs. Note: For more details on EPSON Print CD options, click Help. 8. Click OK to close the Text Settings window. 9. When you’re finished, open the File menu, select Save, and save your design file.
- Page 40 Mac OS X 1. Select Applications > EPSON Software > Print CD. 2. To select an image to use in the background, click the background icon. • Click Select Background.
- Page 41 Select the font, size, and other text effects in the options below or on the Distort Text tab. Note: For more details on EPSON Print CD options, click Help. 5. When you’re finished, open the File menu, select Save, and save your design file.
- Page 42 2. Select your EPSON printer. 3. Click Print. 4. Remove the printed CD/DVD from the printer. If you need to adjust the print position or print quality, see: Adjust Print Position Adjust Print Quality Adjust Print Position If your printed design is not positioned on your disc correctly, you can adjust the print position...
- Page 43 Windows Adjustment 1. Open EPSON Print CD. 2. Open the File menu and select Print. 3. Select your EPSON printer as the Printer setting, if necessary. 4. Click Print Position Confirmation Pattern. 5. Click Print. 6. Remove the disc after printing.
- Page 44 Now you can burn another CD or DVD and print your design again. Mac OS X Adjustment 1. Open EPSON Print CD. 2. Open the File menu and select Print. 3. Make sure your EPSON printer is selected. 4. Click Print Position Check Pattern.
- Page 45 5. Click Print. 6. Remove the disc after printing. 7. Using a metric ruler, measure the distance from the hole to the cross marks labeled Top and Right. 8. Click Position Adjustment. 9. Click Value Entry, then select the distance for Top into the Top Space box and the distance for Right in the Right Space box.
- Page 46 Windows Adjustment 1. Open EPSON Print CD. 2. Open the File menu and select Print. 3. Select your EPSON printer as the Printer setting. 4. Click Print Density Confirmation Pattern. 5. Click Print to print the density pattern on the CD/DVD.
- Page 47 Mac OS X Adjustment 1. Open EPSON Print CD. 2. Open the File menu and select Print. 3. Make sure your EPSON printer is selected. 4. Click Print Density Check Pattern. 5. Click Print. 6. Remove the disc after printing and examine it to see if you need to make the density darker or lighter.
-
Page 48: Refill Ink
You can continue printing until the ink tank needs to be refilled. When you need to refill ink, click the How to button on the EPSON Status Monitor screen and follow the on-screen instructions or follow the steps in Refill ink tanks. You must refill the tank to be able to print. - Page 49 The progress meter appears automatically when you start a print job. You can check the approximate ink levels from this window. Click the Check Ink Levels button on the progress meter screen to display the approximate ink levels as shown below: You may also see this screen every time you print (if your computer is connected to the Internet):...
- Page 50 Latin America. If you cannot check the ink levels from the printer driver, make sure that the Disable EPSON Status Monitor 3 checkbox is not selected by clicking the Speed & Progress button on the Maintenance window of the printer driver.
-
Page 51: Purchase Epson Ink Bottles
Purchase EPSON Ink Bottles You can purchase genuine EPSON ink and paper from an EPSON authorized reseller. To find the nearest one, contact Epson. Use these part numbers when you purchase new ink bottles and use the ink by the date printed on... -
Page 52: Precautions On Refilling Ink
Precautions on Refilling Ink • We recommend the use of genuine EPSON ink bottles. Epson cannot guarantee the quality or reliability of non-genuine ink. The use of other products may affect your print quality could result in printer damage. •... - Page 53 You can monitor the approximate ink levels from your computer and view on-screen instructions to refill the ink. You must use the printer driver to refill the ink. Click the How to button in the EPSON Status Monitor window and follow the on-screen instructions, or follow the instructions below to refill ink.
- Page 54 Caution: Do not pull the ink tubes. 3. Open the ink tank unit cover, and then remove the ink tank cap. Note: Be careful not to spill any ink. Make sure that the color of the ink tank matches the ink color that you want to refill. 4.
- Page 55 Note: Do not throw away the tip of the bottle cap. If any ink remains in the ink bottle after refilling the tank, use the top of the cap to seal the ink bottle cap. 5. Refill the ink tank with the correct colored ink up to the upper line on the ink tank. Note: If any ink remains in the ink bottle after filling the ink tank up to the upper line, install the cap securely and store the ink bottle upright for later use.
- Page 56 7. Hook the ink tank unit onto the printer. Caution: Make sure the transportation lock is set to the printing position when using the printer, or ink will not be delivered and you may experience print quality problems. When transporting the printer, set the transportation lock to the transport position or ink may leak.
-
Page 58: Adjust Print Quality
Adjust Print Quality If your print quality declines, you may need to run a utility to clean or align the print head. Clean the Print Head Align the Print Head If you see ink on the back of a printout, you may need to clean the paper guide. Clean the Print Head If your printouts become too light, dots are missing, or you see dark or light bands across them, you may need to clean the print head nozzles. - Page 59 5. Check the printed pattern to see if there are gaps in the lines. Nozzles are clean Nozzles need cleaning 6. If there are no gaps, the print head is clean and you can continue printing. If there are gaps or the pattern is faint, clean the print head. From the Computer 1.
- Page 60 4. Select Nozzle Check. 5. You see one of these windows: 6. Click Print. 7. Check the printed pattern to see if there are gaps in the lines. Nozzles are clean Nozzles need cleaning 8. If there are no gaps, click Finish. If there are gaps or the pattern is faint, clean the print head.
- Page 61 4. Run a nozzle check to confirm that the print head is clean. You may need to clean the print head up to 3 times. If print quality has still not improved, contact Epson. From the Computer 1. Make sure that no lights are indicating errors, that the CD/DVD tray is not inserted in the printer, and that the output tray is in the paper position.
- Page 62 5. Click Start to begin the cleaning cycle, which lasts around 1 minute. power light flashes throughout the cleaning cycle and stays on green when the cycle is finished. Caution: Never turn off the printer during a cleaning cycle. 6. When the power light stops flashing and remains on, you can check to see if the nozzles are clean;...
-
Page 63: Align The Print Head
Continue button and then run the power cleaning utility again, or refill the ink and then run the power cleaning utility again. If print quality does not improve, contact Epson. To maintain print quality, print a few pages on a regular basis. -
Page 64: Clean The Paper Guide
If no patterns are aligned in one or more of the sets, choose the closest one in each set and click Realignment. Then print another alignment sheet and check it. 7. When you’re done, click Finish. Clean the Paper Guide If you see ink on the back of a printout, you can clean the paper guide to remove any excess ink. -
Page 65: Solve Problems
Get More Help Check for Software Updates Periodically, it’s a good idea to check Epson’s support website for free updates to your printer software (website available only in Spanish and Portuguese). With Windows, you can manually update the software by selecting Driver Update on the Maintenance tab in the printer settings window. - Page 66 Check the Lights on Your Printer Lights Problem and solution Paper out No paper is loaded. Load paper into the sheet feeder, and then press the paper button. The printer resumes printing and the light goes out. CD/DVD tray error When printing on a CD or DVD, the Insert the CD/DVD tray in the printer CD/DVD tray is not inserted.
- Page 67 CD/DVD position. When printing on paper, set the output tray to the paper position. Maintenance The printer’s ink pads are at the end Contact Epson support to replace ink of their service life. pads. Flashing alternately Unknown printer error An unknown printer error has Turn off the printer.
-
Page 68: Problems And Solutions
Check these sections for solutions to problems you may have using the product: Setup Problems Miscellaneous Problems Paper Problems Printing Problems Page Layout and Content Problems Print Quality Problems If none of the solutions here solve your problem, contact Epson for help. See also: Problem-solving Tools Re-install Software... - Page 69 Close your other programs, including any screen savers and virus protection software, and install the software again. • Make sure the EPSON L800 is selected as the default printer and that the correct port is shown in the printer properties. •...
- Page 70 • If multiple pages feed at once, remove the paper from the sheet feeder, fan the edges to separate the sheets, then reload it. • If paper is jamming when you are inserting only one or two sheets, try loading more pages at a time.
- Page 71 4. If you cancelled the print job, relaunch it. Note: The product won’t operate properly if it’s tilted or at an angle. Place it on a flat, stable surface that extends beyond the base in all directions. Paper Does Not Eject or Ejects Wrinkled •...
- Page 72 Windows Vista: Click , select Control Panel, and click Printer under Hardware and Sound. Then right- click EPSON L800 Series, select Open, right-click the stalled print job, and click Cancel and then Yes. Windows XP: Click Start and select Printers and Faxes. (Or open the Control Panel, select Printers and Other Hardware if necessary, and then Printers and Faxes).
- Page 73 Turn off the Mirror Image setting in the printer driver in the Page Layout window (Windows) or Print Settings window (Mac OS X). If you are printing on EPSON Iron-on Cool Peel Transfer Paper, however, the image should be inverted.
- Page 74 • Choose the correct margins for your paper size in your printing program. • Use the Print Preview option in your Windows printer software to check your margins before you print. • Make sure your paper is positioned against the right side of the sheet feeder. White Border on Borderless Photo •...
- Page 75 Use a support sheet with special paper, or try loading your paper one sheet at a time. • Make sure your paper meets the specifications. • Use EPSON papers to ensure proper saturation and absorption of genuine EPSON inks. • Use genuine EPSON inks. •...
- Page 76 Matching setting. To access this setting, click the Speed & Progress button in the Maintenance tab of the printer settings window. • For best results, use genuine EPSON ink and paper. Printout Is Slanted • Make sure the edge guide is against the left side of the paper.
-
Page 77: Re-Install Software
• Adjust the print position in your EPSON Print CD software. • Adjust the brightness or contrast in your EPSON Print CD software for Windows or Mac OS CD/DVD Tray Ejected or Won’t Feed • Reinsert the CD/DVD tray correctly. -
Page 78: Get More Help
Epson provides these technical support services: Internet Support Visit Epson’s support website for your L800 printer for solutions to common problems. You can download drivers and documentation, get FAQs and troubleshooting advice, or e-mail Epson with your questions (site available in Spanish and Portuguese only). - Page 79 If your country is not listed, contact the Epson sales office in the nearest country. Purchase Supplies and Accessories You can purchase genuine EPSON ink and paper from an authorized reseller. To find the nearest one, call your nearest Epson sales office as described above.
-
Page 80: Clean And Transport Your Product
Clean and Transport Your Product If your printer gets dirty or you need to move it some distance, follow the instructions in these sections: Cleaning Transportation Cleaning To keep the printer working at its best, you should clean it several times a year. Caution: Do not use a hard brush, benzene, alcohol, or paint thinner to clean the printer or you may damage it. - Page 81 5. Open the printer cover, then secure the print head with tape, as shown below. 6. Close the front cover, then close the paper support. 7. Set the transportation lock to the transport position. 8. Pack the printer in its original box or one of a similar size using protective material to keep it from moving inside the box.
-
Page 82: Use Your Product On A Network
Faxes. 2. Do one of the following: Windows 7: Right-click the EPSON L800 Series icon, click Printers properties, click the Sharing tab, then click the Change sharing options button Windows Vista: Right-click the EPSON L800 Series icon, then click Sharing. Click Change sharing options button and click Continue. -
Page 83: Mac Os X Network Setup
Select A network printer, or a printer attached to another computer, then click Next. 4. Follow the on-screen instructions to complete access to the shared printer. You may need to insert the CD that came with the L800 and click Have Disk. Mac OS X Network Setup Install the printer software on the Mac OS X to which you connected it. - Page 84 5. If you see a message telling you sharing is turned off, click the Sharing Preferences button and click the Printer Sharing checkbox. 6. Close System Preferences. Now you can access the shared printer from other computers on the network. Just select the printer from the Format For menu (in the Page Setup window) or Printer menu (in the Print menu).
-
Page 85: Specifications And Notices
Specifications and Notices For information about using your printer and detailed specifications, see: Important Safety Instructions Computer System Requirements Product Specifications Copyright and Trademarks Important Safety Instructions Before using your printer, read and follow these safety instructions: General Safety Ink Safety General Safety •... - Page 86 The power cord or plug is damaged; liquid has entered the printer; the printer has been dropped or the casing damaged; the printer does not operate normally or exhibits a distinct change in performance. • Do not adjust controls that are not covered by the operating instructions. •...
-
Page 87: Computer System Requirements
To use the printer and its software, your computer system should meet or exceed the requirements in these sections: Windows Requirements Mac OS X Requirements Note: Visit Epson’s support website for the latest in compatibility and drivers for Epson’s L800 printer (website available only in Spanish and Portuguese). Windows Requirements Your system should include: ®... -
Page 88: Product Specifications
Since the quality of any particular brand or type of paper may be changed by the manufacturer at any time, Epson cannot guarantee the quality of any non-EPSON brand or type of paper. Always test a sample of paper stock before purchasing large quantities or printing large jobs. - Page 89 5 × 7 inches (127 × 178 mm) 8 × 10 inches (203 × 254 mm) 3.5 × 5 inches (89 × 127 mm) Paper types Plain paper Special papers distributed by Epson Thickness 0.003 to 0.004 inch (0.08 to 0.11 mm) Weight 17 lb (64 g/m...
- Page 90 Bottom: 0.12 inch (3 mm) minimum Envelopes Left Bottom Right Left: 0.12 inch (3 mm) minimum Bottom: 0.20 inch (5 mm) minimum Top: 0.20 inch (5 mm) minimum Right: 0.78 inch (20 mm) minimum CD/DVD 12-cm CD/DVD A: Inner margin: 0.7 inch (18 mm) maximum B: Outer margin: 4.7 inch (120 mm) maximum 8-cm CD/DVD A: Inner margin: 0.7 inch (18 mm) maximum...
- Page 91 We recommend that you use genuine EPSON ink bottles. The use of other products may affect your print quality and could result in printer damage that is not covered by Epson’s warranty and under certain circumstances may cause erratic printer behavior.
- Page 92 Depth: 22.4 inches (571 mm) Height: 11.4 inches (289 mm) Weight (without the power cord and CD/DVD tray) 13.7 lb (6.2 kg) Electrical Power supply rating 120 V Model: 100 to 137 V 220 V Model: 220 to 240 V Input voltage range 120 V Model: 90 to 132 V...
-
Page 93: Copyright And Trademarks
(excluding the U.S.) failure to strictly comply with Seiko Epson Corporation’s operating and maintenance instructions. Seiko Epson Corporation shall not be liable for any damages or problems arising from the use of any options or any consumable products other than those designated as Original EPSON Products or EPSON Approved Products by Seiko Epson Corporation. - Page 94 EPSON is a registered trademark and EPSON Exceed Your Vision is a registered logomark of Seiko Epson Corporation. General Notice: Other product names used herein are for identification purposes only and may be trademarks of their respective owners. Epson disclaims any and all rights in those marks.
Need help?
Do you have a question about the l800 and is the answer not in the manual?
Questions and answers