Advertisement
EASY STEPS GUIDE
Model: HT-01
Important: Do Not Use This Pressure Cooker Until You Have Read
The Entire Owner's Manual That Comes With This Unit
1
Technique Electric Pressure Cooker Model HT-01
Easy Steps Guide
Important: Do Not Use This Pressure Cooker Until You Have
Read The Entire Owner's Manual That Comes With This Unit
Included in this Easy Steps Guide, you will find the following:
TPC_ESG_QVC_V2_110318
2
3
4
6
7
Advertisement
Table of Contents

Related Manuals for Technique HT-01


Summary of Contents for Technique HT-01
- Page 1 Technique Electric Pressure Cooker Model HT-01 Easy Steps Guide Important: Do Not Use This Pressure Cooker Until You Have Read The Entire Owner’s Manual That Comes With This Unit Included in this Easy Steps Guide, you will find the following:...
-
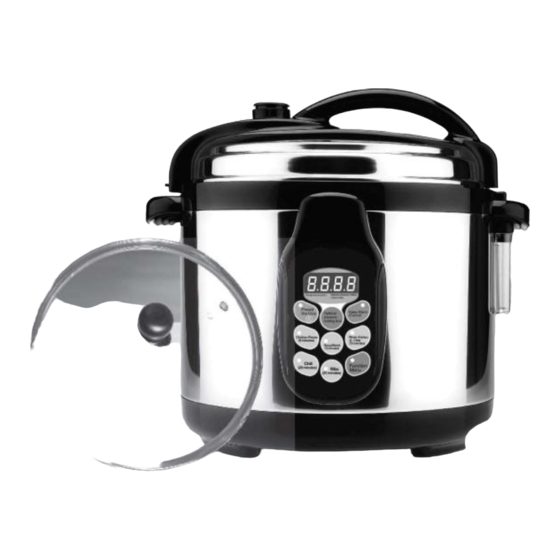
Page 2: Parts List
Parts List... -
Page 3: Display Control Panel
Display Control Panel Chicken Pieces – Push the CHICKEN PIECES Button on the Control Panel for the CHICKEN PIECES default setting with a pressure of 70kPa and a Preset the Time – This is a Delay cook time of 9 minutes. Time Feature. -
Page 4: For General Use
For General Use Make sure the Sealant Washer is seated properly on the inner steel ring inside the Lid. (See Figure 1) 1. To remove the Sealant Washer, Pull up from the inner steel ring. The Sealant Washer should be separated from the inner steel ring for Figure 2 proper cleaning. - Page 5 Place Pressure Lid on Cooker so that the Lid Handle and the Pressure When the unit is first plugged in, it will sound a beep and the LED will Discharging Valve are pointed to the “10 o’clock” position. Rotate Lid light up with 0000.
-
Page 6: Glass Lid Handle Assembly
properly. Place Pressure Lid on unit. Rotate Lid counter-clockwise until you feel a click. IMPORTANT: Insert the Pressure Discharging Valve located on top of the Lid Handle and set it to the SEAL position, and ensure that the Floating Valve is in a lowered position. Note: The “cook times”... -
Page 7: To Cook Using A Custom Cooking Time
To Cook Using A Custom Cooking Time 5) Once you have set your own cooking time, press the FUNCTION MENU Button for the unit to begin building pressure. This mode is the easiest way to select Time settings that are less or greater than the preset defaults. - Page 8 THE PRESSURE DISCHARGING VALVE: To remove the Pressure Discharging When cleaning the Lid, the Sealant Washer must be removed and washed Valve, simply pull up and the valve will release from its spring lock separately with a sponge or soft cloth and warm, soapy water. Rinse off mechanism.
Need help?
Do you have a question about the HT-01 and is the answer not in the manual?
Questions and answers