
Subscribe to Our Youtube Channel
Related Manuals for TS-market EDIC-mini Led S 51


Summary of Contents for TS-market EDIC-mini Led S 51
- Page 1 EDIC-mini Led S 51 Digital Recorder OPERATION MANUAL Version: November, 2011 © TS-Market...
-
Page 2: Table Of Contents
Contents Overlook .............3 Specifications ............3 Recorder’s Appearance ........4 Software .............5 Technical Characteristics .........7 Operating the Recorder ........9 Getting Started ...........9 Clock Indication ..........9 Recording ............10 Playing back and deleting records ....11 Navigation in Playback Mode ......11 Deleting Recordings ........12 Monitoring battery ..........12 Profile Selection ..........13 Record Types ...........14... -
Page 3: Overlook
Overlook Recorders of the Edic-mini Led family are professional devices intended for making high quality record of voice messages into a built-in flash memory. The recordings can be further uploaded onto the PC or played back with headphones. Specifications • LED time display; •... -
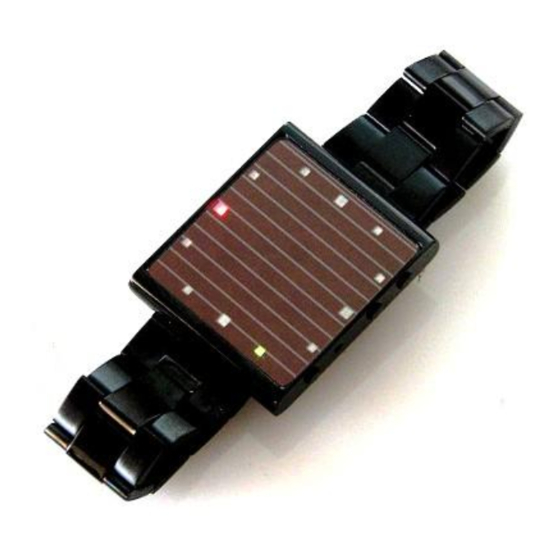
Page 4: Recorder's Appearance
Recorder’s Appearance 6 o’clock position 12 o’clock position Play Microphone USB connector... -
Page 5: Software
Recorder’s Appearance for Edic-Mini-Led-S51 • The Recorder has 3 control buttons: the K1 button to turn on/off time display; • Time is indicated with the help of two LEDs; • Position of the red LED is hours; • Position of the green LED is minutes; •... - Page 6 The capacity of the files uploaded depends on marking: 300h – up to 2 Gb, 1200h - up to 8 Gb. The Recorder is equipped with VAS (Voice Activation System) to compress pauses efficiently in messages therefore enhancing real record duration.
-
Page 7: Technical Characteristics
Technical Characteristics Analog-to-digital converter 16 bit Control 3 buttons Indication LEDs Record Mode mono Sampling rate 4000, 8000, 13300, 20000, 40000 Hz (ADPCM up to 8kHz, u-Law – up to 20kHz) Sound compression types: without compres- sion, u-Law (2/1), ADPCM 4 bit (4/1), ADPCM 2 bit(8/1) Signal-to-noise ratio of 60±2 dB... - Page 8 Battery level monitoring Interface with the PC HiSpeed USB-SPI adapter Maximum exchange rate 7700 kbs from flash memory Maximum exchange rate 2800 kbs into flash memory Rechargeable battery 120 mAh capacity The option to charge from solar element Charging time no more than 3 hours Battery life in Standby...
-
Page 9: Operating The Recorder
Operating the Recorder Getting Started Before starting make sure the rechargeable battery is charged. When necessary charge the rechargeable battery by connecting HiSpeed USB- SPI adapter to the USB port of the PC, and then to the Recorder. Full charging takes 2,5 hours. While charging yellow LED is in the 12 o’clock position flashing with the interval of 1 second. -
Page 10: Recording
If constant Clock mode is on the clock will be indicated until one of the following occurs: • rechargeable battery is discharged up to 50%; • constant Clock mode is off; • the Recorder is charging; • the Recorder quits Standby Mode. Recording The Recorder is in Standby Mode. -
Page 11: Playing Back And Deleting Records
Playing back and deleting records Connect headphones to micro-USB connector. The Recorder is in Standby Mode. Press the Play button twice – after a short blue-and-yellow flash (the 12 o’clock position) the Recorder starts playing back the last record and the green LED (the 1 o’clock position) will be flashing with the interval of 3 seconds. -
Page 12: Deleting Recordings
Deleting Recordings The recorded message can be deleted during playback. Press the Play button twice to start Playback Mode. The Recorder starts playing back the last recording (green LED is flashing). Using navigation (see Table) go to the desired record. Keep the Rec and Play buttons pressed until the blue LED starts flashing in the 12 o’clock position. -
Page 13: Profile Selection
Red LED indicates battery charge level: the closer LED to the 12 o’clock position the more full the rechargeable battery (1 to 12 scale). If the red LED is in the one o’clock position, the rechargeable battery needs immediate charging. Profile Selection In Standby Mode press the Rec and Play buttons simultaneously until the yellow-and-blue LED (the... -
Page 14: Record Types
Record Types Voice Activation System Voice Activation System (VAS) can significantly (up to 100 times) reduce both memory consumption and energy consumption from the power source. The principle of VAS is as follows: after the user starts recording, the Recorder starts tracing signal from the microphone. -
Page 15: Recording By Timer
store them in the file uploaded or not. If you save pauses, the duration of the resulting record will correspond to the time during which the recording was performed, and the moments when the signal was below threshold will be played back silent. The duration of silence corresponds to the time when the signal was below the configured threshold. -
Page 16: Circular Recording
If you use Once Timer, only one record will be performed, which will start and end at the specified date and record’s start and end time. For example, December 31, 2011 at 23:50 recording starts, and January 3, 2012 at 00:10 ends. Recording will be carried out as long as the Recorder has free memory and its battery charge is enough to perform the operation. -
Page 17: Recorder Setup
Recorder Setup Profile Selection Profile Selection is available through the RecManager software, but one of eight preset profiles is selected directly on the Recorder. Profile record consists following characteristics: Coder type – type of compression • No compress; • uLaw; •... -
Page 18: Connecting To The Pc
VAS - Voice Activation System When turning VAS on you can set threshold above which the recording starts from 0 to -60 And the time during which (after the recording level is below the threshold of record) recording continues - from 0 to 255 seconds Gain - amplification from -1 to 40 dB with steps of 0,5 dB AGC - Automatic Gain Control... -
Page 19: Firmware Update
• Run the firmware update program and follow its instructions (after the corresponding message the button can be released). Technical Support Our engineers constantly work improving the software and documentation. You can always download the last version of the program from our website for free. www.ts-market.com... -
Page 20: Address
Address: TS-Market Ltd. Building 10/1 Sosnovaya Alleya, Zelenograd, Moscow, The Russian Federation, 124489 Tel: +7 (495) 638-88-00; +7 (499) 940-95-75 (Cell) +7 (903) 530-10-01, +7 (909)638-88-00 Fax: +7 (499) 735-04-91 E-mail: support@ts-market.com http://www.ts-market.com...
Need help?
Do you have a question about the EDIC-mini Led S 51 and is the answer not in the manual?
Questions and answers